Advertisement
Quick Links
Advertisement

Related Manuals for amaran F21x


Summary of Contents for amaran F21x
- Page 1 F21x Product Manual English...
-
Page 2: Important Safety Instructions
Thank you for purchasing "amaran" LED photography lights - amaran F21x. Amaran F21x is amaran newly designed cost performance light fixture. Compact structure design, compact and light, excellent texture. Has a high performance level, such as high brightness, high color render- ing index, can adjust the brightness, etc. - Page 3 8. Let the lighting fixture cool completely before storing. Unplug the power cable from lighting fixture before storing and store the cable at assigned space of thecarrying case. 9. To reduce the risk of electric shock, do not immerse this fixture in water or any other liquids.
-
Page 4: Fcc Compliance Statement
19. This product is certified by RoHS, CE, KC, PSE, and FCC. Please operate the product in full compliance with relevant country's standards. Any malfunctions caused by incorrect use are not covered by warranty. The user may pay for maintenance. 20. -
Page 5: Components List
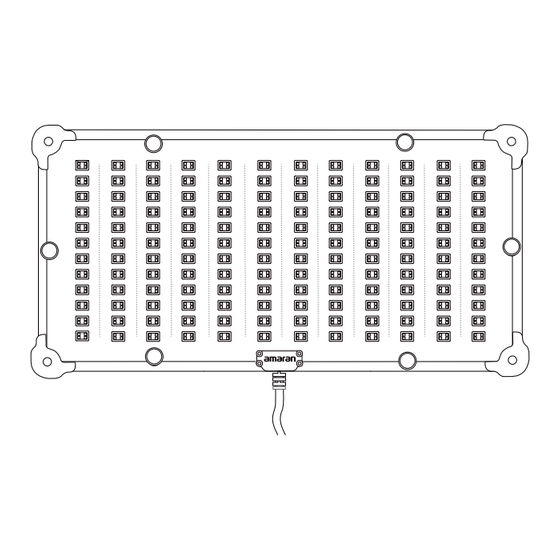
Components List Please make sure all accessories listed below are completed before using. If not, please contact with your sellers immediately. F21x (1 pc) Control Box(1 pc) Frame (1 pc) Tie Down (1 pc) Power Adapter (1 pc) AC Cable (1 pc) - Page 6 Components List 1. Lamp Head Frame Mounting Corner Mounting Hole LED Lamp Beads Cable Frame Mounting Corner Velcro...
- Page 7 2. Control Box DC Output TRIGGER ON/OFF Protective column MODE MENU LIGHT MODE OLED Screen Quick-Release Plate DMX / Firmware Lanyard upgrade Port Battery Plate 1/4 Screw DC Output DC IN...
- Page 8 Setting Up the Light 1. Disassembly and assembly of X-type frame. After pulling out the bolts in the direction shown in the picture, unfold the four support rods, and then loosen the fixing bolts to lock the support rods. Front of the frame Back of the frame 2.Disassembly and assembly of the lamp body and X-shaped bracket.
- Page 9 3.Installation of soft box. The side of the soft box with grooves corresponds to the side of the lamp body with the power cord. Then attach the velcro of the lamp body and the soft box in turn and then install the fabric diffusion and grid. * Light stand is not standard.
- Page 10 Powering up the Light Powered by AC Lanyard AC 100V-240V DC Output Power Adapter For V-Mount DC IN For Anton Bauer...
- Page 11 Powered by DC Lanyard DC Output V-Mount Battery Battery Anton Bauer Battery -10-...
- Page 12 How to use the extension cord AC 100V-240V *The battery is not standard. *When removing the wire, because of self-locking device at the wire connection, please press or rotate the spring lock on the connector before pulling it out. Do not pull it out forcibly. *Extension cable, control box and lamp body need to correspond, and different models cannot be mixed.
- Page 13 2.1 Press the Light Mode button to enter the interface 2.2.1 Press the INT knob, select CCT mode to adjust color temperature (2500K~7500K), brightness (0%~100%) . 2.2.2 Press the INT button to select FX mode, then rotate the INT control knob to toggle between Paparazzi Lightning Fire...
- Page 14 2.2.3 Press the INT knob, after selecting the CFX mode, Rotate the INT knob to select the Picker FX, Music FX, and TouchBar FX. 2.3 Press the MENU button to enter MENU, as shown in the figure below. 2.3.1 DMX Mode Press the INT knob to enter the DMX mode, and rotate the INT knob to adjust the DMX channel (001~512).
- Page 15 2.3.3 Dimming Curve Press the INT knob to enter the dimming curve menu, rotate the INT knob to select “Exp; Log; S-curve; Linear”Dimming curve, then press the INT knob to confirm the selection. 2.3.4 BT Reset Press the INT knob to enter the BT Reset, rotate the INT knob to select "Yes", press the INT knob to reset the Bluetooth;...
- Page 16 2.3.7 Language Rotate the INT knob to select the language menu, press the INT knob to enter the language setting interface, rotate the INT knob to select "English" or "Chinese", and then press the INT knob to confirm. 2.3.8 Firmware Version Rotate the INT knob to select the Firmware Version, press the INT knob to enter the firmware version interface, short press the INT knob again to return to the main menu.
- Page 17 3.DMX Control 3.1 Connecting Type-c to DMX adapter to controller *Type-c to DMX adapter is not standard 3.2 Connect a standard DMX controller OUTPUT DMX512 Connecting DMX to only one light OUTPUT DMX512 Daisy chaining multiple lights using DMX -16-...
- Page 18 3.3 The DMX interface schematic: Data 1+ Data 1+ (Primary Data Link) (Primary Data Link) Data 2- (Optional Data 1- Data 1- Secondary Data Link) Data 2- (Optional (Primary Data Link) (Primary Data Link) Secondary Data Link) Data 2+ (Optional Data 2+ (Optional Secondary Data Link) Signal Common...
- Page 19 5. Specifications ≥95 2500K~7500K Power Output 100W (Max) TLCI ≥98 Power Input Operating Current 2.5A (Max) 120W (Max) Power Supply Operating Temperature -10°C ~ 40°C V-Mount battery 12 ~ 28.8V Voltage V-mount battery compatibility 16.8V ,26V, 28.8V battery full output. Power adapter output Controlling method Manual, Sidus Link APP, DMX...
- Page 20 Bare Bulb 12170 3670 6500K Softbox (1/2 stop) 7060 2116 Bare Bulb 13470 3960 7500K Softbox (1/2 stop) 7170 2216 * These are average data measured in the laboratory, there will be slight differences in the brightness, color temperature and other parameters of different lights. Trademarks Bowens is a trademark registered by Bowens in China and other countries.
Need help?
Do you have a question about the F21x and is the answer not in the manual?
Questions and answers