
Related Manuals for Forever Redwood THE LORETO PAVILION


Summary of Contents for Forever Redwood THE LORETO PAVILION
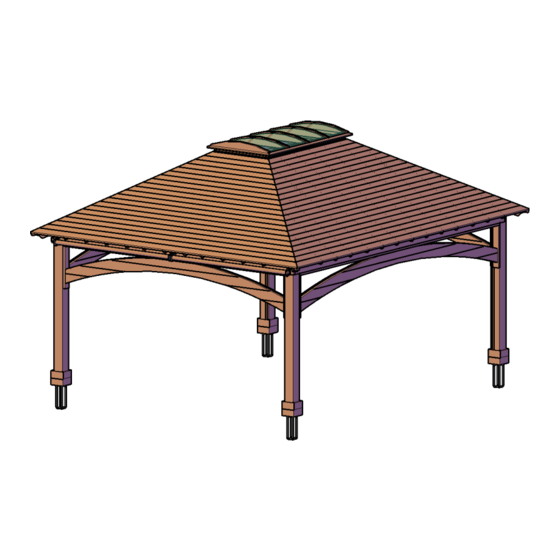
- Page 1 866.332.2403 (TOLL FREE) (707) 640.29.05 (Option 4) Direct Line for the Design Department; 7am – 7pm Pacific Time, Monday-Saturday ASSEMBLY INSTRUCTIONS FOR THE LORETO PAVILION...
- Page 2 Insert the carriage bolts into the holes and lightly tap with a hammer until the square neck fit in the wood piece and the bolt head must flush with the wood piece. Finally, place the washer and the nut and carefully tighten it using a ratchet with the necessary socket or a wrench. P| 1 THE LORETO PAVILION www.ForeverRedwood.com...
- Page 3 Place the washers in their lag bolts. After that, insert the lag bolts into the holes and carefully tighten it using a ratchet with the necessary socket. Use the washers only for the Wood Pieces. To install the deck screws. Insert the deck screws into the holes and carefully tighten it using a drill. P| 2 THE LORETO PAVILION www.ForeverRedwood.com...
- Page 4 Single Supports-A Supports with In-Between Blocking-A Single Supports-B Supports with In-Between Blocking-B Arcs In-between blocking cover Skylight Diagonal rafter Rafters collar tie Roof board Boots High wind anchor bases Metal plaques-A Metal plaque-B Curtain base P| 3 THE LORETO PAVILION www.ForeverRedwood.com...
-
Page 5: Hardware List
3/8” X 8 ½” bolts 3/8” X 7 ¼” bolts 3/8´´ X 4 ½” Bolts 5/16´´ X 2 ½” Bolts 5/16” X 4 7/8” Bolts 3´´ deck screws 4” deck screws 1 5/8” deck screws P| 4 THE LORETO PAVILION www.ForeverRedwood.com... - Page 6 Single Supports-A Supports with In-Between Blocking-A Single Supports-B Supports with In-Between Blocking-B Arcs In-between blocking cover Skylight Diagonal rafter Rafters collar tie Roof board Boots High wind anchor bases Metal plaques-A Metal plaque-B Curtain base P| 5 THE LORETO PAVILION www.ForeverRedwood.com...
- Page 7 Note: Part numbers in the Drawing are for reference only. These do not match to the numbers marked on the parts sent. P| 6 THE LORETO PAVILION www.ForeverRedwood.com...
- Page 8 Step 2: Attach the single supports-A (2) to the post with 3/8” X 8 ½” bolts (BL1). Check the marked numbers on each support and place as drawings shown. Note: Don’t completely tighten yet the bolts – you will need the install the supports with in between blocking first. P| 7 THE LORETO PAVILION www.ForeverRedwood.com...
- Page 9 Step 4: Use 3/8´´ x 12´´ lag bolts (LB2) to attach the supports with in-between blocking-B (5) to the supports. Check the marked numbers on each support with in-between blocking and place as drawings shown. Note: put silicone in the support joins. P| 8 THE LORETO PAVILION www.ForeverRedwood.com...
- Page 10 Step 6: Attach the arcs (6) to the support with in-blocking with 3/8” X 4” Lag Bolts (BL3) and to the posts with 3/8” X 3” Lag Bolts (BL1). Check the marked on each arc and place as drawings shown. P| 9 THE LORETO PAVILION www.ForeverRedwood.com...
- Page 11 Note: put silicone in the support with in-between blocking cover joins. Step 9: Attach the metal plaques-A&B (15,16) to the supports with 3/8” X 3” Lag Bolts (LB1). P| 10 THE LORETO PAVILION www.ForeverRedwood.com...
- Page 12 Step 11: Attach the rafters (10) to the metal plaques-A (15) with 5/16´´ X 2 ½” Bolts (BL4) and to Ridge beam (8) with 3” deck screws (DS1). Check the marked numbers on each rafter and place as drawings shown. F-35 F-21 F-49 P| 11 THE LORETO PAVILION www.ForeverRedwood.com...
- Page 13 Step 13: Attach the collar tie (11) to the rafters (10) with 5/16” X 4 7/8” Bolts (BL5). Check the marked numbers on each collar tie and place as drawings shown (H-1 at H-4). P| 12 THE LORETO PAVILION www.ForeverRedwood.com...
- Page 14 Check the marked numbers on each roof board and place as drawings shown. Step 15: Use 3´´ deck screws (DS1) to attach the curtain base (17) to the support. P| 13 THE LORETO PAVILION www.ForeverRedwood.com...
- Page 15 Step 16: Put the curtain roads in place. Step 17: Finally, use 3´´ deck screws (DS1) to attach the boots (13) to each post. P| 14 THE LORETO PAVILION www.ForeverRedwood.com...
- Page 16 This completes the Pavilion assembly. Hope you enjoy your set for many decades. If you ever have a problem or a question, don't hesitate to call us (866 332 2403) or email us. We are here to support you. P| 15 THE LORETO PAVILION www.ForeverRedwood.com...
Need help?
Do you have a question about the THE LORETO PAVILION and is the answer not in the manual?
Questions and answers