Table of Contents
Advertisement
Quick Links
Advertisement
Table of Contents

Related Manuals for Drinkpod ONYX


Summary of Contents for Drinkpod ONYX
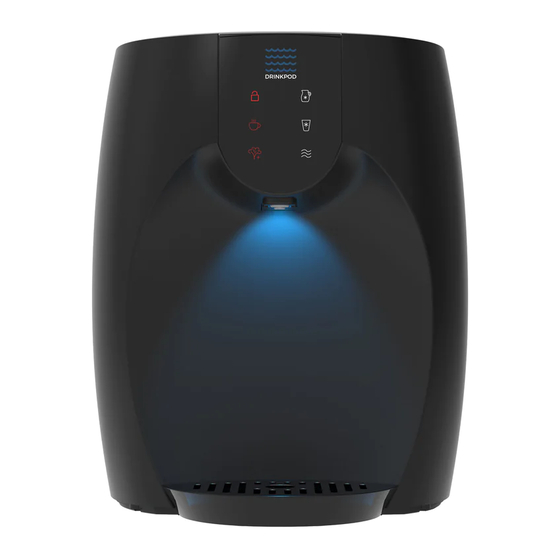
- Page 1 Installation Guide English REPLACEMENT FILTERS AVAILABLE HERE ONYX Water Purifier·Dispenser Model: DPWPA700CT(B/W) Customer Assistance 1-844-374-6576 www.drinkpod.com Drinkpod and the Drinkpod logo are the registered trademarks of Drinkpod, LLC. All Rights Reserved.
-
Page 2: Table Of Contents
Ensure the power cord is always unplugged before performing any maintenance, INSTALLING YOUR DRINKPOD troubleshooting, or filter upgrades. Only use Kenmore or Drinkpod accessories and filters to avoid causing damage and voiding Running Water Source Line product warranty. Connecting Your DRINKPOD For all service and support related issues, please contact Drinkpod. -
Page 3: Getting Started
Be prepared to feel like a DIY pro when you’re finished! Configuration & Location First, let’s decide where you want to install your DRINKPOD ONYX. In almost all cases, this easily decided by answering two simple questions. 1. What water sources are available? If you’re not sure what you have, or how to check, “Appendix A - Water Sources”... -
Page 4: Preparation
(Under Kitchen Sink) (Sink Faucet Connection) Diagram 2.1.2-A Faucet Cold Water Line Source 2. Your ONYX needs to be connected to your water source by the white ¼ in. PP tubing (included in your installation kit). Take a moment to visualize where you’ll need to run your water tubing, visually inspect any potential trouble areas, and adjust your plans accordingly. -
Page 5: Tapping Water Source
Getting Started Getting Started Tapping Water Source Option A: Tapping Accessory Water Line source In this section, you will require 1/4 in. White PP Tubing, and may also need 1/4 in. Compression To Quick Connect Adapter, and pliers, or an adjustable wrench or 1/2 in. - Page 6 Getting Started Getting Started 6. Now, use pliers, adjustable or 1/2 in. wrench, to disconnect the appliance water line from the source shutoff valve. If you’re unsure how to disconnect the water line, see “Appendix B - Component Connections” on page 27.
- Page 7 9. Congratulations! You’ve just completed the second most difficult part of your installation. KS-H: Cold Faucet Handle Now jump ahead to “Running Water Source Line Step #4” on page KS-I: Garbage Disposal Installing Your Drinkpod 10 Installing Your Drinkpod 11...
- Page 8 5. Use our pliers, crescent wrench, or 11/16 in. wrench to loosen KS-F Cold Water Feed Line from Cold Water Shutoff Valve. IF THE WRENCH FITS, continue to loosen and detach the hose, and proceed. IF IT DOESN’T FIT, the Installing Your Drinkpod 12 Installing Your Drinkpod 13...
- Page 9 8. Let’s confirm there are no leaks. Check to make sure the valve on part 3/8 in. Sink Adapter Valve is closed (pointing downward as shown above). Next, KS-F open the flow on by repeating “Step 4” on page Cold Water Shutoff Valve Installing Your Drinkpod 14 Installing Your Drinkpod 15...
-
Page 10: Installing Your Drinkpod
Congratulations! You’ve just completed the second most difficult part of your installation. Diagram 2.3(B).10 - Thread Tubing Through Compression Nut Now jump ahead to “Running Water Source Line Step #4” on page Installing Your Drinkpod 16 Installing Your Drinkpod 17... -
Page 11: Running Water Source Line
Running Water Source Line Connecting Your DRINKPOD It’s time to run your water line (tubing) from your water source to where your ONYX will be Congratulations! You are now close enough to the end that you should be able to taste it. - Page 12 6. Turn on the water at your Water Source (see following diagrams). Confirm there are no leaks at any of your connections. If there are, turn off the water, reconnect correctly, and then turn water back on. Installing Your Drinkpod 20 Installing Your Drinkpod 21...
-
Page 13: Enabling Water Flow To Your Drinkpod
Diagram 2.9.3 - Open Shutoff Valve 4. You should hear water running and filling the ONYX’s tanks. Check for leaks, and wait until the sound of water running stops. 5. Once the ONYX is filled, plug it in. DO NOT FLIP ON THE POWER SWITCHES (WATER HEATER) YET! 6. -
Page 14: Appendix A - Water Sources
APPENDIXES Appendixes Appendixes Appendix A - Water Sources Accessory Water Line Source - Floor Mounted 1. Shutoff water by turning valve handle clockwise (usually 90 degrees). Accessory Water Line Source - Wall Mounted Shutoff water by turning valve handle clockwise (usually 90 degrees). 2. -
Page 15: Accessory Water Line Source - Unmounted
Appendixes Appendixes Accessory Water Line Source - Unmounted Faucet Cold Water Line Source KS-E 1. Shutoff water by turning valve handle clockwise (usually 90 degrees). 2. Disconnect water line by unscrewing compression bolt counterclockwise. KS-H KS-B Water Line Hose Hose Compression Nut Valve Handle Valve Feed Line... -
Page 16: Appendix B - Component Connections
NOTES Appendixes Notes Appendix B - Component Connections ¼ in. Compression Tubing With Brass Fittings ¼ in. Compression (Plastic Tubing) Appendixes 28 Notes Notes-1... - Page 17 Customer Care Hotline For technical support, warranty repair service, or to order replacement parts. 1-844-374-6576 www.drinkpod.com...
Need help?
Do you have a question about the ONYX and is the answer not in the manual?
Questions and answers