Advertisement
Table of Contents
- 1 Read this First
- 2 Join the Community
- 3 B L a C K S U N V I G O a S S E M B L y ( a )
- 4 B L a C K S U N E N F O R C E R a S S E M B L y ( B )
- 5 B L a C K S U N E N F O R C E R a S S E M B L y ( C )
- 6 B L a C K S U N E N F O R C E R a S S E M B L y ( D )
- 7 B L a C K S U N E N F O R C E R a S S E M B L y ( E )
- Download this manual
READ THIS FIRST
Be sure to use a pair of sharp hobby clippers to remove the miniature components from the sprue. Carefully clean the excess material and mold lines with a sharp
hobby knife. Check the fit of each part before gluing. Use a small amount of hobby plastic glue to assemble the components. Use caution with all products and follow all
manufacturer instructions. Adult supervision is recommended for children under the age of 16. Have fun!
JOIN THE COMMUNITY
TM
Use ##MyStarWarsLegion to share your miniature photos and be a part of the Star Wars: Legion community!
TM
AtomicMassGames
AtomicMassGames
Atomic_Mass_Transmissions
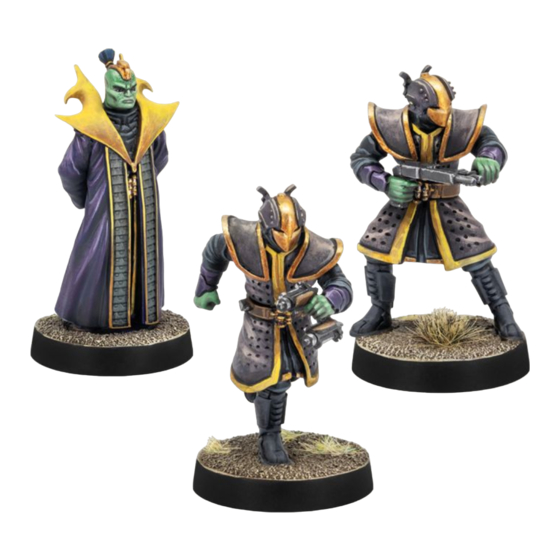
B L A C K S U N V I G O
A S S E M B L Y
( A )
S T E P
1
S T E P
2
S T E P
3
S T E P
4
A05
A06
ALTERNATE
ASSEMBLY
A02
A03
A01
A04
ALTERNATE
ASSEMBLY
ALL PARTS SHOULD BE ASSEMBLED USING PLASTIC GLUE. PERMISSION GRANTED TO PRINT OR PHOTOCOPY FOR PERSONAL USE.
© LFL © AMG
Advertisement
Table of Contents

Subscribe to Our Youtube Channel
Summary of Contents for ATOMIC MASS GAMES Star Wars LEgion Black Sun Vigo
- Page 1 READ THIS FIRST Be sure to use a pair of sharp hobby clippers to remove the miniature components from the sprue. Carefully clean the excess material and mold lines with a sharp hobby knife. Check the fit of each part before gluing. Use a small amount of hobby plastic glue to assemble the components. Use caution with all products and follow all manufacturer instructions.
- Page 2 READ THIS FIRST Be sure to use a pair of sharp hobby clippers to remove the miniature components from the sprue. Carefully clean the excess material and mold lines with a sharp hobby knife. Check the fit of each part before gluing. Use a small amount of hobby plastic glue to assemble the components. Use caution with all products and follow all manufacturer instructions.
- Page 3 READ THIS FIRST Be sure to use a pair of sharp hobby clippers to remove the miniature components from the sprue. Carefully clean the excess material and mold lines with a sharp hobby knife. Check the fit of each part before gluing. Use a small amount of hobby plastic glue to assemble the components. Use caution with all products and follow all manufacturer instructions.
- Page 4 READ THIS FIRST Be sure to use a pair of sharp hobby clippers to remove the miniature components from the sprue. Carefully clean the excess material and mold lines with a sharp hobby knife. Check the fit of each part before gluing. Use a small amount of hobby plastic glue to assemble the components. Use caution with all products and follow all manufacturer instructions.
- Page 5 READ THIS FIRST Be sure to use a pair of sharp hobby clippers to remove the miniature components from the sprue. Carefully clean the excess material and mold lines with a sharp hobby knife. Check the fit of each part before gluing. Use a small amount of hobby plastic glue to assemble the components. Use caution with all products and follow all manufacturer instructions.


Need help?
Do you have a question about the Star Wars LEgion Black Sun Vigo and is the answer not in the manual?
Questions and answers