Advertisement
PopPulse PC-Link 24/96Khz Wireless USB Digital
Transport
User Manual
Congratulations on purchasing this top quality PopPulse product.
This amazing new device from PopPulse allows digital audio to be sent
uncompressed wirelessly from a PC's USB port to the receiver unit up to 50
meters away outdoors or up to 20 meters indoors.
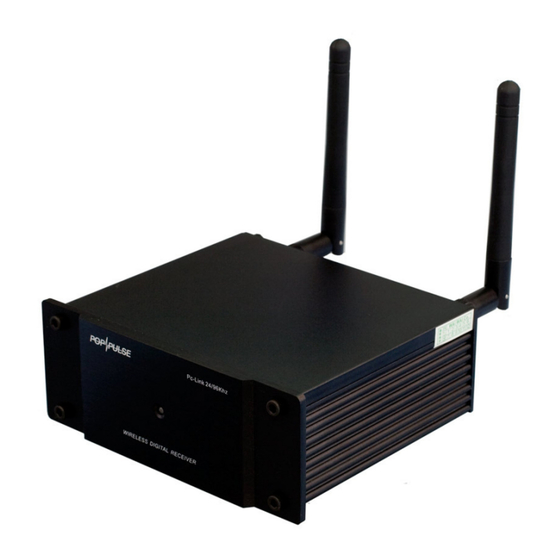
The receiver unit then converts the pristine, uncompressed digital wireless signal
into a clean S/PDIF signal to feed into either a DAC or surround sound amplifier.
As well as having both optical toslink and coaxial digital outputs, the receiver also
features a superior XLR balanced digital output.
Being able to output 24/96khz resolution digital audio, its performance should
meet or surpass the expectations of audiophiles everywhere.
Advertisement
Table of Contents

Summary of Contents for PopPulse PC-Link 24/96Khz
- Page 1 User Manual Congratulations on purchasing this top quality PopPulse product. This amazing new device from PopPulse allows digital audio to be sent uncompressed wirelessly from a PC’s USB port to the receiver unit up to 50 meters away outdoors or up to 20 meters indoors.
- Page 2 Receiver...
- Page 3 USB Digital Transmitter Quick Start Guide 1. Carefully unpack all the items from the box and make sure all items listed below are present. • PC-Link 24/96Khz Wireless Receiver • USB Digital Wireless Transmitter • 2x Antenna • 12V DC Power Supply •...
- Page 4 3. Boot up the PC and wait for the Operating System to fully load. 4. Remove the end cap of the USB Digital Transmitter. Plug the Transmitter into a spare USB port on the PC. Windows should recognise and load a suitable driver.
- Page 5 optical toslink cable is provided), partner the Receiver to either a DAC, surround sound amplifier or other similar device. 9. Using the power switch on the rear panel of the Receiver, switch on the green device. If the status LED on the front panel is , the Receiver is in range of the USB Digital Transmitter and is receiving a clear signal.
- Page 6 Changing the ID of the Receiver By default, both the USB Digital Transmitter and the Receiver are factory set to the same ID. In most circumstances, this ID does not need to be changed. The one exception where the user may need to change the ID is if several identical Receivers are to be used with one USB Digital Transmitter.
- Page 7 Troubleshooting Changing the Wireless Channel (USB Digital Transmitter) If sonic interference or playback interruptions are heard, changing the wireless operating channel of the USB Digital Transport could solve the issue. To switch to another channel (the Transmitter has 8 channels), press “Band”. If the “Band”...
- Page 8 • Move the Receiver away from TV, CRT computer monitor or any other device that emits strong magnetic fields. • Change the Wireless Channel (procedure described above) Windows does not automatically detect the Transmitter • Plug the USB Digital Transmitter directly into a spare USB port. Due to its fairly heavy power requirements and need for on optimal flow of digital data, external USB hubs should be avoided.
Need help?
Do you have a question about the PC-Link 24/96Khz and is the answer not in the manual?
Questions and answers