
Subscribe to Our Youtube Channel
Related Manuals for RTX 8430


Summary of Contents for RTX 8430
- Page 1 Handset Operations Manual RTX 8430 Technical Reference Document Version 4.1 © Jan-2016 RTX A/S, Denmark SME VoIP Handset guide Proprietary and Confidential Page | 1...
-
Page 2: Table Of Contents
Table of Contents About This Document ............................5 1.1 Audience ................................5 1.2 Abbreviations ..............................5 1.3 References/Related Documentations ......................5 1.4 Document History ............................5 Making Handset Ready ............................6 2.1 Package - Contents/Damage Inspection ......................6 2.1.1 Before the Package Is Opened ........................6 2.1.2 Contents of the Package ........................... - Page 3 6.2 Central Directory ............................19 6.2.1 LDAP Mode and Local Mode ........................19 6.2.2 Calling a Contact in the Central Directory ....................20 6.3 Calls ................................20 6.3.1 Call ................................21 6.3.2 View ................................ 22 6.3.3 More Calls Options ..........................22 6.4 Connectivity ..............................
- Page 4 7.7.1 Establishing a Conference Call ........................ 41 7.7.2 Terminating a Conference Call ....................... 42 Accessories ..............................44 Troubleshooting .............................. 44 9.1 Operational problems ............................ 44 SME VoIP Handset guide Proprietary and Confidential Page | 4...
-
Page 5: About This Document
1 About This Document This document describes the features and functionalities available in the RTX SME VoIP DECT 8430 Handset. We describe how to operate the handset without going into details about its mechanical features. The reference for features and operation in this manual is RTX generic mode. -
Page 6: Making Handset Ready
2 Making Handset Ready In this chapter we briefly describe how to prepare the handset for use, install, and how to insert and charge new batteries. 2.1 Package - Contents/Damage Inspection 2.1.1 Before the Package Is Opened Examine the shipping package for evidence of physical damage or mishandling prior to opening. If there is proof of mishandling prior to opening, you must report it to the relevant support center of the regional representative or operator. -
Page 7: Damage Inspection
2.1.3 Damage Inspection The following are the recommended procedure for you to use for damage inspection: 1. Examine all relevant components for damage. 2. Make a “defective on arrival - DOA” report or RMA to the operator. Do not move the shipping carton until the operator has examined it. -
Page 8: How To Replace Battery
2.2.5 How to Replace Battery Remove the back cover from the handset as showed in section 2.2.4 How to Open Back Cover above. Then remove the old battery and replace it with a new one. 2.2.6 Handset Serial and IPEI/IPUI Number The serial number and IPEI/IPUI number of each handset are found either on a label which is placed behind the battery, or on the packaging label. -
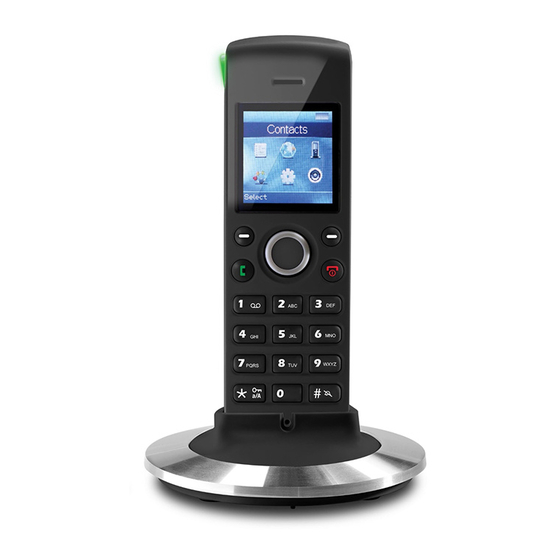
Page 9: Phone Overview
3 Phone Overview This section contains an overview of the handset from a front and a rear view. 3.1 Handset – Front View 1. Earpiece Speaker 2. Screen 3. Navigation Keys (Up/Down/Right/left) 4. Selection Key (Centre of Navigation Keys) This functions as the activity menu key. Press this in idle to enter all the menus available on the handset. -
Page 10: Rear View - Handset
3.2 Rear View – Handset 10. Headset connector (3.5mm) This is for connecting a headset. The connector is protected against dust by the headset connector cover. 11. External Speaker Is used for ringing, alarms, and when speaker mode is enabled in call. 12. -
Page 11: Display
4 Display This section contains a description of the different icons seen in the idle and in the menu. 4.1 Icons and Text in the Display All functions and settings available to the handset user are shown as icons and text in the display. The icons and text in the display indicate functions and settings to which you have access. -
Page 12: Menu Icons
“Do not disturb” icon is displayed in the status bar when this feature is enabled; in this case the handset does not react on any incoming calls. “HD” icon is displayed during a call if the quality of the call is “High Definition” and hereby using the 722 codec (also called a wideband call). -
Page 13: Keys And Buttons
4.3 Keys and Buttons 4.3.1 Navigation Keys/Selection Key Use this key when navigating in menus, and to move the cursor when writing some text or a number. The navigation keys are used for stepping left/right and up/down when navigating in the menus. When selecting or entering a menu use the selection key in the middle of the navigation keys. -
Page 14: The Keypad
4.4 The Keypad The keypad is used when entering a name or number, and the sketch below shows the available characters on the handset. NOTE: Depending on the selected menu language, other characters can be available. Therefore the character order can differ from the table above. 4.4.1 Idle Mode, and Number Input Mode When in idle a short press on a key enters the digits “0”... -
Page 15: Basic Operation
5 Basic Operation The following explain three basic operations of the handset: how to switch the handset on/off, how to lock/unlock the keypad, and the available options when entering a number in idle. 5.1 How to Switch the Handset On/Off Switching on the handset To switch the handset on long-press the on-hook key to switch the handset on. -
Page 16: Menu Operation
6 Menu Operation In the following a description of the different menus and submenus on the handset will be given. Before the functions of every menu are explained a menu tree will be showed at top to give an overview of how to enter the different menus. -
Page 17: Add Contact
6.1.1 Add Contact To add a new contact, press the right softkey “More”, select “Add contact” and the information displayed in the menu tree below can be filled out for the contact. Hereby, it is possible to edit the name, add a work phone number, and add a specific ringtone to be used for this contact. -
Page 18: Speed Dial/One Touch Dial
To delete all contacts in the local contact list, press the left softkey “Yes”. To go back to the “More” menu, press the right softkey “No”. 6.1.4 Speed dial/One Touch Dial With this feature it is possible to add a contact to the speed dial. Hereby, this contact can be called directly from idle by long-pressing the speed dial number that the contact is added to. -
Page 19: Central Directory
6.2 Central Directory In the “Central directory” menu different contacts can be called according to which list the system administrator has setup in the base system. This menu can be entered directly from idle with the right softkey Otherwise the menu can be opened by pressing the selection key in idle and choosing “Central directory”. -
Page 20: Calling A Contact In The Central Directory
The search function is similar in these two modes. When typing something in the search field, and pressing search the results of the search will be displayed. This is showed in the following images. To scroll through the search results, use the navigation keys up and down. If a green arrow is seen to the right of a contact (as seen above), this contact has more than one number assigned. -
Page 21: Call
Use the up/down navigation keys to scroll through the list. The list contains all the different call types (including both outgoing and incoming) that have been made to or from the handset. When there is a missed call on the handset, a red icon is displayed in the status bar until the entry has been viewed in the “All calls”... -
Page 22: View
6.3.2 View The left softkey enters a “View” function for each entry. With this feature the following details of the call can be seen: number, status (answered, dialled, missed), duration, and time stamp as displayed in the image below. 6.3.3 More Calls Options When a specific call is highlighted, pressing “More”... -
Page 23: Connectivity
6.4 Connectivity The “Connectivity” menu is entered in the menu by pressing the selection key in idle and choosing this menu. In this menu it is possible to register or deregister the handset to a certain base system. 6.4.1 Register When a handset is to be registered on a base system, the user will be prompted for an access code (base registration PIN) before the registration procedure is started. -
Page 24: Settings
With this feature it is possible to connect the handset to another PBX than the one used by the base station system. In this way, the handset can for example function on a PBX without being connected to a system of base stations. -
Page 25: Time & Date
6.5.1 Time & Date To set the time and date in the handset select the “Time & date” menu. Below it is shown how the time and date format can be changed. To change the time use the keypad, or the navigation keys to set the time to be what you want, and press save; as seen in the third image. -
Page 26: Led Signal
Slovenian The currently applied language is displayed when highlighting or selecting the menu “Language”. When entering this menu, a specific language can be selected by pressing the left softkey “Select”. Scroll through the list by using the up/down navigation keys. 6.5.3 LED Signal The LED at the upper left of the handset blinks green and can be assigned to distinctive situations by the user. -
Page 27: Security
In the images above, it is illustrated how the power save can be set between 5 seconds and 60 seconds. An interval is chosen by pressing the left softkey “Select” when the desired item is highlighted. 6.5.5 Security In the “Security” menu it is possible to set an automatic keylock and change the PIN of the handset. Automatic keylock If the “Automatic keylock”... -
Page 28: Reset Settings
Line If the handset is used in a multiline environment, it is possible to select preferred lines for the handset to make outgoing calls from in the “Line” menu. NOTE: To see additional information on this “Line” feature, please check the base system document via [2] 6.5.7 Reset Settings The handset settings can be reset to default settings by selecting this menu “Reset settings”. -
Page 29: Silent Charging
The “Auto answer” feature makes it possible for the handset to automatically answer an incoming call. This setting can be set to the following conditions: Normal With this enabled the handset does not answer a call automatically, but the user must always press the green “Off-hook”... -
Page 30: Hide Number
With this feature disabled, the handset reacts as normal on all incoming activity. If the function is enabled, though, the handset will not react, and the calling counterpart will be directed to voice mail if this feature is enabled. The “Do not disturb” icon is displayed in the status bar when “Do not disturb”... -
Page 31: Idle Screen Saver
In this case the handset will not receive any incoming calls – all calls will automatically be forwarded to the number setup in “Forward To”. Forward No Answer By enabling “Forward No Answer”, an incoming call to the handset is forwarded if the call is not answered within a given time interval, for example 30 seconds. - Page 32 By selecting “Off” the idle clock will not be displayed in idle, and by selecting “On” the clock is displayed in idle. SME VoIP Handset guide Proprietary and Confidential Page | 32...
-
Page 33: Audio Settings
6.6 Audio Settings The “Audio Settings” menu is entered through the menu by pressing the selection key in idle. It contains different settings for the sounds and ringing on the handset. 6.6.1 Silent Mode The “Silent” profile can either be enabled with the right softkey “On” or disabled with the left softkey “Off”. When the “Silent”... -
Page 34: Key Sound
When the ring volume is set to mute, the “Sound off” icon is displayed in the status bar and no sound is heard when receiving an incoming call. Ring melody Six different ring melodies can be chosen for the handset to play when receiving an incoming call. A list of melodies is displayed when entering the menu. -
Page 35: Confirmation Sound
6.6.4 Confirmation Sound This feature can either enable or disable confirmation sounds on the handset. When the function “Confirmation sound” is enabled (On), an audible indication is given when an event succeeds or fails. For example, a positive confirmation sound is generated when a new setting is set or an entry is saved successfully in the phonebook. -
Page 36: Calls Operations
7 Calls Operations In this section the different types of calls and call handling will be described. 7.1 Incoming call As the handset receives an incoming call an alerting screen will be displayed as displayed below. A ring signal will accompany this according to the respective settings on the handset. -
Page 37: Ending A Call
7.1.4 Ending a Call To end an ongoing call, press the red “On-hook” key , and the call will be terminated. The duration of the call is shown in the display. Furthermore, this duration time can also be viewed from the call list where the call is stored. -
Page 38: Initiating A Call From The Central Directory
NOTE: The “Calls” list can be reached from the menu “Calls” or directly from idle by pressing the green “Off- hook” button. 7.2.4 Initiating a Call from the Central Directory When opening the “Central directory” a call can be made to a specific contact by searching for this contact, and thereby enter the list from which a contact can be called by pressing the green “Off-hook”... -
Page 39: Unattended Transfer
2. Press the right softkey “Transfer” on either of the handsets in call. The counterpart of the call is put on hold. 3. Enter the number that the transfer should be made to and press the green “Off-hook” button 5. A ring back tone is heard, and the third party is called. 6. -
Page 40: Swap Between Two Calls
3. Enter the number that the transfer should be made to, and press transfer. 4. This will end the call on the first handset party (screen showing “Call ended”), and the second party will stop being on hold and hear a ring back tone instead which indicates that this handset is now calling the third party. -
Page 41: Call Waiting
7.6 Call Waiting When two parties are in call it is possible to receive a call waiting on one of the handsets which means that a third party calls one of the two parties already in a call. During a call waiting, two short beeps are heard every three seconds in the handset receiving the call waiting and the following screen is displayed: In this case the call waiting is from party 4241 (called Gary in the local phonebook). -
Page 42: Terminating A Conference Call
1. Initiate a call with a counterpart so that the handset displays “Connected” as shown above. 2. Press the left softkey “Hold” to put the ongoing call on hold. 3. The second party is put on hold and will hear a tone on hold. 4. - Page 43 SME VoIP Handset guide Proprietary and Confidential Page | 43...
-
Page 44: Accessories
8 Accessories It is possible to get different accessories to the RTX SME VoIP 8430 handset: Battery Battery Cover 9 Troubleshooting This troubleshooting section contains information on how to solve some operational problems that you may experience on the handset.
Need help?
Do you have a question about the 8430 and is the answer not in the manual?
Questions and answers