Table of Contents
Advertisement
Quick Links
• HOZ7173 WIFI
USER INSTRUCTIONS
OVENS
NOTICE D'EMPLOI ET D'INSTALLATION
DES FOURS ENCASTRABLES
MANUALE D'ISTRUZIONI
FORNO
INSTRUCCIONES DE USO
HORNOS EMPOTRABLES
BEDIENUNGSANLEITUNG
BACKOFEN
KULLANIM KILAVUZU
FIRINLAR
POKYNY PRO UŽIVATELE
TROUBY
CANDY HOOVER GROUP S.R.L. • Via Privata Eden Fumagalli • 20047 Brugherio Milano Italy
02
EN
17
FR
33
IT
48
ES
64
DE
79
TR
95
CZ
Advertisement
Table of Contents

Related Manuals for Hoover HOZ7173 WIFI


Summary of Contents for Hoover HOZ7173 WIFI
- Page 1 USER INSTRUCTIONS OVENS NOTICE D'EMPLOI ET D'INSTALLATION DES FOURS ENCASTRABLES MANUALE D’ISTRUZIONI FORNO INSTRUCCIONES DE USO HORNOS EMPOTRABLES BEDIENUNGSANLEITUNG BACKOFEN KULLANIM KILAVUZU FIRINLAR POKYNY PRO UŽIVATELE TROUBY CANDY HOOVER GROUP S.R.L. • Via Privata Eden Fumagalli • 20047 Brugherio Milano Italy...
- Page 2 Safety Indications • WARNING: the appliance and accessible parts become hot during use. Be careful not to touch any hot parts. •WARNING: the accessible parts can become hot when the grill is in use. Children should be kept at a safe distance. •WARNING: ensure that the appliance is switched off before replacing the bulb, to avoid the possibility of electric shocks.
- Page 3 •Only use the meat probe recommended for this oven. •Do not use a steam cleaner. •Put the plug into a socket equipped with a third contact which corresponds to the earth and which must be connected and in operation. For models without a plug, attach a standard plug to the cable that is able to bear the load indicated on the tag.
-
Page 4: Table Of Contents
Summary General Instructions 1.1 Safety indications 1.2 Electrical safety 1.3 Recommendations 1.4 Installation 1.5 Waste management 1.6 Conformity declaration 2.1 Overview Product Description 2.2 Accessories 2.3 First use Use of the Oven 3.1 Display description 3.2 Cooking modes Oven Cleaning and Maintenance 4.1 General notes on cleaning 4.2 Steam cleaning 4.3 Maintenance... -
Page 5: General Instructions
1. General Instructions We thank you for choosing one of our products. For the best results with your oven, you should read this manual carefully and retain it for future reference. Before installing the oven, take note of the serial number so that you can give it to customer service staff if any repairs are required. -
Page 6: Recommendations
NOTE: as the oven could require maintenance work, it is advisable to keep another wall socket available so that the oven can be connected to this if it is removed from the space in which it is installed. The power cable must only be substituted by technical service staff or by technicians with equivalent qualifications. -
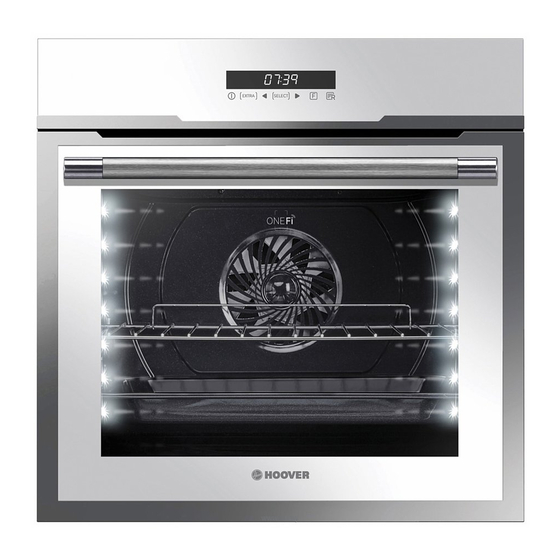
Page 7: Product Description
10 High Power LED (for pyrolitic innovative technologies and the vast experience versions) lights are integrated within the door. acquired by the Candy Hoover Group in this These produce white high quality illumination sector. The Chef Panel is an air conveyor that which enables to view the inside of the oven with increases air circulation inside the oven. -
Page 8: First Use
Meat-probe (depends on the oven model) Measures the internal temperature of food during cooking. Insert the meat-probe into the hole on the top of the cavity. – Prepare the food and properly insert the meat probe into the food. Do not preheat or start cooking before properly inserting the meat probe. - Page 9 FUNCTION HOW TO USE HOW TO DEACTIVATE WHAT IT DOES WHY IT IS NEEDED When a cooking programme NB: can only be set with an When the cooking time has •To modify cooking before t e r m i n a t e s , t h e o v e n active cooking programme.
- Page 10 - The icon blinks 1 second on and 3 seconds off: the oven is in read only mode. HOOVER For detailed information on HOW TO CONNECT your OneFi appliance and HOW TO USE IT effectively, go to http://wizardservice.candy-hoover.com/ LANGUAGE SETTING The language can be set when...
- Page 11 MEAT PROBE (depends on the oven model) If the meat probe is identified, the display shows "PROBE"; if the meat probe is inserted once a cooking programme is underway, the programme stops. When a cooking programme is selected, the display shows the default temperature but is never higher than 200°C: the selectable temperature is also limited to 200°C.
-
Page 12: Cooking Modes
3.2 Cooking Modes Function T °C T °C Function (Depends on the oven model) Dial default range LAMP: Turns on the oven light. DEFROST: When the dial is set to this position. The fan circulates air at room 40 ÷ 40 temperature around the frozen food so that it defrosts in a few minutes without the protein content of the food being changed or altered. -
Page 13: Oven Cleaning And Maintenance
4. Oven cleaning and maintenance 4.1 General notes on cleaning The lifecycle of the appliance can be extended through regular cleaning. Wait for the oven to cool before carrying out manual cleaning operations. Never use abrasive detergents, steel wool or sharp objects for cleaning, so as to not irreparably damage the enamelled parts. -
Page 14: Maintenance
4.3 Maintenance REMOVAL AND CLEANING OF THE SIDE RACKS 1. Unscrew the bolt in an anti-clockwise direction. 2. Remove the side racks by pulling them towards you. 3. Clean the side racks in a dishwasher or with a wet sponge and then dry them immediately. 4. -
Page 15: Removal And Cleaning Of The Glass Door
REMOVAL AND CLEANING OF THE GLASS DOOR 1. Open the oven door. 2.3.4. Lock the hinges, remove the screws and remove the upper metal cover by pulling it upwards. 5.6. Remove the glass, carefully extracting it from the oven door (NB: in pyrolytic ovens, also remove the second and third glass (if present)). -
Page 16: Changing The Bulb
CHANGING THE BULB 1. Disconnect the oven from the mains supply. 2. Undo the glass cover, unscrew the bulb and replace it with a new bulb of the same type. 3. Once the defective bulb is replaced, replace the glass cover. 5. - Page 17 INSTALLATION INSTALLATION INSTALLATION DU FOUR KURULUM INSTALLAZIONE INSTALACE INSTALACIÓN If the furniture is equpped with a bottom at the back part, provide an opening for the power supply cable. Si le meuble est équipé d’un fond à l’arrière : prévoir une Opening 500 x 10 ouverture pour le passage du câble d'alimentation.
- Page 18 The manufacturer will not be responsible for any inaccuracy resulting from printing or transcript errors contained in this brochure. We reserve the right to carry out modifications to products as required, including the interests of consumption, without prejudice to the characteristics relating to safety or function.
Need help?
Do you have a question about the HOZ7173 WIFI and is the answer not in the manual?
Questions and answers