Table of Contents
Advertisement
Quick Links
Installatie instructies
Einbauanleitung
Instructions d'installation
Instrucciones de instalación
Installation instructions
Istruzioni per l'installazione
Installations instruktioner
Monteringsinstruktioner
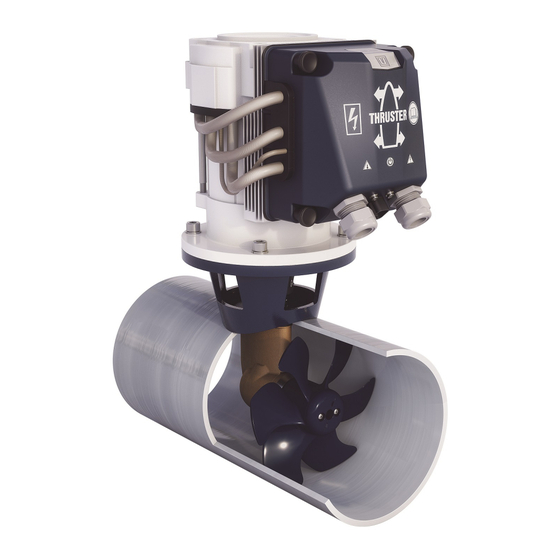
BOW PRO Series Thrusters
BOWA0361 - BOWA0421
36 kgf - 42 kgf - ø 125 mm
Copyright © 2018 Vetus b.v. Schiedam Holland
NEDERLANDS
ENGLISH
DEUTSCH
FRANÇAIS
ESPAÑOL
ITALIANO
DANSK
SVENSKA
NORSK
SUOMEKSI
POLSKI
Installasjonsinstrukser
Asennusohje
Instrukcja instalacji
9
21
33
45
57
69
81
93
105
117
129
020803.01
Advertisement
Table of Contents

Related Manuals for Vetus BOWPRO361


Summary of Contents for Vetus BOWPRO361
- Page 1 Istruzioni per l’installazione Installasjonsinstrukser Einbauanleitung Installations instruktioner Asennusohje Instructions d’installation Monteringsinstruktioner Instrukcja instalacji Instrucciones de instalación Installation instructions BOW PRO Series Thrusters BOWA0361 - BOWA0421 36 kgf - 42 kgf - ø 125 mm Copyright © 2018 Vetus b.v. Schiedam Holland 020803.01...
- Page 2 Installation instructions BOW PRO Series Thrusters: BOWA0361 and BOWA0421 020803.01...
- Page 3 . . . . . . . . . . . . . . . . . . . . . . . Raadpleeg de eigenaarshandleiding voor Bediening, Onderhoud, Consult the owner’s manual for Operation, Maintenance, Trouble Storingen en Technische gegevens . ’ shooting and Technical data . vetus® Installation instructions BOW PRO Series Thrusters: BOWA0361 and BOWA0421 020803.01...
-
Page 4: Warning Indications
ENGLISH Safety Introduction This manual give guidelines for installing a Vetus bow and/or stern Warning indications thruster from the BOW PRO series, model ‘BOWA0651’ , ‘BOWA0762’ The following warning indications are used in this manual in the con- and ‘BOWA0902’... -
Page 5: Installation Recommendations
0.5 x D (where D is the (10...20”) tunnel diameter). - The length of the tunnel (distance B) should be between 2 x D and 4 x D. vetus® Installation instructions BOW PRO Series Thrusters: BOWA0361 and BOWA0421 020803.01... -
Page 6: Positioning Of The Bow Thruster In The Thrust-Tunnel
C = 13...19 mm ( ”) sloped side and the ship’s hull. dimensions 0.1 to 0.15 x D. D = 125 mm (4 ”) β = β γ = γ vetus® Installation instructions BOW PRO Series Thrusters: BOWA0361 and BOWA0421 020803.01... -
Page 7: Grid Bars In The Tunnel Openings
• Treat the side of the tunnel oxy-acetylene cutter. which comes into contact with water with ‘epoxy paint’ or 2-component polyurethane paint. Install the thrust-tunnel. • Then apply anti-fouling treat- ment if required. vetus® Installation instructions BOW PRO Series Thrusters: BOWA0361 and BOWA0421 020803.01... -
Page 8: Drilling The Holes In The Thrust-Tunnel
NOTE: The gaskets supplied are already electrically insulated. How- ever the bolts and the shaft need to be fitted with insulation mate- rial, for example nylon bushes. vetus® Installation instructions BOW PRO Series Thrusters: BOWA0361 and BOWA0421 020803.01... -
Page 9: Installation Tailpiece And Intermediate Flange
• Grease the threads of the bolts with ‘outboard gear grease’ before Outboard Gear inserting and tightening them. Grease Check for any leaks immediately the vessel returns to the wa- ter . vetus® Installation instructions BOW PRO Series Thrusters: BOWA0361 and BOWA0421 020803.01... -
Page 10: Final Assembly
• For a first check, turn the propeller by hand - it should turn easily, while connected to the output spindle of the electric motor. 20 - 25 Nm (15 - 18 ft.lbf ) Molykote® G-n plus vetus® Installation instructions BOW PRO Series Thrusters: BOWA0361 and BOWA0421 020803.01... -
Page 11: Electrical Installation
Main switch see page 29 The main switch must be fitted to the ‘positive cable’ . The Vetus battery switch type BATSW250 is a suitable switch, which is also available in a 2-pole version, Vetus part number BATSW250T. 5 .4... -
Page 12: Connecting Main Power Cables
The drawing shows how the cables must be laid in order for the cover to be replaced again. See Chapter 6 Configuring the system before replacing the Fuse cover again Main switch • Reinstall the cover and tighten the glands. vetus® Installation instructions BOW PRO Series Thrusters: BOWA0361 and BOWA0421 020803.01... -
Page 13: Connecting Control Voltage Cables
The default configuration is for use as a bow thruster. Only the configuration of the stern thruster must be adapted. Configure a stern thruster by cutting the red cable as shown in the drawing. vetus® Installation instructions BOW PRO Series Thrusters: BOWA0361 and BOWA0421 020803.01... -
Page 14: Configuring The Panels
( . − . ) With a bow and stern thruster panel, together at the same helm station, the helm station number entered must be the same . vetus® Installation instructions BOW PRO Series Thrusters: BOWA0361 and BOWA0421 020803.01... -
Page 15: Changing The Thrust Direction
( . − . ) ashing The settings of the thrust direction have been changed and will remain as set even when the voltage supply has been switched off . vetus® Installation instructions BOW PRO Series Thrusters: BOWA0361 and BOWA0421 020803.01... - Page 16 ” ) 0.5 - 22 ( ” ) BPPPA 85 ( 3 ” ) 55 ( 2 ” ) 111 ( 4 ” ) 0.5 - 22 ( ” ) vetus® Installation instructions BOW PRO Series Thrusters: BOWA0361 and BOWA0421 020803.01...
- Page 17 ø 125 “ DIA.) “) 1 : 10 BOWA0421 200 (7 “) 310 (12 “) “) 159 (6 “) 210 (8 “) ø 125 “ DIA.) “) 1 : 10 vetus® Installation instructions BOW PRO Series Thrusters: BOWA0361 and BOWA0421 020803.01...
- Page 18 Fusibile della tensione di comando 5 Panneau de contrôle Panel de control Pannello di controllo 6 Câble de raccordement Cable de conexión Cavo di connessione 7 Terminateur Terminador Terminatore vetus® Installation instructions BOW PRO Series Thrusters: BOWA0361 and BOWA0421 020803.01...
- Page 19 Skrzynka przyłączeniowa pędnika dziobowego (lub pędnik rufowy) 2 Keskitin Koncentrator 3 CAN-väylän syöttö Zasilanie magistrali CAN 4 Ohjausjännitteen sulake Bezpiecznik sterowania 5 Ohjauspaneeli Panel sterowania 6 Kytkentäkaapeli Kabel przyłączeniowy 7 Terminaattori Terminator vetus® Installation instructions BOW PRO Series Thrusters: BOWA0361 and BOWA0421 020803.01...
- Page 20 Una (1) estación de timón Jeden pędnik dziobowy ORAZ jeden pędnik rufowy, Jedna (1) sterówka Un'elica di prua E un'elica di poppa, Una (1) plancia di comando 12 V vetus® Installation instructions BOW PRO Series Thrusters: BOWA0361 and BOWA0421 020803.01...
- Page 21 Bezpiecznik sterowania 5 Keulapotkurin ohjauspaneeli Panel sterowania pędnik dziobowy 6 Kytkentäkaapeli Kabel przyłączeniowy 7 Terminaattori Terminator 8 Peräpotkurin liitäntärasia Skrzynka przyłączeniowa pędnik rufowy 9 Peräpotkurin ohjauspaneeli Panel sterowania pędnik rufowy vetus® Installation instructions BOW PRO Series Thrusters: BOWA0361 and BOWA0421 020803.01...
- Page 22 Zwei (2) Helmstationen . Das Diagramm kann auf bis zu vier comando . Lo schema di cui sopra può essere esteso a un (4) Helmstationen erweitert werden . massimo di quattro (4) plance di comando . 12 V vetus® Installation instructions BOW PRO Series Thrusters: BOWA0361 and BOWA0421 020803.01...
- Page 23 6 Tilkoblingskabel Kytkentäkaapeli Kabel przyłączeniowy 7 Terminator Terminaattori Terminator 8 Koblingsboks for hekkthruster Peräpotkurin liitäntärasia Skrzynka przyłączeniowa pędnik rufowy 9 Kontrollpanel for hekkthruster Peräpotkurin ohjauspaneeli Panel sterowania pędnik rufowy vetus® Installation instructions BOW PRO Series Thrusters: BOWA0361 and BOWA0421 020803.01...
- Page 24 Installation instructions BOW PRO Series Thrusters: BOWA0361 and BOWA0421 020803.01...
-
Page 25: Accucapaciteit, Accukabels
0 - 14 m 50 mm BOWA0421 300 A ZE300 42 kgf - 12 V 105 Ah - 12 V BCI 30 H 0 - 38 ft AWG 1 vetus® Installation instructions BOW PRO Series Thrusters: BOWA0361 and BOWA0421 020803.01... - Page 26 FOKKERSTRAAT 571 - 3125 BD SCHIEDAM - HOLLAND b.v. TEL.: +31 0(0)88 4884700 - sales@vetus.nl - www.vetus.com Printed in the Netherlands 020803.01 2018-02...
Need help?
Do you have a question about the BOWPRO361 and is the answer not in the manual?
Questions and answers