
Subscribe to Our Youtube Channel
Related Manuals for Bolin Technology FEX30BHD-RNP2


Summary of Contents for Bolin Technology FEX30BHD-RNP2
- Page 1 FEX SERIES FIXED 4K/HD IP ZOOM CAMERA USER MANUAL VERSION: FEXM11192018 © 2018 Bolin Technology...
-
Page 2: Table Of Contents
Contents IP ZOOM CAMERA USER MANUAL ..............................4 IMPORTANT INFORMATION ................................4 OVERVIEW ......................................7 ......................................7 EATURES WHAT’S IN THE BOX ....................................8 ....................................... 8 CCESSORY CAMERA DIAGRAMS..................................9 INSTALLING YOUR CAMERA ................................10 RJ45 W ........................... 10 ATERPROOF ONNECTOR NSTALLATION UIDE... - Page 3 MAINTENANCE ....................................41 .................................... 42 PGRADING THE EVICE ................................... 42 ESTARTING THE YSTEM ..........................42 MPORTING AND XPORTING YSTEM ONFIGURATION ............................... 43 OLLECTING IAGNOSTIC NFORMATION & F ..............................43 IGITAL OCUS ONFIGURATION LIVE VIEW ......................................44 ....................................44 OOLBAR ................................45 IEWING ERTAIN REA OF...
-
Page 4: Ip Zoom Camera User Manual
Before operating the unit, please read this manual thoroughly and retain it for future reference. Copyright Copyright 2015-2018 Bolin Technology all rights reserved. No part of this manual may be copied, reproduced, translated, or distributed in any form or by any means without prior consent in writing from our company. - Page 5 We will readily improve or update the products or procedures described in the manual. Best effort has been made to verify the integrity and correctness of the contents in this document, but no statement, information, or recommendation in this manual shall constitute formal guarantee of any kind, expressed or implied. We shall not be held responsible for any technical or typographical errors in this manual.
- Page 6 Safety Information WARNING! Installation and removal of the unit and its accessories must be carried out by qualified personnel. You must read all of the Safety Instructions supplied with your equipment before installation and operation. Warnings: If the product does not work properly, please contact your dealer. Never attempt to disassemble the camera yourself. (We will not assume any responsibility for problems caused by unauthorized repair or maintenance.) ...
-
Page 7: Overview
Overview This user guide is suitable for the following models: • FEX30BHD-RNP2 (FHD, IP) • FEX22B4K-RNP2 (4K, IP) Key Features 4K Resolution: 12MP, 4K(8MP), 6MP, 5MP, 3MP, 1080P, 720P Full HD Resolution: up to 1080P/60) Zoom: Optical 4K: 22X; FHD: 30X ... -
Page 8: What's In The Box
WHAT’S IN THE BOX Accessory... -
Page 9: Camera Diagrams
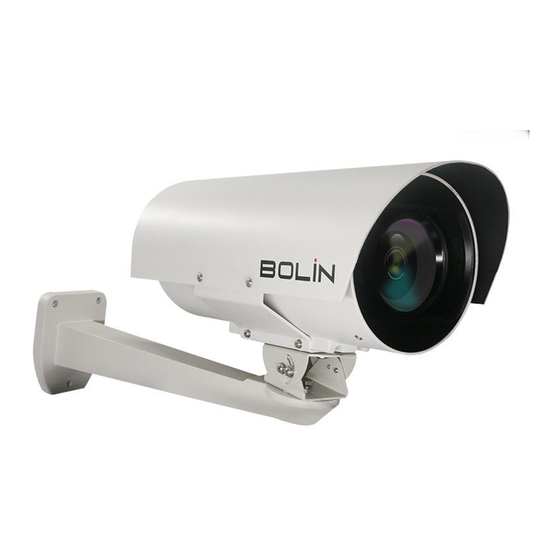
Camera Diagrams Camera 1. Infrared LED Lights 2. Camera Lens, 30X(FHD) zoom, 22X(4K) zoom 3. Nitrogen Pressurization Schrader Valve (For Factory Use Only) 4. Handle 5. MS Connector (Male) 18 Pin, POE+ Power Input. 6. Sunshield 7. MS Connector (Female) 18 Pin built with 5ft long Tail cable 8. -
Page 10: Installing Your Camera
Installing Your Camera The diagrams included in this user guide are for your reference only. See the actual product to mount your camera. RJ45 Waterproof Connector Installation Guide The RJ45 connector is IP67 water-proof rated. Please follow the illustration bellow to install the connector. 1. -
Page 11: Install The Tail Cable
Cable Requirements Network Cable 10/100 Mbps Ethernet CAT 5/5E/6 UTP cables are applicable to the ANSI/EIA/TIA-568A/B and ISO/D. Eight wires in the network cable need to be inserted in parallel into the top of the cable connector. The cable connector needs to be crimped in position. -
Page 12: Starting The Camera
Starting the Camera After you have mounted the camera properly, connect the camera to switch or router. Setting Camera over the LAN To view and configure your camera via the local area network (LAN), you need to install the VMS (Video Management System) to access the camera. -
Page 13: Network Connection
Installing the ActiveX The following message will show in IE browser on first login. Click Download to install Active X. Click Run. You may also click Save to download the file to your computer first. Close the browser and follow the steps to complete the installation. NOTE: ... - Page 14 http://192.168. 0.13 Clear the check NOTE: NOTE: The IP address 192.168.0.13 in this example is the default IP address. Please replace it with the actual address of your camera if it has been changed. Modify user access control settings (Optional) Before you access the camera, follow the steps to set User Account Control Settings to never notify.
-
Page 15: Login To The Web Interface
Login to the Web Interface The default static IP address of the camera is 192.168.0.13, and the default subnet mask is 255.255.255.0. DHCP is turned on by default. If a DHCP server is used in the network, the IP address of your camera may be assigned dynamically, and you need to use the correct IP address to log in. -
Page 16: Introduction To The Web Interface
Introduction to the Web Interface By default, the live view window is displayed when you are logged in to the Web interface. The following shows an example. Initial Configuration After you log in to the device, please perform the following initial configuration. 1. -
Page 17: Configuring Parameters
Configuring Parameters Local Parameters Set local parameters for your PC. NOTE: The local parameters may vary with models, please see the actual Web interface for details. Setting options Basic information, if click-in setting, there are shown parameter for selections. Shortcut entrance to common Configuration, you can one-click to enter relevant setting for IPC. -
Page 18: Network Configuration
i. Real Time Prior: Recommended if the network is in good condition. ii. Fluent Prior: Recommended if you want short time lag for live video. iii. Ultra-low Delay: Recommended if you want the minimum time lag for live video. b. Video Pixel Format i. -
Page 19: Pppoe
1. Select Enable for UNP Service. 2. In the UNP Server IP text box, enter an IP address for the UNP server. Select Yes to enable authentication, and then set the username and password for UNP authentication. Click Save. NOTE: ... - Page 20 After the configuration of FTP, you will be able to upload snapshots from network cameras to the specified FTP server. 1. Click Setup > Network > FTP. 2. Configure the IP address, port number of the FTP server, the username and password of the upload account, enable Upload Images and Overwrite Storage, and then set the overwrite image threshold.
-
Page 21: Image Configuration
DDNS BoLin IPC supports DynDNS, NO-IP and EzDDNS. Some of DDNS provider will be extra fee for using their service 1. Click Setup > Network > DDNS. 2. Enable DDNS Service. 3. Click Save. NOTE: This function is not supported by some models, please see the actual model for details. - Page 22 Setting the Scene Set image parameters to achieve the desired image effects based on live video in different scenes. Click Setup > Image > Image. Click Scenes. The scene management page for some models is displayed as follows (Right Top), you can select the desired scene in the drop-down list.
- Page 23 NOTE: If Auto Switching is enabled (scene settings will be unavailable), the device will switch between the set scenes. If not, the device will stay at the current scene. The device will stay at default scenes unless the non-default scenes are triggered.
- Page 24 a. Shutter is used to control the light that comes into the lens. A fast shutter speed is ideal for scenes in quick motion. A slow shutter speed is ideal for scenes that change slowly. i. You can set a shutter speed when Exposure Mode is set to Manual or Shutter Priority.
- Page 25 a. After enabling the WDR function, you can improve the image by adjusting the WDR level. i. Use level 7 or higher when there is a high contrast between the bright and dark areas of the scene. In the case of low contrast, it is recommended to disable WDR or use level 1-6. 3.
- Page 26 Focus NOTE: This function is not supported by some models, please see the actual model for details. 1. Click Setup > Image > Image and then click Focus. 2. Select the focus mode as required. A. Focus Mode a. Auto Focus: The camera focuses automatically according to the current light condition.
- Page 27 Defog Use the defog function to adjust the clarity of images captured in fog or haze conditions. NOTE: This function can be configured only when WDR is disabled. 1. Click Setup > Image > Image and then click Advanced. 2.
- Page 28 Custom and enter the content you want. After you have set the position and OSD content, the symbol appears in the Status column, which means that the OSD is set successfully. You may set multiple lines of contents for each area and use and to adjust the sequence of display.
-
Page 29: Audio And Video Configuration
Audio and Video Configuration Video Configuration You can set video parameters that your camera supports and view the current status of BNC output. If available, you may also enable sub-stream and third stream as required. NOTE: This function may vary with models. Only some camera models support the third stream. To determine if your camera supports this function, see the Web interface. -
Page 30: Video Format
Video Format 1. You can select the video format from Capture Collect Mode dropdown menu. 2. The selection of the video format is different on HD, 3MP, 4K resolution models. 3. Click Save after you make the selection. NOTE: Changing the video format/capture mode will restore the default encoding setting and causes the device to restart. -
Page 31: Alarm Configuration
RTSP URL are as following: Main Steam: rtsp://username:password@IP:port/media/video1 Sub: rtsp://username:password@IP:port/media/video2 Third: rtsp://username:password@IP:port/media/video3 Note: We recommend that you can use VCL or FFMPEG Media Player as they will often be faster and include audio support. RTSP Multicast Address After an RTSP multicast address is configured, the third-party player can request the RTSP multicast media stream from the camera through the RTP protocol. - Page 32 1. Click Setup > Events > Common Alarm > Motion Detection. 2. In the Detection Area, click to add a new detection area. To delete a detection area, click 3. Click and drag the mouse to set a detection area. 4.
- Page 33 2. When an alarm is reported, the PTZ camera automatically goes to the preset to capture video in the correct scene. d. Upload to FTP i. With Upload to FTP selected, the camera will automatically upload snapshots to the specified FTP server when an alarm is triggered.
- Page 34 2. Select Enable for Audio Detection, select a detection type and set the difference or threshold. To disable audio detection, clear the Enable check box. The following table describes some major parameters. a. Detection Type i. Rise Above: An alarm is reported when the rise of volume exceeds the difference. ii.
-
Page 35: Memory Card Storage
Click Setup > Events > Alarm Output. Select the alarm and set the alarm name. Set the status to Normally Open (default setting) and set the alarm duration. Click Save. CAUTION: Strictly follow the sequence when powering on the devices to avoid damaging camera components: ... -
Page 36: System Maintenance
i. Overwrite: If there is no free space in the memory card, new data will overwrite the existing data repeatedly. ii. Stop: If there is no free space in the memory card, new data will not be saved to the memory card. c. - Page 37 system. Common user: referred to as “user” in this manual. User only has permission to play live and recorded video. Up to 31 common users are allowed in the system. You can add a user on the user management interface (under Setup > System > Security). After the user is added successfully, you can change the password by entering the new password or delete the user by clearing the username.
-
Page 38: Setting The System Time
You can allow or deny the access from the specified IP address to your camera. Click Setup > System > Security > IP Address Filtering. Select Enable. Select the filtering mode and then enter the desired IP addresses. Click Save. NOTE: ... -
Page 39: Serial Port Mode Configuration
If the device ID, protocol or server IP is changed, the camera will restart, and the login password for admin and the system time will be updated as the settings on the central management server. In addition, all settings, except the following, will be restored to factory defaults: network interface card, server, image, OSD, privacy mask, custom information, and ROI. - Page 40 To control a PTZ camera through a third-party device, you need to set Port Mode to PTZ Control. By sending PELCO-D compliant PTZ control commands through the RS485 port, you can control the PTZ camera without using the PTZ control panel. 1.
-
Page 41: Maintenance
To display information from the third-party device on the OSD, you need to select OSD as the port mode. The camera receives information from the third-party device through the RS485 serial port, translates the received information, and then displays it on the OSD. NOTE: To enable the camera to correctly translate information received from the third-party device, make sure that the information sent by the third-party device through the serial port complies with the data format specified by our company. -
Page 42: Upgrading The Device
Upgrading the Device If the device is managed by the central management server and you want to upgrade the devices in batch mode, it is recommended to perform the upgrade operation on the central server. For detailed steps, see the user manual for the central management server. -
Page 43: Collecting Diagnostic Information
Click Setup > System > Maintenance. To import configurations that you have backed up, click Browse next to the Import button and select the configurations you want to import, and then click Import. The result will be displayed. To export configurations, click Browse next to the Export button, select the destination folder, and then click Export. -
Page 44: Live View
Max. Zoom Ratio This section provides the zoom capabilities, which is digital zoom capabilities. Click Setup > System > Maintenance. Configure zoom ratio in dropdown menu. The smallest number is the camera optical zoom range. Click OK. NOTE: This digital zoom functionality is ONLY available in 3MP, 4K H.265 models. Live View Live view means playing live video (real-time audio and video) received from a camera in a window through the Web interface. -
Page 45: Viewing Certain Area Of Images
1. Play/stop live video. 2. Take a snapshot of the current image displayed on the PC. The path for saving snapshots is set in System Configuration. 3. Start/stop local recording. The path for saving local recordings is set in System Configuration. 4. -
Page 46: Video Playback And Download With Edge Storage
Video Playback and Download with Edge Storage NOTE: Edge storage refers to recording video to the memory card of a frontend device (mostly a camera). Local recording refers to recording video to a local PC client. Before you play back video with edge storage, check that the camera has been installed with a memory card and storage has been configured. -
Page 47: Ptz Control
PTZ Control This function is available only for the PTZ dome cameras or a box camera installed on a Pan/Tilt motor. NOTE: Some of the lens control functions are applicable to cameras equipped with motorized lens. The PTZ control buttons may vary with camera model. For the PTZ control buttons that your camera supports, ... -
Page 48: Dimensions
Dimensions Unit: mm Model: FEX30BHD-NP2 (Nitrogen Pressurized Housing) - Page 49 2082 TECHNOLOGY LLC BOLIN TECHNOLOGY...
Need help?
Do you have a question about the FEX30BHD-RNP2 and is the answer not in the manual?
Questions and answers