Table of Contents
Advertisement
Quick Links
Advertisement
Table of Contents

Subscribe to Our Youtube Channel
Related Manuals for Rohde & Schwarz SFE100


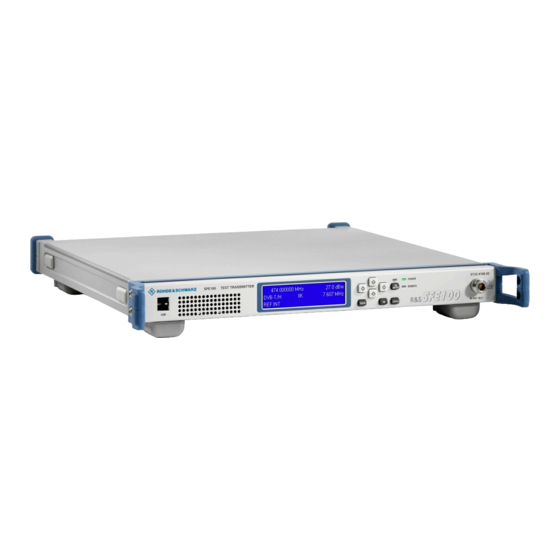
Summary of Contents for Rohde & Schwarz SFE100
- Page 1 ® R&S SFE100 Test Transmitter Getting Started (E<YFÌ) 2112.4122.62 ─ 13...
- Page 2 SFE100, model .13 (2112.4100.13) The software contained in this product uses several valuable open source software packages. For information, see the "Open Source Acknowledgment" document, which is available for download from the R&S SFE100 product page at www.rohde- schwarz.com/product/sfe100.html > "Downloads" > "Firmware".
- Page 3 Basic Safety Instructions Always read through and comply with the following safety instructions! All plants and locations of the Rohde & Schwarz group of companies make every effort to keep the safety standards of our products up to date and to offer our customers the highest possible degree of safety. Our products and the auxiliary equipment they require are designed, built and tested in accordance with the safety standards that apply in each case.
- Page 4 Basic Safety Instructions Symbol Meaning Symbol Meaning Caution ! Hot surface Alternating current (AC) Protective conductor terminal Direct/alternating current (DC/AC) To identify any terminal which is intended for connection to an external conductor for protection against electric shock in case of a fault, or the terminal of a protective earth Earth (Ground) Class II Equipment...
- Page 5 Basic Safety Instructions Operating states and operating positions The product may be operated only under the operating conditions and in the positions specified by the manufacturer, without the product's ventilation being obstructed. If the manufacturer's specifications are not observed, this can result in electric shock, fire and/or serious personal injury or death. Applicable local or national safety regulations and rules for the prevention of accidents must be observed in all work performed.
- Page 6 Basic Safety Instructions 6. The product may be operated only from TN/TT supply networks fuse-protected with max. 16 A (higher fuse only after consulting with the Rohde & Schwarz group of companies). 7. Do not insert the plug into sockets that are dusty or dirty. Insert the plug firmly and all the way into the socket provided for this purpose.
- Page 7 Basic Safety Instructions 2. Before you move or transport the product, read and observe the section titled "Transport". 3. As with all industrially manufactured goods, the use of substances that induce an allergic reaction (allergens) such as nickel cannot be generally excluded. If you develop an allergic reaction (such as a skin rash, frequent sneezing, red eyes or respiratory difficulties) when using a Rohde &...
- Page 8 Basic Safety Instructions 2. Adjustments, replacement of parts, maintenance and repair may be performed only by electrical experts authorized by Rohde & Schwarz. Only original parts may be used for replacing parts relevant to safety (e.g. power switches, power transformers, fuses). A safety test must always be performed after parts relevant to safety have been replaced (visual inspection, protective conductor test, insulation resistance measurement, leakage current measurement, functional test).
- Page 9 Instrucciones de seguridad elementales 3. If you use the product in a vehicle, it is the sole responsibility of the driver to drive the vehicle safely and properly. The manufacturer assumes no responsibility for accidents or collisions. Never use the product in a moving vehicle if doing so could distract the driver of the vehicle.
- Page 10 Instrucciones de seguridad elementales Además queda en la responsabilidad del usuario utilizar el producto en la forma debida. Este producto está destinado exclusivamente al uso en la industria y el laboratorio o, si ha sido expresamente autorizado, para aplicaciones de campo y de ninguna manera deberá ser utilizado de modo que alguna persona/cosa pueda sufrir daño.
- Page 11 Instrucciones de seguridad elementales Símbolo Significado Símbolo Significado Conexión a tierra El aparato está protegido en su totalidad por un aislamiento doble (reforzado) Conexión a masa Distintivo de la UE para baterías y acumuladores Más información en la sección "Eliminación/protección del medio ambiente", punto 1.
- Page 12 Instrucciones de seguridad elementales Estados operativos y posiciones de funcionamiento El producto solamente debe ser utilizado según lo indicado por el fabricante respecto a los estados operativos y posiciones de funcionamiento sin que se obstruya la ventilación. Si no se siguen las indicaciones del fabricante, pueden producirse choques eléctricos, incendios y/o lesiones graves con posible consecuencia de muerte.
- Page 13 Instrucciones de seguridad elementales integran productos sin interruptor en bastidores o instalaciones, se deberá colocar el interruptor en el nivel de la instalación. 5. No utilice nunca el producto si está dañado el cable de conexión a red. Compruebe regularmente el correcto estado de los cables de conexión a red.
- Page 14 Instrucciones de seguridad elementales 17. No utilice el producto en condiciones en las que pueda producirse o ya se hayan producido condensaciones sobre el producto o en el interior de éste, como p. ej. al desplazarlo de un lugar frío a otro caliente.
- Page 15 Instrucciones de seguridad elementales pueden causar perturbaciones radioeléctricas en entornos residenciales debido a posibles perturbaciones guiadas o radiadas. En este caso, se le podrá solicitar al operador que tome las medidas adecuadas para eliminar estas perturbaciones. Aparato de clase B: Aparato adecuado para su uso en entornos residenciales, así...
- Page 16 Instrucciones de seguridad elementales 8. En caso de devolver baterías de litio a las filiales de Rohde & Schwarz, debe cumplirse las normativas sobre los modos de transporte (IATA-DGR, código IMDG, ADR, RID). Transporte 1. El producto puede tener un peso elevado. Por eso es necesario desplazarlo o transportarlo con precaución y, si es necesario, usando un sistema de elevación adecuado (p.
- Page 17 Safety Instructions - Informaciones de seguridad Safety Instructions for Instruments with Fold-Out Feet Danger of injury The feet may fold in if they are not folded out completely or if the in- strument is shifted. The feet may break if they are overloaded. Fold the feet completely in or completely out to ensure stability of the instrument and personal safety.
- Page 18 Safety Instructions - Informaciones de seguridad Informaciones de seguridad para aparatos con telepiés Peligro de heridas Los telepiés pueden doblarse hacia adentro si no han sido desdobla- dos por completo o si el aparato es movido. Los telepiés pueden rom- perse si son sobrecargados.
- Page 19 Safety Instructions - Informaciones de seguridad Safety Instructions for Stacking Instruments Danger of injury Instruments may slip if they are stacked on top of each other. Place the instrument on a stable, even surface. Stack the instruments according to their size, with the largest instrument on the bottom. Do not stack more than three in-struments directly on top of each other.
- Page 20 Safety Instructions - Informaciones de seguridad Informaciones de seguridad para el amontonamiento de aparatos Peligro de heridas Los aparatos pueden desplazarse al ser amontonados. Posicionar los aparatos sobre una superficie estable y lisa. Amontonar los aparatos por orden de su tamaño. No amontonar nunca más de tres aparatos uno sobre el otro.
- Page 21 Customer Support Technical support – where and when you need it For quick, expert help with any Rohde & Schwarz equipment, contact one of our Customer Support Centers. A team of highly qualified engineers provides telephone support and will work with you to find a solution to your query on any aspect of the operation, programming or applications of Rohde &...
-
Page 22: Table Of Contents
4.1.3 Checking the Accessories.....................15 4.1.4 Warranty Conditions......................15 Putting Up the R&S SFE100..................15 4.2.1 Placing the R&S SFE100 on a Bench Top..............15 4.2.2 Mounting the R&S SFE100 in a Rack................16 5 Interfaces and Connectors..............17 Front Panel........................17 5.1.1 Hardkeys........................17 5.1.2... - Page 23 Mouse........................... 31 6.3.3 Memory Stick........................ 31 6.3.4 External Monitor......................31 7 Switching On or Off the R&S SFE100..........33 Switching On the R&S SFE100.................. 33 Switching Off the R&S SFE100.................. 34 Checking the Provided Options.................34 Turn-On Tests......................35 8 Sample Application................36 Using Display and Keys on the Front Panel.............41...
- Page 24 10.3 Windows XP Recovery and Backup Partition............50 10.3.1 Performing Backup/Recovery..................50 10.3.2 Recommended Procedure for the R&S SFE100 Models 02, 03........51 10.3.3 Windows XP Embedded Recovery and Backup Partition Dialog........51 11 Maintenance..................57 11.1 Cleaning the Instrument..................... 57 11.2...
- Page 25 ® Contents R&S SFE100 Getting Started 2112.4122.62 ─ 13...
-
Page 26: Preface
1.1 For Your Safety The R&S SFE100 is designed for use solely in industrial and laboratory environments. Use the R&S SFE100 only in its designated purpose as described in the product docu- mentation, for example in Chapter 3, "System Overview",... - Page 27 If possible, the procedure using the front panel is described. The terms "select" and "press" may refer to any of the described methods, i.e. using a key on the R&S SFE100 or on a keyboard, or a mouse pointer in the display. Getting Started 2112.4122.62 ─ 13...
-
Page 28: Documentation Overview
Includes the contents of the getting started manual. The contents of the user manual is available as help in the R&S SFE100. The help offers quick, context-sensitive access to the complete information for the base unit and the software options. -
Page 29: Data Sheets And Brochures
Application Notes, Application Cards, White Papers, etc. 2.5 Data Sheets and Brochures The data sheet contains the technical specifications of the R&S SFE100. It also lists the options and their order numbers, and optional accessories. The brochure provides an overview of the instrument and deals with the specific char- acteristics. -
Page 30: System Overview
It provides a number of instruments and applications and offers unri- valed RF and baseband characteristics. Due to its modular design, the R&S SFE100 can be optimally adapted to the require- ments of different applications. It is an ideal research and development tool for making improvements to introduced standards and for generating new standard signals. -
Page 31: Baseband Section
The baseband section of the R&S SFE100 contains the hardware for generating and processing I/Q signals. It is entirely digital in design. Depending on the R&S SFE100 model, the baseband section provides all of the trans- port stream (TS) interfaces and handles processing of the transport streams. The TS/ Video generator option is also found here. -
Page 32: Rf Section
FEC for the selected digital TV standard. The subassembly generates digital I/Q signals which are forwarded to the RF section. Using the AWGN software option (R&S SFE100-K40 noise generator), additive white Gaussian noise (AWGN) can be generated. 3.1.2 RF Section The D/A converter converts the digital signal into an analog I/Q signal. -
Page 33: Setting Up The R&S Sfe100
4. Remove the shock protectors attached to the R&S SFE100. Retain the original packing material. If the R&S SFE100 needs to be transported or shipped at a later date, you can use the material to prevent control elements and con- nectors from being damaged. -
Page 34: Checking The Accessories
If the R&S SFE100 is not set up securely, you or others can be injured. Place the R&S SFE100 on a stable and level surface. Do not place anything on top of the R&S SFE100, if the R&S SFE100 is not in a level position. -
Page 35: Mounting The R&S Sfe100 In A Rack
4.2.2 Mounting the R&S SFE100 in a Rack The R&S SFE100 may be installed in a 19" rack mount by using a rack adapter kit (for order no. see data sheet). Follow the installation instructions that are part of the adapter kit. -
Page 36: Interfaces And Connectors
Front Panel 5 Interfaces and Connectors This chapter describes the front panel and the rear panel of the R&S SFE100, includ- ing all status displays and connectors. See the data sheet for information about per- missible levels on the inputs and output levels on the outputs. -
Page 37: Status Display Leds
LED off: RF output is switched off. ● LED green: RF output is switched on. POWER Displays the power supply status. ● LED off: No power is supplied. R&S SFE100 is switched off. ● LED green: Power is supplied. REMOTE Displays the remote control status. ●... -
Page 38: Cursor Keys
N (50R mechanics) connector. Used to output the RF signal. The level range can be extended upwards by installing the power amplifier option (R&S SFE100-B90). With this option installed, the output is located on the rear panel. Do not overload the RF output See the data sheet for the limits for the DC voltage and reverse RF power. -
Page 39: Usb Interfaces
® Interfaces and Connectors R&S SFE100 Front Panel 5.1.6 USB Interfaces See (5) in Figure 5-1 or (2) in Figure 5-2. Two USB (universal serial bus) interfaces of the type A (host USB) are provided. Use the interfaces to connect external devices like a keyboard, mouse, printer, memory stick (Chapter 6.3, "Connecting External... -
Page 40: Rear Panel
A fuse holder is integrated. The AC power switch is located on the right of the AC power connector. Switch positions: ● I: The R&S SFE100 is in operation. ● O: The entire instrument is disconnected from the AC power supply. For further information: ●... -
Page 41: Video In
When using an internal reference, the frequency generated by the internal refer- ence oscillator of the R&S SFE100 is made available. If an external reference is activated, the signal applied to REF IN is also available on REF OUT pin. It is buf- fered and filtered. -
Page 42: Monitor
5.2.6 100 BASE-T 1 Gigabit LAN interface (100 Base-T). Used to connect the R&S SFE100 to a local network for remote control, remote opera- tion, printouts and data transfer. The assignment of the RJ.45 CAT5 connector sup- ports twisted pair category 7 UTP/STP cables in a star configuration (UTP stands for "unshielded twisted pair", and STP for "shielded twisted pair"). -
Page 43: Dig I/Q
7, 8 Termination, 75R 5.2.7 DIG I/Q Requires the extended I/Q input option (R&S SFE100-K80). Used to receive digital I/Q signals from another R&S instrument with the same interface. For further details see the user manual or the help system. - Page 44 ® Interfaces and Connectors R&S SFE100 Rear Panel Table 5-4: Input pin assignment Name Signal DIG_IQ_CLK2+ Data clock 2 (control signal) Ground (control signal) DIG_IQ_IN_D0+ Data bit (LSB), OUT/IN 0 line (I/Q signal) DIG_IQ_IN_D1+ Data bit, OUT/IN 1 line (I/Q signal)
-
Page 45: Usb Interface
BNC connector. Input for the 1 pulse per second signal used in SFN modes. Input for external triggering of digital modulations standards and ARB. 5.2.11 RF OUT Requires the power amplifier option (R&S SFE100-B90). For details see Chapter 5.1.5, "RF OUT",... - Page 46 ® Interfaces and Connectors R&S SFE100 Rear Panel Getting Started 2112.4122.62 ─ 13...
-
Page 47: Connecting The R&S Sfe100
23. 6.2 Connecting to the AC Power Supply The R&S SFE100 can be used with different AC power voltages and adapts itself auto- matically to it. Adjusting the R&S SFE100 to a particular AC supply voltage is therefore not required. -
Page 48: Connecting External Devices
Take care that the AC voltage lies within the limits printed on the AC power connector of the R&S SFE100 and listed in the data sheet. ► Connect the R&S SFE100 to the AC power supply, using the power cable that is supplied. The AC power connector is located on the rear panel of the R&S SFE100. -
Page 49: External Keyboard
SFE100 Connecting External Devices To uninstall a USB device ► Disconnect the USB device from the R&S SFE100. You can do this during opera- tion. Windows XP immediately detects the change in the hardware configuration and deactivates the corresponding driver. -
Page 50: Mouse
2. Select "Control Panel" and then "Mouse". 6.3.3 Memory Stick The R&S SFE100 has a disk drive. You can exchange data by using a memory stick which you plug into one of the USB interfaces. The memory stick is automatically assigned a free drive letter and you can use Windows Explorer to transfer data. - Page 51 SFE100 Connecting External Devices If you have used the R&S SFE100 without monitor before, activate the HDMI interface by pressing the CTRL+ALT+F4 key combination, several times if necessary. For R&S SFE100s without HDMI interface, it is possible to display the screen contents on external monitors by using remote operation on an external computer.
-
Page 52: Switching On Or Off The R&S Sfe100
R&S SFE100 or other devices in the test setup. To switch on the R&S SFE100 1. Make sure that the R&S SFE100 is connected to a power supply (for details see Chapter 6.2, "Connecting to the AC Power Supply",... -
Page 53: Switching Off The R&S Sfe100
5.1.2, "Status Display LEDs", on page 18). 2. Set the AC switch on the rear panel of the R&S SFE100 to the O position. None of the LEDs on the front panel should be lit. 7.3 Checking the Provided Options The R&S SFE100 may be equipped with options. -
Page 54: Turn-On Tests
R&S SFE100 Turn-On Tests For an overview of the all options available for the R&S SFE100 refer to the Rohde & Schwarz Homepage. 7.4 Turn-On Tests If an error is detected, an error indication is displayed in the error/warnings line along with a brief description of the error. -
Page 55: Sample Application
SFE100 8 Sample Application The following example involves the following main steps: ● Feed an MPEG2 transport stream to the R&S SFE100 using the serial interface 1 (TS1 IN, see Chapter 5.2.2, "TS1 IN / TS2 IN", on page 21) on the rear panel. - Page 56 ® Sample Application R&S SFE100 2. Press the ENTER key. The tree is expanded and the "FREQUENCY" submenu is displayed. 3. In the tree, select the "FREQUENCY" submenu. 4. Press the ENTER key. The focus is set on the work view.
- Page 57 ® Sample Application R&S SFE100 3. In the tree, select the "LEVEL" submenu. 4. Press the ENTER key. The focus is set on the work view. 5. Set a level of -20 dBm. a) Select the "LEVEL" field. b) Enter -20.
- Page 58 Select the "SIGNAL SOURCE" field. b) Press the ENTER key to display the list. c) Depending on the R&S SFE100 model, if not fixed, select "DIGITAL TV". d) Press the ENTER key to confirm the selection. 7. Depending on the installed options, select the "DVB-C" transmission standard.
- Page 59 ® Sample Application R&S SFE100 Selecting the transport stream input and setting the DVB-C transmission param- eters 1. In the tree, select the "DIGITAL TV" menu. 2. Press the ENTER key. The tree is expanded and the "DIGITAL TV" submenu is displayed.
-
Page 60: Using Display And Keys On The Front Panel
The selected constellation is displayed in the info area. 8.1 Using Display and Keys on the Front Panel A display and keys on the front panel are only provided by the R&S SFE100 models 02 and 03. For details on using the front panel display see the user manual or the help system. - Page 61 ® Sample Application R&S SFE100 Using Display and Keys on the Front Panel 2. Using the UPARROW/DNARROW keys, select the "FREQUENCY" menu. 3. Press the OK or RIGHTARROW key. The tree is expanded and the "FREQUENCY" submenu is displayed. 4. Select the "FREQUENCY" submenu and confirm your entry with OK.
- Page 62 8. Press the BACK key to exit the work view and get back to the tree. Setting the modulation parameters and selecting the transmission standard Depending on the R&S SFE100 model, the signal source and the transmission stan- dard are fixed to "DTV" and "DVBC" under "MODULATION".
- Page 63 ® Sample Application R&S SFE100 Using Display and Keys on the Front Panel 9. Select a symbol rate of 6.9 MS/s. a) Using the UPARROW/DNARROW keys, select the "SYMBOL RATE" field. b) Using the LEFTARROW/RIGHTARROW keys, move the cursor to the digit you want to change in the frequency entry.
-
Page 64: Operating The R&S Sfe100 In A Lan
Connecting the R&S SFE100 to the Network 9 Operating the R&S SFE100 in a LAN The R&S SFE100 is equipped with a network interface and can be connected to an Ethernet LAN (local area network). The network card operates with 100 MBit Ethernet IEEE 802.3u. -
Page 65: Establishing A Point-To-Point Connection
To connect the R&S SFE100 to the network 1. Fulfill all prerequisites mentioned above. 2. Make sure that the R&S SFE100 is switched off. This is the only way to ensure that the network connection is reliably detected and any disruptions during the opera- tion of the R&S SFE100 are avoided. -
Page 66: Configuring The Network Card
XP Start menu (for details refer to the Windows XP help system). Querying the computer name using the firmware 1. If the R&S SFE100 has a default computer name, the computer name is displayed as part of the window title of the application. -
Page 67: Firewall Settings
By default, the Windows Firewall is activated to protect the R&S SFE100 from an attack of hostile users and programs. The Windows Firewall suppresses all network communication which is not initialized by the R&S SFE100 itself or which is not defined as an exception. -
Page 68: Installed Software
As user name and password, instrument are factory-set. If the R&S SFE100 is connected to a network and if the user name and the password are identical under Windows XP and on the network, you log on to operating system and the network at the same time. -
Page 69: Windows Xp Start Menu
Rohde & Schwarz. 10.3 Windows XP Recovery and Backup Partition The R&S SFE100 provides a backup and recovery partition. A backup of the factory system partition (C:\) is stored per default and can be recovered in case of a system crash. -
Page 70: Recommended Procedure For The R&S Sfe100 Models 02, 03
After pressing OK within 4 seconds, the recovery process starts and the following message is displayed: "Restore in progress! Please wait..." After the restore process is finished, a "warm boot" is carried out and R&S SFE100 continues with normal operation. - Page 71 R&S SFE100 models 02, 03: The recovery of the system partition factory version is started, see "Important infor- mation for the R&S SFE100 models 02, 03" on page 53. R&S SFE100 models 12, 13: The "Windows XP Recovery and Backup Embedded Partition" dialog is displayed.
- Page 72 LPCx_SFE_0024), you must not select "Factory Default" to avoid problems due to interference with the running background process. For R&S SFE100 models 12/13, continue as described in one of the following chap- ters.
- Page 73 After the backup, the "Windows XP Embedded Recovery and Backup Partition" dialog is displayed again. 3. Click "Exit and Shutdown". 4. Turn off/on the R&S SFE100 manually. 10.3.3.2 Recovering the Selected Version of System Partition Only R&S SFE100 models 12, 13.
- Page 74 Windows XP Recovery and Backup Partition 2. Under "Select Backup", select the backup to be restored. 3. Click "Restore" and follow the instructions. 4. After the recovery, turn off/on the R&S SFE100 manually. 10.3.3.3 Recovering the Factory Default Only R&S SFE100 models 12, 13.
- Page 75 2. Under "Select Backup", select the backup to be deleted. 3. Click "Remove". After the deletion, the R&S SFE100 returns to the "Remove Backup" dialog as long as backups are still available. If the last backup is deleted, the "Windows XP Embedded Recovery and Backup Partition"...
-
Page 76: Maintenance
SFE100 Cleaning the Instrument 11 Maintenance The R&S SFE100 does not need a periodic maintenance unless it is operated in dusty areas. Risk of instrument damage If the R&S SFE100 is operated in dusty areas, the fans may become obstructed by dust or other particles in the process of time. -
Page 77: Replacing The Fuses
11.3 Storing the Instrument The storage temperature range of the R&S SFE100 is given in the data sheet. If the R&S SFE100 is to be stored for a longer period of time, it must be protected against dust. Repack the R&S SFE100 as it was originally packed when transporting or shipping. -
Page 78: Index
® Index R&S SFE100 Index Symbols External keyboard ............. 30 External monitor ..............31 1PPS / TRIG connector ............. 26 100 BASE-T connector ............. 23 Firewall settings ..............48 Firmware AC power supply options ................ 34 connecting to .............. 28 update ................. - Page 79 ® Index R&S SFE100 Network TCP/IP protocol configuring card ............47 configuring ..............47 connecting to .............. 45 TS1 IN connector .............. 21 disconnecting from ............45 TS2 IN connector .............. 21 Tutorials ................9 OK hardkey ............... 18 Open source acknowledgment (OSA) ....... 10 Unpacking the cardboard box ...........
Need help?
Do you have a question about the SFE100 and is the answer not in the manual?
Questions and answers