Advertisement
Quick Links
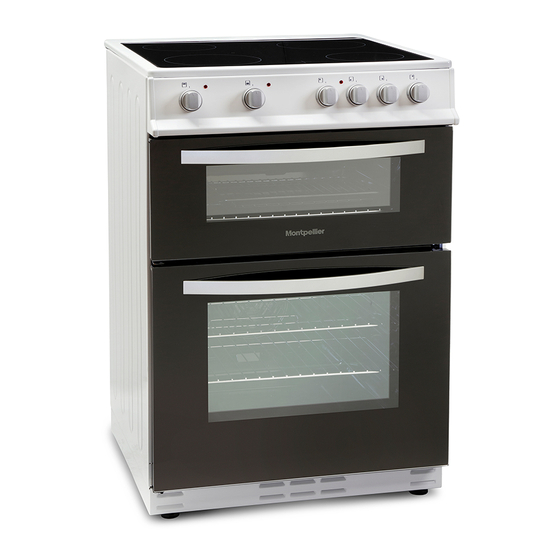
60cm Twin Cavity Ceramic Cooker
MTC60FW/FS - White/Silver
Please read these instructions carefully before attempting to install or use this appliance.
We recommend that you keep these instructions in a safe place for future reference.
THE PERFECT BALANCE OF FUNCTION AND STYLE
LAUNDRY - DISHWASHING - COOKING - COOLING
Installation and Operating Instructions
Advertisement

Subscribe to Our Youtube Channel
Summary of Contents for montpellier MTC60FW
- Page 1 LAUNDRY - DISHWASHING - COOKING - COOLING Installation and Operating Instructions 60cm Twin Cavity Ceramic Cooker MTC60FW/FS - White/Silver Please read these instructions carefully before attempting to install or use this appliance. We recommend that you keep these instructions in a safe place for future reference.
- Page 2 Welcome Thank you for choosing this Montpellier Freestanding Cooker. Our Cookers has been designed to provide you with the best combination of style, reliability and performance to give you years of trouble-free use. You may be familiar with a similar product, but please take time to read these instructions carefully before installing or using your Freestanding Cooker to ensure you get the most from your purchase.
- Page 3 Description of The Appliance: Hotplate Control Panel Top Oven Door Door Handle Main Oven Door (Line drawing indicative of model supplied) (N.B. Model supplied my not have all features shown in this User Manual).
- Page 4 CONTENTS: Section 1: Installation Section 2: Safety Advice Section 3: Operating the Appliance including Temperature Conversion Chart & Cooking Guidelines Section 4: Maintenance Section 5: Guarantee, Points of Contacts & Recycling Info, Including Product Fiche (pg. 15)
- Page 5 Section 1. Installation - This appliance must be installed by a qualified electrician. Remove all packaging, protective film and securing tape from the appliance. Position the appliance in a dry atmosphere. The following dimensions are provided as a guide for installation –...
- Page 6 Adjust the height and stability of the cooker by adjusting the two front feet as shown below. Rotate in a clockwise direction to decrease the height and in an anti-clockwise direction to increase the height. Electrical Connection 1.2. This appliance must be ‘hard wired’...
- Page 7 Section 2. Safety Advice THIS APPLIANCE MUST BE INSTALLED BY A QUALIFIED ELECTRICIAN! It is important that you use only ‘oven proof’ pans and dishes when using the appliance for cooking or grilling. Never allow cookware and/or utensils to come into contact with the top heating element/grill.
- Page 8 Section 3. Operating the Appliance 3.1. Control Panel (N.B. Model supplied my not have all features shown in this User Manual). 3. 4. 5. 6. 1. 2. 1. Grill/Top Oven Control Knob 2. Main Oven Control Knob 3. Left Hand Rear Heat Zone Control Knob 4.
- Page 9 3.2.1. Using the Hob Heat Zones Turn the required heat zone control knob (3, 4, 5 or 6) to the required heat setting between 1 (Low) and 6 (High). Whilst one or more of the heat zones are in use, the heat zone warning light will be on.
- Page 10 3.2.1. Main Oven We always recommend Pre-Heating. Firstly, set the required temperature and allow the oven to get to temperature (up- to 15 minutes) before placing food in the cavity. To operate the oven, turn the control knob to the required heat setting.
- Page 11 Gas Mark to °F & °C – Temperature Conversion...
- Page 12 All timings given are purely as a guide. Timings may always vary due to personal methods, size of food being prepared and the temperature of said food stuffs. We always recommend following the cooking guidelines on your meat products and packets. For additional information, please call Customer Services on 03333 234 474.
- Page 13 Turn the lamp fixing glass in an anti-clockwise direction to separate it. To separ ate the lamp from the body, turn it in an anti-clockwise direction. Fix new lamp that you can purchase from any decent DIY store or direct from Montpellier Product Support on 03333 234 474...
- Page 14 4.4. What to do if something goes wrong Please make the following checks before calling Montpellier Product Sup port: If all the necessary checks have been made and there is still an issue or fault with your appliance, please call Montpellier Service on...
- Page 16 Your 2 year Manufacturer’s guarantee THIS DOES NOT AFFECT YOUR STATUTORY RIGHTS. Your new Montpellier appliance carries a free guarantee which protects you against the cost of repairs during the first 24 months from date of purchase provided that: Any claim is accompanied by evidence of the model reference, model serial number and proof of purchase, such as a Sales Receipt, showing that the appliance was purchased within the 24 months prior to the date of claim.
- Page 17 Montpellier Domestic Appliances Ltd. Unit 1, Tewkesbury Retail Park, Northway Lane, Tewkesbury, Gloucestershire GL20 8JU www.montpellier-appliances.com The symbol on the product or on its packaging indicates that this product may not be treated as household waste. Instead it shall be handed over to the applicable collection point for the recycling of electrical and electronic equipment. By ensuring this product is disposed of correctly, you will help prevent potential negative consequences for the environment and human health, which could otherwise be caused by inappropriate waste handling of this product.


Need help?
Do you have a question about the MTC60FW and is the answer not in the manual?
Questions and answers