Plantronics Savi W730 User Manual
Multi device wireless headset system
Hide thumbs
Also See for Savi W730:
- Quick start manual ,
- Quick setup manual (4 pages) ,
- Quick start quide (1 page)
Table of Contents

Subscribe to Our Youtube Channel
Related Manuals for Plantronics Savi W730


Summary of Contents for Plantronics Savi W730
- Page 1 Savi W730 ® Multi Device Wireless Headset System User Guide Executive Systems, Inc. Richmond, Virginia 23230-2657 804-288-0041 804-288-4731 [Fax] 800-288-0041 [Sales & Service] www.ExecutiveSystemsInc.com info@esitsd.com - Email...
-
Page 2: Table Of Contents
Multi-Phone Status Mobile Phone and Headset Audio Combine Audio From Any Two Lines or Channels Conference Up to Three Additional Headsets Advanced Use Install Plantronics Software Plantronics Control panel Devices Tab Device Settings > Base Tab Device Settings > Headset Tab Device Settings >... - Page 3 Preferences About Tab Plantronics Update Manager Troubleshooting Headset Desk Phone Mobile Softphone...
-
Page 4: Welcome
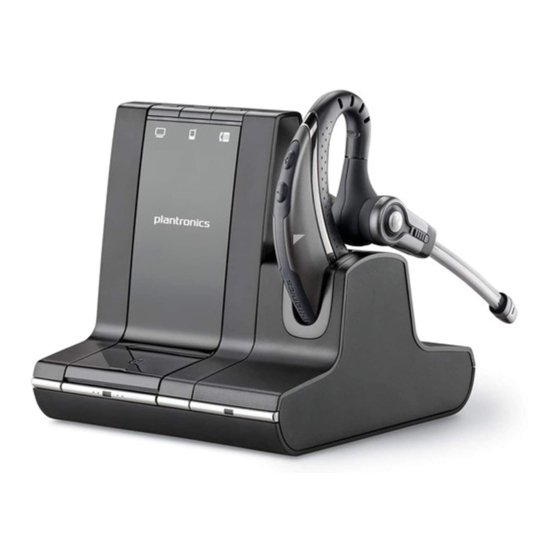
Welcome Congratulations on purchasing your new Plantronics product. This guide contains instructions for setting up and using your Savi W730 Wireless Headset System which has a WO2 base and a WH210 headset. Please refer to the separate safety instructions for important product safety information prior to installation or use of the product. -
Page 5: What's In The Box
What's in the Box Headset Base and charging cradle Eartips USB cable Telephone interface cable Power supply... -
Page 6: Base And Headset Basics
Base and Headset Basics Base Power jack Computer button Handset lIfter jack Mobile phone button Telephone interface cable jack Desk phone button USB port Bluetooth pairing button/LED Desk phone speaking volume Subscription button/LED Desk phone configuration switch Charging LED Desk phone listening volume Headset Volume up button Indicator light... -
Page 7: Accessories
Accessories Electronic hookswitch cable (EHS cable) Electronically and automatically takes your desk phone handset off hook. Enables remote call control with your headset. HL10 lifter Automatically lifts handset and returns it to the cradle. Enables remote call control with your headset. -
Page 8: Customize Your Headset
Customize Your Headset Customize the headset by changing the eartip, wearing it on the right or left and optimizing the position of the microphone. Change the Eartip The headset comes with a pre-installed eartip. To install a different eartip see the following: Remove the pre-installed eartip by pushing in and turning the eartip CLOCKwise, then pull firmly. -
Page 9: Left Ear Wearing
Left Ear Wearing The headset can be converted for wearing on left ear as follows: Turn microphone boom around. Rotate microphone boom down. -
Page 10: Charge Your Headset
Charge for at least 20 minutes prior to the first use. A full charge takes 3 hours. NOTE This product has a non-replaceable battery. Contact Plantronics for replacement information. -
Page 11: Desk Phone: Connect And Call
Desk phone + HL10 lifter (sold separately) See the user guide at plantronics.com/accessories for details. Desk phone + EHS cable (sold separately) See the user guide at plantronics.com/accessories... -
Page 12: Make A Desk Phone Call
Make a Desk Phone Call While wearing headset, short press base desk phone button. NOTE If you don't have remote call control through a lifter (HL10) or cable (EHS), manually remove desk phone handset before each call. If you do not hear a dial tone, open side panel and adjust middle configuration switch until you do. -
Page 13: Mobile: Connect And Call
Mobile: Connect and Call Your mobile phone can be paired to multiple headsets and hands-free devices, but it can only be connected to one device at a time. Following are instructions for pairing your mobile phone to the base. Press down and hold Bluetooth pairing button (4 seconds) on Savi base until indicator LED flashes red and blue. -
Page 14: Computer: Connect And Call
Computer: Connect and Call Connect Your Computer Connect the USB cable. Load the Plantronics software by visiting plantronics.com/software and click on the download button. For a list of compatible softphones, visit plantronics.com/software Place a Softphone Call While wearing your headset, short press the base computer button. -
Page 15: Headset Features
For your safety, do not use headset at high volumes for extended periods of time. Doing so can cause hearing loss. Always listen at moderate levels. For more information on headsets and hearing visit plantronics.com/healthandsafety. Headset Power If the headset battery is installed and charged, the headset is automatically on. The headset does not have an on/off button. -
Page 16: Headset Battery Level
There are two ways to determine your headset battery status. View System Tray Icon With Plantronics software installed, a headset icon will appear in your system tray, displaying battery status. A warning will be issued if your headset’s battery is critically low. -
Page 17: Turn On/Off Headset Led
(see below). Mobile phone volume can be adjusted on the mobile phone. NOTE You can quickly access your system’s control panel by using the link in the Plantronics Control Panel on the Preferences Tab. For Windows Vista and Windows 7 systems Adjust your overall volume by going to: Start Menu >... -
Page 18: Base Features
With the system idle, you can change your default outbound line by pressing the desired outbound base button until it flashes green four times. You can also change the default outbound line using the Plantronics Control Panel by going to Start > Programs > Plantronics > Plantronics Control Panel > Device Settings > Base. -
Page 19: Set The Range
150 ft. up to 50 ft. You can also set the range using the Plantronics Control Panel. Go to Start > Programs > Plantronics > Plantronics Control Panel > Device Settings > Base > Range. Bluetooth Pairing Button... - Page 20 Bluetooth button again, before the auto connection feature will resume. You may customize this feature by using the Plantronics Control Panel by going to Start > Programs > Plantronics > Plantronics Control Panel > Devices > Device Settings > Base > Auto Connect to Mobile Phone.
-
Page 21: Daily Use
Plantronics software must be installed for this feature to function. The Action to Media Player settings are defined in the preference tab of the Plantronics Control Panel. - Page 22 To enable hands-free dialing, install the Plantronics software. Once installed, go to Start > Programs > Plantronics > Plantronics Control Panel > Device Settings > Base and activate Initiate Mobile voice commands. For hands-free dialing, initiate the mobile call from the base by pressing the base mobile button.
-
Page 23: Multi-Phone Status
A single tone in the master headset will be heard as each guest leaves the call. View guest headsets As you add headsets to the base, an additional headset icon will appear in the Plantronics Control Panel screen with a number from 1 to 3 indicating the number of additional headset... - Page 24 subscribed to the base. The first headset is the primary user’s headset and the number inside the next headset is the number of guest headsets subscribed to the base. The following example shows one primary headset with 2 guest headsets conferenced in.
-
Page 25: Advanced Use
Plantronics Savi 7xx from the pull down menu and click the Device Settings button. Below are the setting options and defaults for the base and headset. NOTE Some parameters that do not apply to a particular Plantronics device may appear grayed out. -
Page 26: Device Settings > Base Tab
Device Settings > Base Feature Settings Default General Default Line Desk phone/PC/Mobile Desk phone Range High/Med/Low High Desk phone audio Wideband/Narrowband Narrowband bandwidth PC audio bandwidth Wideband/Narrowband Narrowband Bluetooth enabled Selected/Not selected Selected Auto connect to mobile Selected/Not selected Selected phone Stop auto connect to Selected/Not selected... - Page 27 Over-The-Air Subscription This feature allows a headset to be subscribed to the base without physically docking the headset. It is required when conferencing multiple models of Plantronics headsets. For more on subscription, see Base Subscription Buttons.
-
Page 28: Device Settings > Headset Tab
This feature allows users to customize the time variable used in the Audio Limiting algorithm to match their daily use. Choose a value that best represents the typical use of your Plantronics headset. Anti-Startle Anti-startle provides advanced hearing protection against sudden loud sounds. When Anti- startle is SELECTED, the system identifies and eliminates sudden loud sounds and rapidly reduces them to a comfortable level. - Page 29 Feature Settings Default General Mute Tone Standard/Low/Off System Tones Standard/Low/Off Standard Second Inbound Call Ring Continuously/ Ring Continuously Ring Once/Ignore Auto Answer Selected/Not selected Not Selected Desk Phone Desk Phone ringtone Sound 1/Sound 2/ Sound 1 Sound 3 Desk Phone volume Standard/Low/Off Standard PC ringtone...
-
Page 30: Device Settings > Security Tab
Device Settings > Feature Set Lock Security Tab The Plantronics software allows all of the base settings to be locked to prevent changes. The ability to lock/unlock these settings requires a password. In order to lock/unlock any setting, follow these steps: Create a new passwordFrom the Security screen, create and confirm your new password in the Feature Set Lock section and press OK. -
Page 31: About Tab
Help Us Improve This Software By Allowing Us To Collect Anonymous Feature Usage Statistics When selected, this will allow Plantronics to collect data on feature usage pattern. This information will only be used by Plantronics to improve the quality of our future software and hardware products. - Page 32 You can choose to check for available software and firmware updates at any time by clicking on the Check For Updates Now button in Update Manager by clicking on the Start menu > Programs > Plantronics > Plantronics Update Manager. Install Checked Updates Following an AUTOMATIC or MANUAL CHECK FOR UPDATES, this field will be populated with any applicable software updates and the INSTALL CHECKED UPDATES will begin installation.
-
Page 33: Troubleshooting
Troubleshooting Headset Talk time performance is Battery is wearing out. Contact us at plantronics.com/support significantly degraded even after a full recharge. I can’t hear a dial tone in the Make sure your headset is charged. headset. Make sure your headset is subscribed to base. -
Page 34: Desk Phone
For a list of compatible softphones, visit plantronics.com/ software. If the Plantronics software is not installed and you do not have a compatible softphone, you must first press the base computer call button and then use the softphone interface to place/ answer/end calls. - Page 35 • Under “Sound Playback”, change the default setting from Savi Office to your PC speakers. Click “OK” to confirm your change. For Windows Vista and Windows 7 systems • Refer to the “Sound” option in your PC Control Panel. • Under the “Playback” tab, change the default setting from “Speakers Savi Office”...
- Page 36 2011 Plantronics, Inc. All rights reserved. Plantronics, the logo design, HL10, Savi, Sound Innovation are trademarks or registered trademarks of Plantronics, Inc. Windows is a registered trademark of Microsoft Corporation. Nortel is a trademark of Nortel Networks. Skype is a registered trademark of Skype Limited.
Need help?
Do you have a question about the Savi W730 and is the answer not in the manual?
Questions and answers