Advertisement
Quick Links
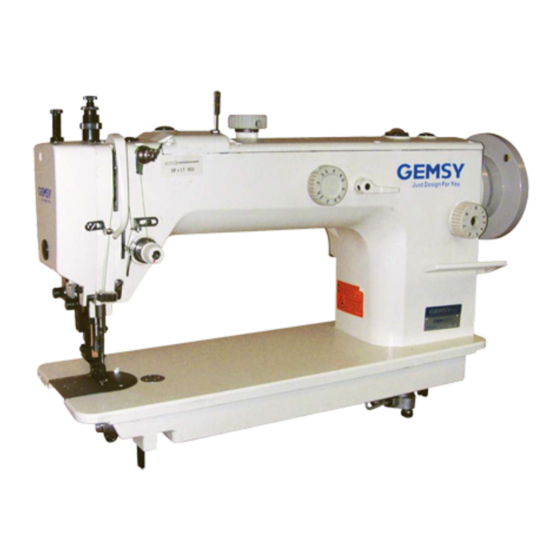
0311/0611D
0311/0611E3-Y
DIRECT DRIVE TOP AND BOTTOM/
COMPOUND FEEDING LOCKSTITCH
SEWING MACHINE
MCHATRONIC TOP AND BOTTOM/
COMPOUND FEEDING LOCKSTITCH
SEWING MACHINE
节能直驱上下复合/综合送料厚料平缝机
节能一体上下复合/综合送料厚料平缝机
使 用 说 明 书 & 零 件 样 本
Operation Instuction & Parts Book
为了安全地使 用,请您 在使 用之 前一定 阅读 本使用说明书。
用说明书,以便随时查 阅;零件 更改设计时 ,恕不另 行通知。
Read safety instructions carefully and understand them before using. Retain this Operation Instruction for
future reference.Excuse for not noticement in advance while the design of the sparepart haw to be changed.
另 外,请您注意保管本使
Advertisement
Chapters

Related Manuals for Gemsy GEM0311/0611D


Summary of Contents for Gemsy GEM0311/0611D
- Page 1 0311/0611D 0311/0611E3-Y DIRECT DRIVE TOP AND BOTTOM/ COMPOUND FEEDING LOCKSTITCH SEWING MACHINE MCHATRONIC TOP AND BOTTOM/ COMPOUND FEEDING LOCKSTITCH SEWING MACHINE 节能直驱上下复合/综合送料厚料平缝机 节能一体上下复合/综合送料厚料平缝机 使 用 说 明 书 & 零 件 样 本 Operation Instuction & Parts Book 为了安全地使 用,请您 在使 用之 前一定 阅读 本使用说明书。 另...
- Page 2 GEM0311/0611D GEM0311/0611E3-Y DIRECT DRIVE TOP AND BOTTOM/ COMPOUND FEEDING LOCKSTITCH SEWING MACHINE MCHATRONIC TOP AND BOTTOM/ COMPOUND FEEDING LOCKSTITCH SEWING MACHINE 节能直驱上下复合/综合送料厚料平缝机 节能一体上下复合/综合送料厚料平缝机 使 用 说 明 书 & 零 件 样 本 Operation Instuction & Parts Book 为了安全地使 用,请您 在使 用之 前一定 阅读 本使用说明书。...
- Page 3 非 常感谢 您 购买本 公 司的工 业 缝纫机 。 在使用 缝 纫机 之 前,请 仔 细阅读 ( 为了您 的 安全使 用 )和使 用 说明 书 。 工 业缝纫 机 的特性 之 一,是 要 在机针 和 旋梭等 运 动零 部 件附近 进 行操作 , 而这些 零 部件很 容 易引起 受 伤的 危...
- Page 4 Thank you very much for buying our sewing machine.Before using your new machine,please read the safety instructions below and the explanations given in the Operation Instruction. With industrial sewing machines,it is normal to carry out work while positioned directly in front of moving parts such as the needle and thread take-up lever,and consequently there is always a danger of injury that can be caused by these parts.Follow the instructions from training personnel and instructors regarding safe and correct operation before operating the machine so that you will know how to use it correctly.
- Page 5 2.安全注意事项 危险 打 开控制 箱盖时 , 必须先 关 闭电源 开 关并将 电 源插头 从 插座上 拔 下, 至 少等待5分 钟 后,再 打 开控 制 箱盖。 触摸带 有 高电压 的 区域将 会 造成人 员 伤亡。 请勿将 手放入 皮 带开口 处,否 则手可 能 会将被 卷 入皮带 中 造成重 伤 。 注意...
- Page 6 2.Notes on safety DANGER Wait at least 5 minutes after turning off the power switch and disconnecting the power cord from the wall outlet before opening the face plate of the control box. Touching areas where high voltages are present can result in severe injury. Please do not put hand in belt openings, or hand may be involved into the belt will be seriously injured.
- Page 7 2.安全注意事项 注意 缝纫 本 缝纫机 仅 限于接 受过安 全 操作培 训 的人员 使 为了 安 全起见 , 在使 用 本缝纫 机 之前, 请 安装 用 。 保护 装 置。如 果 未安 装 这些安 全 装置就 使 用缝 纫机 , 会造成 人 身伤 害 及缝纫 机 损坏。 缝...
- Page 8 2.Notes on safety CAUTION Sewing If using a work table which has casters, the casters This sewing machine should only be used by should be secured in such a way so that they cannot operators who have received the necessary training move.
-
Page 9: Table Of Contents
1.机 器简介 Profile of the machine ..................1 ......................1 2.规格 Specifications 3.机头的安 装 Install the machine ..................1 4.膝控装置 安装 Install the knee-control device ..............2 ......................2 5.润滑 Lubricating 6.旋梭润滑 的调整 Rotary hook lubrication adjustment ............3 7.油泵的调 整 Pump adjustment ...................3 8.安 装机针 Replace needles ....................3 9.穿... -
Page 10: 机 器简介 Profile Of The Machine
使 用 说明书 Operation Instruction 1.机器简介 Profile of the machine 本系 列 平缝机 单 直针, 采 用连杆 式 送料, 挑 线杆 挑 线,旋 梭 勾线, 形 成3 0 1线 迹。机 头 加长 设 计,令 操 作回 转 空间更 宽 敞。 超 长针杆 行 程,大 互 动量交 替 压脚, 使 缝厚能 力 更显出 色。 本机... -
Page 11: 膝控装置 安装 Install The Knee-Control Device
使用说明书 Operation Instruction 4.膝控装置 安装 Install the knee-control device 1.尽量拉出膝控铰链轴① , 进行适当安装 。 ① 2.在轴上装上膝控碰块接头②。 3.在膝控碰块接头上装膝控碰块弯轴组件③。 1.Pull the device ① and adjust it. 2.Install the joint ②. ③ 3.Install device ③. ② 5.润滑 Lubricating 加油结束之前,不能接触电源开关,否则误踩踏板启动,可能会受伤事故 加润滑油时,请使用保护身体的眼镜。手套防止与眼或皮肤接触,同时应放在小孩 碰不到的地方。 首次使用缝纫机或长时间没有使用重新使用时必须加油。 Plug in only after oil supply is finished.If the operator mistakenly steps on the pedal with the plug in, the machine will start automatically and can cause severe injuries. -
Page 12: 旋梭润滑的调整 Rotary Hook Lubrication Adjustment
使用说明书 Operation Instruction 6.旋梭润滑的调整 Rotary hook lubrication adjustment 顺时针(+ ) 转动油量调整螺丝① 出 油量会增加,相 反逆时针(-)转动油量调整螺丝①时,出油量会减少。 注:调整该螺钉后,机器应至少运转30秒钟,然后检查旋梭 旋梭 出油量。 hook ① When you turn clockwise the lubrication adjustment screw① inserted in the front bushing of the lower shaft,the amount of oil will increase while turning to counterclockwise (-) will decrease the amount. -
Page 13: 穿面线 Routing Upper Thread
使用说明书 Operation Instruction 穿面线 Routing upper thread 将挑线杆转到最高位置,然后如图所示穿线. ① ② Into the thread take-up position, then as shown threading. ④ ③ ⑤ ⑨ ⑥ ⑦ ⑧ 10.线张力调整 Adjusting the thread tension 1.线调整装置 如图所示,顺时针转动压线螺母①,面线张力会 变强, 相反则会变弱。根据布料、缝线、线距等缝纫条件,线的 (正确) 张力会有所不同,因此需要按照不同情况,进行调整。 (right) 2.底线张力调整 面线太紧 如图所示,在线调整螺钉②上利用起子,顺时针转动,... -
Page 14: 压脚压 力的调 整 Presser Foot Pressure
使用说明书 Operation Instruction 压脚压力的调整 Presser foot pressure 要调整内压力时,顺时针转动压力调整螺丝①,压 力会变 内 压脚压力 强,相反则会变弱。调整后,必须完全拧紧固定螺丝②。 Presser foot pressure within 外压脚也同样,顺时针转动压力调整螺丝③,压力会变强, 强 弱 相反则会变弱。调整后,必须完全拧紧固定螺丝④。此外, strong weak ⑤ 左右转动辅助压力调节螺丝,进行微细调节。 ③ ④ The pressure of the upper feed presser foot becomes stronger when you turn the pressure adjustment screw①clockwise, and becomes weaker in case of turning it counterclockwise. -
Page 15: 内外压脚的调整 Adjustingthe Auxiliary And Upper Feed Presser Foot
使用说明书 Operation Instruction 13.内外压脚的调整 Adjustingthe auxiliary and upper feed presser foot 1.交互运动的调整 (1)内外压脚的交互量调整范围为2mm-5.5mm。 (2)内外压脚的交互运动量可通过机壳上的提升压脚 标盘A来调节。 ① (3)上盖板的标盘①是限制提升压脚标盘A的。 注:由小到大进行调整时,先调整标盘①,再调整 标盘A;相反,由大到小进行调整时,先调整标盘A, 再调整标盘①。 1.Interactive motion adjustment (1)The vertical running range of the auxiliary presser foot and the upper feed presser foo is from 2 to 5.5 mm. (2)The vertical running amounts of the auxiliary presser foot and the upper feed presser foot are easily adjus table from the climb device dial attached to the front side of the machine. - Page 16 使用说明书 Operation Instruction 13.内外压脚的调整 Adjusting the auxiliary and upper feed presser foot 3.外压脚的调整方法 松开调压螺钉⑥和压杆导架螺钉⑦。 提升压脚扳手⑧时,上下调整压杆导架螺钉⑦。 让外压脚⑨提升到离针板上面7毫米的位置。 ⑥ 调整完后,完全拧紧压杆导架螺钉⑦。适当调好调 压螺钉⑥。 3.Adjusting the auxiliary presser foot Loosen the presser bar pressure adjustment screw ⑥ and the bracket fixing screw ⑦. Adjust vertically the bracket fixing screw ⑦ so that the ⑦...
-
Page 17: 送布牙同步关系的调整 Adjusting The Synchronous Relationship Of The Feed Dog
使用说明书 Operation Instruction 送布牙同步关系的调整 Adjusting the synchronous relationship of the feed dog 1.转动手轮,使针杆位于最高位置; 第一螺钉 2.打开上盖,如图所示位置:送布凸轮"左"①的第一 第一螺钉 第二螺钉 The first screw 颗螺钉和送布凸轮"右"②上的第一颗螺钉与上轴中心线位 The first screw The second screw 于同一平面上。 注:送布凸轮②的位置调节,可以取下上盖上的橡皮塞④ 进行调整,但是单齿轮⑤不易看到,调节时应小心保护。 ② ① 1. turn the pulley with hands to fix the needle bar to the ⑤... -
Page 18: 接线 Connecting The Wire
使用说明书 Operation Instruction 15.调节针杆停针位置 Adjusting the needle stop posting 2.停针位置的标定(一体机0311E/0611E) 挑线杆最高点 1).打开电控开关,进入工作模式; 2).按住电控操作面板“F”键2秒,进入标机头界面(显示 F0|xxxx),正转手轮使挑线杆转到未到最高点0.5-1mm处; 0 . 5-1mm 3).按“S”键保存机头位置后系统自动返回到工作界面, 蜂鸣器响一下,机头标定完成。 注:如果误进入标定机头界面,按“F”键返回即可。 Mark needle position ( Mechatronic 0311E/0611E ) 1)Turn on switch, enter into work pattern. 2)Press key “F” 2 seconds, enter into screen(show F0|xxxx ), forward hand wheel make the thread take-up located the location which far from the highest point 0.5-1mm. -
Page 19: 剪线机构的调整 Adjusting For Thread Trimmer
使用说明书 Operation Instruction 17.剪线机构的调整 Adjusting for thread trimmer(自动剪线型) 1.本缝纫机的切线机构如下图所示。 The structure of thread trimmer of this machine is as follows in figure Base for solenoid counecting link Thread trimmer solenoid 电磁铁安装架 剪线电磁铁 Thread guide Thread trimming solenoid 栏线板 剪线凸轮 定刀片 counter knife 动刀片... - Page 20 使用说明书 Operation Instruction 17.剪线机构的调整 Adjusting for thread trimmer(自动剪线型) 4.安装剪线电磁铁 (1)剪线电磁铁的行程: A.标准的行程为4.6mm. B.通过调节螺母A来调整行程。 电磁铁连接件 (2)剪线电磁铁的调整 电磁铁安装 固定螺钉 A.电磁铁的安装位置以电磁铁工作时,凸轮左曲柄 架螺钉 螺母A lectromagnet link a ③与凸轮右曲柄②之间有0.5mm间隙为标准。 electromagnet nut A fixed screw 4.6mm B.如需调整,可按图所示箭头方向移动电磁铁安装 mounts screw 架。 ② ③ 4.installation of thread trimmer (1)working amount of the thread trimming solenoid. A.The standard working amount of the thread trimming solenoid is 4.6mm.
-
Page 21: 定期清洁机器 Regular Cleaning Machine
使用说明书 Operation Instruction 17.剪线机构的调整 Adjusting for thread trimmer(自动剪线型) 6、刀片位置调整 ② (1)动刀与定刀的位置调整: 7.5mm 如图所示,动刀①与机针中心的距离为7.5mm,定 刀②与机针中心的距离为5mm。 (2)动刀移动量调整: ① 开动电磁铁,启动机器.剪线凸轮会使动刀①向右旋 转。当动刀①移动到其最远位置时,其断面定刀② 的端点进行到1.0mm-1.5mm。 (3)刀片压力调整: 如果剪线情况不良,尤其当线较粗时,只需增加 定刀张力 即可。 定刀 定刀张力可调整:松开螺母B,通过调节螺钉A来调 节刀片 1-1.5mm fixed blade 压力。 扳手 wrench 6. Adjusting the position of blade ① (1) Adjusting the position of the movable knife and the 动刀... - Page 22 使用说明书 Operation Instruction 19.故障原因及对策 缝纫机故障处理方法 送布牙定时 机针与送布牙定时不好 调整送布牙定时 针与旋梭之间的间隙 分线片 切线后,分线片无法夹住底线 适当调整分线片的位置及张力 夹线器的松线量 夹线器松线量过小 调整夹线器松线量...
-
Page 23: 故障原 因及对 策 Causes Of Troubles And Troubleshshooting
使用说明书 Operation Instruction .Causes of troubles and troubleshshooting Sewing machine troubleshooting... -
Page 24: 台板加工图 Schematic Diagram Of The Machine Table
使用说明书 Operation Instruction 20.台板加工图 Schematic diagram of the machine table... - Page 25 零件目录 PARTS CONTENTS 1. 机壳部件 Frame Components .....................1 2. 挑线勾线部件 Thread Take-up & Thread Components ................5 3. 下送料部件 Feed Mechanism Components ..................7 4. 针距调节部件 Feed Adjust Mechanism Components ................11 5.压脚摆动部件 Hand Swing Components ....................13 6. 压脚提升部件 .....................15 Hand Lifter Components 7.
-
Page 26: 机壳部件 Frame Components
1. 机壳部件 Frame Components 3 4 5 38-1 51 42-1... - Page 27 1. 机壳部件 Frame Components 数量 序号 名称 图号 DESCRIPTION REF NO. 0311D 0311E 0611D 0611E 120-02-16 橡皮塞 Rubber Plug Φ8.8 1300-01-02 下过线勾毛毡 Oli Felt 11-60111020-01 后盖板螺钉 Screw Sm11/64x40 L=10 1300-01-04 侧盖板 Back Cover 1300-01-05 侧盖板垫片 Gasket For Back Cover 120-01-30 橡皮塞...
- Page 28 1. 机壳部件 Frame Components 3 4 5 38-1 42-1...
- Page 29 1. 机壳部件 Frame Components 数量 序号 名称 图号 DESCRIPTION REF NO. 0311D 0311E 0611D 0611E 1300-01-61B 底板 1300-01-62 挑线杆防护罩 Thread Take-up Lever Cover GP-031308-00 下过线油毡压板 Clamp 11-60060320-02 下过线油毡压板螺钉 Screw Sm3/32x56 L=3 1300-01-54-00 推板组件 Push Board Component 1281-01-14-01 电子夹线器 Electronic Thread Clamp Device 11-80150710-01 电子夹线器螺钉...
-
Page 30: 挑线勾线部件 Thread Take-Up & Thread Components
2. 挑线勾线部件 Thread Take-up & Thread Components 32-1 12 13 14... - Page 31 2. 挑线勾线部件 Thread Take-up & Thread Components 数量 序号 名称 图号 DESCRIPTION REF NO. 0311D 0311E 0611D 0611E 120-02-16 针杆上轴套橡皮塞 Needle Bar Bushing(upper) Rubber Plugφ8.8 L=7 120-02-15 针杆上轴套毛毡 Felt Plug 04-108A-1230 针杆上轴套 Needle Bar Bushing(upper) 1300-02-04 针杆 Needle Bar 04-103A-640L 针杆下轴套...
-
Page 32: 下送料部件 Feed Mechanism Components
3. 下送料部件 Feed Mechanism Components 0611 35-1... - Page 33 3. 下送料部件 Feed Mechanism Components 数量 序号 名称 图号 DESCRIPTION REF NO. 0311D 0311E 0611D 0611E 11-40110625-01 牙架轴螺钉 Screw Sm11/64x40 L=6 06-168A-640L 牙架曲柄偏心轴 Eccentricity Shaft For Feed Bar 120-04-01 牙架曲柄 Feed Rock Shaft Crank 11-60121420-01 送布轴曲柄螺钉 Screw Sm3/16x28 L=15 21-06113102-03 牙架曲柄轴垫圈...
- Page 34 3. 下送料部件 Feed Mechanism Components 0611 35-1...
- Page 35 3. 下送料部件 Feed Mechanism Components 数量 序号 名称 图号 DESCRIPTION REF NO. 0311D 0311E 0611D 0611E 11-60151020-01 挡板螺钉 Screw Sm15/64x28 L=10 22-06000000-08 挡板螺钉弹簧垫圈 Washer 1300-03-50 抬牙轴曲柄 Feed Lifting Rock Shaft Crank 1300-03-51 抬牙轴曲柄铰链销 Feed Lifting Rock Shaft Crank 11-80151010-01 下轴轴套支头螺钉 Screw Sm15/64x28 L=10 11-40110625-01 牙架滑块轴支头螺钉...
-
Page 36: 针距调节部件 Feed Adjust Mechanism Components
4. 针距调节部件 Feed Adjust Mechanism Components 16 15... - Page 37 4. 针距调节部件 Feed Adjust Mechanism Components 数量 序号 名称 图号 DESCRIPTION REF NO. 0311D 0311E 0611D 0611E 02-121A-1230 倒缝台紧圈 T Hrust Collar 11-80160710-01 倒缝台紧圈螺钉 Screw Sm1/4x40 L=7 06-029A-640L 倒缝台轴套 Feed Regulator Shaft Bushing 11-80151010-01 倒缝台轴套螺钉 Screw Sm15/64x28 L=10 11-80150812-01 支撑轴螺钉 Screw Sm15/64x28 L=8 1300-04-06 支撑轴...
-
Page 38: 压脚摆动部件 Hand Swing Components
5.压脚摆动部件 Hand Swing Components 3 26 10 9... - Page 39 5.压脚摆动部件 Hand Swing Components 数量 序号 名称 图号 DESCRIPTION REF NO. 0311D 0311E 0611D 0611E 1300-05-01 压脚摆动左曲柄 Upper Feed Lever Level Adjusting Crank 11-40151525-01 压脚摆动曲柄螺钉 Screw Sm15/64x28 L=15 11-80150510-01 压脚摆动轴套螺钉 Screw Sm15/64x28 L=5 1300-03-57 压脚摆动前轴套 Upper Feed Lever Level Driving Shaft Front Bushing 13-60163220-01 压脚曲柄连接螺母...
-
Page 40: 压脚提升部件 Hand Lifter Components
6. 压脚提升部件 Hand Lifter Components 0611 42-1 0611 48-1... - Page 41 6. 压脚提升部件 Hand Lifter Components 数量 序号 名称 图号 DESCRIPTION REF NO. 0311D 0311E 0611D 0611E 1300-06-01 压脚提升轴 Presser Lifting Shaft 11-80150710-01 提升轴轴套螺钉 Screw Sm15/64x28 L=7 1300-06-03 压脚提升轴左轴套 Upper Feed Driving Shaftbushing(left) 1300-06-04 压脚提升轴右轴套 Upper Feed Driving Shaftbushing(right) 1300-06-05 提升轴调节曲柄 Upper Feed Driving Crank 11-60151460-01 提升轴调节曲柄螺钉...
- Page 42 6. 压脚提升部件 Hand Lifter Components 0611 42-1 0611 48-1...
- Page 43 6. 压脚提升部件 Hand Lifter Components 数量 序号 名称 图号 DESCRIPTION REF NO. 0311D 0311E 0611D 0611E 21-10135180-01 压脚位置调节盘垫片 Washer 1300-06-52 压脚位置调节凸轮(长) Climb Device Eccentric Cam(long) 120-02-65 止动销弹簧 Spring 1300-06-34 止动销 Stopper Pin 1300-06-55 压脚位置调节盘(机壳) Climb Device Dial Asm.(arm ) 11-80151550-01 自由式凸轮支头螺钉...
-
Page 44: 压脚部件 Presser Lifting Mechanism
7. 压脚部件 Presser Lifting Mechanism 13-2 13-1 0611 51 50 26-1... - Page 45 7. 压脚部件 Presser Lifting Mechanism 数量 序号 名称 图号 DESCRIPTION REF NO. 0311D 0311E 0611D 0611E 11-00110520-01 大线勾螺钉 Screw Sm11/64x40 L=5 1300-07-02 大线勾 Upp Thread Guide 1300-07-03 压紧杆导架 Presser Bar Bushing 11-80150810-01 压紧杆导架螺钉 Screw Sm15/64x28 L=8 1300-07-05 调压螺钉 Pressure Regulating Thumb Screw 1300-07-06 调压螺钉锁紧螺母...
- Page 46 7. 压脚部件 Presser Lifting Mechanism 13-2 13-1 0611 51 50 26-1...
- Page 47 7. 压脚部件 Presser Lifting Mechanism 数量 序号 名称 图号 DESCRIPTION REF NO. 0311D 0311E 0611D 0611E 40-004C-2700 软线锁紧螺母 Nut M5 H=4 12-40401025-01 软线夹(下)螺钉 Screw M4 L=10 24-06000000-08 卡簧 Ring 11-80160612-01 提升凸轮螺钉 Screw Sm1/4x40 L=6 1300-07-25B 膝控提升杠杆销 Presser Bar Lifting Link Pin...
-
Page 48: 剪线部件 Feed Adjust Mechanism Components
8. 剪线部件 Feed Adjust Mechanism Components... - Page 49 8. 剪线部件 Feed Adjust Mechanism Components 数量 序号 名称 图号 DESCRIPTION REF NO. 0311D 0311E 0611D 0611E 1300-08-01 定刀片 Counter Knife 11-10090620-01 定刀片螺钉 Counter Knife Screw Sm9/64x40 L=6 11-00580720-02 定刀调节螺钉 Counter Knife Adjusting Screw Sm1/8x40 L=7 13-60582420-02 压力调节螺钉锁紧螺母 Lockut Of Counter Knife Adjusting Screw 1300-08-05 栏线板...
- Page 50 8. 剪线部件 Feed Adjust Mechanism Components...
- Page 51 8. 剪线部件 Feed Adjust Mechanism Components 数量 序号 名称 图号 DESCRIPTION REF NO. 0311D 0311E 0611D 0611E 11-40110625-01 电磁铁连杆销螺钉 Solenoid Pin Screw Sm11/64x40 L=6 14-60504020-01 螺母 Nut M5 H=4 1300-08-56-01 剪线电磁铁组件 Thread Trimming Solenoid Asm. 1300-08-57 剪线电磁铁安装架 Base For Solenoid Connecting Link 22-06000000-08 弹簧垫片...
-
Page 52: Automatic Reverse Feed Components
9. 倒缝部件 Automatic Reverse Feed Components... - Page 53 9. 倒缝部件 Automatic Reverse Feed Components 数量 序号 名称 图号 DESCRIPTION REF NO. 0311D 0311E 0611D 0611E 1302-09-01 倒送料转换器组件 Reverse Feed Switch Asm 1300-09-02 倒送料安装板 Mounting Plate 11-40110625-01 螺钉 Screw Sm11/64x40 L=6 11-40111025-01 电磁铁螺钉 Screw Sm11/64x40 L=10 1300-01-10 后盖板 Side Palte 1300-01-11 后盖板垫圈...
-
Page 54: 润滑部件 Oil Lublication Components
10. 润滑部件 Oil Lublication Components 15 14 13 11... - Page 55 10. 润滑部件 Oil Lublication Components 数量 序号 名称 图号 DESCRIPTION REF NO. 0311D 0311E 0611D 0611E 43-10250000-00 油线 Oil Wick Φ2.5 L=500 132-10-40 羊毛毡 Oil Felt 43-10250000-00 油线 0.25 0.25 0.25 0.25 Oil Wick Φ2.5 L=250 1300-10-04 上轴油管组件 Oil Tube Asm For Arm Shaft 1300-10-28 油线固定架...
-
Page 56: 电控部件 Electric Control Electric Control
11. 电控部件 Electric Control Electric Control 0311/0611D 17 19 0311/0611E... - Page 57 11. 电控部件 Electric Control Electric Control 数量 序号 名称 图号 DESCRIPTION REF NO. 0311D 0311E 0611D 0611E 1302-12-01 电机连接板 Motor Connection Plate 12-60501222-02 电机连接板螺钉 Screw M5 L=12 1302-12-03-00 节能直驱电控组件 Energy Saving Straight Drive Electric Control Component 12-60501022-01 电机固定螺钉 Screw M5 L=10 12-80600812-01 转子固定螺钉...
-
Page 58: Accessories Components
12. 附件 Accessories Components... - Page 59 12. 附件部件 Accessories Components 数量 序号 名称 图号 DESCRIPTION REF NO. 0311D 0311E 0611D 0611E 120-02-21 机针 DP×17 #22 Needle Dpx17 22# 301-20-26 内六角扳手(3) Hexagon Wrench(s3) 301-20-13 内六角扳手(2) Hexagon Wrench(s2) 120-09-07 小磁块 Magnet 120-09-04 机头防震垫块(大) Rubber Cushion(big) 01-213R-1230 机头防震垫块(小) Rubber Cushion(small) 120-09-06 小油壶...
- Page 60 目录索引 INDEX 部件 /序号 图号 部件 /序号 图号 部件 /序号 图号 部件 /序号 图号 REF No. REF No. REF No. REF No. 01-009R-2350 3/53 11-40110625-01 11-80150810-01 6/45 120-06-46 8/38 01-009R-2350 8/39 11-40110625-01 3/60 11-80150810-01 10/6 120-07-01 1/24 01-021R-1600 8/54 11-40110625-01 11-80150812-01 10/12 120-07-07...
- Page 61 目录索引 INDEX 部件 /序号 图号 部件 /序号 图号 部件 /序号 图号 部件 /序号 图号 REF No. REF No. REF No. REF No. 1300-02-04 5/15 1300-05-15 7/26 1300-07-26 1/47 1302-01-60E 2/11 1300-02-11 5/17 1300-05-17 7/28 1300-07-28 2/32 1302-02-32 2/16 1300-02-16 5/18 1300-05-18 7/29 1300-07-29...
- Page 62 目录索引 INDEX 部件 /序号 图号 部件 /序号 图号 部件 /序号 图号 部件 /序号 图号 REF No. REF No. REF No. REF No. 4/16 24-04000000-08 12/2 301-20-26 12/33 43-001A-1600 12/22 44-010C-1600 5/25 24-04000000-08 2/48 31-03618000-09 12/26 43-008G-1600 1/32 CMB-BJ002400 7/45 24-05000000-08 7/19 31-04018000-09 12/24...
- Page 63 产品标准号:Q/ZBJ 49-20 1 4...
Need help?
Do you have a question about the GEM0311/0611D and is the answer not in the manual?
Questions and answers