Table of Contents
Advertisement
Advertisement
Table of Contents
Troubleshooting

Subscribe to Our Youtube Channel
Related Manuals for AG Neovo F-317A


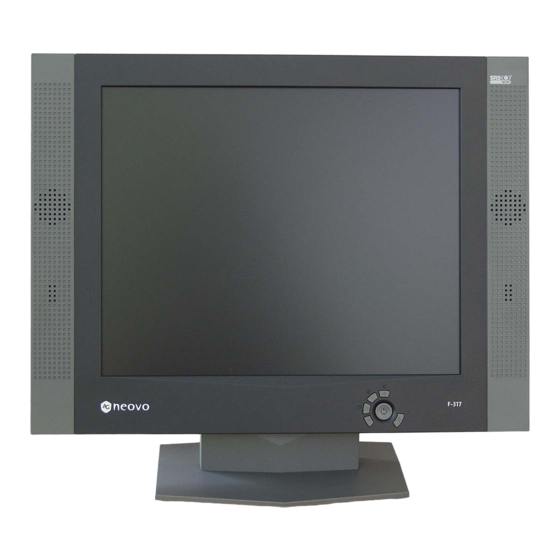
Summary of Contents for AG Neovo F-317A
-
Page 2: Preface (English)
REFACE NGLISH About this manual This manual is designed to assist you in setting up and using the LCD monitor. Information in this document has been carefully checked for accuracy; however, no guarantee is given to the correctness of the contents. The information in this document is subject to change without notice. -
Page 3: Fcc Compliance Statement
FCC Compliance Statement This equipment has been tested and found to comply with the limits for a Class B digital device, pursuant to Part 15 of the FCC Rules. These limits are designed to provide reasonable protection against harmful interference when the equipment is operated in a commercial environment. -
Page 4: Important Operating Instructions
Important Operating Instructions Please read the following instructions carefully. This manual should be retained for future use. 1. To clean the LCD monitor screen, first, make sure the monitor is in the power off mode. Unplug the monitor from its power source before cleaning it. - Page 5 TCO ‘95 Congratulations! You have just purchased a TCO’95 approved and labeled product! Your choice has provided you with a product developed for professional use. Your purchase has also contributed to reducing the burden on the environment and also to the further development of environmentally adapted electronics products.
- Page 6 The energy requirements include a demand that the computer and/or display, after a certain period of inactivity, shall reduce its power consumption to a lower level in one or more stages. The length of time to reactivate the computer shall be reasonable for the user.
- Page 7 than 25 ppm (parts per million) of cadmium. The colour-generating layers of display screens must not contain any cadmium. Mercury** Mercury is sometimes found in batteries, relays and switches. Mercury damages the nervous system and is toxic in high doses. TCO’95 requirement states that batteries may not contain more than 25 ppm (parts per million) of mercury.
- Page 8 radioactive waste), it is vital to save energy. Electronics equipment in offices is often left running continuously and thereby consumes a lot of energy. What does labeling involve? This product meets the requirements for the TCO'99 scheme, which provides for international and environmental labeling of personal computers.
- Page 9 rise to severe health effects, including reproductive damage in fish-eating birds and mammals, due to the bio-accumulative found in human blood and researchers fear that disturbances in foetus development may occur. The relevant TCO'99 demand requires that plastic components weighing more than 25 grams must not contain flame retardants with organically bound bromine or chlorine.
- Page 10 Ergonomics Ergonomics is the study of how people with their different physical characteristics and ways of functioning relate to their working environment (the furnishings and machines they use). The goal of Ergonomics is to incorporate comfort, efficiency, and safety into the design of monitors, computer desks, chairs, etc., in an effort to prevent physical discomfort and health problems in the working environment.
-
Page 11: Table Of Contents
PREFACE (ENGLISH)... 1 Getting Started Quick Setup Unpacking Attaching the Base Adjusting the Monitor’s Tilting Angle Security Slot Making Connections Removing the Rear-connector Cover ... 17 Connectors Close up... 18 Replacing the Rear-connector Cover ... 19 Customizing your Monitor Adjusting the Monitor’s Display OSD Controls ... - Page 12 Volume...30 Audio Enable/Mute...30 OSD Lock Function Lock/unlock OSD ...31 Troubleshooting Troubleshooting Procedures Warning Messages ...32 Troubleshooting ...33 LCD Panel Display Technical Features and Specifications...34...
-
Page 13: Getting Started
Your LCD monitor is versatile, ergonomic, and above all easy to use. The LCD monitor is capable of displaying most standards, from 640 x 480 VGA to 1280 by 1024 SXGA (F-317 only). Built-in stereo speakers (audio effects by SRS Labs, Inc.™) provide excellent stereo sound while saving desktop space. -
Page 14: Unpacking
Unpacking After you unpack the monitor, make sure the following items are included in the box and are in good condition: · LCD monitor · Base assembly · Power adapter · Power cord · D-sub 15-pin VGA cable · Audio cable ·... -
Page 15: Attaching The Base
Attaching the Base Before using the monitor, you must attach the base. You will need a Phillips screwdriver and a blanket or foam sheet to lay the monitor on. The procedure is described below. Cover a table with foam or a soft blanket to protect the monitor screen. Carefully place the monitor with the screen facing down on the table. -
Page 16: Adjusting The Monitor's Tilting Angle
Adjusting the Monitor’s Tilting Angle Your LCD monitor’s vertical tilting angle can be adjusted between 0º ~ 20º for comfortable viewing. To adjust the tilting angle, grasp the top corners of the monitor with both hands and tilt to the desired angle. -
Page 17: Making Connections
Making Connections This section tells you how to connect your LCD monitor to your computer. Removing the Rear-connector Cover Before making connections, you must remove the rear-connector cover. Refer to the following: Tilt the monitor to its 0º vertical position. (See Adjusting the Monitor’s Tilting Angle on page 16.) Remove the cover by gripping at the top and pulling in the direction of the arrow as shown here:... -
Page 18: Connectors Close Up
Connectors Close up The following illustration shows the connectors on the rear of the monitor. (Unplug the power source when making connections. The final step in the following procedures should be connecting the power adapter to a wall socket.) Connector DC power Power cord and jack... -
Page 19: Replacing The Rear-Connector Cover
Replacing the Rear-connector Cover After making connections, replace the rear-connector cover as shown below: Loop the cables through the bracket as shown here: Replace the cover at the bottom first; then push at the top until it “clicks” into place as shown here:... -
Page 20: Customizing Your Monitor
This section covers the LCD monitor’s On-Screen Display (OSD), and front panel control buttons. Adjusting the Monitor’s Display The LCD monitor features an intuitive, menu-driven, OSD. You can access the OSD any time that the PC is powered up. If the PC is in a power saving mode, or is powered down, the OSD is inaccessible. -
Page 21: Working With Osd Groups
— While full customization is available, we strongly recommend Important! using the AUTO settings, which are preset to fully optimize your monitor’s performance. Simply press the AUTO button engage the AUTO settings. It is also recommended that you execute the AUTO function following any change made to your computer display properties. -
Page 22: Picture Adjustment
Press the INCREASE the setting menu Group. Use the DOWN from the Group’s displayed menu. With the setting selected, use the INCREASE buttons to change the settings as listed under each setting in the following section. Use the DOWN Push the AUTO Group selection menu. -
Page 23: Horizontal & Vertical Position
Horizontal & Vertical Position To fine-tune the display’s position on the monitor screen, select the item from the menu. Use the INCREASE display as desired on the 0-100 scale that appears at the bottom of the window. Push the AUTO the Group selection menu. -
Page 24: Audio Setting
Audio Setting Volume Adjust To adjust the monitor’s built-in speaker volume, select the item from the menu. Use the INCREASE volume as desired on the 0-100 scale that appears at the bottom of the window. Push the AUTO button Group selection menu. NEOVO O S D VOLUME ADJUST... -
Page 25: Srs 3D/Trubass/Wow/Bypass
SRS 3D/TruBass/WOW/Bypass The following settings allow you to enhance your monitor’s audio features. SRS 3D™ SRS (Sound Retrieval System) 3D (F-315 model sound technology in the world. SRS is based on the only) human hearing system and was designed to retrieve the natural spatial cues and ambient information that is present in audio but masked by traditional recording and playback methods. -
Page 26: Color Temperature
Color Temperature Selecting a Color Temperature setting The following conditions are recommended for the available settings: Select the desired setting from the menu. Use the INCREASE the item. Push the AUTO button Group selection menu. Selecting a User-Defined Color Balance Setting You can fine-tune the red/green/blue picture settings according to your preference or specific application. -
Page 27: Osd Setting
OSD Setting OSD Position To position the OSD window to your preference, select the item from the menu. Use the INCREASE the display through its available positions. Push the AUTO button Group selection menu. Center OSD To center the OSD’s position on the monitor screen, select the item from the menu. -
Page 28: Transparency
Transparency To enable transparency of the OSD window, select the item from the menu. Use the INCREASE between YES and NO. Push the AUTO button Group selection menu. Language To select the language for the OSD interface, select the item from the menu. -
Page 29: Text/Graphic
B. Select NO and push the AUTO button Group selection menu without making changes. Text/Graphic To choose between the monitor’s automatic sharpness optimization for text or graphic use, select the item from the menu. Use the INCREASE between YES and NO. Push the AUTO button Group selection menu. -
Page 30: Volume/Mute Adjust
Volume/Mute Adjust Use the INCREASE volume of the monitor’s built-in stereo speakers. Volume Push the INCREASE window. Use INCREASE volume as desired. Push the AUTO button the Volume adjust window. Audio Enable/Mute Push the DECREASE window. Use the DECREASE Push the AUTO button the Audio Enable/Mute window. -
Page 31: Osd Lock Function
OSD Lock Function Use the OSD lock function to prevent unwanted adjustment of the monitor’s settings. Once the OSD controls are locked, none of the OSD settings including the volume is accessible. Lock/unlock OSD Refer to the following to lock the OSD: Press and hold the DOWN for 15 seconds. -
Page 32: Troubleshooting
Troubleshooting Procedures This LCD monitor comes pre-adjusted with standard VGA timing. Due to output timing differences among various VGA cards, you may initially experience an unstable or unclear display when a new display mode or new VGA card is selected. Before applying any of the following troubleshooting procedures, you should first press the AUTO OSD menu. -
Page 33: Troubleshooting
Troubleshooting Symptom · No picture · LED power indicator is not lit · No picture · The LED power indicator is orange Text is not solid · Screen image is not centered properly · Some lines are missing There are tiny red, green, blue or black dots on the screen. -
Page 34: Lcd Panel Display Technical Features And Specifications
LCD Panel Display Technical Features and Specifications Panel Size Pixel Format Brightness Panel Contrast Ratio Viewing Angle Color Depth Frequency Input Signal Max. Pixel Clock Compatibility Analog Connector Power Audio-In Audio-Out Speakers Audio Amplifier Audio processor Effects Tilt Tilt Angle Dimensions (W x H x D) Packing... - Page 35 Weight Gross Safety Regulations VESA Power Consumption VESA 3.7 Kg (8.2 lb) 5.9 Kg (13.0 lb) UL, CUL, EPA, CB, TUV/GS, Nordic, NUTEK, CB, CCC, TCO95 or TCO99 (depends on color) FCC, CE, BSMI, VCCI DDC1/2B, DPMS 100 ~ 240V, 50 ~ 60 Hz <...
Need help?
Do you have a question about the F-317A and is the answer not in the manual?
Questions and answers