Renishaw PHC10-3 PLUS Installation Manual
Hide thumbs
Also See for PHC10-3 PLUS:
- Installation and user manual (65 pages) ,
- Installation manual (35 pages) ,
- Installation and user manual (63 pages)

Related Manuals for Renishaw PHC10-3 PLUS


Summary of Contents for Renishaw PHC10-3 PLUS
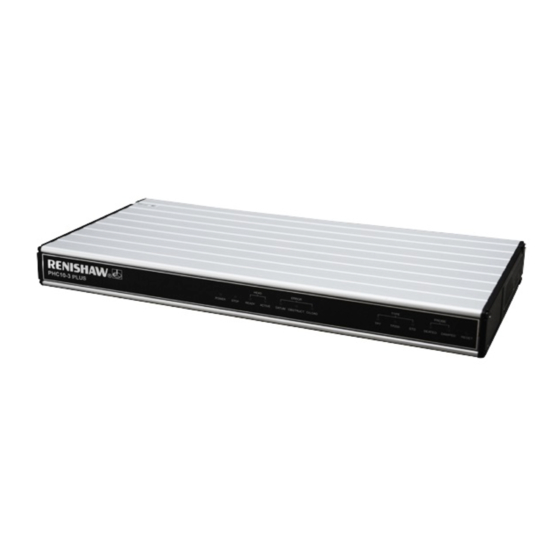
- Page 1 PHC10-3 PLUS installation guide www.renishaw.com PHC10-3 PLUS installation guide Document part number: H-1000-0077-03-B Issued 12 2021...
-
Page 2: General Information
Renishaw warrants its equipment and software for a limited period (as set out in the Standard Terms and Conditions), provided that they are installed and used exactly as defined in associated Renishaw documentation. You should consult these Standard Terms and Conditions to find out the full details of your warranty. -
Page 3: Care Of Equipment
Renishaw probes and associated systems are precision tools used for obtaining precise measurements and must therefore be treated with care. Changes to Renishaw products Renishaw reserves the right to improve, change or modify its hardware or software without incurring any obligations to make changes to Renishaw equipment previously sold. Company registration details Renishaw plc. -
Page 4: Product Compliance
Information to user (47 CFR 15.21) The user is cautioned that any changes or modifications not expressly approved by Renishaw plc or authorised representative could void the user's authority to operate the equipment. -
Page 5: Reach Regulation
PHC10-3 PLUS installation guide www.renishaw.com ICES-001 (Canada only) This ISM device complies with Canadian ICES-001. Cet appareil ISM est conforme à la norme ICES‐001 du Canada. REACH regulation Information required by Article 33﴾1﴿ of Regulation ﴾EC﴿ No. 1907/2006 ﴾“REACH”﴿ relating to products containing substances of very high concern (SVHCs) is available at: www.renishaw.com/REACH... -
Page 6: International Safety Instructions
PHC10-3 PLUS installation guide www.renishaw.com International safety instructions BG ‐ ПРЕДУПРЕЖДЕНИЕ Моля, обърнете на приложение 1 и прочетете инструкциите за безопасност на вашия собствен език, преди за разопаковате и монтирате този продукт. CZ ‐ VÝSTRAHA Před rozbalením a instalací tohoto výrobku si přečtěte bezpečnostní pokyny ve vlastním jazyce uvedené v příloze 1. - Page 7 PHC10-3 PLUS installation guide www.renishaw.com GA - RABHADH Téigh chuig aguisín 1 agus déan na treoracha sábháilteachta a léamh i do theanga féin le do thoil sula ndéantar an táirge seo a dhíphacáil agus a shuiteáil. HR - NAPOMENA Prije nego što proizvod izvadite iz ambalaže i ugradite ga, otvorite Prilog 1 i pročitajte sigurnosne upute na svom jeziku.
- Page 8 PHC10-3 PLUS installation guide www.renishaw.com RO - AVERTISMENT Înainte de a desface ambalajul şi a instala acest produs, vă rugăm să căutaţi Anexa 1 şi să citiţi cu atenţie instrucţiunile de siguranță, în limba română. SK ‐ VÝSTRAHA Pred rozbalením a inštaláciou tohto produktu si pozrite prílohu 1 a prečítajte si bezpečnostné pokyny vo vašom jazyku.
- Page 9 Beware of unexpected movement. The user should remain outside the full working envelope of probe head / extension / probe combinations. In all applications involving the use of machine tools or CMMs, eye protection is recommended. For instructions regarding the safe cleaning of Renishaw products, refer to the maintenance information in the relevant product documentation.
- Page 10 PHC10-3 PLUS installation guide www.renishaw.com Safety If the equipment is used in a manner not specified by the manufacturer, the protection provided by the equipment may be impaired. There are no user serviceable parts inside the equipment. The PHC10-3 head controller is to be used with the provided PSU.
-
Page 11: Environmental Conditions
PHC10-3 PLUS installation guide www.renishaw.com Environmental conditions The following environmental conditions exceed those as defined in BS EN 61010-1:2010: Indoor use IP30 (no protection against water) Altitude Up to 2000 m Operating temperature 0 °C to +50 °C Storage temperature ‐10 °C to +70 °C... -
Page 12: References And Associated Documents
PHC10-3 PLUS installation guide www.renishaw.com References and associated documents Title Document number Installation and user's guide: PH10 PLUS H-1000-7592 Installation and user's guide: PH10M-iQ PLUS H-1000-7564 User's guide: HCU2 H-1000-5361 Installation guide: PICS H-1000-5000 USB driver package for PHC10-3 PLUS Issued 12 2021... - Page 13 The PH10 PLUS series of motorised probe heads can only be used in conjunction with the PHC10-3 PLUS when part of an OEM system installation. PHC10-3 PLUS has replaced the PHC10-2 and provides support for RS232 and USB communications (IEEE is no longer supported).
-
Page 14: Rear Panel Layout
PHC10-3 PLUS installation guide www.renishaw.com Rear panel layout Description 9-way D-type plug for PICS output 9-way D-type connector to HCU2 25-way D-type plug RS232 communications connector to CMM computer USB type “B” socket PHC10-3 PLUS configuration switches 15-way D-type connector to probe head... - Page 15 Conversion from PHC10-2 to PHC10-3 PLUS PHC10-3 PLUS is designed to be a plug in functional replacement for PHC10-2. There are some differences which the user needs to be aware of, the connectors have been rearranged on the rear panel but are of the same type and are labelled in the same way. A USB connector has been added for those requiring USB communications.
- Page 16 PHC10-3 PLUS installation guide www.renishaw.com Changes in configuration switches The table below is a summary of the differences between PHC10-3 PLUS and PHC10-2 configuration switch settings that allows you to correctly configure your PHC10-3 PLUS when replacing a PHC10-2. PHC10-2 switch...
-
Page 17: Pics Interface Configuration
DIN 'raw probe' connection. The following descriptions are specific to PHC10-3 PLUS PICS connections when an internal interface is not present. Please refer to the PICS installation guide (Renishaw part number H-1000-5000) for further information when interfaces are fitted. - Page 18 PHC10-3 PLUS installation guide www.renishaw.com between the PHC10-3 PLUS and the interface is less than 0.5 m (1.6 ft) otherwise interference from other PICS signals can occur. Reserved PDAMP PDAMP is an active low signal Pull down to 0 V to partially...
- Page 19 TP2 / TP20 / TP6 detected when lit SEATED Green Probe seated when lit DAMPED Yellow Probe damped when lit NOTE: The probe reset button on the front of PHC10-3 PLUS only functions if a probe interface card is installed within the unit. Issued 12 2021...
- Page 20 Standard PHC10-3 PLUS with provision for interface card to be inserted (Renishaw part number A-5863-0100) PHC10-3 PLUS with single rear panel and integrated PI 200-3 probe interface (Renishaw part number A-5863-0200) PHC10-3 PLUS with integrated PI 200-3 probe interface and external PICS loop...
-
Page 21: System Interconnection Diagrams
PHC10-3 PLUS installation guide www.renishaw.com System interconnection diagrams PH10 PLUS system with standard two wire touch-trigger probes With internal PI 200-3 Issued 12 2021... - Page 22 PHC10-3 PLUS installation guide www.renishaw.com PH10 PLUS system with standard two wire touch-trigger probes With internal PI 200-3 and autochange Description Communication connection to CMM controller RS232 or USB Communication to CMM controller Communication to autochange rack PICS output to CMM controller...
- Page 23 PHC10-3 PLUS installation guide www.renishaw.com PH10 PLUS system with standard two wire touch-trigger probes With external PI 200-3 and autochange Description Communication connection to CMM controller - RS232 or USB Communication to CMM controller Communication to autochange rack PICS output to CMM controller...
-
Page 24: Ph10 Plus System With Multiwire Scanning Probes
PHC10-3 PLUS installation guide www.renishaw.com PH10 PLUS system with multiwire scanning probes Description Comms to CMM controller PICS to CMM controller Multiwire to probe interface Issued 12 2021... - Page 25 PHC10-3 PLUS installation guide www.renishaw.com PH10 PLUS system with multiwire scanning and touch-trigger probes with internal PI 200-3 Description Comms to CMM controller Touch-trigger probe and PICS to CMM controller Multiwire to probe interface Issued 12 2021...
-
Page 26: Rs232 Connector Pinouts
PHC10-3 PLUS installation guide www.renishaw.com RS232 setup RS232 connector pinouts The PHC10-3 PLUS communicates with the CMM computer via the RS232 cable as shown in the table below: Signal Screen Transmitted data (Tx) to CMM computer Received data (Rx) from CMM computer... -
Page 27: Protocol Selection
1 or 2 stop bits (switch 4) Protocols: PHC10-3 PLUS RTS is asserted before first transmission from the head and remains asserted. If switch 5 is UP, CTS must be asserted by the CMM computer to allow the head to transmit. If switch 6 is UP, the PHC10-3 will add an ASCII LF character to every transmitted message. - Page 28 PHC10-3 PLUS or the output buffer overflows. It is possible to continue transmissions to the PHC10-3 PLUS while it is in the XOFF state, although this is not recommended as it may cause overflow of the output buffer, resulting in lost responses.
-
Page 29: Usb Communications
USB communications USB communication is via the USB type "B" socket on the rear panel. The PHC10-3 PLUS is self powered and therefore takes no power from the PC bus. The PHC10-3 PLUS will switch automatically from RS232 to communicate via the USB port if a powered up cable is connected. -
Page 30: Interface Connection
Probe reseat time The extended probe reseat timer on the PHC10-3 PLUS unit is designed to be used where the touch probe fails to fully seat within the standard reseat period following a head index move (e.g, when using long extension bars). -
Page 31: Output Configuration
PHC10-3 PLUS installation guide www.renishaw.com Output configuration The PHC10-3 PLUS can be connected to a probe interface via the PICS connection or via the raw probe connection (7-pin DIN connector). Switch Description Position Probe output configuration PICS Probe output configuration... - Page 32 - head will continue to move in single steps. Head will lock up as normal when movement key is released. System in automatic mode - stop asserted PHC10-3 PLUS will not unlock or index the Normal system operation resumed. before update command received. head.
- Page 33 2. The overall cable screen is continuous and connected to the system ground on the user's equipment through the bodies of the connectors. CAUTION: For correct system function, the maximum overall single core resistance between the head and PHC10-3 PLUS should be no more than 2.5 ohm.
- Page 34 PHC10-3 PLUS installation guide www.renishaw.com Head connector cables PHC = probe head cable MC = machine cable MC / PHC Signal name 15-way male 'D' Cable PLM 6 - 9 14-way LEMO 12 core cable 14-way Tuchel Max line current...
- Page 35 PHC10-3 PLUS installation guide www.renishaw.com Motorised head cables The table below shows the standard range of motorised head cables available from Renishaw: PHC = probe head cable MC = machine cable Cable Name Length Type Connector Connects to Connector Connects to 0.1 m to 0.8 m...
-
Page 36: Power Supply
The PHC10‐3 PLUS controller is rated to operate at +24 Vdc, 1 A max input current. It should be connected via Ø5.5 mm dc jack plug to the provided 24 Vdc 40 W power supply. If an internal interface is fitted with the PHC10-3 PLUS it will obtain its power internally from the PHC10-3 PLUS controller. -
Page 37: Stand-Alone Installation
180 mm (7.1 in) Weight 1.5 kg (3 lb 3 oz) The PHC10-3 PLUS controller can be used in a 19 inch rack system or as a stand-alone unit. CAUTION: Ensure the controller is disconnected from the power supply during installation. Stand-alone installation Four self-adhesive rubber feet are supplied with the unit for stand-alone use. -
Page 38: Troubleshooting
This section on troubleshooting is a guide to problems associated with the installation and integration of the system only. Refer to the 'PH10 PLUS installation and user's guide' (Renishaw part number H-1000-7592) regarding problems associated with normal operation of the system. - Page 39 PHC10-3 PLUS installation guide www.renishaw.com No head movement in manual mode Possible cause Solution Head controller in automatic mode. Change to manual mode. Power loss Check mains cable connections and integrity. Check power block is supplying 24 V. Check CMM emergency stop condition - power may have been removed by CMM.
-
Page 40: Maintenance
PHC10-3 PLUS installation guide www.renishaw.com Maintenance There are no user serviceable parts inside any PH10 PLUS system components. Components requiring attention must be returned to an authorised Renishaw customer service centre. Cleaning The probe head, controller and hand control unit should only be cleaned with a soft, dry, lint-free cloth. -
Page 41: Appendix 1 - International Safety Warnings
Вж. инструкциите за работа на доставчика на машината. Отговорност на доставчика на машината е да гарантира, че на потребителя са обяснени всякакви рискове по време на работа, включително онези, упоменати в продуктовата документация на Renishaw, и да гарантира осигуряване на съответни предпазители и обезопасителни блокировки. - Page 42 Při jakékoli práci s obráběcími stroji nebo souřadnicovými měřicími stroji ﴾CMM﴿ je doporučeno používat ochranu očí. Pokyny týkající se bezpečného čištění produktů společnosti Renishaw naleznete v části věnované informacím o údržbě v příslušné dokumentaci k produktu. Před započetím jakékoliv údržby zařízení odpojte napájení.
- Page 43 PHC10-3 PLUS installation guide www.renishaw.com DA - ADVARSLER Der er risiko for at blive klemt mellem bevægelige dele og mellem bevægelige og statiske dele. Hold ikke sondehovedet under bevægelse eller ved manuelle sondeskift. Pas på uventede bevægelser. Brugeren bør holde sig uden for hele probehovedets/forlængerens/probekombinationernes arbejdsområde.
- Page 44 Auf unerwartete Bewegungen achten. Der Anwender soll sich nur außerhalb des Messtaster‐Arbeitsbereiches aufhalten. Bei Arbeiten an Koordinatenmessgeräten und Werkzeugmaschinen wird ein Augenschutz empfohlen. Anleitungen zur sicheren Reinigung von Renishaw Produkten sind im Kapitel Wartung in der Produktdokumentation enthalten. Bevor Wartungsarbeiten begonnen werden, muss die Stromversorgung getrennt werden.
- Page 45 Σε όλες τις εφαρμογές που συνεπάγονται τη χρήση εργαλείων μηχανημάτων και εξαρτημάτων CMM, συνιστάται η χρήση συσκευής προστασίας των ματιών. Για οδηγίες σχετικά με τον ασφαλή καθαρισμό των προϊόντων Renishaw, ανατρέξτε στις πληροφορίες σχετικά με τη συντήρηση του έντυπου συνοδευτικού υλικού του αντίστοιχου προϊόντος.
- Page 46 In all applications involving the use of machine tools or CMMs, eye protection is recommended. Replace blown fuses with new components of the same type. Refer to the safety information in the relevant product documentation. For instructions regarding the safe cleaning of Renishaw products, refer to the maintenance information in the relevant product documentation.
- Page 47 Se recomienda usar gafas de protección en todas las aplicaciones que implican el uso de Máquinas‐Herramienta y máquinas de medición de coordenadas. Para instrucciones sobre seguridad a la hora de limpiar los productos Renishaw, remitirse a la sección de mantenimiento en la documentación sobre el producto.
- Page 48 Masina tarnija vastutuseks on tagada, et kasutajat teavitatakse masina tööga kaasnevatest ohtudest, kaasa arvatud need ohud, mida on mainitud Renishaw toote dokumentides, ning samuti tagada, et masinaga oleks kaasas korrektsed kaitsepiirded ja turvalukud. Teatud tingimustel võib sondi signaal viidata valesti sondiga seotud olukorrale. Ärge lootke masina liikumise peatamiseks sondi signaalile.
- Page 49 Katkaise virta ennen huoltotoimenpiteiden suorittamista. Tutustu koneen toimittajan käyttöohjeisiin. Koneen toimittajan vastuulla on että käyttäjä on saanut tiedon mahdollisista käyttöön liittyvistä vaaroista, mukaan lukien Renishaw'n tuoteselosteessa mainitut vaarat. Konetoimittajan tulee myös varmistaa, että suojukset ja turvalukitukset ovat riittävät. Tietyissä olosuhteissa anturilta tuleva signaali saattaa virheellisesti osoittaa, että anturi on paikallaan. Älä luota siihen, että anturin signaalit pysäyttävät varmuudella koneen liikkumisen.
- Page 50 Le port de lunettes de protection est recommandé pour toute application sur machine‐outil ou MMT. Les conseils de nettoyage en toute sécurité des produits Renishaw figurent dans les consignes de maintenance de votre documentation. Mettre la machine hors tension avant d'entreprendre toute opération de maintenance.
- Page 51 Moltar cosaint do na súile i ngach aon fheidhmiú lena mbaineann úsáid uirlisí meaisín nó CMM. Féach an fhaisnéis chothabhála sa cháipéisíocht a théann leis an táirge bainteach chun treoracha a fháil faoi tháirgí Renishaw a ghlanadh go sábháilte.
- Page 52 Kod svih primjena koje uključuju upotrebu alatnih strojeva ili CMM‐ova preporučuje se zaštita očiju. Za upute o sigurnom čišćenju proizvoda Renishaw proučite informacije o održavanju u odgovarajućoj dokumentaciji proizvoda. Isključite napajanje prije provođenja bilo kakvih radova održavanja. Proučite upute za rad dobavljača stroja.
- Page 53 Ezzel kapcsolatban tekintse át a gép gyártója által kiadott kezelési utasítást. A gép gyártójának kötelessége felhívni a felhasználó figyelmét a berendezés használata során fennálló valamennyi veszélyre, beleértve a Renishaw termékeihez tartozó dokumentációban említett kockázatokat is; emellett az ő felelőssége a megfelelő védőelemek és biztonsági megszakító berendezések biztosítása is.
- Page 54 Si raccomanda di indossare occhiali protettivi in applicazioni che comportano l'utilizzo di macchine utensili e macchine di misura a coordinate. Per le istruzioni relative alla pulizia dei prodotti Renishaw, fare riferimento alle informazioni di manutenzione nella documentazione del prodotto.
- Page 55 PHC10-3 PLUS installation guide www.renishaw.com JA ‐ 警告 可動部の間または可動部と固定部の間に指などが挟まれる危険があります。駆動中やプローブの手動交換中は、プローブヘッドを手で持たないでください。 予想外の動作に注意してください。プローブシステムの可動範囲内に入らないでください。 工作機械や三次元測定機を使用する場合は、保護眼鏡の着用を推奨します。 レニショー製品を清掃する場合は、関連する製品の説明書のメンテナンスに関するセクションを参照してください。 メンテナンス作業を行う前には必ず、電源を切ってください。 機械メーカーの操作説明書を参照してください。 レニショーの製品説明書に記載されている内容も含め、操作に伴うあらゆる危険性をユーザーへ周知してください。また、適切な保護機構とインターロックシステ ムの設置は、各工作機械メーカーの責任で行なってください。 ある状況下では、プローブ信号出力が正しく出力されない場合もあります。プローブ信号のみに頼って機械を停止させないようにしてください。 本製品をメーカーが指定する方法以外で使用した場合、本製品の保護性能・機能が低下することがあります。 レニショー製品を緊急停止する場合には、電源供給を切って緊急停止してください。 Issued 12 2021...
- Page 56 Įrenginio tiekėjas atsako už tai, kad naudotojas būtų įspėtas apie pavojus, susijusius su įrenginio naudojimu, taip pat apie pavojus, minimus „Renishaw“ prietaiso techninėje dokumentacijoje, ir kad būtų sumontuoti atitinkami apsauginiai įrenginiai bei blokatoriai. Susiklosčius tam tikroms aplinkybėms, zondo signalas gali neteisingai nurodyti, kad jo reikšmės atstatytos į pradinę būseną. Nepasikliaukite zondo signalais ir iš...
- Page 57 Uzmanieties no nejaušām kustībām. Lietotājam jāpaliek ārpus zondes galviņas/uzgaļa/kontaktmērgalviņas pilna darbības rādiusa. Izmantojot darba iekārtas vai koordinātu mērīšanas ierīces, ieteicams izmantot acu aizsarglīdzekļus. Lai uzzinātu par drošu „Renishaw“ izstrādājumu tīrīšanu, attiecīgā izstrādājuma dokumentācijā izlasiet informāciju par apkopi. Atvienojiet izstrādājumu no strāvas pirms jebkuru apkopes darbu veikšanas.
- Page 58 Taħt ċerti ċirkustanzi, is‐sinjal tas‐sonda jista' jindika b'mod falz kundizzjoni probe‐seated. Tiddependix fuq is‐sinjali tas‐sonda biex twaqqaf il‐ moviment tal-magna. Jekk it‐tagħmir jintuża b'mod li ma jkunx speċifikat mill‐manifattur, il‐protezzjoni pprovduta mit‐tagħmir tista' titnaqqas. Il‐metodu mistenni ta' waqfien ta' emerġenza għal prodotti ta' Renishaw huwa billi jintefa l‐iswiċċ li jforni l‐elettriku lill‐prodott. Issued 12 2021...
- Page 59 De leverancier van de machine dient te zorgen dat de gebruiker op de hoogte is van de risico's die zijn verbonden aan het gebruik van de machine, met inbegrip van de risico's vermeld in de productdocumentatie van Renishaw, en dat de machine is voorzien van voldoende beveiligingen en veiligheidsvergrendelingen.
- Page 60 Na dostawcy maszyny spoczywa odpowiedzialność za uprzedzenie użytkownika o wszelkich zagrożeniach związanych z eksploatacją łącznie z tymi, o jakich wspomina się w dokumentacji produktu Renishaw oraz za zapewnienie stosownych osłon i blokad zabezpieczających. W pewnych okolicznościach sygnał z sondy może błędnie wskazywać stan gotowości sondy. Nie należy zatrzymywać pracy maszyny polegając wyłącznie na sygnale z sondy.
- Page 61 Consultar as instruções de operação do fornecedor da máquina. É da responsabilidade do fornecedor da máquina assegurar que o utilizador tem conhecimento de quaisquer perigos envolvidos no funcionamento, incluindo os mencionados na documentação do produto da Renishaw, e garantir que são fornecidas proteções e bloqueios de segurança.
- Page 62 Furnizorul mașinii este responsabil să asigure că utilizatorul cunoaște pericolele pe care le presupune operarea mașinii, inclusiv cele menționate în documentația produsului Renishaw, și să asigure că sunt furnizate dispozitivele de blocare și de protecție corespunzătoare. Sob certas circunstâncias, o sinal do apalpador pode incorretamente indicar uma condição de não contato do apalpador. Não confie nos sinais do apalpador para parar o movimento da máquina.
- Page 63 Dávajte pozor na neočakávaný pohyb. Používateľ by mal zostať mimo celej pracovnej dráhy zostavy snímacej hlavice, ramena a sondy. Vo všetkých aplikáciách zahŕňajúcich používanie obrábacích strojov alebo súradnicových meracích prístrojov sa odporúča ochrana očí. Pokyny týkajúce sa bezpečného čistenia produktov spoločnosti Renishaw získate v informáciách o údržbe uvedených v dokumentácii k príslušnému produktu.
- Page 64 Bodite pozorni na nepričakovane premike. Zadržujte se zunaj delovnega območja merilne glave/podaljška/kombinacij merilne glave. Pri vsaki uporabi obdelovalnih strojev ali koordinatnih merilnih strojev priporočamo uporabo zaščitnih očal. O varnem čiščenju izdelkov Renishaw si preberite razdelek Vzdrževanje v pripadajoči dokumentaciji. Pred začetkom vzdrževanja stroj izklopite iz električnega omrežja.
- Page 65 PHC10-3 PLUS installation guide www.renishaw.com SV - VARNINGAR Det finns risk för klämning mellan rörliga delar och mellan rörliga och stillastående delar. Håll inte i probhuvudet under rörelse eller vid manuellt probbyte. Se upp för plötsliga rörelser. Operatören ska hålla sig utanför arbetsområdet för probhuvud/förlängning/probkombinationer.
- Page 66 PHC10-3 PLUS installation guide www.renishaw.com TW ‐ 警告 行走移動零件之間以及行走移動零件與靜止零件之間存在夾傷的危險。在移動時或手工更動換測頭時,切勿握住測頭座。 謹防意外移動。使用者位置應保持在測頭座/延長桿/測頭組合件的整個工作包覆面以外。 在所有涉及使用工具機或三次元量床的應用中,建議要有眼睛保護措施。 有關 Renishaw 公司產品的安全清潔指示,請參見相關產品說明書的維護資訊。 執行任何維修工作前,請先關閉總電源。 請參閱機器供應商的操作指南。 機器供應商有責任確保使用者瞭解操作機器所存在的任何危險,包括 Renishaw 產品說明書中提及之情況,並保證提供充分的安全防護罩和安 全聯鎖裝置。 在某些情況下,測頭的顯示信號可能錯誤表示測頭已就位。切勿單憑測頭訊號來停止機器的行程移動。 如果裝置使用方式與製造商要求的方式不符,則裝置提供的保護功能可能會減弱。 Renishaw 公司產品的緊急關機方法是關閉電源。 Issued 12 2021...
- Page 67 PHC10-3 PLUS installation guide www.renishaw.com 中文 — 警告 运动部件之间以及运动部件与静止部件之间存在夹伤危险。在移动时或手工更换测头时,切勿握住测头座。 谨防意外移动。用户应该保持在测座/加长杆/测头组合件的整个工作区以外。 在所有涉及使用机床或坐标测量机 ﴾CMM﴿ 的应用中,建议采取保护眼睛的措施。 有关雷尼绍产品的安全清洁的指示,请参阅相关产品说明书中的维护说明。 在执行任何维护作业之前,请先断开电源。 请参阅机床供应商的操作说明书。 机床制造商有责任确保用户了解操作中存在的任何危险(包括雷尼绍产品说明书中提到的危险),并应确保提供充分的防护装置和安全联锁装 置。 在某些情况下,有误发测头已复位状态信号的可能。切勿单凭测头信号来停止机床运动。 如果设备使用方式与制造商要求的方式不符,则设备提供的保护功能可能会减弱。 紧急关闭雷尼绍产品的方法是断开电源。 Issued 12 2021...
- Page 68 Renishaw plc +44 (0)1453 524524 New Mills, Wotton-under-Edge +44 (0)1453 524901 Gloucestershire, GL12 8JR United Kingdom www.renishaw.com/cmmsupport For worldwide contact details, please visit our main website at www.renishaw.com/contact Issued 12 2021...
Need help?
Do you have a question about the PHC10-3 PLUS and is the answer not in the manual?
Questions and answers