Table of Contents
Advertisement
Quick Links
Advertisement
Table of Contents

Subscribe to Our Youtube Channel
Related Manuals for Star futurePRNT ECO TSP100


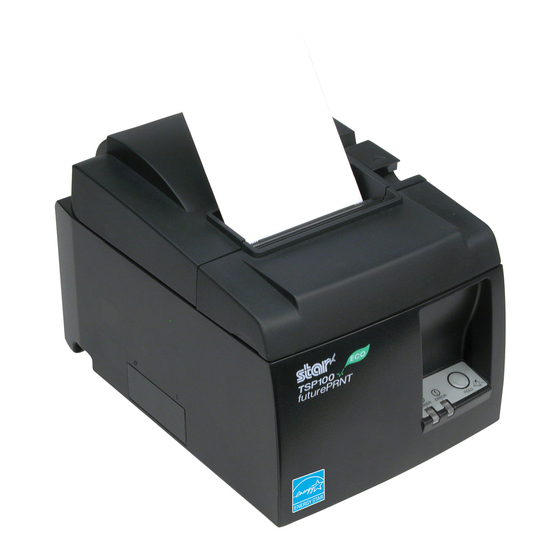
Summary of Contents for Star futurePRNT ECO TSP100
- Page 1 Hardware Manual Model: TSP143IIU...
- Page 2 Trademark acknowledgments TSP100II: Star Micronics Co., Ltd. Notice • All rights reserved. Reproduction of any part of this manual in any form whatsoever, without STAR’s express permission is forbidden. • The contents of this manual are subject to change without notice.
-
Page 3: Table Of Contents
TABLE OF CONTENTS 1. Unpacking and Installation ........................1 1-1. Unpacking ............................1 1-2. Choosing a place for the printer ....................2 1-3. Nomenclature ..........................3 2. Product Features ............................4 2-1. Product Features ...........................4 2-2. Operation Modes ..........................4 3. Setup ................................5 3-1. Connecting the Power Cord ......................5 3-2. -
Page 4: Unpacking And Installation
1. Unpacking and Installation 1-1. Unpacking After unpacking the unit, check that all the necessary accessories are included in the package. USB cable Power cord Paper roll holder Screws Upper guide Rubber feet Screws CD-ROM Holder plate Installation sheet Printer Roll paper Fig. -
Page 5: Choosing A Place For The Printer
1-2. Choosing a place for the printer Before actually unpacking the printer, you should take a few minutes to think about where you plan to use it. Remember the following points when doing this. Choose a firm, level surface where the printer will not be exposed to vibration. ... -
Page 6: Nomenclature
1-3. Nomenclature Cover open lever Push this lever in the direction of the arrow to open the printer cover. Printer cover Open this cover to load or replace paper. Control panel Features LED indicators to indicate printer status and switches to oper- ate the printer. -
Page 7: Product Features
2. Product Features 2-1. Product Features • This printer is not equipped with a power switch. The printer turns on when the computer, which the printer is connected to, is turned on. • After the paper is discharged, the roll paper is rewound to reduce the margin on the leading edge of the paper, which reduces the amount of paper used. -
Page 8: Setup
3. Setup 3-1. Connecting the Power Cord (1) Check the label on the back or bottom of the printer to make sure its voltage matches that of the AC outlet. Also make sure the plug on the power cord matches the AC outlet. (2) If the power cord is not attached to the printer, plug the appropriate end into the AC inlet on the back of the printer. -
Page 9: Connecting The Usb Cable To The Printer
3-2. Connecting the USB Cable to the Printer Pass the cable through the cable support as shown. Then, connect the USB interface cable to the printer. Precautions regarding USB connections 1) Depending on the settings and configurations, the printer may not operate correctly with some computers even if they meet the conditions for the connection environment. -
Page 10: Connecting To A Peripheral Unit
3-3. Connecting to a Peripheral Unit You can connect a peripheral unit to the printer using a modular plug. The following describes how to install the ferrite core and make the actual connection. Note that this printer does not come with a modular plug or wire, so it is up to you to obtain one that suits your needs. CAUTION Make sure that the printer is turned off and unplugged from the AC outlet and that the computer is turned off before making connections. -
Page 11: Turning Power On And Power Off
3-4. Turning Power On and Power Off Important: This printer is not equipped with a power switch. 1) The following four conditions are necessary to turn on the printer. • The computer is turned on. • The printer's power cord is plugged into an AC outlet. •... - Page 12 3-4-2. Turning Power Off (System Off Mode) There are two ways to turn off the power. 1) Turning power off manually Disconnect the USB cable. When the sleep switch is available, you can also turn off the power by setting the sleep switch to Sleep. 2) Turning power off automatically Turn off the computer.
-
Page 13: Loading The Paper Roll
3-5. Loading the Paper Roll 3-5-1. Using 79.5 mm Width Paper Roll Be sure to use roll paper that matches the printer’s specification. When using a paper roll with an 57.5 mm width, install the paper roll holder as described on the following page. - Page 14 3-5-2. Using 57.5 mm Width Paper Roll When using a paper roll with 57.5 mm width, install the supplied paper guide on the printer. To change the effective print width (roll paper width), change the setting of the Print Width in the Configuration.
- Page 15 Caution Symbol These labels are located near the thermal print head. Because the thermal print head is hot immediately after printing, do not touch it. Static electricity can damage the thermal print head. To protect the thermal print head from static electricity, do not touch it. This symbol is placed near the cutter.
- Page 16 CAUTION 1) Do not operate the cover open lever while pressing on the printer cover with your hand. 2) Do not push the cover open lever and open the printer cover when printing is in progress or when the auto cutter is operating. 3) Do not push out paper while the printer cover is closed.
-
Page 17: Attaching The Accessories
4. Attaching the Accessories The following accessories are necessary when mounting the printer to a wall. • Upper guide and two flanged screws • Holder plate and two flangeless screws The following accessories are necessary when positioning the printer vertically. •... -
Page 18: Attaching The Holder Plate
• Be sure to have qualified personnel install the specified screws and printer to the wall. Star is not responsible for any accidents or injuries that occur as a result of improper installa- tion, misuse, or modifications. Especially when installing the printer at a high location, make sure that the printer is securely installed to the wall. - Page 19 (1) Attach the holding plate to the printer. Then tighten the two screws that were supplied to secure it in place. Flangeless screws (2) Position the printer over the screws, etc., on the wall and then slide it downward to set it in place.
-
Page 20: Attaching The Rubber Feet
4-3. Attaching the Rubber Feet (1) Attach the four rubber feet in the posi- tions shown in the figure. Ensure that any soiling has been com- pletely wiped off before attaching the rubber feet. (2) Push the cover open lever, and open the printer cover. -
Page 21: Thermal Roll Paper Specification
5. Thermal Roll Paper Specification When consumable parts have run out, use those specified below. 5-1. Compliant Paper Roll Specifications Thickness 65~85 µm 79.5±0.5 mm Width (57.5±0.5 mm when the paper roller holder is used) Outer roll diameter ø83 mm or less Take up paper roll width mm or (58 mm when the paper roller holder is used) -
Page 22: Control Panel And Other Functions
6. Control Panel and Other Functions 6-1. Control Panel 1 POWER lamp (Green LED) Lights when the power is ON. Important: This printer is not equipped with a power switch. After plugging the power cord into an AC outlet, the printer power will be turned on for the first time when the USB 3 FEED button cable is connected to a computer that is... - Page 23 2) Automatically recoverable errors Error Description POWER Lamp ERROR Lamp Recovery Conditions Cover open error Automatically recovered after the printer cover is closed. Power cord disconnec- Flashes at 0.5-sec- Flashes at 0.5-sec- Automatically recovered after the power tion error ond intervals *1 ond intervals *1 cord is plugged into an AC outlet.
-
Page 24: Self-Printing
6-3. Self-Printing Test Printing 1) Make sure that the computer is turned on. 2) Make sure that the printer’s power cord is plugged into an AC outlet. 3) While holding the FEED button down, connect the USB cable to the computer. Test printing starts. -
Page 25: Preventing And Clearing Paper Jams
7. Preventing and Clearing Paper Jams 7-1. Preventing Paper Jams The paper should not be touched during ejection and before it is cut. Pressing or pulling the paper during ejection may cause a paper jam, paper cutting failure or line feed failure. 7-2. - Page 26 Caution Symbol These labels are located near the thermal print head. Because the thermal print head is hot immediately after printing, do not touch it. Static electricity can damage the thermal print head. To protect the thermal print head from static electricity, do not touch it. This symbol is placed near the cutter.
-
Page 27: Releasing A Locked Cutter
7-3. Releasing a Locked Cutter If the auto cutter locks up, disconnect the USB cable, and unplug the power cord to turn the printer off. Then reconnect the USB cable, and plug in the power cord to turn the printer on. If restarting the printer does not release the locked cutter, follow the steps below. - Page 28 (4) Insert a Philips screwdriver into the manual operation hole on the side of the cutter, and turn it in the direction of the arrow shown on the right until the rear cover is opened. CAUTION: If the printer cover does not open easily, do not force the printer cover open. Consult the dealer for repairs.
-
Page 29: Periodical Cleaning
8. Periodical Cleaning Printed characters may become partially unclear due to accumulated paper dust and dirt. To prevent such a problem, paper dust collected in the paper holder and paper transport section and on the surface of the thermal head must be removed periodically. Such cleaning is recommended to be carried out once six month or one million lines. - Page 30 http://www.starmicronics.com/support/ Rev. 3.1...
Need help?
Do you have a question about the futurePRNT ECO TSP100 and is the answer not in the manual?
Questions and answers