Table of Contents
Advertisement
Quick Links
Advertisement
Table of Contents

Subscribe to Our Youtube Channel
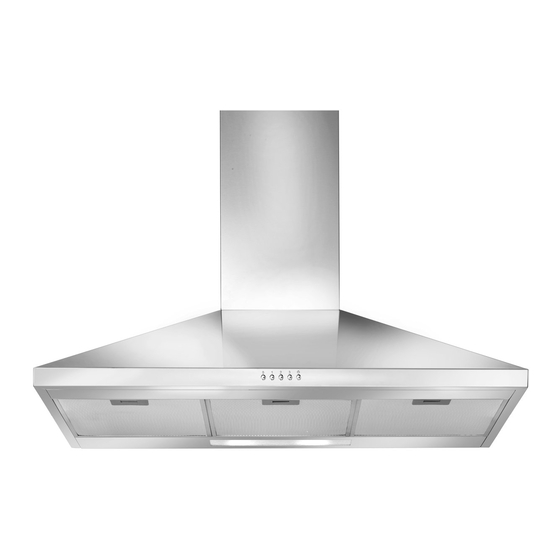
Summary of Contents for Artusi ACH900X
- Page 1 A PPLIANCES FO R LIV IN G ACH600X, ACH900X OPERATION MANUAL...
- Page 2 This instruction manual has been specially created to inform you of the features specified in this Manual may not be available on your appliance. full range of features your ARTUSI appliance has to offer and serves as an All our appliances are only for domestic use, not for commercial use. Products introduction to getting the very best out of your ARTUSI appliance.
- Page 3 HOOD DUCTING GUIDE Here are some important points to consider when choosing and/or installing a range hood: Diagram 2. External Vent • An externally ducted range hood will generally outperform a recirculating range hood. • We discourage the use of flexible ducting as this has a significant negative impact on airflow and noise 1.0m due to turbulence...
-
Page 4: Information And Advice
Information and advice Caution: Take care when touching the hood as it may become hot due to high heat from steam and fats when cooking. In certain circumstances electrical appliances may be a hazard. Please pay attention to the following points: A. - Page 5 Know your cooker hood Please read these instructions before using your cooker hood. Congratulations on the purchase of our cooker hood which is designed to include many superior features. Before installing and using the hood carefully read all the instructions. 1.
-
Page 6: Installation
Installation Ensure the power is turned off before beginning the installation Check the voltage and frequency on the rating plate located inside the hood. The hood must not be installed and connected to flues where other appliances are installed. Ensure the hood is installed so that the bottom of the hood is no less than 600-750mm... - Page 7 Installation Installation work and electrical wiring must be done by qualified person(s) in accordance with all applicable laws, regulations and safety standards. Fig. 3 Attach the damper flap on the air outlet as shown.
- Page 8 Installation You will need two people to install this hood Using the drill hole stencil mark the screw positions on the wall. Drill four 8mm holes into the wall. Put one expansion plug and one 10mm screw into each of the holes.
- Page 9 Installation Hang the hood body onto the screws. First screw in the top 2 screws then the bottom 2 screws. Adjust the level of the hood on the wall to be straight horizontally.
- Page 10 Installation Ensure the power is turned off before beginning the installation venting direction. into a fuel Attach the Vertical discharge of Horizontal discharge ducting hose to air. Run the ducting of air. Run the ducting the air duct. through a cupboard through the eaves and/or into a space (soffit) and the outside...
- Page 11 Installation Attaching the chimney flues Assemble the 2 flues, inner top to outer bottom.Place them onto the hood body covering the air duct assembly and screw into place. Measure the height for the chimney flue bracket. Pull the inner chimney to the desired height.
- Page 12 Installation Attaching the chimney flues Screw the chimney flue bracket into place as measured. Connect the chimney flues to the bracket using four 10mm screws.
-
Page 13: Hood Operation
Hood Operation Caution Never cover the lamp with thermal Ensure the hood is OFF when first installed. insulation or Insert the power plug when all previous installation steps are any other completed. material. Press the Light button for the lights to turn ON. Warning Press again to turn OFF The lamp is... -
Page 14: Replacing The Light Bulb
Replacement & maintenance Replacing E14 Lamp Max 2X40W the light bulb Fig 16. Replacing the light bulb Clean the filters and Wait 30minutes for the light bulb to cool down after using the hood. ventilating Open the filter and remove the old light bulb fan at least Replace with a new lightbulb (no more than 40W) once every... -
Page 15: Cleaning Instructions
Cleaning instructions Turn off the hood before cleaning. 1. Clean the surface of the hood frequently using mild soap or detergent at least once every 3 months. Never let water enter the motor 2. Avoid the use of harsh cleaning agents as it may spoil the hood’s or electrical appearance. - Page 16 The manufacturer shall decline all responsibility when the recommendations and instructions regarding installation, maintenance and use are not observed.
- Page 17 Appliances Privacy Policy is available at 2. What is not Covered by the Warranty. of the artusi in respect of an artusi product www.artusi.com.au. Worldwide Appliances will The Warranty does not apply if an artusi product purchased as a “factory second”...
- Page 18 Last Name: First Name: Address: State: Postcode: Email: Home Phone: Mobile: Purchase Date: (Please attach proof of purchase to validate warranty) SERIAL NUMBER MODEL NUMBER (if you cannot locate the serial number please call ARTUSI on 1300 694 583) 01032014...
- Page 20 DISCLAIMER Worldwide Appliances PTY LTD, trading as ARTUSI, is continually seeking ways to improve the design specifications, aesthetics and production techniques of its products. As a result alterations to our products and designs take place continually. Whilst every effort is made to produce information and literature that is up to date, this brochure should not be regarded as an infallible guide to the current specifications, nor does it constitute an offer for the sale of any particular product.


Need help?
Do you have a question about the ACH900X and is the answer not in the manual?
Questions and answers
how to reinstall the filter to an Artusi ACH900X RANGEHOOD