
Subscribe to Our Youtube Channel
Related Manuals for Schacht SPINNING WHEEL WS6502


Summary of Contents for Schacht SPINNING WHEEL WS6502
- Page 1 WS6502 MATCHLESS DOUBLE- WS6504 TREADLE SPINNING WHEEL & assembly maintenance warranty Find out more at schachtspindle.com Schacht Spindle Company 6101 Ben Place Boulder, CO 80301 p. 303.442.3212 f. 303.447.9273 © 2019 Schacht Spindle Company, Inc. 04.19...
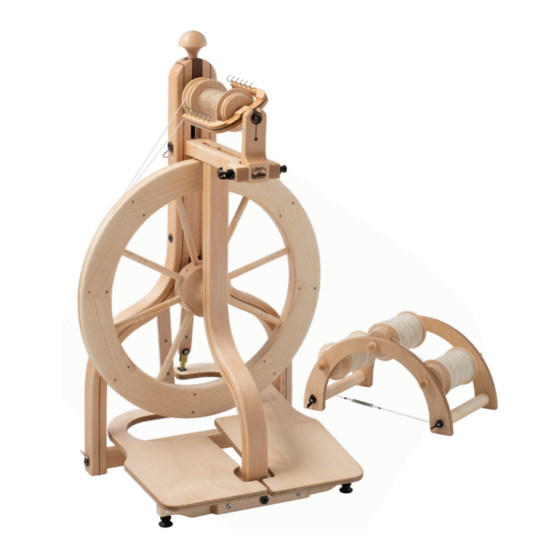
- Page 2 IMPORTANT! Don’t throw away the shipping box and box inserts for your spinning wheel. Save them in case you ever have to ship or pack your wheel. drive band tension rear leg knob flyer flyer whorl orifice bobbin front maiden mother-of-all quick-release Scotch tension peg...
-
Page 3: Parts & Hardware
We are pleased that you have chosen one of our Schacht spinning wheels and trust that it will give you many fruitful hours of spinning. We have taken great care in the design of our wheels to make them efficient and sturdy as well as aesthetically pleasing. Our wheels are constructed using traditional woodworking joinery, following the concept that form follows function. - Page 4 right treadle ssembling heel (bottom side) Work on a raised surface such as a table left treadle or counter (covered in a blanket or towel). (bottom side) ATTACHING THE TREADLES Place the left treadle and right treadle treadle support bar (bottom wrong side up on the work surface, with side) their straight edges facing you and their...
- Page 5 Using the 4 mm hex wrench, remove the front leg bolt and washer attaching the front leg to the cross brace (Figure 4). Leave the short rod in place on the front leg. lower rear Slightly loosen the lower rear leg bolts leg bolt on both rear legs (Figure 5).
- Page 6 the clevis pin from the back of the wheel towards the front. Put another washer on the clevis pin and secure by inserting a cotter pin through the clevis pin until the cotter pin is about halfway through the clevis pin (Figure 8). The right treadle is attached in the same way, but the clevis pin should be inserted through the footman and treadle...
- Page 7 sing heel maiden stop CHANGING BOBBINS Open the quick-release lever on the front maiden (Figure 10). Hold the flyer with one hand and pivot the front maiden forward until the flyer orifice comes out of the front maiden bearing. Hold the drive front band up and out of the way as you pull the bearing...
- Page 8 Adjust the tension on the drive band by turning the drive band tension knob. Start with a loose drive band. Begin to treadle loop end slowly, tightening the tension knob until rear bar the flyer and bobbin both begin to turn. scotch Now you can begin to spin.
- Page 9 In Scotch tension mode, the yarn will best to tie a separate drive cord following wind onto the bobbin in the opposite the instructions above. Several drive cords direction from double drive mode. This can be left on the wheel at the same time: does not affect your spinning unless you simply fold up the ones not in use and let change spinning modes in the middle of a...
-
Page 10: Lubricating Moving Parts
Wood is a natural breathing material, and like any natural material, it is affected by its environment. Avoid placing your wheel near direct heat sources such as heat vents, wood stoves, space heaters, and direct sunlight. Heat concentrated on parts of the wheel can cause them to dry out and shrink. - Page 11 ■ front maiden bearing ■ rear bearing ■ bobbin bearings ■ drive wheel bearings ■ footman contact points—sparingly The flyer shaft should also be oiled where it touches the front and rear bearings and the bobbin bearings (Figures 14 and 15). Use medium-weight oil such as 20- or 30-weight SAE motor oil.
-
Page 12: Maintenance Notes
Spindle Company’s obligation under this Warranty shall be limited to the repair or replacement of any part or parts which may prove defective within two (2) years following the date of original purchase by the consumer, and which Schacht Spindle Company’s examination shall disclose to our satisfaction to be thus defective.
Need help?
Do you have a question about the SPINNING WHEEL WS6502 and is the answer not in the manual?
Questions and answers