Advertisement
Quick Links
Issue 1 September 2020
Handbook for the Trius PRO-674C
Manual for the TRIUS PRO-674C colour CCD
camera
Thank you for purchasing a Starlight Xpress 'TRIUS PRO 674C' camera. We hope that
you will be very pleased with the performance of this product. Please register your
product and warranty at
https://forms.gle/tmsHEJfQG2bLJjr57
.
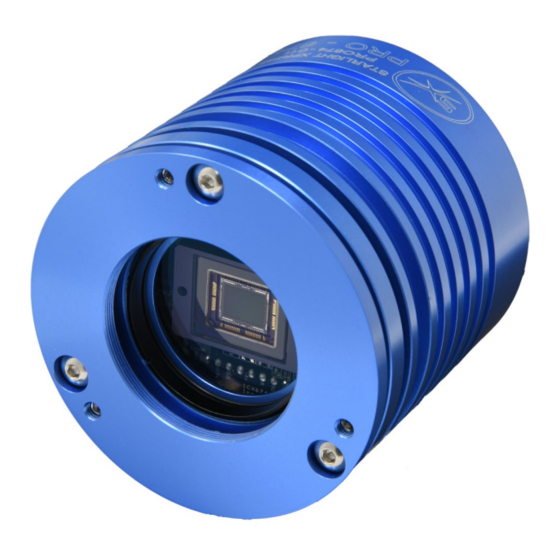
The TRIUS PRO-674C is an advanced, high-resolution one-shot colour, cooled CCD
camera, especially designed for astronomical imaging. It uses a third generation
version of the very popular Sony 'EXview' CCDs that offer very high QE and extremely
low thermal noise. This 'PRO' camera uses an updated version of the original TRIUS
main board and has both improved read noise and faster download time. It features
an internal USB hub with 3 external ports and a dry argon CCD chamber fill. The USB
hub permits several other devices to share the single USB connection and greatly
reduces the number of cables required in a typical set-up. For example, a Lodestar
PRO or Ultrastar PRO guide camera and an SX filter wheel could use two of the USB
ports and the third might connect to an electric focuser, or similar peripheral. The
argon fill, along with other improvements to the cooler stack, has improved the delta
T to about -42 degrees C below ambient.
The camera also includes a CCD temperature monitoring circuit that provides
regulated set-point cooling of the chip, an adjustable chip alignment plate and a very
1
Advertisement

Subscribe to Our Youtube Channel
Related Manuals for Starlight Xpress TRIUS PRO 674C


Summary of Contents for Starlight Xpress TRIUS PRO 674C
- Page 1 Manual for the TRIUS PRO-674C colour CCD camera Thank you for purchasing a Starlight Xpress ‘TRIUS PRO 674C’ camera. We hope that you will be very pleased with the performance of this product. Please register your product and warranty at https://forms.gle/tmsHEJfQG2bLJjr57...
- Page 2 Issue 1 September 2020 Handbook for the Trius PRO-674C The TRIUS PRO-674C uses a Sony ICX674AQG ‘EXview’ progressive scan CCD, with 1940 x 1460 x 4.54uM pixels in a 8.8 x 6.3mm active area. This EXview device has an excellent quantum efficiency, with a broad spectral response peaking at around 77% in yellow light, and an extremely low dark current, well below that of any comparable CCD currently available.
- Page 3 Handbook for the Trius PRO-674C Issue 1 September 2020 ‘Quick Starting’ your TRIUS PRO-674C system In the shipping container you will find the following items: 1) The TRIUS PRO-674C camera head. 2) A universal AC power supply module. 3) A USB camera cable. 4) An adaptor for 1.25”...
- Page 4 Issue 1 September 2020 Handbook for the Trius PRO-674C Installing the USB system: First, find a free USB socket on your PC and plug in the USB cable (do not connect the camera at this time). If you do not have a USB2 capable computer, it is normally possible to install a USB 2 card into an expansion slot.
- Page 5 ‘BlockIOClass’ and clicking on the ‘+’ sign will reveal it to be a ‘Starlight Xpress USB 2.0 SXV-H674C BlockIO camera driver’. If this device shows as faulty, try clicking on it and selecting ‘properties’...
- Page 6 Handbook for the Trius PRO-674C Issue 1 September 2020 Now connect up the power supply and switch it on. The supply is a very efficient ‘switch mode’ unit, which can operate from either 110v or 220v AC via an appropriate mains power cable (supplied). You can now start the software by double clicking on the icon, when you should see the main menu and image panel appear.
- Page 7 Issue 1 September 2020 Handbook for the Trius PRO-674C As can be seen above, there is a CCD temperature monitoring window at the right hand side of the panel. At switch-on, this will default to full power cooling with an end point of -40C (actual chip temperature) and, needless to say, this is rather extreme.
- Page 8 Handbook for the Trius PRO-674C Issue 1 September 2020 Recording your first image: We now have the camera and computer set up to take pictures, but an optical system is needed to project an image onto the CCD surface. You could use your telescope, but this introduces additional complications, which are best avoided at this early stage.
- Page 9 Handbook for the Trius PRO-674C Issue 1 September 2020 If you use a normal lens, then stop it down to the smallest aperture number possible, (usually F22), as this will minimise focus problems and keep the light level reasonable for daytime testing. The pin hole needs no such adjustments and will work immediately, although somewhat fuzzily! Point the camera + lens or pinhole towards a well-lit and clearly defined object some distance away.
- Page 10 Issue 1 September 2020 Handbook for the Trius PRO-674C 1) Ensure that the power indicator lamp is on and that the cables are properly home in their sockets. 2) If the screen is completely white, the camera may be greatly overexposed. Try a shorter exposure time, or stop down your lens.
- Page 11 Issue 1 September 2020 Handbook for the Trius PRO-674C The visible grid encodes the colour information within the image data and will now be used to decode the red, green and blue image planes into a colour picture. To do this, open the ‘Colour’...
- Page 12 Issue 1 September 2020 Handbook for the Trius PRO-674C 4) Apply Anti-Alias: - Runs a special filter over the colour data to remove coloured artefacts around sharp edges. This is especially useful for cleaning up erratically coloured star images. 5) IR Filter Used? – Sets the colour balance to allow for the loss of infra-red content when using an IR blocking filter.
- Page 13 Handbook for the Trius PRO-674C Issue 1 September 2020 program defaults’ dialog box and altering the ‘Pixel’ and ‘Line’ offsets. Reload the raw file and try synthesis again. If it’s still not right, experiment with just a pixel offset or just a line offset until the colour is good. There is every reason to expect that the image will be reasonably well colour balanced, but if it is not, you can adjust the colour in the ‘Set Colour Balance’...
- Page 14 Issue 1 September 2020 Handbook for the Trius PRO-674C compared with the red and green data. To correct for this, the other histogram sliders may be used as slope adjusters. In the case of the excess blue, try increasing the top end (Max) value to greater than 255 (300 max is allowed). This will reduce the blue slope and result in a more yellowish rendition.
- Page 15 Handbook for the Trius PRO-674C Issue 1 September 2020 can discern details well enough to optimise the focus setting. An additional complication is the need to add various accessories between the camera and telescope in order that the image scale is suitable for the subject being imaged and (sometimes) to include a ‘flip mirror’...
- Page 16 Handbook for the Trius PRO-674C Issue 1 September 2020 results. The longer the extension tube used, the greater the focal reduction will be. As a guide, most CCD astronomers try to maintain an image scale of about 2 arc seconds per pixel for deep sky images. This matches the telescope resolution to the CCD resolution and avoids ‘undersampling’...
- Page 17 Issue 1 September 2020 Handbook for the Trius PRO-674C Press ‘Take Picture’ and wait for the image to download. There is a good chance that your selected star will appear somewhere within the image frame and it should be close to a sharp focus. If the focus is still poor, then it may appear as a pale disk of light, often with a dark centre (the secondary mirror shadow in an SCT, or Newtonian).
- Page 18 Handbook for the Trius PRO-674C Issue 1 September 2020 data hidden from view. You can get to see a lot of this, without affecting the image data, if you go to the ‘View’ menu and select ‘Auto Contrast Stretch Image’. The faint image data will then appear in considerable detail and I think that you will be impressed by the result! If you are happy with the image, go to the ‘File’...
- Page 19 Handbook for the Trius PRO-674C Issue 1 September 2020 other software (e.g. Maxim DL) will provide a ‘hot pixel killer’ that can be mapped to specific locations in the image, or methods such as ‘Sigma combine’ may be used. In the unlikely event that you feel that dark frame really is necessary, please proceed as follows: To take a dark frame, just cover the telescope objective with the lens cap and take another exposure with the same length as that of the light frame.
- Page 20 Issue 1 September 2020 Handbook for the Trius PRO-674C M42 – 30 seconds exposure at F2 with a C8 Hyperstar 2) Once you have subtracted any dark frame, you can convert the raw image to colour. 3) The resulting image will probably look faint and dull, possibly with a pale yellowish background, due to light pollution so it is now time to process the ‘luminance’...
- Page 21 Issue 1 September 2020 Handbook for the Trius PRO-674C attractive, although dark. You can now try brightening the highlights with another ‘Normal’ stretch, in which you bring down the ‘White’ slider to just above the main image peak. The best setting for this is rather more difficult to guess and you may need several attempts before the result is ideal.
- Page 22 Issue 1 September 2020 Handbook for the Trius PRO-674C Other things to try, include summing several images for a better signal to noise ratio. Summing can be done in the ‘Merge’ menu and involves loading the first processed image, selecting a reference point (a star) then loading the second image and finding the same star with the mouse.
- Page 23 Handbook for the Trius PRO-674C Issue 1 September 2020 To start the Autosave process, call up the SXV Camera Interface and select the ‘Continuous Mode’ check box at the top (make sure the rest are unchecked). Now check the ‘Autosave Image’ checkbox near the bottom of the window. If you now click on ‘Take Picture’...
- Page 24 Issue 1 September 2020 Handbook for the Trius PRO-674C After conversion and the application of an ‘Unsharp mask’ In general terms, the larger the image and the worse the seeing, then the wider the radius for best results. My Jupiter shots are usually about one third the height of the CCD frame and I find that the ‘radius 5, power 5’...
- Page 25 Handbook for the Trius PRO-674C Issue 1 September 2020 This mode can help to overcome a poor RA drive by summing images that have exposure times shorter than the drive error period. The resulting image has more noise than a single exposure of the same total length, but this method of imaging is still an effective way of making long exposures without a guider.
- Page 26 Handbook for the Trius PRO-674C Issue 1 September 2020 If dust motes are your main problem, it is best to clean the camera window, rather than to rely on a flat field to remove the do-nuts. Flat fields always increase the noise in an image and so physical dust removal is the best option.
- Page 27 Issue 1 September 2020 Handbook for the Trius PRO-674C The TRIUS PRO-674C is provided with a guide port for use with ST4 compatible mounts. The Autoguider output port is a 6 way RJ11 socket, which is compatible with the standard autoguider input of most telescope mounts. It provides 4 active-low opto-isolator outputs and a common return line, capable of sinking a minimum of 5mA per output.
- Page 28 Handbook for the Trius PRO-674C Issue 1 September 2020 pharmacist shops will have small bottles of pure acetone. A bright light and a strong watchmakers eyeglass will also be found to be essential. Procedure: 1) Disconnect the lead from the camera head and remove it from the telescope. Place it on a table with the optical window facing downward.
- Page 29 Handbook for the Trius PRO-674C Issue 1 September 2020 The ports are sealed by M4 stainless set-screws and soft plugs, which may be removed to provide access to the chamber gas fill. You will need to make some kind of nozzle to fit the gas ports, but simply tapering the end of the standard 4 mm plastic gas tubing that is used with small welding bottles, will probably be sufficient.
- Page 30 Handbook for the Trius PRO-674C Issue 1 September 2020 Some details of the camera and CCD characteristics The TRIUS PRO-674C uses a Sony ICX674AQG ‘EXview’ progressive scan CCD, with 1940 x 1460 x 4.54uM pixels in a 8.8 x 6.3 mm active area. This EXview device CCD type: Sony ICX674AQG EXview interline imager.
-
Page 31: Conditions Of Guarantee
Issue 1 September 2020 Dear Observer, Thank you for purchasing a Starlight Xpress CCD Imaging System. We are confident that you will gain much satisfaction from this equipment, but please read carefully the accompanying instruction manual to ensure that you achieve the best performance that is capable of providing.
Need help?
Do you have a question about the TRIUS PRO 674C and is the answer not in the manual?
Questions and answers