Table of Contents
Advertisement
Quick Links
Advertisement
Table of Contents

Related Manuals for ViewSonic VS13920


Summary of Contents for ViewSonic VS13920
- Page 1 ViewSonic ® NMP-640 - User Guide Commercial Media Player Model No.: VS13920...
-
Page 2: Compliance Information
• This Class B digital apparatus complies with Canadian ICES-003. • C et appareil numérique de la classe B est conforme à la norme NMB-003 du Canada. CE Conformity for European Countries The device complies with the EMC Directive 2004/108/EC and Low Voltage Directive 2006/95/EC. Following information is only for EU-member states: The mark is in compliance with the Waste Electrical and Electronic Equipment Directive 2002/96/EC (WEEE). The mark indicates the requirement NOT to dispose the equipment including any spent or discarded batteries or accumulators as unsorted municipal waste, but use the return and collection systems available. ViewSonic NMP-640... -
Page 3: Important Safety Instructions
The unit is hot pluggable. However it is recommended that the power be turned off before the memory card is inserted or removed. Do not remove the memory card during data access. The data may be lost and the product could be damaged. 10. Disconnect the power cord if the product will not be used for an extended period. 11. Do not repair, disassemble, or modify the product. Only qualified ViewSonic personnel should check and repair any damage to the machine. 12. The unauthorized playing of certain audio or image files may infringe the related copyright laws under certain circumstances. 13. Do not adjust the volume to a high level, or the sounds may distort and become unpleasant. - Page 4 Polybrominated biphenyls (PBB) Polybrominated diphenyl ethers (PBDE) Certain components of products as stated above are exempted under the Annex of the RoHS Directives as noted below: Examples of exempted components are: 1. M ercury in compact fluorescent lamps not exceeding 5 mg per lamp and in other lamps not specifically mentioned in the Annex of RoHS Directive. 2. L ead in glass of cathode ray tubes, electronic components, fluorescent tubes, and electronic ceramic parts (e.g. piezoelectronic devices). 3. L ead in high temperature type solders (i.e. lead-based alloys containing 85% by weight or more lead). 4. L ead as an allotting element in steel containing up to 0.35% lead by weight, aluminium containing up to 0.4% lead by weight and as a cooper alloy containing up to 4% lead by weight. ViewSonic NMP-640 Proposed Maximum Actual Concentration Concentration 0.1% 0.1% 0.01% 0.1% 0.1% 0.1% < 0.1% < 0.1% < 0.01%...
-
Page 5: Copyright Information
Product Name: Model Number: Document Number: Serial Number: Purchase Date: Product disposal at end of product life ViewSonic respects the environment and is committed to working and living green. Thank you for being part of Smarter, Greener Computing. Please visit ViewSonic website to learn more. USA & Canada: http://www.viewsonic.com/company/green/recycle-program/ Europe: http://www.viewsoniceurope.com/uk/support/recycling-information/ Taiwan: http://recycle.epa.gov.tw/recycle/index2.aspx ViewSonic NMP-640 For Your Records NMP-640 ViewSonic Commercial Media Player VS13920 NMP-640_UG_ENG Rev. 1A 12-30-10 ____________________________________ ____________________________________... -
Page 6: Table Of Contents
Table of Contents Chapter 1 Introducing the NMP-640 Left/Right side View ... Front Side View ... Top Side View ... Back Side View ... Bottom View ... Chapter 2 Connecting Peripherals Placement of the NMP-640 Network Media Player On the Desk ... Mounted to the back of a display ... -
Page 7: Chapter 1 Introducing The Nmp-640
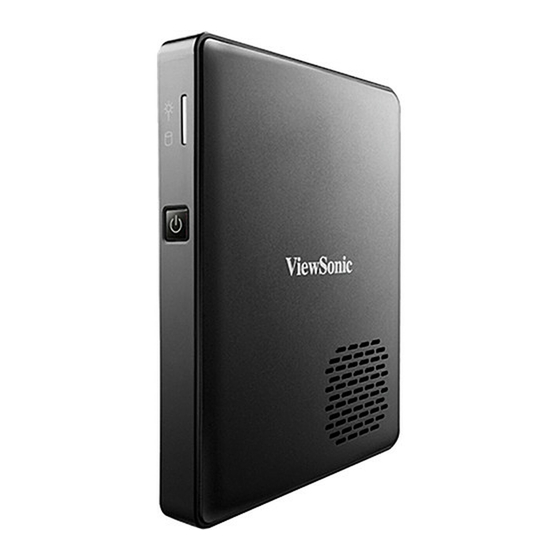
Chapter 1 Introducing the NMP-640 The NMP-640 Network Media Player is a compact and easy to use desktop. It features all the standard PC capabilities but with a slim body design which enables you to do spreadsheets, create documents, watch online content and browse the internet in a smarter and greener way. This chapter introduces NMP-640: ·... -
Page 8: Left/Right Side View
Introduction The NMP-640 features all the desktop capabilities but with a slim body design which enables you to browse the internet in a relaxed and comfortable way. 1-1 Left/Right side View 150.00mm 1-2 Front Side View Name SYS LED HDD LED Power Button NMP-640 Description... -
Page 9: Top Side View
1-3 Top Side View Name Microphone in Port Headphone out Port USB2.0/e-SATA Combo Multi-Function Card Reader 1-4 Back Side View Name Air vent Kensington Lock HDMI Port USB 2.0 Port D-Sub Port Network Port Power Input Port 1-5 Bottom View NMP-640 Description Connects to a microphone... -
Page 10: Chapter 2 Connecting Peripherals
Chapter 2 Connecting Peripherals In this chapter, the placement and the connection of some necessary peripherals will be introduced. This chapter includes the following information: · Placement of the NMP-640 Network Media Player · Connections of the NMP-640 NMP-640... -
Page 11: Placement Of The Nmp-640 Network Media Player
2-1 Placement of the NMP-640 Network Media Player 1. On the Desk Seat the unit in the desktop stand as shown to the right. 2. Mounted to the back of a display This is the best space-saving way. 1.Use four screws(M4*10, round head) to fasten the VESA mounting bracket to the back of the display. - Page 12 2. Fit the NMP-640 into the bracket with the power button located at the top for easy access. 3.Install top bar on the bracket. NMP-640...
-
Page 13: Connecting The Nmp-640 To A Monitor
2-2ConnectionofNMP-640 1. Connecting the NMP-640 to a monitor Connect to the monitor thru the VGA connector. 2.Connecting USB Devices Connect USB devices using the USB ports on the top or back, for example, mouse and keyboard. 3.Connecting the network cable Connect the LAN cable into the RJ-45 port with the other end connected to a hub or switch. -
Page 14: Connecting The Power Cord
4.Connecting the power cord Connect the power adapter to the power input port of the NMP-640, and push the power button to start it up. NMP-640... -
Page 15: Chapter 3 Bios Setup
This chapter provides a description of the BIOS setup utility. The BIOS setup menus and available selections may vary from those of your product. For specific information on the BIOS for your product, please contact ViewSonic ® . The BIOS setup utility provides a built-in Setup program, which allows the user to modify the basic system configuration and hardware parameters. -
Page 16: Mainmenu
MainMenu The BIOS Setup is accessed by pressing the <DEL> button after the Power-On Self-Test (POST) memory test begins and before the operating system boot begins. Once you enter the BIOS Setup Utility, the Main Menu will appear on the screen. The Main Menu provides System Over-view information and allows you to set the System Time and Date. -
Page 17: Advanced Menu
Advanced Menu ►Quick Boot If this item is set as Enabled, the system can be started within five seconds and some detection items will be ignored. The options are [Disabled] and [Enabled]. ►Quiet Boot To start the system quietly. (Full Screen Log display can be shut down) ►Onboard LAN Controller[Enabled] This item is used to enable or disable the Onboard LAN Controller. -
Page 18: Boot Menu
Boot Menu ►BootDevicePriority Press <Enter> to go to relative submenu. ►1stBoot Device These items are used to specify the boot sequence from the available devices. Security Menu ►ChangeSupervisorPassword Select this item to set or change the supervisor password. The Supervisor Password item on top of the screen displays the default Not Installed. -
Page 19: Exit Menu
►ChangeUser Password Select this item to set or change the user password. The User Password item on top of the screen displays the default Not Installed. After you have set a password, this item displays Installed. ►Clear User Password Select this item to delete the user password. Exit Menu ►Save Changes and Exit Exit system setup after saving the changes. -
Page 20: About Recovery Partition
CAUTION! Do not delete "recovery partition" in hard disk, otherwise your system can not be restored. If you encounter any problems during the recovery process, please bring your computer to any of ViewSonic agent center or call Customer Service for assistance. NMP-640... -
Page 21: Plan A
Plan A — Advanced Startup Options: 1. Turn on the master computer. 2. Press F8 before Windows starts. 3. Choose “Repair Your Computer”. Note: If Windows starts, you did not press F8 within the appropriate time allows. Shutdown the computer and try again. 4. - Page 22 5. Select the user you created and enter your password. 6. Select Reinstall Windows. NMP-640...
-
Page 23: Plan B
7. Click the Yes button to start the reinstallation of Windows using the image you placed in the recovery partition. Plan B — Recovery Console: 1. On the master computer, remove the DVD-ROM and USB hard drive and start the computer. 2. - Page 24 5. From the search results, launch the Recovery control applet. 6. Select the "Advanced recovery methods" option. 7. Select "Reinstall Windows" option. NMP-640...
- Page 25 8. Follow the on-screen instructions if you want to back up your files. Then the computer will restart. NMP-640...
- Page 26 9. Verify that the computer starts in Windows RE. 10. From the System Recovery Options dialog box, select a language and keyboard layout. NMP-640...
- Page 27 11. Click the Yes button to reinstall Windows using the image you placed in the recovery partition. Note: By selecting Yes, Windows will begin the reinstallation of Windows using the recovery image you created. NMP-640...
-
Page 28: Appendix-Frequentlyaskedquestions
12. Once the Windows Setup is complete, the PC will boot to OOBE. Complete Windows Welcome. Note: If you create a backup prior to the restore, you'll have the option to restore the backup. Note: Restore the system will not completely remove all data on the original disk, the system will automatically save the user files to the “Windows.old”... -
Page 29: Customer Support
Customer Support For technical support or product service, see the table below or contact your reseller. Note: You will need the product serial number. Country/ Web Site Region Australia/New www.viewsonic.com.au Zealand Canada www.viewsonic.com Europe www.viewsoniceurope.com Hong Kong www.hk.viewsonic.com India www.in.viewsonic.com www.viewsoniceurope. -
Page 30: Limited Warranty
3. A ny product exhibiting a condition commonly known as “image burn-in” which results when a static image is displayed on the product for an extended period of time. How to get service: 1. F or information about receiving service under warranty, contact ViewSonic Customer Support (please refer to Customer Support page). You will need to provide your product’s serial number. 2. To obtain warranted service, you will be required to provide (a) the original dated sales slip, (b) your name, (c) your address, (d) a description of the problem, and (e) the serial number of the product.
Need help?
Do you have a question about the VS13920 and is the answer not in the manual?
Questions and answers