Table of Contents
Advertisement
Quick Links
Contents
Safety .................................................................................................................... 3
Environment ........................................................................................................ 4
1 Getting Started ................................................................................................. 5
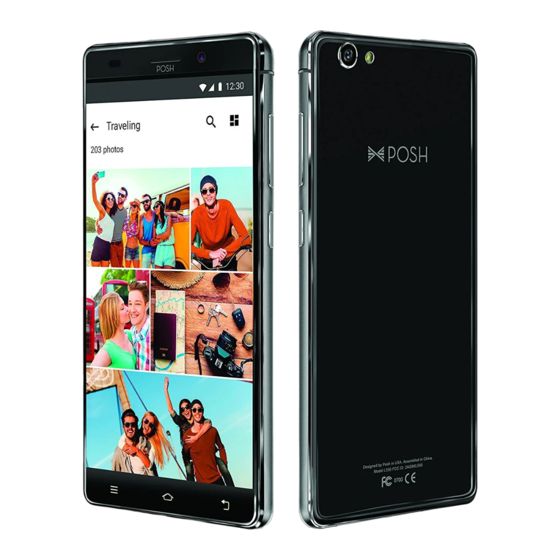
1.1 Getting to know your touch phone .................................................... 5
1.2 Installing the SIM card and storage card ........................................... 5
1.3 Charging the Battery .......................................................................... 5
1.4 Starting up the device......................................................................... 6
1.5 Status Icons ........................................................................................ 7
2 Using phone features ....................................................................................... 8
2.1 Turning the phone function on and off .............................................. 8
2.2 Making a call ..................................................................................... 9
2.3 Answering and Ending a call ............................................................. 9
2.4 In-call options .................................................................................... 9
2.5 Using call history ............................................................................. 10
3 Setting on your device .................................................................................... 11
4 ActiveSync ....................................................................................................... 14
5 Contacts .......................................................................................................... 17
6 Exchanging Messages .................................................................................... 19
7 Internet ........................................................................................................... 25
7.1 Ways of Connecting to the Internet ................................................. 25
7.2 Browser ............................................................................................ 25
8 Experiencing Multimedia .............................................................................. 27
8.1 Camera & Picture ............................................................................. 27
8.2 Music................................................................................................ 29
8.3 FM Radio ......................................................................................... 32
8.4 Voice Search ..................................................................................... 32
8.5 Sound recorder ................................................................................. 32
9 Other applications .......................................................................................... 32
1
Advertisement
Table of Contents

Related Manuals for Posh L550


Summary of Contents for Posh L550
-
Page 1: Table Of Contents
Contents Safety ........................3 Environment ......................4 1 Getting Started ....................5 1.1 Getting to know your touch phone ............ 5 1.2 Installing the SIM card and storage card ........... 5 1.3 Charging the Battery ................5 ... - Page 2 9.1 Calendar ................... 32 9.2 Alarm Clock ..................34 9.3 Calculator ..................35 SAR ........................36...
-
Page 3: Safety
Safety Never attempt to disassemble your phone. You alone are responsible for how you use your phone and any consequences of its use. As a general rule, always switch off your phone wherever the use of a phone is prohibited. Use of your phone is subject to safety measures designed to protect users and their environment. -
Page 4: Environment
manufacturers of such equipment will be able to give you any advice you may need in this area. Hospitals: Always make sure that your phone is switched off in hospitals when so instructed by warning signs or by medical staff. Road safety: Do not use your phone when driving. -
Page 5: Getting Started
1 Getting Started 1.1 Getting to know your touch phone 1.2 Installing the SIM card and storage card To install the SIM card Turn off the phone, pull out card slot. Add the SIM card according to instruction on the card slot. When you need to remove the SIM card, please shut down. -
Page 6: Starting Up The Device
Warning: • As a safety precaution, the battery stops charging before it overheats. 1.4 Starting up the device Power on/off To power off your phone, press & hold POWER. On release, the Phone options menu opens. Select ‘Power off’ and confirm. To power on again, press &... -
Page 7: Status Icons
2. Create Home screen shortcuts and widgets: • From the Home screen, touch the menu button to select ‘WIDGETS’, the widgets menu opens. • Select the widget you want to display on home screen, then touch & hold an application icon. It can be added to the Home screen; back to the home screen to see it. -
Page 8: Using Phone Features
Alarm is set Battery electric quantity Bluetooth is on Battery is charging Connected the PC Connected the earphone Read your notifications When you see a notification in the status bar, touch the bar and slide your finger down the screen to open the list of notifications displayed in the sliding window. Ongoing notifications report activities such as call forwarding ON, current call status, song playing. -
Page 9: Making A Call
1. Touch Settings > More… > Airplane mode. 2. Touch ‘Airplane mode’ to enable or disable. When you disable Airplane mode, the phone function is turned back on and the previous state of Bluetooth and WLAN are restored. Adjusting the volume Press Volume button on the side of the phone to show the volume screen. -
Page 10: Using Call History
this icon when Mute is on. 3. Hold: To put an active call on hold, select ‘Hold’ so it become regain. To resume the call, or take the call off hold, select it again so the bar is unfilled. If you take a call while already on a call, the first call will be placed on hold automatically. -
Page 11: Setting On Your Device
3 Setting on your device Control phone-wide settings from Settings. 3.1 Wireless & networks SIM cards You can select to activate or deactivate the SIM card you want to open. Set the default SIM to use Voice call, Messaging and Data connection. Wi -Fi Wi-Fi on/off: Select this check box if you prefer to use Wi-Fi for your data connection. - Page 12 Sound & notification Select one user profile and enter the following options: Vibrate: Select to have your phone vibrate for incoming calls. Volume: Select to open the volume control, and then slide your finger along the volume bar to set an incoming call ring volume or alarm, playing back music, videos.
- Page 13 application). 2. Disassociate the application with any actions. 3. Uninstall - If you’ve downloaded an application from Android Market, you will be able to uninstall it from this screen by selecting Uninstall. Development: If you are an application developer, you may be interested in these settings: 1.
-
Page 14: Activesync
3.4 System Date & time Set time, time zone, and date: Use Automatic unless you need to override the network values. Time format: Select from 12 or 24 hour formats. About phone View your phone Status: This screen lists a variety of information, including your phone number, the network you are currently using, the type of network, signal strength, whether you are roaming or not, any WLAN addresses you’re connected to, and more. - Page 15 have .When any of the applications are synchronizing, you will see the “sync” icon . You will also see the last time your data was synchronized. 3. By default, the personal information in Contacts will sync whenever you make a change or receive a new message. You can change this behavior: Auto-sync: When selected, Auto-sync will sync Contacts automatically, as you make changes or receive new messages.
- Page 16 settings screen, to make your phone undiscoverable. Name your Bluetooth device 1. Make sure you have turned Bluetooth on. 2. Select Settings > Bluetooth > Bluetooth settings > Device name. 3. Type the name for your device in the dialog box, and then select ‘OK’. 4.
-
Page 17: Contacts
5 Contacts The contacts on your phone are synced with your account contacts stored on the Web. To view the contacts on your phone, select Contacts. Contacts belonging to a specific group (you can choose which group) are listed in the Contacts tab. Only those contacts you star as “favorites” are listed in the Favorites tab. - Page 18 5. To save your contact, press BACK, or touch ‘Done’. Assign favorites Use Favorites as a way to display only those contacts you contact most frequently. To add a contact to Favorites: 1 From Contacts, touch the contact you want to add to Favorites to open the Contact details screen.
-
Page 19: Exchanging Messages
4. Send email to a contact: To send an email message to a contact, you must have an email address stored for them in their contact details. • Select the contact you want to email. Their Contact details screen opens. •... - Page 20 attachment, or if you address the message using an email address rather than a phone number. View the message from the message list Select a message thread in the list to open it for reading. When open, the individual messages appear stacked on the screen, much like with instant messaging conversations (or chats).
- Page 21 Delete all threads. Compose text and multimedia messages 1. Press ‘+’ icon to make ‘New message’. The Compose screen opens. 2. Add recipients by typing a name, phone number, or email address in the ‘To’ field. Matching contacts will appear. Select the recipient or continue typing. Add as many recipients as you wish.
- Page 22 notifications. Note that when you check a ring tone, it plays briefly. If you want your phone to vibrate when you receive a new message, select ‘Vibrate’ check box. 2. Text message settings Delivery reports: To receive a report on the delivery status of your message, select this check box.
- Page 23 4. If you want, select the Send email from this account by default check box. This setting only applies if you have more than one POP3 or IMAP account set 5. Select ‘Next’. If you have a popular email account, the application will set everything up for you! Before you go to your Inbox, you can name the account (if you don’t, your email address will be used).
- Page 24 From the Inbox: 1. Expand the Inbox to display the messages. 2. Touch & hold the message you want to delete. 3. Select ‘Delete’. 4. Your message is moved to the Trash. 6. Empty Trash: Once you’ve moved a message to the Trash, to empty messages in the Trash you must delete each message individually.
-
Page 25: Internet
7 Internet 7.1 Ways of Connecting to the Internet Your device’s networking capabilities allow you to access the Internet or your corporate network through WLAN, 4G (if SIM card supported). You can also add and set up a VPN or proxy connection. Wi-Fi Wi-Fi provides wireless Internet access over distances of up to 100 meters (300 feet). - Page 26 Open a new window: From a Web page, press the icon on the bottom-right. The Current windows screen opens, showing the Web page you started from, your home page opens in a new window. To return to one of the other windows, press the icon.
-
Page 27: Experiencing Multimedia
application installed on the phone. Warning! Applications downloaded from the Web can be from unknown sources. To protect your phone and personal data, only download applications from sources you trust, such as Android Market. 8 Experiencing Multimedia 8.1 Camera & Picture All the pictures you can capture or view on your phone are stored on memory card, which must be installed in your phone. - Page 28 hold the phone steady. Touch Camera button to capture. Continue to hold the camera steady for a second after you hear the shutter sound. 3. Immediately after capture, you can select to Save, Set as (contact icon or wallpaper), Share (via a compatible application), or Delete your picture. 4.
-
Page 29: Music
with the cropped area, select ‘Save’. 4. Set as contact picture: In full-screen view, press MENU and select Set picture as. From the menu that opens, select Contact icon. Your contact list opens. Select the contact you want to associate with the picture. Touch & hold an edge of the cropper to reveal the sizing arrows, then drag the edge in or out to size. - Page 30 the instructions below to add music to your memory card. 1. Mount your memory card to your computer by doing one of the following: Remove the memory card and insert it into a card reader attached to your computer; or, attach your phone to your computer using a USB cable that came in the box.
- Page 31 If a song is playing while you are on the Library screen, you can switch to the Playback screen quickly by selecting the lower song bar. Playlists You can create as many playlists as you wish. Note that the “Recently added” playlist is a system playlist and cannot be deleted or renamed.
-
Page 32: Fm Radio
2. Go to the screen that shows the artist, album, or song that you want to delete. 3. Touch & hold the item to open the context menu. 4. Select ‘Delete’. You will be asked to confirm that you want to delete the item from your memory card. - Page 33 previous/next month. Create new event- Touch & hold a day to open the context menu. Select ‘New event’. You can also press MENU and select ‘New event’. 2. Agenda view Events in the current month are shown vertically in a list, one event after the other.
-
Page 34: Alarm Clock
Edit an event - Assuming you have write privileges on an event, select Edit to edit it. Navigate within the current day - Slide your fingertip up/down. Navigate to a past or future day - Slide your fingertip left/right. Create new event - Touch an empty time slot to open the new Event details screen. -
Page 35: Calculator
alarms to open Alarm settings. Set the following options: Alarm: Select the check box to turn alarm on (checked) or off (cleared). This is the same check box that appears on the main Alarm Clock screen. Time: The time the alarm will go off is shown. To change this time, select Time to open the time selector. -
Page 36: Sar
This Model Meets International Guidelines for Exposure to Radio Waves. Your mobile device is a radio transmitter and receiver. It is designed not to exceed the limits, for exposure to radio waves recommended by international guidelines. These guidelines were developed by the independent scientific organization ICNIRP and include safety margins designed to assure the protection of all persons, regardless of age and health. - Page 37 Note2: Music player. File manager. FM all of volume control obey to this demand. USB with load 200mA The socket-outlet shall be installed near the equipment and shall be easily accessible. Correct Disposal of this product This marking indicates that this product should not be disposed with other household wastes throughout the EU.
- Page 38 The plug portion of the AC/DC adaptor is used as disconnect device. Therefore, the appliance should be placed near the socket outlet. Warning: Any Changes or modifications not expressly approved by the party responsible for compliance could void the user's authority to operate the equipment.
- Page 39 guarantee that interference will not occur in a particular installation. If this equipment does cause harmful interference to radio or television reception, which can be determined by turning the equipment off and on, the user is encouraged to try to correct the interference by one or more of the following measures: —Reorient or relocate the receiving antenna.
- Page 40 station antenna, the lower the power output. Before a new mobile phone is a available for sale to the public, it must be tested and certified to the FCC that it does not exceed the exposure limit established by the FCC, Tests for each phone are performed in positions and locations (e.g.
Need help?
Do you have a question about the L550 and is the answer not in the manual?
Questions and answers