Table of Contents
Advertisement
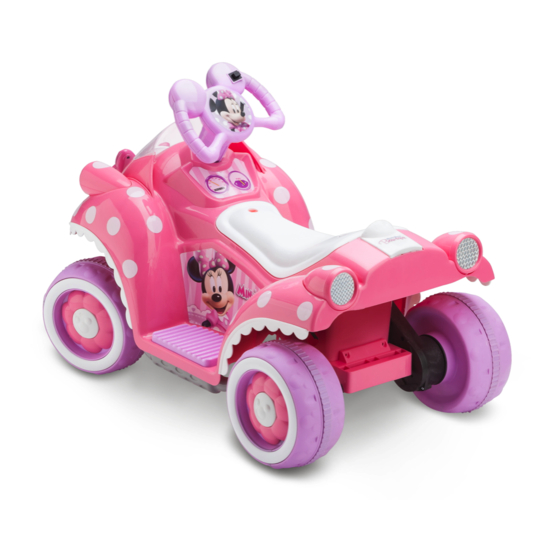
OWNER'S MANUAL
KT1123 / KT1123TGA /KT1123TR / KT1123KM
The owner's manual contains assembly, use and maintenance instructions.
The Minnie Quad must be assembled by an adult who has read and understands
the instructions in this manual. Keep the packaging away from children and dispose
of all packaging before use.
Styles and colors may vary • Made in China
Keep instructions for future reference.
Toddler Quad
©Disney
Advertisement
Table of Contents

Subscribe to Our Youtube Channel
Related Manuals for KID Trax Disney MINNIE KT1123


Summary of Contents for KID Trax Disney MINNIE KT1123
- Page 1 Toddler Quad OWNER’S MANUAL KT1123 / KT1123TGA /KT1123TR / KT1123KM The owner’s manual contains assembly, use and maintenance instructions. The Minnie Quad must be assembled by an adult who has read and understands the instructions in this manual. Keep the packaging away from children and dispose of all packaging before use.
- Page 2 Thank You For purchasing this Kid Trax Disney ride-on toy. We hope Your child will have years of riding enjoyment with our product. Please call Kid Trax Toys Consumer Relations at 877-741-6154 with comments or questions.
-
Page 3: Table Of Contents
Contents 1 Safety ..........1 Battery Warnings . -
Page 4: Safety
Safety WARNING! The following safety hazards may result in serious injury or death: • This product contains small parts that are for adult assembly only. Keep small children away when assembling. Remove and dispose of all protective material and poly bags before assembly. Be sure to remove all packaging materials and parts from underneath the vehicle body. -
Page 5: Battery Warnings
WARNING! The following safety hazards may result in serious injury or death: • Use of a battery or charger other than the supplied Kid Trax Toys 6V rechargeable battery and charger may cause a fire or explosion. Only use the supplied Kid Trax Toys 6V rechargeable battery and charger with the vehicle. -
Page 6: User Requirements And Warnings
USER REQUIREMENTS AND WARNINGS Age Range 18 months - 3 years Weight Range No more than 44 lb (20 kg) Before using the quad the child should understand the vehicle controls and safety issues. They must also demonstrate the capability to handle the vehicle and operate its controls. -
Page 7: Parts
Parts BODY PARTS Charger 6V 4AH battery Handlebar/steering rod Quad body Open Close Seat Front axle assembly Wheel cover (4) Wheels (4) Hubcaps (4) Figure 2.1 HARDWARE Rear axle Large washer Gear box pad Spanner Small washer (4) Nut (4) Figure 2.2... -
Page 8: Assembly
Assembly ATTACH THE FRONT AXLE ASSEMBLY ❶ Position the front axle assembly so the flat side is facing towards the front bumper. Figure 3.1 ❷ Slide the front axle assembly over the two tubes coming from underside of the front body. ❸... -
Page 9: Attach The Front Wheels
ATTACH THE FRONT WHEELS ❶ Using the spanner, remove the nut from the axle. Then remove the small washer. Note: Leave the large washer on the axle. ❷ Slide the wheel all the way onto the axle until it meets the large washer. Note: All the wheels are identical and can be placed on any axle. -
Page 10: Attach The Rear Axle And Gear Box Pad
ATTACH THE REAR AXLE AND GEAR BOX PAD ❶ Remove the locknut and small washer from the right hand side of the rear axle. Leave the large washers on the axle. Figure 3.3 ❷ Position the rear axle so the gear box end is on the side where the gear box is located. -
Page 11: Attach The Rear Wheels
ATTACH THE REAR WHEELS ❶ Slide the wheel all the way onto the axle until it meets the large washer. Note: All the wheels are identical and can be placed on any axle. Figure 3.4 ❷ Slide the small washer onto the end of rear axle. ❸... -
Page 12: Attach The Steering Wheel Assembly
ATTACH THE STEERING WHEEL ASSEMBLY ❶ Position the steering wheel so the Minnie Mouse ears are facing up. Figure 3.5 ❷ Place the steering rod and wire connector through the opening located on the front panel. Be sure the end of the steering rod is fully inserted through the hole in the front axle assembly. -
Page 13: Connect The Steering Wheel Wires
CONNECT THE STEERING WHEEL WIRES ❶ Carefully turn the quad over. ❷ Attach the wire connector coming from the bottom of the steering wheel assembly to wire connector attached to the underside of the quad body. Figure 3.6 ATTACH THE WINDSHIELD ❶... -
Page 14: Attach The Seat
ATTACH THE SEAT ❶ Insert the seat tabs into the seat slots, located at the back of the seat opening. Figure 3.8 ❷ Lower the seat into the quad body. Turn the locking screw clockwise until the lock is engaged. Open Close Open... -
Page 15: Using The Minnie Quad
11. Figure 4.1 ❷ Disconnect the red connectors. ❸ Plug the charger connector into the red connector from the battery. Important!: Only use the Kid Trax Toys charger included with the Quad (Input: AC 120V–, 0.2A, 60Hz Output: DC 7V, 0.8A). -
Page 16: Re-Charge Interval And Time
• Check the battery and charger (supply cord, connector) for wear and damage before charging. Do not charge the battery if damage has occurred. Only replace with a Kid Trax Toys 6V rechargeable battery and charger. The battery should be charged after each use, or if not used regularly, once a month at a minimum. -
Page 17: Battery Replacement And Disposal
Close dispose of them in landfills. Take it to a federal or state-approved lead acid battery recycler, such as a Kid Trax Toys authorized service center or your local automotive battery retailer. Do not throw the battery away with your regular household trash! ❻... -
Page 18: Operating The Controls
OPERATING THE CONTROLS Important! Before using the quad for the first time the battery needs to be charged for a full 12 hours. Note: Do not charge more than 18 hours. Only an adult who has read and understands the safety warnings should handle, charge or recharge of the battery. -
Page 19: Maintenance
Water will damage the motor, electrical system and battery. • Kid Trax Toys recommends that you take the vehicle to an authorized service center for periodic maintenance and service. Call Kid Trax Toys Consumer Relations at... -
Page 20: Troubleshooting Guide
Kid Trax Toys Consumer Relations. If you still need help resolving the problem please call 877-741-6154. Kid Trax Toys recommends that you take the vehicle to an authorized service center for periodic maintenance and service. Call the number listed above for the closest center to you. - Page 21 Problem Possible Cause Remedy Vehicle runs Battery low on power Recharge battery sluggishly or Battery is old Replace battery beeping occurs Vehicle is overloaded Reduce weight on vehicle Vehicle is being used in Operate the vehicle level ground and harsh conditions firm surfaces Vehicle needs a Poor contact of wires...
-
Page 22: Services, Repairs And Parts
Do not return this product to the place of purchase. If your Disney Minnie Mouse Toddler Quad needs service, repairs or replacement parts, call: Kid Trax Toys Consumer Relations Hours: 8:00 am – 5:00 pm (CST) Monday - Friday Phone: 877-741-6154 Email: customerservice@kidtraxtoys.com... -
Page 23: Warranty
1-800-858-2800, 24 hours a day; write to Kid Trax Consumer Relations Department, Kid Trax Toys, P.O. Box 344 Olney, IL 62450 or call 1-877-741-6154 from 8 a.m. to 5 p.m., Monday through Friday, CST. Proof of purchase is required, and shipping charges are the responsibility of the consumer. -
Page 24: Contact Information
In U.S.A. 2016 4902 Hammersly Rd. Madison, WI 53711 Customer Service: 877-741-6154 customerservice@kidtraxtoys.com www.kidtraxtoys.com FCC Information Warning: Any changes or modifications to this unit not expressly approved by the party responsible for compliance could void the user's authority to operate the equipment. NOTE: This equipment has been tested and found to comply with the limits for a Class B digital device, pursuant to part 15 of the FCC Rules.
Need help?
Do you have a question about the Disney MINNIE KT1123 and is the answer not in the manual?
Questions and answers
How can I order just the charger ?