Table of Contents
Advertisement
Advertisement
Table of Contents

Related Manuals for medi Pcs brio


Summary of Contents for medi Pcs brio
- Page 1 Operator’s Manual...
-
Page 3: Table Of Contents
Starting the session Pausing the session Completing the session Turning off the PCU Error screen Caring for your medi pcs brio system Storing the medi pcs brio Cleaning the medi pcs brio Troubleshooting & technical information Troubleshooting Warranty & return policy Safety warnings &... -
Page 4: Before You Get Started
Keep all packaging such as gangrene, untreated or infected wounds, recent materials in in the event that you must transport the medi skin graft, and dermatitis; known presence of malignancy in pcs brio. The packaging materials have been specifically the limb intended for treatment;... -
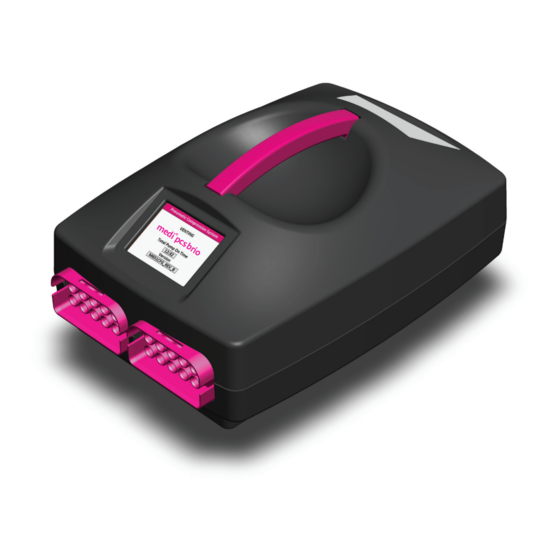
Page 5: The Medi Pcs Brio System
PCU to an electrical outlet. System assembly Step 1: When your medi pcs brio arrives, carefully unpack the NOTE: Garments should not be connected to the PCU until after contents and ensure that all equipment required to begin garments have been applied to the appropriate limbs to reduce operation is present. -
Page 6: Programming Treatment Settings
Patient Quick Start Guide for instructions on running a treatment session. Before using the medi pcs brio for the first time, ensure that a treatment area has been established for the patient so that he or she can easily access the PCU Graphical User Interface (GUI) at all times. - Page 7 The PCU is preloaded with default settings of a distal pressure of 50 mmHg and a step value of 3 mmHg, regardless of garment type. This compression profile is shown below in Example 1. Example 1: A 6-chamber garment (lower leg) where the distal pressure is set to 50 mmHg with a step value of 3 mmHg.
-
Page 8: Unlocking Settings
Step 8: Set up complete. Press after selecting beeper option to return to the Treatment Summary screen. The medi pcs brio is now ready to operate. Please review the settings displayed in the Treatment Summary screen to ensure that all settings have been entered correctly. -
Page 9: Patient Settings
Patient settings Record the patient’s settings here in the event that they must be reprogrammed: Patient Name: _____________________________________________________________________________ Language: ______________________________ Treatment time: ____________________________ Distal pressure: ______________________________ Access level: ____________________________ Step value: ______________________________ Beeper: ___________________________________ Programming treatment settings... -
Page 10: Garments
Garments Sizing Sizing Chart: Use to select the appropriate garment based on body measurements. All measurements in cm. Circumferences Size Item # Arm Length Wrist (C) Axilla (G) Short CSAR085M22 50-57 Regular CSAR085M26 58-66 14-42 21-57 Long CSAR085M29 66-74 Arm Garment Sizing Measurements Lower Leg Sizing Chart: Use to select the appropriate garment based on body measurements. -
Page 11: Introduction
Introduction The garments are air-chambered garments that are made Six or eight chamber garments can be used with the medi pcs of smooth, pliable fabric (100% nylon). They are designed to brio. fit the contours of the body by wrapping around the limb(s) and attaching with hook and loop fasteners. - Page 12 Leg garments Method B: Step 1: While sitting or lying down, undo the hook and loop material of the garment and open the it (4.5). Step 2: Place your foot in the foot section of the garment with your heel comfortably positioned in the (4.5) heel pocket (4.6).
-
Page 13: Connecting The Garments To The Pressure Control Unit (Pcu)
Connecting the garments to the pressure control unit (PCU) Unilateral treatment (treatment with one garment) Step 1: Locate the garment connector at the end of the hoses attached to the garment (5.1). The number of open ports will vary based on the garment model. -
Page 14: Conducting A Treatment Session
Step 1: Ensure that the garment(s) are properly connected to the PCU before beginning treatment. Step 2: Turn on the medi pcs brio by pressing the power switch on the back of the PCU (6.1). Once on, the Startup Venting screen will be displayed while the air chambers vent (6.2). -
Page 15: Pausing The Session
Turning off the PCU Press the power switch on the back of the PCU to turn off the medi pcs brio. Please note that the PCU inflation & deflation valves close while the PCU is turned off. If a garment is connected it will not be able to be deflated further until it is disconnected from the PCU or the PCU is turned on. -
Page 16: Caring For Your Medi Pcs Brio System
Caring for your medi pcs brio system Storing your system After treatment is complete and the PCU is turned off, unplug the power supply cord from the power outlet and from the PCU. Disconnect the garments from the PCU. Store the garments by first loosely coiling the hoses and garment connectors. Avoid kinking or crushing the hoses. Lay the garments flat in a cool, dry place for storage. -
Page 17: Troubleshooting & Technical Information
1. Check garment connection. Disconnect and reconnect garment entirely. longed duration attempting to 2. Check hoses and garments for leaks. If any component is found to have a leak, contact medi USA Customer Service. fill chamber (e.g. leak) 3. If Blocking Plate is not connected during unilateral treatment, connect Blocking Plate to PCU. -
Page 18: Warranty & Return Policy
Never attempt to perform maintenance or service the device while in use. To completely eliminate power, disconnect the power supply from the Pressure Control Unit or from the wall outlet. Warning:Electric Shock Hazard Unplug power supply from source and do not use medi pcs during electrical storms. Warning: Electric Shock Hazard To prevent electric shock, do not open the Pressure Control Unit. - Page 19 Children under the age of 18 should only use the system under adult supervision and direction of a physician. Caution: Single Patient Use Garments are intended for single patient non-ambulatory use only. Caution: Compatibility Use only the medi pcs power supply (GSM60B24), garments, and accessories with the medi pcs system. Troubleshooting & technical information...
- Page 20 Symbol Glossary Reference Symbol Title Standard Function Caution ISO 7000 / IEC 60417 Graphical symbols for use 0434A To indicate that caution is necessary when operating the on equipment device or control close to where the symbol is placed, or to indicate that the current situation needs operator awareness or operator action in order to avoid undesirable consequences.
-
Page 21: Specifications
ISO 13485, ISO 14971, IEC 62304 IEC/EN 60601-1-2, IEC/EN61000-3-2, IEC/EN 61000-3-3, FCC CFR 47; Part15; Subpart B, ICES 001; ISSUE 4, AS/NZS CISPR 11, JIS T 0601-1-2, ABNT NBR IEC 60601-1-2 LEGAL MANUFACTURER: medi USA, LP, 6481 Franz Warner Parkway, Whitsett, NC 27377, www.mediusa.com Made in USA Environmental Conditions Temperature: Operating Temperature: 41°F (5°C) –... -
Page 22: Electromagnetic Compatibility
WARNING: Portable RF communications equipment (including peripherals such as antenna cables and external antennas) should be used no closer than 30 cm (12 inches) to any part of the medi pcs, including cables specified by the manufacturer. Otherwise, degradation of the performance of this equipment could result. - Page 23 Guidance and Manufacturer’s Declaration – Electromagnetic Immunity The medi pcs is intended for use in the electromagnetic environment specified below. The customer or the user of the medi pcs should assure that it is used in such an environment. Electromagnetic...
- Page 24 To assess the electromagnetic environment due to fixed RF transmitters, an electromagnetic site survey should be considered. If the measured field strength in the location in which the medi pcs is used exceeds the applicable RF compliance level above, the medi pcs should be observed to verify normal operation. If abnormal performance is observed, additional measures may be necessary, such as re-orienting or relocating the medi pcs.
- Page 25 Guidance and Manufacturer’s Declaration – Electromagnetic Immunity The medi pcs is intended for use in the electromagnetic environment specified below. The customer or the user of the medi pcs should assure that it is used in such an environment. Electromagnetic...
- Page 26 RF wireless communications equipment the medi pcs The medi pcs is intended for use in an electromagnetic environment in which radiated RF disturbances are controlled. The customer or the user of the medi pcs can help prevent...
- Page 27 For other language translations, please visit www.mediusa.com.
- Page 28 USA 6481 Franz Warner Parkway Whitsett, NC 27377 info@mediusa.com T 800-633-6334 F 888-570-4554 mediusa.com PBO157 Rev A...
Need help?
Do you have a question about the Pcs brio and is the answer not in the manual?
Questions and answers
How do you deflate the boots?
To deflate Medi Pcs Brio boots, follow these steps:
1. Allow the system to complete the active treatment cycle. When the time reaches 00:00, the PCU will vent all air chambers automatically.
2. If the PCU is turned off, the inflation and deflation valves close, preventing further deflation.
3. To manually remove the garment, either slide your limb out or undo the hook and loop material.
4. If a garment remains inflated after turning off the PCU, disconnect it from the PCU to allow deflation.
This answer is automatically generated