
Subscribe to Our Youtube Channel
Related Manuals for Birlea HOUSTON


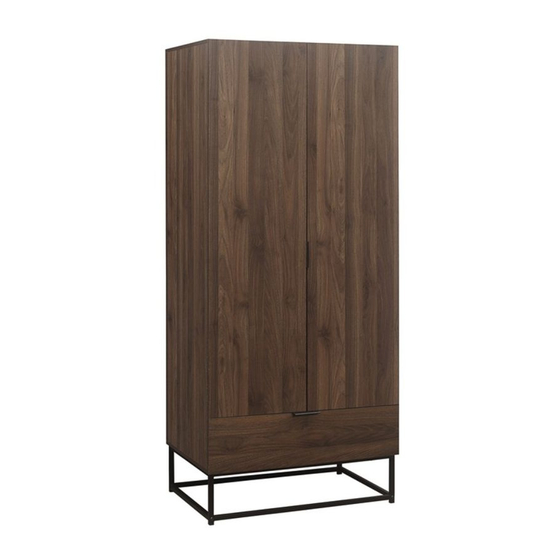
Summary of Contents for Birlea HOUSTON
-
Page 2: Health And Safety
ASSEMBLY INSTRUCTIONS HOUSTON 2 DOOR 1 DRAWER WARDROBE IMPORTANT : READ THESE INSTRUCTIONS CAREFULLY BEFORE ATTEMPTING TO ASSEMBLE OR USE YOUR HOUSTON 2 DOOR 1 DRAWER WARDROBE. PLEASE KEEP THESE INSTRUCTIONS FOR FUTURE REFERENCE. ASSEMBLY: Assembly should be carried out with this item laying flat, not standing upright. - Page 3 Vendor: S000350 Parts List Hardware List ( BOX 2 ) Part Descripion Part Description Top panel Cam lock Bottom panel Minifix screw Side panel ( Left ) Plastic cap Side panel ( Right ) M8 x 30mm Wood Dowel Middle panel M6 x 50mm CSK Cap Wood screw Door panel ( Left ) M3.5 x 16mm C.B Screw...
- Page 4 Vendor: S000350 Step 1: Prepare these parts for assembly using hardware parts A1, A2, B, D, H, M and O1. DO NOT use any power tools as this may damage the frame and will invalidate any claim. Page of 9...
- Page 5 Vendor: S000350 Step 2: Attach middle panel (5) and back bone (8) to side panel (3) using hardware A1 and A2 with a screwdriver (not provided). DO NOT use any power tools as this may damage the frame and will invalidate any claim. A3 x 6 Step 3: Insert back panel (9) along the slot.
- Page 6 Vendor: S000350 Step 5: Attach side panel (3) and (4) to top panel (1) using hardware A1 and A2 with a screwdriver (not provided). DO NOT use any power tools as this may damage the frame and will invalidate any claim. A3 x 4 Step 6: Attach bottom panel (2) to side panel (3) and (4) using hardware C and F.
- Page 7 Vendor: S000350 Step 8: Attach metal frame (15) to metal bone (16) using hardware F and J. DO NOT use any power tools as this may damage the frame and will invalidate any claim. J x 8 Step 9: Attach metal frame (15) to bottom panel (2) using hardware F and I. DO NOT use any power tools as this may damage the frame and will invalidate any claim.
- Page 8 Vendor: S000350 Step 11: Fix hardware G onto door panel (6) and drawer front (10) using hardware E with a screwdriver (not provided). DO NOT use any power tools as this may damage the frame and will invalidate any claim. G x 2 E x 4 Step 12: Attach door panel (6) and (7) to side panel (3) and (4) using hardware D with a screwdriver (not provided).
- Page 9 Vendor: S000350 Step 13: Attach drawer bone (14) to drawer front (10) and drawer back (11) using hardware A1 and A2 with a screwdriver (not provided). DO NOT use any power tools as this may damage the frame and will invalidate any claim. A3 x 2 Step 14: Attach the 1x Drawer Side (12) to the Drawer Front (10) and Drawer Back (11) using hardware L.
- Page 10 Ensure the head of any screw used has a diameter greater than the mounting hole and the fixing is safe and secure before use. Birlea Furniture advise you use the wall straps provided to further enhance the safety of this product.
Need help?
Do you have a question about the HOUSTON and is the answer not in the manual?
Questions and answers