Advertisement
Quick Links
Please give us a chance to make it right and do better !
Contact our friendly customer service department for help first.
Replacements for missing or damaged parts will be shipped ASAP !
US office: Fontana
UK office: Ipswich
DE office: Hamburg
FR office: Saint Vigor d'Ymonville
Contact Us!
Do NOT return this item.
AU office: Truganina
PL office: Gdańsk
US:cs.us@costway.com
UK:cs.uk@costway.com
AU:cs.au@costway.com
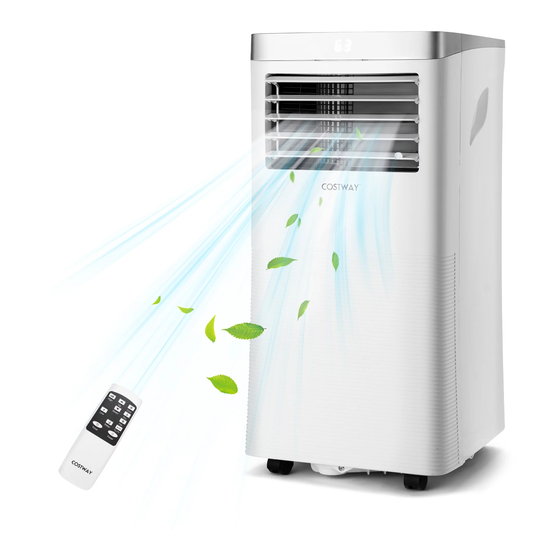
Portable Air Conditioner
THIS INSTRUCTION BOOKLET CONTAINS IMPORTANT SAFETY INFORMATION. PLEASE READ AND KEEP FOR FUTURE REFERENCE.
USER'S MANUAL
FP10123US
Advertisement

Subscribe to Our Youtube Channel
Summary of Contents for Costway FP10123US
- Page 1 DE office: Hamburg FR office: Saint Vigor d'Ymonville PL office: Gdańsk USER’S MANUAL Contact Us! Portable Air Conditioner FP10123US US:cs.us@costway.com Do NOT return this item. UK:cs.uk@costway.com AU:cs.au@costway.com THIS INSTRUCTION BOOKLET CONTAINS IMPORTANT SAFETY INFORMATION. PLEASE READ AND KEEP FOR FUTURE REFERENCE.
- Page 2 1. BEFORE YOU BEGIN 1.1 PRODUCT DESCRIPTION Our powerful portable air conditioners are great cooling solutions for single rooms, creating a comfortable atmosphere in your space. It also has ventilation and dehumidifying function for circulating air and removal of moisture. They're self-contained systems that do not require any permanent installation allowing you to move to the space in which it is most needed.
- Page 3 The appliance shall be disconnected from its power source during The unit shall be installed in accordance with national wiring ■ ■ service. regulations. Always operate the unit from a power source of equal voltage, Do not use means to accelerate the defrosting process or to ■...
-
Page 4: Installation
3.2 FEATURES 3. PRODUCT OVERVIEW √ High Capacity in a compact size with cooling, dehumidifying and 3.1 PRODUCT DIAGRAM fan function. √ Temperature setting and display √ LED Digital display √ Electronic control with built-in timer, sleep mode √ Self-evaporating system for better efficient √... - Page 5 4.2 Choose your location Step 1: ● If tipped more than 45°, allow the unit to set upright for at least 24 hours before start Connect the hose connector to one end of the exhaust hose. ● Place the unit on a firm, level surface in an area with at least 50cm (20’’) of free space around it to allow for proper air circulation.
- Page 6 5. OPERATION 5.1 CONTROL PANEL AND DISPLAY Step 5: Attach the hose connector to the exhaust air outlet of unit. POWER Press to switch the machine on or off. Press Mode button to switch the operation MODE mode between fan, cooling, and Step 6: dehumidifier.
- Page 7 5.2 REMOTE CONTROL 5.3.2 Operation mode The unit has four operation modes: Cool, dry, fan, sleep. A. Cooling your room Select the cool mode to lower the temperature in your room. Press MODE button repeatedly until the LED of COOL operation High Cool lights up.
- Page 8 D. Sleep mode (this function can only be used with a remote 5.3.4 Automatic Defrost control) At low room temperatures, frost may build up at the evaporator The sleep mode can be activated when in cool mode. during operation. The unit will automatically start defrosting and the POWER LED blinking.
- Page 9 ● Switch off the unit before The air filter requires regular cleaning. The air filter is removable for operating. easy cleaning. Do not operate the unit without an air filter, or the evaporator may be contaminated. ● Remove the plug of the water outlet opening, and keep it in safe 1.
-
Page 10: Troubleshooting
6.2 CLEANING UP OF REFRIGERANT √ Check the air filter ■ Clean the air filter The unit for dirt. as necessary. works with General Measures: reduced 1. Gas/vapor heavier than air. It may be accumulated in confined capacity. √ Check if the air duct ■... - Page 11 ATTENTION: √ Communication ■ Check the wire Error The evaporator inside the machine has to be dried out before the unit faults between main harness of the display Codes is packed to avoid component damage and molds. Unplug the unit PCB and display PCB.


Need help?
Do you have a question about the FP10123US and is the answer not in the manual?
Questions and answers