Table of Contents
Advertisement
Quick Links
Advertisement
Table of Contents

Related Manuals for Colorjet VASTRAJET K2


Summary of Contents for Colorjet VASTRAJET K2
- Page 2 This manual serves as the reference tool which guides their customers how to use or operate the VastraJet K2 machine without anyone else assistance. The information provided in this document ensures its uniqueness and language quality.
-
Page 3: Table Of Contents
6. Getting Familiar with Printer Manager Interface ....................28 Setting Menu ................................29 Feeding Password ..............................31 7. Printer Manager Operations ............................ 33 Setting the Print Origin ............................33 Setting MEDIA THICKNESS ............................34 Print Head Calibration ............................. 35 VastraJet K2 Page 2 of 73... - Page 4 Understanding the Belt Shifting Control ......................61 Belt Shifting Procedure ............................62 Glue Coating Layer .............................. 65 Environmental Maintenance ........................... 65 Daily Maintenance ..............................65 Weekly Maintenance .............................. 65 Monthly Maintenance ............................. 68 13. Troubleshooting ..............................69 VastraJet K2 Page 3 of 73...
-
Page 5: About Document
Infrared Heaters Operating Interface Touch screen Printing Interface USB 3.1 RIP Software Supported ErgoSoft / NeoStampa (Colorjet Editions) File Format JPEG, TIFF, BMP/PDF (RGB, CMYK) Power Supply 220 V, 105A Single/Three phase load distribution, 50Hz, Operating Conditions Temperature 18 to 28 C, Humidity: 35-80% RH (Non-... -
Page 6: Machine Overview
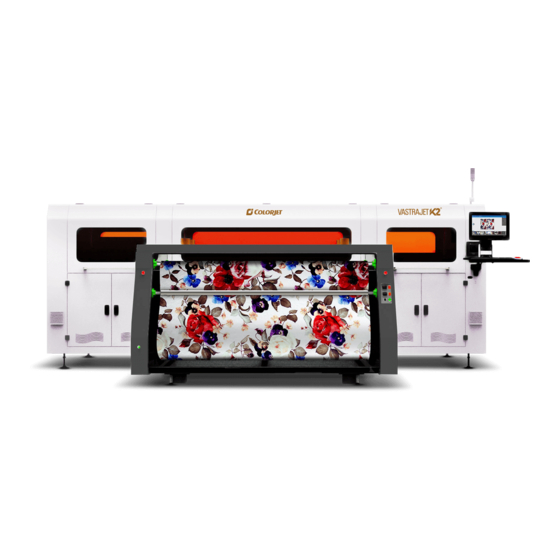
The Front View of the machine is shown in the image below: Front Cover Tower Light Monitor Right Cover Right Cover Keyboard Stand Wheel Leveller Conveyor Belt Washing Unit Fig 1: Displaying the Front View of the Machine VastraJet K2 Page 5 of 73... -
Page 7: Back View
BACK VIEW The Back View of the machine is shown in the image below: Fig 2: Displaying the Back View of the Machine VastraJet K2 Page 6 of 73... -
Page 8: Feeder Overview
DANCING ROLLER Fig 3: Displaying the Feeder Unit The Roller Adjustment Handle and Supply Shaft are shown in the image below: Roller Adjustment Handle Supply Shaft Fig 4: Displaying Different Parts of the Feeder VastraJet K2 Page 7 of 73... -
Page 9: Dryer Overview
FRONT ROLLER Fig 5: Displaying THE Different Parts of the Dryer The top view of the Dryer is shown in the image below: Air Shaft Fig 6: Displaying the Back View of the Dryer VastraJet K2 Page 8 of 73... -
Page 10: Getting The Printer Ready
Step 3: Check whether an Emergency button is pressed or not. If the Emergency button is pressed, then immediately release it. Step 4: Turn on the machine power by pressing the MC Power button, as shown below: Fig 7: Turn ON the Machine Power Button VastraJet K2 Page 9 of 73... - Page 11 Step 8: Check and change the fresh water in the head cleaning tray, if required. Step 9: Refill ink, if the low ink level alarm gets activated and starts sounding. The ink main tanks are shown below: Fig 9: Displaying the Main Tanks VastraJet K2 Page 10 of 73...
- Page 12 Fig 10: Enabling the Machine ONLINE Mode Step 14: After enabling the ONLINE mode, turn on print heater and washing system to activate the glue using the WASHING SYSTEM screen as shown below: Fig 11: Enabling the Print Dryer VastraJet K2 Page 11 of 73...
- Page 13 Step 26: Hold fabric till it reaches the take up (care it should not go into washing tub). Step 27: Wind the fabric into take up and set take up power. Step 28: Start printing. Now, the printer is ready for printing. VastraJet K2 Page 12 of 73...
-
Page 14: Signal Lamp Description
Need to Restart Orange Printer is Working Printer in working mode Green Printer is ON Blue Printer is ON The Signal Lamp is shown in the image below: Fig 13: Displaying the Signal Lamp VastraJet K2 Page 13 of 73... -
Page 15: Loading The Fabric
Step 4: Insert the shaft into the fabric roll. Step 5: After inserting the fabric roll, fill air into the shaft to fix the roll with shaft, as shown below: Air Filling Fig 15: Filling Air VastraJet K2 Page 14 of 73... - Page 16 Note: Please be careful while loading the fabric as there are chances of serious injuries (like pinching finger or hand). Step 8: Move the belt using the Belt Movement option available on the Back-HMI (Refer to Fig 16) until the fabric reached to the print origin. Now, the fabric is loaded successfully. VastraJet K2 Page 15 of 73...
-
Page 17: Refilling Ink
Note: Don’t shake ink bottles. The Ink Sub Tank is shown in the image below: Fig 19: Displaying the Ink Sub Tank Note: Low ink level alarm gets activated when ink level goes down. VastraJet K2 Page 16 of 73... -
Page 18: Hmi Operations
READY TO PRINT P. DRYER 2 P. DRYER 2 BELT MOVEMENT C-TEMP C-TEMP ON LINE P. DRYER 2 P. DRYER 2 C-TEMP C-TEMP WASHING SYSTEM P. DRYER 2 P. DRYER 2 C-TEMP C-TEMP WASHING SYSTEM Continue VastraJet K2 Page 17 of 73... - Page 19 BELT MOVEMENT AUTO REV MANUAL REV ON LINE MANUAL FWD AUTO FWD SPEED WASHING SYSTEM BRUSH OFF SPEED TUB OUT BELT DRYER OFF PRINT JETTING PUMP DRYER OFF RESUME READY TO PRINT PRINT STOP START VastraJet K2 Page 18 of 73...
- Page 20 The Back-Control Panel Operational flow diagram is shown in the image below: BACK HMI SOAKING PRESS BELT PRESS ROLL ROLLER LOW MOVEMENT MOVEMENT HIGH POS SPEED AUTO REV/FWD PRESS ROLL SOAKING LOW POS AUTO ROLLER MANUAL LOW POS REV/FWD AUTO MANUAL MANUAL VastraJet K2 Page 19 of 73...
-
Page 21: Main Menu (Front Hmi)
• Washing System Set: Turn ON or OFF washing system units and their settings like brush movement, tub out, print dryer off, belt dryer off and jetting pump off. VastraJet K2 Page 20 of 73... -
Page 22: Purging Ink
Ink Circulation Fig 21: Displaying the INK PURGING Screen In the above screen, user can view the ink circulation button for each color. The Ink circulation enables to remove air from print head ink pipes. VastraJet K2 Page 21 of 73... -
Page 23: Service Screen
To control the belt movement, touch the BELT MOVEMENT icon on the MAIN MENU screen (Refer to Fig 20). The BELT MOVEMENT screen appears as shown below: Display the belt speed Fig 23: Displaying the BELT MOVEMENT Screen VastraJet K2 Page 22 of 73... -
Page 24: Setting Belt Speed
To set the belt speed, touch the SPEED icon on the BELT MOVEMENT screen. The Numeric Keypad appears on the BELT MOVEMENT screen, as shown below: Fig 24: Setting the Belt Speed Enter the belt speed using the Numeric Keypad and touch the Enter button to set the belt speed. VastraJet K2 Page 23 of 73... -
Page 25: Setting Washing Unit
PRINT DRYER: Turn ON or OFF the print dryer. The above screen is used to run the wash cycle by enabling all the options and run the belt in auto mode (using the BELT MOVEMENT screen Fig 23). VastraJet K2 Page 24 of 73... -
Page 26: Controlling Dryer Settings
Note: Default dryer settings are fed. User can update the dryer temperature setting as per the type of fabric and design. Using the above screen, user can also update the washing system settings (refer to the WASHING SYSTEM screen). VastraJet K2 Page 25 of 73... -
Page 27: Online Mode
Using the above screen, user can also open the READY TO PRINT screen simply by touching the Ready To Print icon (Refer to the CONTROLLING DRYER SETTING section). BACK HMI SCREEN The Back HMI Start Up Screen is shown as below: Fig 28: Displaying the Start Up Screen from the Back VastraJet K2 Page 26 of 73... - Page 28 On clicking the Press Roll LOW Pos Icon Screen 2 Screen 1 Case 2: On click the Press Roll Movement icon in Screen 1. The Screen 2 appears, as shown below: Screen 1 Screen 2 VastraJet K2 Page 27 of 73...
-
Page 29: Getting Familiar With Printer Manager Interface
Job Preview Shows the preview of the selected job as well as printing status progress in this area. Job List Displays the thumbnail preview of added jobs. Error message Displays the system generated error messages. VastraJet K2 Page 28 of 73... -
Page 30: Setting Menu
SETTING MENU The Setting window with the Printer tab is shown in the below image: Fig 30: Displaying the Setting Window VastraJet K2 Page 29 of 73... - Page 31 The Move tab is shown in the image below: Fig 31: Displaying the Move Tab The Preference Tab is shown in the image below: Fig 32: Displaying the Preference Tab Note: Unit value can be changed using the Unit drop down list. VastraJet K2 Page 30 of 73...
-
Page 32: Feeding Password
Step 3: After feeding the time password, click on the Set button to set the password (Refer to Fig 34). Step 4: Now the time password gets set, click on the Exit button to close the window (Refer to Fig 34). VastraJet K2 Page 31 of 73... - Page 33 Note: When “First Warning” appears, kindly contact Head Office with the following screen: • Password Screen (Refer to Fig 34) • About Screen Fig 35: Displaying the About Screen VastraJet K2 Page 32 of 73...
-
Page 34: Printer Manager Operations
Fig 38: Displaying the Origin Value Now, the printing origin gets set. Additionally, you can also directly enter the print origin value in the Origin X field under the Print Parameter section. VastraJet K2 Page 33 of 73... -
Page 35: Setting Media Thickness
After updating the value, please perform the bi-direction calibration and correct it, if required. Note: Please don’t disturb other settings on the above window (Fig 40). VastraJet K2 Page 34 of 73... -
Page 36: Print Head Calibration
To perform the nozzle check, click on the Nozzle Check icon on the Quick Access Toolbar as shown below: Fig 41: Performing the Nozzle Check Th print of nozzle check gets started. The Nozzle Test print is shown in the image below: Fig 42: Displaying the Nozzle Check Result VastraJet K2 Page 35 of 73... -
Page 37: The Calibration Wizard
The Calibration Home Page screen appears. Click the Next button and user redirects to the Mechanical Inspection screen as shown below: Fig 44: Displaying the Calibration Wizard Note: The Mechanical Inspection section is only done by the service engineer. VastraJet K2 Page 36 of 73... - Page 38 When the Next button is pressed, you are redirected to the software calibration screen, as shown in the below images: Fig 45: Displaying the Printer Calibration Options VastraJet K2 Page 37 of 73...
-
Page 39: Horizontal Calibration
“-10” which means you need subtract 10 to correct the bi-direction value. Sometimes, the correction value can either positive or negative. If the correction value is positive, then you need to add it in the current bi-direction adjust value or subtract the same if negative. VastraJet K2 Page 38 of 73... - Page 40 “0” position, but at some other point on the calibration scale. The position at which the test head aligns perfectly with the reference head, indicates the error in position. The Left and Right Calibration checks are shown in the image below: Fig 47: Displaying the Horizontal Left and Right Checks VastraJet K2 Page 39 of 73...
-
Page 41: Step Calibration
Note: If lines are not matching exactly in one line in any of the numbers in the printed pattern. Then, we have to select decimal values between two nearest matching numbers. For example, nearest matching values are 0 and 1 then we can select in between 0.1 and 0.9. VastraJet K2 Page 40 of 73... -
Page 42: Setting Print Parameters
Fig 51: Clicking on the Add Job Button The Open window appears on the screen. Step 2: Navigate to the location where the image file with extension “.prt” and “.prn” is stored (Refer to Fig 52). VastraJet K2 Page 41 of 73... - Page 43 Step 3: Click on the Open button to add the file into the Job List area, as shown below: Fig 52: Adding the Job Now, the selected image appears in the Job List area, as shown below: Fig 53: Displaying the Added Job and Their Details VastraJet K2 Page 42 of 73...
-
Page 44: Editing Job
Step 4: Select the desired checkbox in front of the Clip, Reverse Print, and Tile options. On clicking to any option, its related parameters get appeared on the right pane and you can edit them as per the requirements. In our case, we have selected the Clip checkbox. VastraJet K2 Page 43 of 73... - Page 45 Copies: Feeding any number of copies will repeat the prints in the Y direction. Careful, the Print will stop and restart after each copy. • Foot note: You can add footnote printing with each printed image. • Ink Reduction: Reduce the usage of ink. VastraJet K2 Page 44 of 73...
-
Page 46: Ripping And Printing
Fig 58: Displaying the Printing Details DPI AND MODE There are different combination of print modes and resources, as shown through the table: Print DPI Print Passes 540x720 540x1080 540x1440 VastraJet K2 Page 45 of 73... -
Page 47: Pausing And Canceling Printing
Similarly, you can abort the process by right clicking on the selected Job in the Job List area and select the Abort Job option from the context menu. Note: Keyboard shortcut for pausing and resuming is Ctrl+TAB. VastraJet K2 Page 46 of 73... -
Page 48: Head Cleaning
Head wiping refers to the process in which the head surface area is cleaned for better printing result and quality. In VastraJet K2, the Auto Wiping option is available to clean the head surface area. The Auto Wiping option is shown in the image below:... -
Page 49: Setting Wiping And Capping Height
Head purging refers to the method in which heads are cleaned by forcing pressurized ink through the nozzles. In VastraJet K2, user can perform the head purging using the front HMI. To purge, touch the Ink Purging icon on the Main Menu screen. -
Page 50: Head Spraying
Head spraying is used to avoid mixing of colors during the head purging and wiping process. This method can help to open head nozzles, if few nozzles are blocked. To perform head spraying, click on the Spray button available under the Quick Access Toolbar, as shown below: Fig 64: Displaying the Spray Button VastraJet K2 Page 49 of 73... -
Page 51: Switch Off Procedure
Step 8: Insert the bracket to hold the press roller in the UP position, as shown below: Fig 66: Holding the Press Roller in the Up Position Step 9: Cover the printer to avoid dust particles on the machine parts. Now, the printer is switch off. VastraJet K2 Page 50 of 73... -
Page 52: Glue Coating
• Cleantek: Approx. 4 Ltrs • Solvtek : Approx. 10 Ltrs Note: Actual consumption depends on the work load, fabric type, and the maintenance. Generally, shelf life for these chemicals is approx. 4 years. VastraJet K2 Page 51 of 73... -
Page 53: Glue Process Preparation
Step 1: Keep the ventilators and exhaust fans ready. Step 2: Remove the fabric, if any. Step 3: Run the Wash Cycle from HMI, simultaneously belt can be cleaned by wiping with cloth. Fig 67: Running the Wash Cycle VastraJet K2 Page 52 of 73... - Page 54 Fig 69: Using Safety Precautions Step 6: Keep ready the following items: • Glue container(500-600ml), whichever required • Home cleaner liquid spray • Pouring container • Waste bin • Woven cotton bud sticks (for spreading the glue) VastraJet K2 Page 53 of 73...
- Page 55 TUB OUT option appears Step 2: Place the Glue Applicator unit on the given studs in the front of the machine, as shown below: Right Left Fig 70: Placing the Glue Applicator Unit VastraJet K2 Page 54 of 73...
- Page 56 Step 4: Pour 70% glue equally in front of the Glue Applicator unit and leave the 10cm from both edges. Step 5: Let the two persons firmly hold the handle of the Glue Applicator unit, so that it doesn’t move. VastraJet K2 Page 55 of 73...
- Page 57 Step 13: Leave machine idle for 4 hours to let glue dry and set. (Next glue coat has to be done only after resting period of 4 hours) Above process has to be repeated for every glue coat process. VastraJet K2 Page 56 of 73...
- Page 58 Step 2: Wipe cloth or paper towel with purified water. Place wipe clothes on belt to cover belt. Fig 75: Wiping the Belt Step 3: Pour cleaner liquid (Solvtek) onto wipe clothes. Fig 76: Pouring Cleaner Liquid VastraJet K2 Page 57 of 73...
- Page 59 Step 9: After clean up the part, turn belt and repeat cleaning until clean up over all. Remove cover sheet which covers washing unit. Step 10: Finally, remove remained cover sheets, and keep the belt dry. Fig 79: Removing the Cover Sheet VastraJet K2 Page 58 of 73...
-
Page 60: Do's And Don't
4. Don’t manually move the carriage over the capping station when printer is OFF. 5. Don’t print when glue layer is not smooth/peeled OFF. 6. Don’t leave the tub in while switching off the machine (always switch off the print engine). VastraJet K2 Page 59 of 73... -
Page 61: Maintenance
• Don’t use wrinkled or non-ironed fabric roll, as wrinkle on fabric can cause accidents like entangling of fabric with head base. • Don’t use expiry ink and store the ink at recommended environment. VastraJet K2 Page 60 of 73... -
Page 62: Belt Maintenance
(half of last rotated degree performed in step ii of point a). Note: While performing the above process patience is required and need to repeat the process, until the belt shifting is controlled. VastraJet K2 Page 61 of 73... -
Page 63: Belt Shifting Procedure
Note: While performing the belt shifting control process, user needs patience and carefully observe the shifting. Step 3: Tight or loose the belt adjustment side screws to adjust the belt shifting as per requirements, as shown below: Step 1 Step 2 Fig 81: Displaying the Belt Shifting Control Screw VastraJet K2 Page 62 of 73... - Page 64 Note: In VastraJet K2, two belt adjustment handles are available on both sides (left and right) from the back of the machine. This is advisable that user needs to use only one side belt adjustment handle for controlling the belt shifting.
- Page 65 1 and then tight screw 2 as per the requirement. After adjusting the belt shifting, move the belt and carefully observe the belt movement. Screw 1 Screw 2 Fig 83: Controlling Belt Shifting from Right VastraJet K2 Page 64 of 73...
-
Page 66: Glue Coating Layer
Don’t run the wash cycle until the glue gets dry (after glue coating, wait for 3 or 4 hours). • Always use the clean water (50-150 rpm) for the washing system. • Don’t forget to clamp the water pipes before starting the wash cycle. VastraJet K2 Page 65 of 73... - Page 67 Step 1: Lower down the tub by following the screens; Main MenuWashing System Set Tub IN, as shown below: Fig 84: Displaying the Washing System Screen Step 2: Remove Allen screws from both sides to remove the tub. Fig 85: Removing Screws VastraJet K2 Page 66 of 73...
- Page 68 • Clean the jetting pipe nozzles thoroughly to get rid from fabric threads. Step 3: After completing the cleaning process, fix the washing tub by tightening both the Allen screws (refer to step 87). VastraJet K2 Page 67 of 73...
-
Page 69: Monthly Maintenance
LM guide should be wiped monthly. • Cleaning the floor particularly the area near the water tank and washing tub. • Encoder strip should be cleaned gently with wet tissue paper, on weekly basis. VastraJet K2 Page 68 of 73... -
Page 70: Troubleshooting
Vacuum pump connector is loose/open from relay. FABRIC NOT STICKING TO BELT • Glue heater is not ON or not working. • Glue coating layer needs the new glue coating. • Belt layer is full of dust/threads need manual cleaning/wiping. VastraJet K2 Page 69 of 73... - Page 71 PRINT STOPS IN BETWEEN PRINTING • USB cable is loose / faulty. • Image files are heavy in size. • Ground wire is disconnected. • Encoder strip is having ink stains/scratches. • Ripped file is having error. VastraJet K2 Page 70 of 73...
- Page 72 Incorrect resolution is selected. • X div is selected "High Speed" instead of "High Precision". LINES IN PRINTS • Nozzle blocked in heads (check nozzle test). • Incorrect feed step (calibration required). • Belt motor coupling loose. VastraJet K2 Page 71 of 73...
- Page 74 For Any Query Please Contact Us www.colorjetgroup.com Call us on +91-120-4548195 Email on info@colorjetgroup.com For Ink Enquiry:- sales@colorjetgroup.com...
Need help?
Do you have a question about the VASTRAJET K2 and is the answer not in the manual?
Questions and answers
Is this textile printing machine, directly prints on fabric with pre/post treatment on fabric same as sublimation machine?
Yes, the ColorJet K2 textile printing machine is a Direct to Fabric printer, which means it prints directly on fabric and typically involves pre- and post-treatment processes, unlike sublimation machines that transfer designs via heat without printing directly on the fabric.
This answer is automatically generated