Table of Contents
Advertisement
Available languages
Available languages
Quick Links
Milo
™
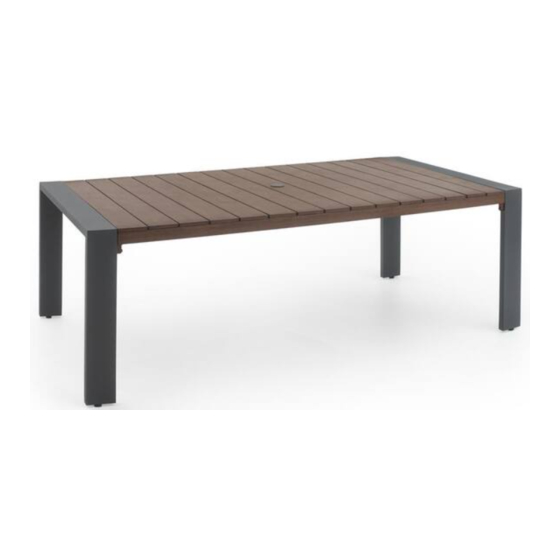
Dining table
Model: OP-PETS9045-MILO-G-TABLE / OP-PETS9045-MILO-E-TABLE
ASSEMBLY INSTRUCTIONS
IMPORTANT, RETAIN FOR FUTURE REFERENCE.
READ CAREFULLY.
For assistance with assembly or customer service,
call 1-877-924-2090 (English) Monday-Friday, 8 a.m. to 5 p.m. Mountain Time, North America. Email:
customerservice@rvstbrands.com or visit our website at www.rstbrands.com
Advertisement
Table of Contents

Subscribe to Our Youtube Channel
Summary of Contents for Milo OP-PETS9045-MILO-G-TABLE
- Page 1 Milo ™ Dining table Model: OP-PETS9045-MILO-G-TABLE / OP-PETS9045-MILO-E-TABLE ASSEMBLY INSTRUCTIONS IMPORTANT, RETAIN FOR FUTURE REFERENCE. READ CAREFULLY. For assistance with assembly or customer service, call 1-877-924-2090 (English) Monday-Friday, 8 a.m. to 5 p.m. Mountain Time, North America. Email: customerservice@rvstbrands.com or visit our website at www.rstbrands.com...
-
Page 2: Parts List
PARTS LIST PICTURE PART DESCRIPTION QTY. Table top Table legs Bolt (M6*45) Bolt (M6*50) Bolt (M8*35) Nut (M6) Washer (ø13*6.5*1.0) Washer (ø15*8.5*1.0) #4 Allen wrench #5 Allen wrench #5 Hexagonal wrench... - Page 3 ATTACH TABLE LEGS- With table (A) upside down, position table legs (B) on both Step 1. sides of the table. Attach the legs (B) through the furthest holes located on the outside of the table with washers (H), bolts (E), and #4 allen wrench (J).
- Page 4 ATTACH TABLE LEGS- Secure the table legs (B) further by inserting bolts (C) and Step 2. washers (G) into the holes located just inside of the outside bolts. Use #5 allen wrench (I).
- Page 5 ATTACH TABLE LEGS- Insert final bolt (D) with washer (G) through the legs (B) into the Step 3. table (A). Use washer (G) and nut (F) to sercure the bolt on the inside of the table. Use allen wrench #5 (I) and hexagonal wrench (K) to tighten.
-
Page 6: Care And Maintenance
Care and Maintenance All outdoor furniture is subject to UV rays and weather elements. In order to keep your furniture as long lasting and vibrant as possible, we advise using furniture covers or storing the furniture when not in use. For more information about the materials used to make our furniture please visit www.rstbrands.com/details-landing WICKER Simply washing your wicker with a mild detergent and... - Page 7 Milo ™ Dining table Model: OP-PETS9045-MILO-G-TABLE / OP-PETS9045-MILO-E-TABLE ASSEMBLY INSTRUCTIONS IMPORTANT, RETAIN FOR FUTURE REFERENCE. READ CAREFULLY. For assistance with assembly or customer service, call 1-877-924-2090 (English) Monday-Friday, 8 a.m. to 5 p.m. Mountain Time, North America. Email: customerservice@rvstbrands.com or visit our website at www.rstbrands.com...
- Page 8 Parts IMAGE RÉFÉRENCE DESCRIPTION QTE. Dessus de table Pattes de table Boulon (M6*45) Boulon (M6*50) Boulon (M8*35) Écrous (M6) Rondelle (ø13*6.5*1.0) Rondelle (ø15*8.5*1.0) #4 Clé Allen #5 Clé Allen #5 Clé Hexagonale...
- Page 9 ATTACHEMENT DE PATTES DE TABLE- Avec la dessus de table (A) à l’envers, posi- tionner les pattes de la table (B) des deux côtés de la table. Attacher les pattes (B) à Étape 1. travers les trous les plus éloignés situés à l'extérieur de la table avec des rondelles(H), des boulons (E), et la #4 clé...
- Page 10 ATTACHEMENT DE PATTES DE TABLE- Fixer les pattes de la table (B) plus en insérant Étape 2. des boulons (C) et rondelles (G) dans les trous situés juste à l'intérieur des boulons extérieurs. Utiliser la # 5 clé Allen (I).
- Page 11 ATTACHEMENT DE PATTES DE TABLE- Insérer le boulon final (D) avec la rondelle (G) à travers les pattes (B) dans la table (A). Utilisez la rondelle (G) et l'écrou (F) pour fixer Étape 3. le boulon à l'intérieur de la table. Utiliser la #5 clé Allen (I) et la clé hexagonale (K) pour serrer.
-
Page 12: Soins Et Entretien
Soins et Entretien Tout mueble à l’extérieur est soumis aux rayons UV ainsi qu’aux éléments météorologiques. Afin de préserver vos meubles aussi longtemps et aussi vibrants que possible, nous vous conseillons de les couvrir ou de les garder à l’intérieur lor- squ’ils ne sont pas utilisés. - Page 13 Milo ™ Mesa de comedor Modelo: OP-PETS9045-MILO-G-TABLE / OP-PETS9045-MILO-E-TABLE MANUAL DE INSTRUCCIONES Y ENSAMBLE IMPORTANTE, RETENER PARA FUTURAS CONSULTAS. LEA CUIDADOSAMENTE Para asistencia con el ensamblaje e instalación de las partes y servicio al cliente llame: 1-877-924-2090 (Inglés) Lunes-Viernes 8 a.m- 5 p.m. Hora de la Montaña, Norte América.
- Page 14 LISTA DE PARTES IMAGEN DESCRIPTIÓN (PARTE) CANT. Superficie de la mesa Patas de la mesa Perno (M6*45) Perno (M6*50) Perno (M8*35) Tuerca (M6) Arandela (ø13*6.5*1.0) Arandela (ø15*8.5*1.0) #4 Llave Allen #5 Llave Allen #5 Llave hexagonal...
- Page 15 ENSAMBLAR LAS PATAS DE LA TABLE- Con la superficie de la mesa (A) boca abajo, coloque las patas de la mesa (B) en ambos lados de la mesa. Sujete las patas (B) a través Paso 1. de los orificios más alejados ubicados en el exterior de la mesa con arandelas (H), pernos (E) y una llave Allen # 4 (J).
- Page 16 ENSAMBLAR LAS PATAS DE LA TABLE - Asegure aún más las patas de la mesa (B) Paso 2. insertando los pernos (C) y arandelas (G) en los orificios ubicados justo dentro de los pernos exteriores. Use la llave Allen # 5 (I).
- Page 17 ENSAMBLAR LAS PATAS DE LA TABLE - Inserte el perno final (D) con la arandela (G) a través de las patas (B) en la mesa (A). Use la arandela (G) y la tuerca (F) para asegurar Paso 3. el perno en el interior de la mesa. Use la llave Allen # 5 (I) y la llave hexagonal (K) para apretar.
-
Page 18: Cuidados Y Mantenimiento
Cuidados y Mantenimiento Todo mobiliario al aire libre está sujeto a los rayos ultravioleta y las inclemencias me- teorológicas. Para que sus muebles duren y los colores se mantengan tan vibrantes como sea posible, aconsejamos cubrirlos o guardarlos cuando no estén en uso. Para obtener más información acerca de los materiales utilizados para fabricar nuestros muebles visite: www.rstbrands.com/details-landing MIMBRE...
Need help?
Do you have a question about the OP-PETS9045-MILO-G-TABLE and is the answer not in the manual?
Questions and answers