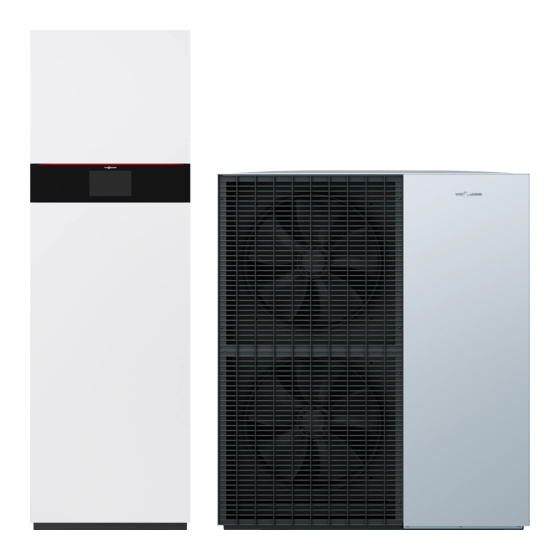
Viessmann VITOCAL 151-A Installation And Service Instructions Manual
Air source heat pump, monoblock version for heating and cooling operation, with 1 integrated heating/cooling circuit
Hide thumbs
Also See for VITOCAL 151-A:
- Installation and service instructions manual (192 pages) ,
- Manual (24 pages) ,
- Service instructions manual (200 pages)
Table of Contents
Advertisement
Advertisement
Table of Contents

Subscribe to Our Youtube Channel
Related Manuals for Viessmann VITOCAL 151-A


Summary of Contents for Viessmann VITOCAL 151-A
- Page 1 VIESMANN Installation and service instructions for contractors Vitocal 151-A Type AWOT(-M)-E-AC/AWOT(-M)-E-AC-AF 151.A Air source heat pump, monoblock version for heating and cooling operation, with 1 integrated heating/cooling circuit VITOCAL 151-A Please keep safe. 6171817 GB 11/2021...
- Page 2 Safety instructions Safety instructions Please follow these safety instruc- tions closely to prevent accidents and material losses. Safety instructions explained Danger Note This symbol warns against the risk Details identified by the word "Note" of injury. contain additional information. Please note The outdoor unit contains easily flamma- This symbol warns against the risk ble refrigerant in safety group A3...
- Page 3 Safety instructions Safety instructions (cont.) Regulations to be observed National installation regulations Relevant country-specific safety regu- ■ ■ Statutory regulations for the prevention lations ■ of accidents Applicable regulations and guidelines ■ Statutory regulations for environmental for operation, service, maintenance, ■...
- Page 4 Safety instructions Safety instructions (cont.) Do not remove, block or bridge safety Please note ■ equipment. Electronic assemblies can be dam- Do not make any changes: aged by electrostatic discharge. ■ Do not modify the outdoor unit, inlet/ Before beginning work, touch outlet lines, electrical connections/ earthed objects, such as heating or cables or the surroundings.
- Page 5 Safety instructions Safety instructions (cont.) A CO or powder extinguisher must be Danger ■ Refrigerant is under pressure: to hand in the following cases: Mechanical loading of lines and Refrigerant is being drained. – components can cause leaks in the Refrigerant is being topped up.
- Page 6 Freezing can cause damage to the safe operation of the system. heat pump. Replace faulty components only ■ Thermally insulate all the ■ with genuine Viessmann spare hydraulic lines. parts. In order to activate the frost pro- ■ Do not undertake any repairs on ■...
- Page 7 Safety instructions Safety instructions (cont.) Safety instructions for operating the system What to do if refrigerant escapes If water escapes from the appliance Danger Danger Escaping refrigerant can lead to fire If water escapes from the appliance and explosions that result in very there is a risk of electric shock.
- Page 8 Safety instructions Safety instructions (cont.) Safety instructions for storage of the outdoor unit The outdoor unit is charged at the fac- Temperature range for storage: 25 °C – ■ tory with refrigerant R290 (propane). to 70 °C Only store the outdoor unit in its ex- ■...
- Page 9 Index Index 1. Information Disposal of packaging ................12 Symbols ....................12 Intended use ..................12 Product information ................13 Layout and functions ................13 ■ System examples ................14 ■ Spare parts lists .................. 14 ■ 2. Preparing for installation Requirements for on-site connections ...........
- Page 10 ■ Removing the circulation pump head ..........132 ■ Status display, internal circulation pump ..........132 Checking the temperature sensors ............133 Viessmann NTC 10 k (blue marking) ..........134 Ω ■ Checking the pressure sensors ............. 135 Checking the fuse .................. 135 7.
- Page 11 Index Index (cont.) Certificates Declaration of conformity ............... 166 12. Keyword index ........................167...
- Page 12 Information Disposal of packaging Please dispose of packaging waste in line with statu- tory regulations. Symbols Symbols in these instructions The steps in connection with commissioning, inspec- tion and maintenance are found in the "Commission- ing, inspection and maintenance" section and identified Symbol Meaning as follows:...
- Page 13 Product information Layout and functions Vitocal 151-A is a monoblock air source heat pump, System with external heating water buffer cylinder comprising 1 indoor unit with integral DHW cylinder and 1 outdoor unit.
- Page 14 230 V~ 230 V~ Control unit/PCB, indoor unit Outdoor unit Instantaneous heating water heater System examples Available system examples: See www.viessmann-schemes.com. Spare parts lists Information about spare parts can be found at www.viessmann.com/etapp or in the Viessmann spare part app.
- Page 15 Preparing for installation Requirements for on-site connections A B C D E F Fig. 2 Secondary circuit flow (heating/cooling circuit 1 / Outdoor unit return (indoor unit heating water out- heating water buffer cylinder), connection Cu 28 x let), connection Cu 28 x 1.0 mm 1.0 mm DHW, connection Cu 22 x 1.0 mm Cold water, connection Cu 22 x 1.0 mm...
- Page 16 Preparing for installation Requirements for on-site connections (cont.) Outdoor unit 1144 Fig. 3 Outdoor unit flow (heating water outlet): Plug-in Power cable plug connection for Cu 28 x 1.0 mm CAN bus communication cable plug (accessories) Outdoor unit return (heating water inlet): Plug-in Condensate drain connection for Cu 28 x 1.0 mm...
- Page 17 Installation sequence Installing the outdoor unit Transport Danger Please note The outdoor unit is filled with refrigerant R290 Excessive tilting of the outdoor unit will lead to (propane): Mechanical loading can lead to leaks equipment damage. in the refrigerant circuit. Where leaks of refriger- ■...
- Page 18 Installation sequence Installing the outdoor unit (cont.) Fig. 4 Transport aid...
- Page 19 Installation sequence Installing the outdoor unit (cont.) Removing the transport aids After handling, remove all transport aids. Fig. 5 Installation information Floorstanding installation Wall mounting Particularly in adverse climatic environments (minus Use the wall mounting bracket set (accessories). ■ temperatures, snow and humidity) a distance to the The wall must meet the structural requirements.
- Page 20 Installation sequence Installing the outdoor unit (cont.) If the outdoor unit is to be installed on a flat roof, in During defrosting, cool vapour escapes from the out- ■ addition to the requirements for floor and wall installa- door unit air discharge vents. This vapour discharge tion, the following planning measures to be taken into must be taken into consideration during installation account include:...
- Page 21 Installation sequence Installing the outdoor unit (cont.) If a design casing for the support for floorstanding Structure-borne noise insulation and vibration iso- ■ installation (accessories) is used: lation between the building and outdoor unit For pipework inside the support, use the thermal insulation supplied.
- Page 22 Installation sequence Installing the outdoor unit (cont.) Do not install in recesses or between walls. This Property boundaries, neighbouring properties, foot- ■ ■ could result in an "air short circuit" between the air paths and driveways being discharged and the air being drawn in. ■...
- Page 23 Installation sequence Installing the outdoor unit (cont.) Siting the outdoor unit in front of an external wall Corner positioning of the outdoor unit, left 2144 2144 3144 2644 3144 1000 Fig. 7 Safety zone Fig. 9 Corner positioning of the outdoor unit, right Safety zone 2394 2894...
- Page 24 Installation sequence Installing the outdoor unit (cont.) Minimum clearances 1000 Fig. 10 Air intake Air discharge ■ Line entry above ground level: 250 mm ≥ Line entry below ground level: ■ 450 mm ≥ Draining condensate via a soakaway ■ Allow the condensate to drain away freely without a drain pipe into a gravel bed beneath the outdoor unit.
- Page 25 Installation sequence Installing the outdoor unit (cont.) Condensate drain connector Foundation Frost protection (compacted crushed stone) Drain pipe with ribbon heater (at least DN 40) Ground Seepage layer for removal of condensate Draining condensate via waste water system Note Condensate drain connector To ensure correct function of the condensate drain Foundation even at low temperatures, provide a ribbon heater in...
- Page 26 Installation sequence Installing the outdoor unit (cont.) Fig. 13 Frost protection for foundations (compacted Conduit (min. DN 40) for draining condensate via crushed stone, e.g. 0 to 32/56 mm); thickness of waste water system or seepage layer layer subject to local requirements and building Fixing points for support: regulations Use ground anchors with a tensile force of at least...
- Page 27 Installation sequence Installing the outdoor unit (cont.) Fig. 14 Frost protection for foundations (compacted Conduit (min. DN 40) for draining condensate via crushed stone, e.g. 0 to 32/56 mm); thickness of waste water system or seepage layer layer subject to local requirements and building Anti-vibration feet (accessories): regulations Align the anti-vibration feet centrally on the founda-...
- Page 28 Installation sequence Installing the outdoor unit (cont.) Floorstanding installation with support: Line entry above ground level 3000 Fig. 15 Ground Support for floorstanding installation (accessories), Pathway, patio illustration without design casing (accessories) Hydraulic connection lines, indoor/outdoor unit Foundation strip Indoor/outdoor unit CAN bus communication cable For free drainage of condensate: Gravel bed as and outdoor unit power cable: soakaway...
- Page 29 Installation sequence Installing the outdoor unit (cont.) Floorstanding installation with support: Line entry Note below ground level ■ Provide thermal insulation of sufficient thickness on the pipework to the outdoor air: See table on page 20. ■ Protect the pipework against damage. Avoid trip haz- ards.
- Page 30 Installation sequence Installing the outdoor unit (cont.) Danger Incorrect installation can lead to equipment damage and personal injury, e.g. if the outdoor unit falls down or falls over. Only install the outdoor unit in accordance with the specifications in these instructions. Wall mounting with bracket set for wall mounting Fig.
- Page 31 Installation sequence Installing the outdoor unit (cont.) Fig. 18 Outdoor unit flow (heating water outlet) Outdoor unit return (heating water inlet) Checking the transport bracket Please note Releasing the transport lock prematurely will affect the function of the safety valve during the filling process.
- Page 32 Installation sequence Installing the outdoor unit (cont.) Fig. 19 After positioning of the outdoor unit, check whether the transport bracket is completely secured with an Allen key (size 5). Securing screw , must be turned as far as it will go to the left.
- Page 33 Installation sequence Positioning the indoor unit (cont.) Dynamic IP addressing (DHCP, delivered condition) Depending on the angle of penetration, the effective ■ in the network (WiFi): wall thickness changes and so does the extent to Have this checked on site by an IT expert prior to which the electromagnetic waves are damped.
- Page 34 Installation sequence Positioning the indoor unit (cont.) Minimum clearances Secondary circuit connections, left/top Secondary circuit connections, right/top Fig. 22 Fig. 23 Minimum room height Note Remove the packaging upwards before positioning. Fig. 24 Indoor unit with integral DHW cylinder Finished floor level or top edge of platform for unfinished floors...
- Page 35 Installation sequence Positioning the indoor unit (cont.) Pressure points Note Observe the permissible floor load. ■ Ø d ■ Level the appliance horizontally. ■ If the adjustable feet are used to compensate for an uneven floor (max. 10 mm), distribute the pressure load on the individual feet evenly.
- Page 36 Installation sequence Connecting the secondary circuit Preparing connections on the heating water side Equip the heating system on site with an expansion Note vessel in the heating return. With underfloor heating circuits, install a temperature ■ The expansion vessel must be approved to EN 13831. limiter to restrict the maximum temperature of under- floor heating systems.
- Page 37 Installation sequence Connecting the secondary circuit (cont.) This also particularly applies when connecting solar thermal systems. Connecting the secondary side Note Indoor unit with 1 integrated heating/cooling cir- So that the system can be filled and flushed via the cuit commissioning assistant, fit a three-way ball valve into each of the following lines: Flow and return lines for heating/cooling circuit 1/...
- Page 38 Installation sequence Connecting the secondary circuit (cont.) 2. Connect all secondary side hydraulic lines (room 5. Connect the drain hose from the safety valve to the heating/cooling, DHW heating) to the indoor unit. waste water system with a fall and an atmospheric pipe vent in accordance with EN 12828, e.g.
- Page 39 Installation sequence Connecting the secondary circuit (cont.) Aligning the indoor unit SW17 Fig. 30 Temperature limiter With underfloor heating circuits, install a temperature Once the temperature limiter has been triggered, the limiter to restrict the maximum temperature in the flow room heating ceases in the particular heating/cooling of underfloor heating systems.
- Page 40 Installation sequence Connecting the secondary circuit (cont.) Contact humidistat For area cooling systems (e.g. underfloor heating cir- cuit, chilled ceiling), a 24 V contact humidistat (accessories) is required. ■ Installation in the coolant flow of the room to be cooled. If required, remove thermal insulation. ■...
- Page 41 Installation sequence Indoor unit: Removing the front panels Fig. 32...
- Page 42 Installation sequence Electrical connection Preparing the electrical connections Cables For cable lengths and cable cross-sections: See the ■ following tables. ■ For accessories: Cables with the required number of cores for exter- nal connections. Prepare an on-site distribution box. Cable lengths in the indoor unit Connection cables Cable lengths in the indoor unit 230 V~, e.g.
- Page 43 Installation sequence Electrical connection (cont.) Overview of electrical terminal areas Fig. 33 Upper PCB HPMU electronics module ■ Upper luster terminal: HMI programming unit BUS connections EHCU electronics module Bottom luster terminal: ■ Sensors Bottom PCB ■ Upper luster terminal: 230 V~ components and digital inputs ■...
- Page 44 Installation sequence Electrical connection (cont.) Removing the programming unit mounting bracket Move the bracket to the maintenance position Fig. 34 Fig. 35...
- Page 45 Installation sequence Electrical connection (cont.) Opening the HPMU electronics module Opening the EHCU electronics module Fig. 36 Fig. 37 Indoor unit: Routing cables to the terminal area Danger Danger Damaged wiring insulation can lead to serious Incorrect wiring can lead to serious injury from injury from electrical current and result in appli- electrical current and result in appliance dam- ance damage.
- Page 46 Installation sequence Electrical connection (cont.) < 42 V 230 V~/400 V~ Fig. 38 Notes regarding the connection values ■ The specified output is the recommended connected load. ■ The total output of all components connected directly to the electronics control module (e.g. pumps, valves, message facilities, contactors): Max.
- Page 47 Installation sequence Electrical connection (cont.) Upper PCB: Bus connections and sensors 1 2 3 4 5 6 7 8 9 10 11 12 CAN L GND CAN H CAN L CAN H PlusBus 1 2 3 4 5 6 7 8 9 10 11 12 24 V 24 V...
- Page 48 Installation sequence Electrical connection (cont.) Luster terminals, top : BUS connections Terminals Component Explanation 6 to 8 Connection of an additional CAN bus sub- To connect the heat pump to an external 91.L scriber CAN bus system: 91.GND Recommended connecting cable and further 91.H information: See chapter "Integrating a heat pump into a CAN bus system".
- Page 49 Installation sequence Electrical connection (cont.) Bottom PCB: 230 V~ function components and digital inputs 1 2 3 4 5 6 7 8 9 10 11 12 13 14 L1 L2 L3 N1 N2 N3 1/N/PE 230 V/50 Hz 3/N/PE 400 V/50 Hz 1/N/PE 230 V/50 Hz Fig.
- Page 50 Installation sequence Electrical connection (cont.) Luster terminals for 230 V~ components and digital inputs Terminals Component/function Explanation 9 to 11 Circulation pump for buffer discharge Configurable connection P1.N Output: 230 W ■ Voltage: 230 V~ ■ P1.L Max. switching current: 1 A ■...
- Page 51 Installation sequence Electrical connection (cont.) Functions Switching contacts Explanation 143.2 143.3 143.4 143.5 External blocking External blocking of refrigerant circuit and instantane- — — — ous heating water heater Heating/cooling Temperature limiter to restrict the maximum tempera- — — — circuits tempera- ture of underfloor heating circuits ture limiter 1...
- Page 52 Installation sequence Electrical connection (cont.) Extra low voltage (ELV) connections < 42 V Terminals Component Explanation 91.L Connection of an additional CAN bus sub- Connecting the heat pump as central sub- 91.GND scriber scriber in an external CAN bus system 91.H Recommended connecting cable: Pre-assembled bus cable (accessories)
- Page 53 156 Power supply for PlusBus subscribers in the HPMU electronics module Mixer extension kit Integrating a heat pump into a CAN bus system The Viessmann CAN bus is designed for "line" bus Integration into an external CAN bus system: ■ topology with a terminator at both ends.
- Page 54 Installation sequence Electrical connection (cont.) Check the terminator when connecting to an exter- The heat pump is the central subscriber nal CAN bus system In this case, 2 connections are required on the heat The heat pump is the first or last subscriber pump for integration into the external CAN bus: ■...
- Page 55 Installation sequence Electrical connection (cont.) Outdoor unit: Electrical terminal area on the underside of the appliance Fig. 46 Indoor/outdoor unit CAN bus communication cable connection Power supply Indoor/outdoor unit CAN bus communication cable (accessories) Please note Incorrectly carried out electrical installation can cause damage to the appliance.
- Page 56 Installation sequence Electrical connection (cont.) 3 4 5 CAN L CAN H CAN H CAN L Fig. 47 Note Only use cables with shielding: Connect the shielding on both sides of the connecting cable to the "GND" connection.
- Page 57 Installation sequence Electrical connection (cont.) Make sure the following is observed for on-site cable: ■ Cable length: Min. 3 m Max. 30 m ■ Recommended connecting cable and further infor- mation: See chapter "Integrating a heat pump into a CAN bus system". Fitting the programming unit Note The integrated WiFi communication module supports...
- Page 58 Installation sequence Power supply Isolators for non-earthed conductors Consult your power supply utility, which may offer dif- ■ ■ Install an isolator in the power cable to provide ferent supply tariffs for the power circuits. omnipolar separation from the mains for all active Observe the technical connection conditions of the conductors, corresponding to overvoltage category power supply utility.
- Page 59 Installation sequence Power supply (cont.) Max. cable length: 30 m ■ ■ Max. fuse rating 32 A ■ Standard tariff: No economy tariff with power-OFF facility possible Heat pump control unit power supply 1 2 3 4 5 6 7 8 9 10 11 12 13 14 L1 L2 L3 N1 N2 N3 1/N/PE...
- Page 60 Installation sequence Power supply (cont.) Instantaneous heating water heater power supply Power supply 400 V~ 1 2 3 4 5 6 7 8 9 10 11 12 13 14 L1 L2 L3 N1 N2 N3 1/N/PE 230 V/50 Hz 3/N/PE 400 V/50 Hz 1/N/PE 230 V/50 Hz L1 L2 L3 Fig.
- Page 61 Installation sequence Power supply (cont.) Power supply 230 V~ 1 2 3 4 5 6 7 8 9 10 11 12 13 14 L1 L2 L3 N1 N2 N3 1/N/PE 230 V/50 Hz 3/N/PE 400 V/50 Hz 1/N/PE 230 V/50 Hz L1 L1 L1 Fig.
- Page 62 Installation sequence Power supply (cont.) Recommended power cable: H07RN-F ■ The use of PVC cable is not permissible. ■ Do not use wire ferrules. Core wire PE must be longer than both the core wires L and N. Shield the power cable from direct sunlight. ■...
- Page 63 Installation sequence Power supply (cont.) Recommended power cable: H07RN-F ■ The use of PVC cable is not permissible. ■ Do not use wire ferrules. The PE wire must be longer than the L1, L2, L3 and N wires. Shield the power cable from direct sunlight. ■...
- Page 64 Installation sequence Power supply (cont.) 143.4 Heat pump compressor 143.1 Heat pump control unit power supply Premium tariff meter Ripple control receiver backup fuse 5 (400 V~) 3 (230 V~) Ripple control receiver (contact open: Power-OFF 7 (230 V~) 5 (400 V~) enabled);...
- Page 65 Installation sequence Power supply (cont.) Mains power supply in conjunction with self-consumption Without power-OFF Vitocal Vitocal E1E2 D /D L1 L1 L2 L2 L3 L3 Fig. 56 Heat pump Bidirectional meter (for photovoltaic systems suita- Additional consumers (of self-generated power) in ble for self-consumption): the household Energy drawn from power supply utility and energy...
- Page 66 Installation sequence Closing the indoor unit (cont.) Indoor unit: Fitting the front panel In reverse order: See page 41.
-
Page 67: Table Of Contents
Commissioning, inspection, maintenance Steps - commissioning, inspection and maintenance Commissioning steps Inspection steps Maintenance steps Page • 1. Compiling reports......................68 • 2. Switching on the power supply..................68 • 3. Starting the heat pump...................... 68 • 4. Commissioning the system....................68 •... -
Page 68: Compiling Reports
Commissioning, inspection, maintenance Compiling reports Enter the readings taken during commissioning in the reports on page 153 onwards and the operator's log (if available). Switching on the power supply Switch on the power supply at the main MCB/fuse. Starting the heat pump Observe the following sequence: Please note Freezing can cause damage to the heat pump... - Page 69 Commissioning, inspection, maintenance Commissioning the system (cont.) Commissioning assistant Procedure Explanations and references Commissioning Language Select the required menu language for the programming unit. Commissioning tool With programming unit Commissioning is continued with the programming unit. ■ (HMI) Commissioning with The appliance automatically switches on the WiFi access point.
- Page 70 Commissioning, inspection, maintenance Commissioning the system (cont.) Procedure Explanations and references System scheme Heating/cooling circuit 1 to Configuring the heating/cooling circuits Heating/cooling circuit 4 Function Not available ■ ■ Heating/cooling circuit without mixer ■ Heating/cooling circuit with mixer (not for heating/cooling circuit 1) ■...
- Page 71 Commissioning, inspection, maintenance Commissioning the system (cont.) Procedure Explanations and references Extensions Power-OFF and Smart Activation of power-OFF and Smart Grid: Grid Connection of floating contacts of the power supply utility (connections 143.4 and 143.5 on the bottom luster terminal in the 230 V~ connection area): See page 49.
- Page 72 Commissioning, inspection, maintenance Commissioning the system (cont.) Procedure Explanations and references Screed drying If a profile is selected, screed drying begins with the respective temperature/time profile, after the commissioning assistant finishes. Not active Screed drying is not switched on. ■ Profile A Temperature/time profile 1 (in acc.
- Page 73 Commissioning, inspection, maintenance Commissioning the system (cont.) This WiFi communication module supports commis- Switch on the WiFi connection. Establish a connection sioning, maintenance and servicing with "Vitoguide" to the router: online or the "Vitoguide App" as well as operation via ■...
-
Page 74: Filling The System
Commissioning, inspection, maintenance Filling the system The filling of the system is menu-guided with the com- Please note missioning assistant. Filling and venting the system with the transport bracket loose can cause damage to the outdoor unit. Before filling and venting the system, check whether the transport bracket is secured: See page 31. - Page 75 Commissioning, inspection, maintenance Filling the system (cont.) Fig. 58 Filling starts automatically, once "Filling" has been called up in the commissioning assistant. 1. Connect the fill hose to the 3-way ball valve in the outdoor unit flow (indoor unit heating water inlet). 2.
- Page 76 Commissioning, inspection, maintenance Filling the system (cont.) 3. Open the outdoor unit 3-way flow and return ball 4. Start the filling process in the commissioning assis- valve as shown in Fig. 75: Open in all directions tant. Allow the heating water to flow in via the fill hose. The filling of the 1st consumer circuit begins.
-
Page 77: Building Up The System Pressure
Commissioning, inspection, maintenance Building up the system pressure Fig. 59 Filling the system with the filling function is completed. 5. As soon as the required system pressure has been The "Build up system pressure" function then starts reached, end the process in the commissioning automatically. -
Page 78: Venting The System
Commissioning, inspection, maintenance Building up the system pressure (cont.) Activate system pressure function To activate this function, start the commissioning assis- See page 69. tant. Venting the system 3. The "Venting" function ends automatically. 1. In the commissioning assistant, the "Venting" The display shows the system pressure. - Page 79 Commissioning, inspection, maintenance Opening the heat pump (cont.) Opening the indoor unit See page 41. Opening the outdoor unit Fig. 60...
-
Page 80: Checking The Expansion Vessel And System Pressure
Commissioning, inspection, maintenance Checking the expansion vessel and system pressure Use the calculation to DIN 4807-2 to check whether 2. If the pre-charge pressure of the expansion vessel ■ the installed expansion vessel is adequate for the is lower than the static system pressure: Top up system water volume. -
Page 81: Checking The Anode Earth Current With An Anode Tester
Commissioning, inspection, maintenance Checking the anode earth current with an anode tester 1. Remove thermal insulation 2. Remove earth cable from protective magne- sium anode 3. Connect the tester (measuring range up to 5 mA) in series across tab of protective magnesium anode and earth cable Anode earth Protective magnesium anode... -
Page 82: Draining The Appliance On The Dhw Side
Commissioning, inspection, maintenance Draining the appliance on the DHW side Fig. 63 1. Shut off the drinking water supply. 4. Remove earth cable Remove protective magnesium anode Note Ensure adequate ventilation in the DHW pipework 5. Remove and dispose of gasket by opening a cold and hot water tap. -
Page 83: Releasing The Outdoor Unit Transport Bracket
Commissioning, inspection, maintenance Checking all connections on the heating water… (cont.) Please note Leaking hydraulic connections lead to appliance damage. ■ Check the internal and on-site hydraulic con- nections for leaks. In the event of leaks, switch off the appliance ■... - Page 84 Clean the cladding of the external panels and the Test the safety chain annually: Request information ■ ■ interior of the outdoor unit. about the test procedure from Viessmann Technical Clean the evaporator: See chapter "Cleaning the Service. ■ heat exchanger (evaporator) of the outdoor unit".
-
Page 85: Cleaning The Filter In The Ball Valve
Commissioning, inspection, maintenance Cleaning the filter in the ball valve 90° Fig. 65 4. Rinse the filter under running water. 5. Refit filter in reverse order (steps 3 to 1 in reverse order). Torque for the top cover: 10.0 0.5 Nm ±... -
Page 86: Cleaning The Outdoor Unit Heat Exchanger (Evaporator)
Commissioning, inspection, maintenance Checking that the fan in the outdoor unit can… (cont.) Fig. 66 3. Turn the fan by hand. Torque for the screws: 0.5 Nm ± Cleaning the outdoor unit heat exchanger (evaporator) Danger Danger If you touch live components or they come into Easily flammable liquids and materials can contact with water, this can result in serious cause deflagration and fires;... -
Page 87: Cleaning The Condensate Pan And Condensate Drain
Commissioning, inspection, maintenance Cleaning the outdoor unit heat exchanger… (cont.) Please note 2. Using compressed air, clean the heat exchanger Commercially available domestic cleaning from the inside out. agents and special cleaning agents can damage the heat exchanger (evaporator). Please note ■... -
Page 88: Cleaning The Dhw Cylinder
Commissioning, inspection, maintenance Cleaning the condensate pan and condensate drain (cont.) Fig. 67 Apertures in the base plate Condensate pan Condensate drain 3. Clean the condensate pan and condensate drain. Torque for the screws: 0.5 Nm ± Cleaning the DHW cylinder According to EN 806, a visual inspection and (if neces- sary) cleaning must be carried out no later than 2 years after commissioning, and as required there-... - Page 89 Commissioning, inspection, maintenance Cleaning the DHW cylinder (cont.) Fig. 68 1. Remove the thermal insulation. Undo the screws. 3. To prevent contaminants entering the pipework, separate the DHW cylinder from the pipework. Danger The uncontrolled escape of DHW can cause 4.
-
Page 90: Checking The Indoor Unit Electrical Connections For Firm Seating
Commissioning, inspection, maintenance Cleaning the DHW cylinder (cont.) 5. Use a chemical cleaning agent to remove hard 6. Flush the DHW cylinder thoroughly after cleaning. deposits that cannot be removed with a high pres- sure cleaner. 7. Fit the protective magnesium anode. Please note Please note Cleaning agents containing hydrochloric acid... -
Page 91: Closing The Heat Pump
Commissioning, inspection, maintenance Closing the heat pump Danger Please note The absence of system component earthing can Leaking hydraulic connections lead to appliance lead to serious injury from electrical current and damage. component damage in the event of an electrical ■... -
Page 92: Checking The Heat Pump For Noise
Commissioning, inspection, maintenance Closing the heat pump (cont.) Closing the outdoor unit Fig. 70 2. Torque 5.0 +1.0 Nm Checking the heat pump for noise Check the indoor and outdoor units for unusual noise, e.g. operating noise from the fan, compressor and cir- culation pumps. -
Page 93: Adjusting The Heating Curve
Commissioning, inspection, maintenance Adjusting the heating curve Tap the following buttons: "Heating curve" for the required value regarding "Slope" and "Level" respectively, depending on the system "Indoor environment" requirements 3. Select the required heating/cooling circuit, e.g. to confirm "Climate circuit 1". Naming the heating/cooling circuits In the delivered condition, the heating/cooling circuits "Rename heating/cooling circuit"... - Page 94 Troubleshooting Message display on the programming unit If there are messages pending in the system, the ■ message and are displayed. The Lightguide flashes. ■ If a central fault message facility is connected, this is switched on. Types of messages Meaning Status Operating message...
- Page 95 Replace the inverter if there is a defect. Refrigerant can escape when working on the ■ Replace faulty components only with genuine refrigerant circuit. Viessmann spare parts. It is essential that regulations and guidelines ■ on handling refrigerant are always observed and adhered to: See "Safety information".
- Page 96 Troubleshooting Fault messages (cont.) Message code System characteristics Cause Measures The heat pump is switched Lead break, flow tempera- Check resistance value off. ture sensor, secondary cir- (NTC 10 k ) at connec- Ω cuit / heating/cooling cir- tion X4.1/X4.2 of the EHCU elec- cuit 1 tronics module.
- Page 97 Troubleshooting Fault messages (cont.) Message code System characteristics Cause Measures F.14 An outside temperature value Short circuit, outside tem- Check resistance value of 0 °C is used to calculate perature sensor (NTC 10 k ). Replace sensor if re- Ω the set flow temperature.
- Page 98 Troubleshooting Fault messages (cont.) Message code System characteristics Cause Measures F.92 Function of connected com- ADIO electronics module Check the settings in the com- ■ ponents in emergency mode communication error missioning assistant. Adjust set- tings if required. Check connections on ■...
- Page 99 Troubleshooting Fault messages (cont.) Message code System characteristics Cause Measures F.100 Function of the electronics Short circuit, PlusBus Check PlusBus power supply at ■ modules connected to Plus- HPMU electronics module: Iso- Bus not available late all PlusBus components con- nected.
- Page 100 Troubleshooting Fault messages (cont.) Message code System characteristics Cause Measures F.117 Refrigerant circuit off Lead break, evaporator Check resistance value suction gas temperature (NTC 10 k ) at connec- Ω sensor tion X20.5/X20.6 of the VCMU re- frigerant circuit controller. Replace sensor if required.
- Page 101 Troubleshooting Fault messages (cont.) Message code System characteristics Cause Measures F.156 The refrigerant circuit is Fault, electronic expan- Check electronic expansion locked. sion valve 2 valve 2. Replace expansion valve if required. F.160 No communication between CAN bus general commu- Check the CAN bus cable.
- Page 102 Troubleshooting Fault messages (cont.) Message code System characteristics Cause Measures F.520 Refrigerant circuit off Communication error, Check the Modbus cable be- ■ Modbus tween inverter and refrigerant cir- cuit controller VCMU at connec- tion X11/X13 on refrigerant cir- cuit controller VCMU. Isolate the system from the pow- ■...
- Page 103 Troubleshooting Fault messages (cont.) Message code System characteristics Cause Measures F.546 Mixer closes. Heating circuit Lead break, flow tempera- Check the settings in the com- ■ pump is operational. ture sensor, heating/cool- missioning assistant. Adjust set- ing circuit 3 with mixer tings if required.
- Page 104 Troubleshooting Fault messages (cont.) Message code System characteristics Cause Measures F.625 Mixer closes. Heating circuit Lead break, return tem- Check the settings in the com- ■ pump switches off. perature sensor, heating/ missioning assistant. Adjust set- cooling circuit 2 tings if required. Check resistance value ■...
- Page 105 Troubleshooting Fault messages (cont.) Message code System characteristics Cause Measures F.687 The heat pump is switched EHCU electronics module Check connections on EH- ■ ■ off. communication error CU electronics module. No function of connected Check whether components are ■ ■...
- Page 106 Troubleshooting Fault messages (cont.) Message code System characteristics Cause Measures F.793 Reduced output, instantane- Phase L3 in power supply Check fuse for instantaneous ■ ous heating water heater of instantaneous heating heating water heater. water heater not present Check power supply on instanta- ■...
- Page 107 Troubleshooting Fault messages (cont.) Message code System characteristics Cause Measures F.819 The refrigerant circuit will not Lead break, electronic ex- Check connections on VCMU re- ■ start. pansion valve 1 frigerant circuit controller. Check electronic expansion ■ valve 1 via actuator test. Isolate the system from the pow- ■...
- Page 108 If the fault persists, contact the power supply utility. F.835 Refrigerant circuit off: Inverter Unsuitable inverter or in- Consult Viessmann Technical and compressor cannot be verter incorrectly program- Service. switched on. F.836 Refrigerant circuit off: Inverter Overvoltage fault on inver- Check power connection on ■...
- Page 109 Troubleshooting Fault messages (cont.) Message code System characteristics Cause Measures F.847 Refrigerant circuit off: Inverter Voltage error on inverter Isolate the system from the power and compressor cannot be supply. Restart the system. switched on. If the fault persists, replace the in- verter.
- Page 110 Isolate the system from the pow- ■ er supply. Shut off the hydraulic connection ■ between the indoor and outdoor unit. Notify Viessmann Werke Techni- ■ cal Service. F.876 The heat pump is switched Lead break, flow sensor Check flow sensor. Replace flow off.
- Page 111 Troubleshooting Fault messages (cont.) Message code System characteristics Cause Measures F.985 The refrigerant circuit will not Control of electronic ex- Check connections on VCMU re- ■ start. pansion valve 2 faulty frigerant circuit controller. Isolate the system from the pow- ■...
- Page 112 Troubleshooting Fault messages (cont.) Message code System characteristics Cause Measures F.996 No cooling of external coolant Short circuit, temperature Check the settings in the com- ■ buffer cylinder sensor of external coolant missioning assistant. Adjust set- buffer cylinder tings if required. Check resistance value ■...
- Page 113 Troubleshooting Fault messages (cont.) Message code System characteristics Cause Measures F.1012 Refrigerant circuit off Fault, low pressure sensor To check the sensor, measure the voltage at the sensor or at connec- tion X14.4 to X14.6 of the VCMU refrigerant circuit controller (0 to 5 V).
- Page 114 A.66 Secondary pump/heating cir- No PWM signal, secon- Use only spare parts supplied or cuit pump, heating/cooling dary pump/heating circuit approved by Viessmann. circuit 1 not running. pump, heating/cooling cir- cuit 1 Incorrect circulation pump installed A.68 Heating circuit pump, heat-...
- Page 115 Troubleshooting Warning messages (cont.) Message code System characteristics Cause Measures A.75 Unusual operating noise Pressure spikes in secon- Check the expansion vessel. ■ ■ Unusual starting and opera- dary circuit Check the system pressure. Top ■ ■ tional characteristics up with water and vent if re- quired.
- Page 116 Troubleshooting Warning messages (cont.) Message code System characteristics Cause Measures A.91 The refrigerant circuit is Outside temperature too No action required ■ ■ temporarily switched off low for heat pump oper- Central heating and DHW ation ■ heating only via instantane- Operation without out- ■...
- Page 117 Troubleshooting Warning messages (cont.) Message code System characteristics Cause Measures A.101 Refrigerant circuit operation Values for hot gas temper- Check sensors. Replace both sen- impaired ature in relation to hot gas sors if required. pressure not plausible To check the high pressure sen- ■...
- Page 118 Troubleshooting Further messages (cont.) Message code Meaning S.115 4/3-way valve in position DHW heating S.116 4/3-way valve in position heating/cooling circuit 1 S.117 4/3-way valve in position heating/cooling circuit 2 S.118 4/3-way valve in position internal buffer cylinder/bypass S.120 Smart grid: Standard mode activated S.121 Smart grid: Recommended mode activated S.122...
- Page 119 Troubleshooting Further messages (cont.) Message code Meaning I.74 Inverter: Undervoltage detected in DC intermediate circuit I.75 Inverter: Excess temperature detected in internal power module I.76 Inverter: Excess temperature detected in power factor correction filter (PFC) I.77 Inverter: Excess current warning detected in power factor correction filter (PFC) I.78 Inverter: Autonomous output reduction (derating) due to excessive output-side pow- er demand...
- Page 120 Troubleshooting Further messages (cont.) Message code Meaning I.123 Refrigerant circuit, max. return temperature reached I.124 Refrigerant circuit, min. return temperature reached I.125 Refrigerant circuit, max. primary inlet temperature reached I.126 Refrigerant circuit, min. primary inlet temperature reached I.127 Max. pressure differential for compressor start reached I.128 Min.
- Page 121 Indoor unit maintenance Overview of electrical terminal areas See page 43 onwards. Removing the programming unit and electronics module Danger Danger Contact with live components can lead to seri- The absence of system component earthing can ous injury from electric current. Some compo- lead to serious injury from electrical current and nents on PCBs remain live even after the power component damage in the event of an electrical...
- Page 122 Indoor unit maintenance Removing the programming unit and electronics… (cont.) After replacing the HPMU electronics module, repeat the commissioning procedure: See chapter "Commis- sioning". Fig. 72 Removing the EHCU electronics module Danger Remove programming unit: See chapter "Removing Contact with live components can lead to seri- the HMI programming unit".
- Page 123 Indoor unit maintenance Removing the programming unit and electronics… (cont.) Fig. 73 Note No recommissioning is necessary following replace- ment of the EHCU electronics module.
- Page 124 Indoor unit maintenance Overview of internal components Pressure sensor 4/3-way valve High limit safety cut-out (STB), instantaneous heating water heater Flow sensor Secondary pump Instantaneous heating water heater Safety valve Flow temperature sensor Return temperature sensor Fig. 74 Expansion vessel Integrated buffer cylinder Draining indoor unit on the secondary side Danger...
- Page 125 Indoor unit maintenance Removing hydraulic components and EPP… (cont.) Danger Please note Residual water will escape when the indoor unit Leaking hydraulic connections lead to appliance or hydraulic components are fitted or removed. damage. Contact of live components with water can lead ■...
- Page 126 Indoor unit maintenance Removing hydraulic components and EPP… (cont.) Removing the expansion vessel 12 ±1 Nm 3,5 +0,5 Nm Fig. 75...
- Page 127 Indoor unit maintenance Removing hydraulic components and EPP… (cont.) Removing the instantaneous heating water heater 400 V 230 V Fig. 76...
- Page 128 Indoor unit maintenance Removing hydraulic components and EPP… (cont.) Fig. 77 Observe the colour coding of the core wires connected to the high limit safety cut-out (as per IEC 60757): BK Black RD Red WH White...
- Page 129 Indoor unit maintenance Removing hydraulic components and EPP… (cont.) Removing the sensors Removing the flow sensor Fig. 78...
- Page 130 Indoor unit maintenance Removing hydraulic components and EPP… (cont.) Removing the secondary circuit temperature sensors Fig. 79...
- Page 131 Indoor unit maintenance Removing hydraulic components and EPP… (cont.) Removing the pressure sensor Fig. 80...
- Page 132 Indoor unit maintenance Removing hydraulic components and EPP… (cont.) Removing the circulation pump head Fig. 81 Torque settings Torque settings for the circuit pump union nuts: ■ 2 Nm ± ■ Torque for the screws on the pump head: 1 Nm ±...
- Page 133 Indoor unit maintenance Checking the temperature sensors Temperature sensor NTC 10 k Connection Ω Outside temperature sensor Luster terminals for sensors, terminal 5 and 6 ■ ■ Plug 1 on the HPMU electronics module ■ Cylinder temperature sensor Plug 5 on the HPMU electronics module ■...
- Page 134 Indoor unit maintenance Checking the temperature sensors (cont.) Viessmann NTC 10 k (blue marking) Ω / °C R / k / °C R / k / °C R / k / °C R / k / °C R / k / °C R / k...
- Page 135 Indoor unit maintenance Checking the pressure sensors 0.45 Pressure Fig. 83 Checking the fuse ■ Fuse F1 is located in the HPMU electronics module: 1. Switch off the power supply. See page 51. Fuse F2 is located on the luster terminal for the heat 2.
- Page 136 Fig. 84 Terminal strip, 400 V~ power supply Terminal strip, 230 V~ power supply Checklist for maintenance work Note Work on the refrigerant circuit must only be carried out by Viessmann Technical Services employees.
- Page 137 Outdoor unit maintenance Checklist for maintenance work (cont.) Every person working on the refrigerant circuit must ■ be able to produce a certificate of competence issued by an organisation with industry accreditation. This certificate confirms their competence in the safe handling of refrigerants by means of a standard industry procedure.
- Page 138 & Any replacement electrical components must be suitable for the ■ application and must correspond to the manufacturer’s specifi- cation. Only replace faulty components with genuine Viessmann spare parts. Carry out all component replacements in accordance with Viess- ■ mann guidelines. If required, consult Viessmann Technical Serv- ice.
- Page 139 In areas where flammable atmospheres exist, only apply voltage ■ to components which are suitable for flammable atmospheres. Only use Viessmann original parts or parts approved by Viess- ■ mann. Other parts may result in refrigerant becoming ignited in the event of a leak.
- Page 140 Outdoor unit maintenance Checklist for maintenance work (cont.) Measure Completed Comments Leak detection The following leak detection processes are suitable for appliances with flammable refrigerant: Leak detection with electronic refrigerant detectors: Electronic refrigerant detectors may not have the required sensi- ■...
- Page 141 Outdoor unit maintenance Overview of internal components Danger Contact with live components can lead to seri- ous injury from electric current. Some compo- nents on PCBs remain live even after the power supply has been switched off. When working on the outdoor unit, isolate the ■...
- Page 142 Outdoor unit maintenance Overview of internal components (cont.) Fig. 85 Hot gas temperature sensor Evaporator Compressor Air intake temperature sensor Electronic expansion valve 1 Interior temperature sensor Oil sump temperature sensor Accumulator Compressor temperature sensor, compressor Liquid gas temperature sensor, cooling Schrader valve, high pressure side 2 Schrader valve, low pressure side Ball valve with filter...
- Page 143 Outdoor unit maintenance Refrigerant circuit flowchart Labelling of the sensors in acc. with EN 1861: Flow rates: High pressure sensor ■ Secondary side (heating water) Min. flow rate: 0.350 m /h (350 l/h) Max. flow rate: 2.050 m /h (2050 l/h) Low pressure sensor Primary side (air) ■...
- Page 144 Outdoor unit maintenance Refrigerant circuit flowchart (cont.) Accumulator Electronic expansion valve 2 Schrader valve, low pressure side Liquid gas temperature sensor, cooling Suction gas temperature sensor, compressor Filter, electronic expansion valve 2 Low pressure sensor Cooling mode Fig. 87 Evaporator Inverter temperature sensor Air discharge Suction gas temperature sensor, evaporator...
- Page 145 Outdoor unit maintenance Extracting the refrigerant Before commencing work, note the "Checklist for main- 06. Extract the refrigerant from all parts of the refriger- tenance work" on page 136 136 onwards. ant circuit using the extraction equipment. Also take into account the following points: Note ■...
- Page 146 Outdoor unit maintenance Extracting the refrigerant (cont.) 14. Affix a label to the outdoor unit in a clearly visible position, containing the following information, with date and signature: ■ Outdoor unit works with flammable refrigerant R290 (propane). System has been taken out of use. ■...
- Page 147 Outdoor unit maintenance Filling the refrigerant circuit (cont.) 6. Affix a label to the heat pump in a clearly visible 8. Seal the sealing cap of the low pressure Schrader position, containing the following information, with valve: See "Outdoor unit maintenance: Overview of date and signature: internal components".
- Page 148 Outdoor unit maintenance Removing the hydraulic components Before dismantling hydraulic components from the Note outdoor unit, empty the hydraulic connection lines to For some parts: See separate installation instructions the indoor unit. for the part. Removing the float air vent valve with quick-action air vent valve G 1¼...
- Page 149 Outdoor unit maintenance Removing the hydraulic components (cont.) Removing the ball valve with filter G 1¼ 50 ±2 Nm Fig. 90...
- Page 150 Outdoor unit maintenance Checking the temperature sensors Temperature sensors are connected to the VCMU refrigerant circuit controller in the outdoor unit. Temperature sensor NTC 10 k Connection Ω Air intake temperature sensor Position of the temperature sensor: See chapter "Out- ■...
- Page 151 Outdoor unit maintenance Checking the temperature sensors (cont.) NTC 10 k (no marking) Ω / °C R / k / °C R / k / °C R / k / °C R / k / °C R / k / °C R / k ϑ...
- Page 152 Outdoor unit maintenance Checking the pressure sensors Pressure Fig. 91 Low pressure sensor High pressure sensor Checking the fuses The fuses are located next to the VCMU refrigerant cir- 1. Switch off the power supply. cuit controller: See page 136. 2.
- Page 153 Commissioning/service reports Commissioning/service reports Hydraulic parameter report Settings and test values Set value Commissioning Maintenance/ service Checking external heating circuit pumps Circulation pump type Circulation pump stage Primary circuit commissioning Air intake temperature °C Air discharge temperature °C Temperature differential (air intake/ discharge) Δ...
- Page 154 Specification Specification Heat pumps with 400 V~ outdoor unit Type AWOT-E-AC 151.A10 151.A13 151.A16 Heating performance data to EN 14511 (A2/W35) Rated heating output Air flow rate Power consumption 1.41 1.76 2.00 Coefficient of performance (COP) in ε heating mode Output control 2.2 to 11.0 2.6 to 12.3...
- Page 155 Specification Specification (cont.) Type AWOT-E-AC 151.A10 151.A13 151.A16 Indoor unit electrical values Rated voltage 1/N/PE 230 V/50 Hz ■ Power supply fuse protection 1 x B16A 1 x B16A 1 x B16A ■ Internal fuse protection 6.3 A H (slow)/250 V~ ■...
- Page 156 Specification Specification (cont.) Type AWOT-E-AC 151.A10 151.A13 151.A16 Integral DHW cylinder Capacity Outdoor unit dimensions Total length Total width 1144 1144 1144 Total height 1382 1382 1382 Indoor unit dimensions Total length Total width Total height 1900 1900 1900 Total weight Indoor unit with 1 integrated heating/ cooling circuit Empty...
- Page 157 Specification Specification (cont.) Type AWOT-E-AC 151.A10 151.A13 151.A16 Heating performance data to Commis- sion Regulation (EU) No. 813/2013 (average climatic conditions) Low temperature application (W35) Energy efficiency ■ η Rated heating output P 12.4 13.67 ■ rated Seasonal coefficient of performance 4.825 4.525 4.525...
- Page 158 Specification Specification (cont.) Type AWOT-M-E-AC 151.A10 151.A13 151.A16 Heating water (secondary circuit) Capacity excl. expansion vessel Heat pump circuit minimum flow rate 1000 1000 1000 (defrosting) Max. flow temperature °C Outdoor unit electrical values Rated voltage, compressor 1/N/PE 230 V/50 Hz Max.
- Page 159 Specification Specification (cont.) Type AWOT-M-E-AC 151.A10 151.A13 151.A16 Refrigerant circuit Refrigerant R290 R290 R290 Safety group ■ Charge weight ■ 0.02 0.02 0.02 Global warming potential (GWP) ■ equivalent 0.00004 0.00004 0.00004 ■ Compressor (hermetically sealed) Type Twin rotary Twin rotary Twin rotary Oil in compressor Type...
- Page 160 Specification Specification (cont.) Type AWOT-M-E-AC 151.A10 151.A13 151.A16 Sound power of the outdoor unit at rated heat- ing output (Measurements with reference to EN 12102/ EN ISO 9614-2) Assessed total sound power level at A7/W55 dB(A) ■ Max. dB(A) ■ In night mode dB(A) ■...
- Page 161 Specification Specification (cont.) Type AWOT-M-E-AC 151.A10 SP 151.A13 SP 151.A16 SP Heating performance data to EN 14511 7/W35) – Rated heating output 11.1 12.4 Power consumption 3.23 3.96 4.539 Coefficient of performance (COP) in ε heating mode Air intake temperature Cooling mode Min.
- Page 162 Specification Specification (cont.) Type AWOT-M-E-AC 151.A10 SP 151.A13 SP 151.A16 SP Mobile data transfer WiFi Transfer standard IEEE 802.11 b/g/n IEEE 802.11 b/g/n IEEE 802.11 b/g/n ■ Frequency range 2000 to 2483.5 2000 to 2483.5 2000 to 2483.5 ■ Max. transmission power ■...
- Page 163 Specification Specification (cont.) Type AWOT-M-E-AC 151.A10 SP 151.A13 SP 151.A16 SP Permissible operating pressure, sec- ondary side Connections with connection pipes supplied Heating water flow/return, heating cir- Cu 28 x 1.0 Cu 28 x 1.0 Cu 28 x 1.0 cuits or heating water buffer cylinder Heating water flow/return, DHW cylinder mm Cu 22 x 1.0 Cu 22 x 1.0...
- Page 164 Preferred appointment: Date Time Date Time The work requested from Viessmann will be billed to me/us in accordance with the latest Viessmann pricelist. Place/date Signature Final decommissioning and disposal Viessmann products can be recycled. Components Isolate the system from the power supply for decom- and substances from the system are not part of ordi- missioning.
- Page 165 Appendix Final decommissioning and disposal (cont.) Decommissioning: If the outdoor units dismantled for disposal are not ■ ■ Positioning requirements apply only so long as the stored in accordance with the positioning require- outdoor unit is filled with refrigerant: See page 17. ments, the following steps must be carried out: ■...
- Page 166 Certificates Declaration of conformity We, Viessmann Climate Solutions SE, D-35108 Allen- dorf, declare as sole responsible body that the named product complies with the European directives and supplementary national requirements in terms of its design and operational characteristics. Viessmann Cli-...
- Page 167 Keyword index Keyword index Connecting cables..........28, 29, 30 Accumulator............. 144 Connection Air discharge.............. 24 – Electric..............42 Air intake..............24 – Electrical components..........42 Air intake temperature sensor......143, 144 – Heating water side..........36, 37 Air short circuit............22 –...
- Page 168 Keyword index Keyword index (cont.) Electrical values Fuse..............135, 152 – Indoor unit..........155, 158, 161 – F1..............135, 152 – Outdoor unit.......... 154, 158, 161 – F2................135 Electric cable routing..........45 – Max. power loss..........135, 152 Electric cables..........28, 29, 30 Fuse rating............
- Page 169 Keyword index Keyword index (cont.) Instantaneous heating water heater...13, 124, 127 Outdoor unit – Power cable............42 – Cable lengths............42 – Power supply............60 – Cleaning..............86 – Resetting the high limit safety cut-out..... 90 – Dimensions........16, 156, 159, 162 –...
- Page 170 Keyword index Keyword index (cont.) Pressure sensors, checking......135, 152 Product information............ 13 Safety check.............138 Programming unit.............121 Safety goggles............84 Programming unit, fitting..........57 Safety valve..........36, 124, 145 Programming unit, opening........121 Safety zone..........22, 110, 145 Protective anode, testing..........80 Sealed enclosures............139 Protective equipment..........
- Page 171 Keyword index Keyword index (cont.) Total weight..........156, 159, 162 Water quality............74, 76 Transport..............17 Weather influences............ 20 – Indoor unit............... 32 Weatherproofing............21 Transport aid............17, 19 Weight................ 21 Transport bracket..........31, 83 Welding work............137 Trap................87 WiFi connection............72 Type overview............
- Page 172 Viessmann Climate Solutions SE Viessmann Limited 35108 Allendorf / Germany Hortonwood 30, Telford Telephone: +49 6452 70-0 Shropshire, TF1 7YP, GB Fax: +49 6452 70-2780 Telephone: +44 1952 675000 www.viessmann.com Fax: +44 1952 675040 E-mail: info-uk@viessmann.com...
Need help?
Do you have a question about the VITOCAL 151-A and is the answer not in the manual?
Questions and answers