Table of Contents
Advertisement
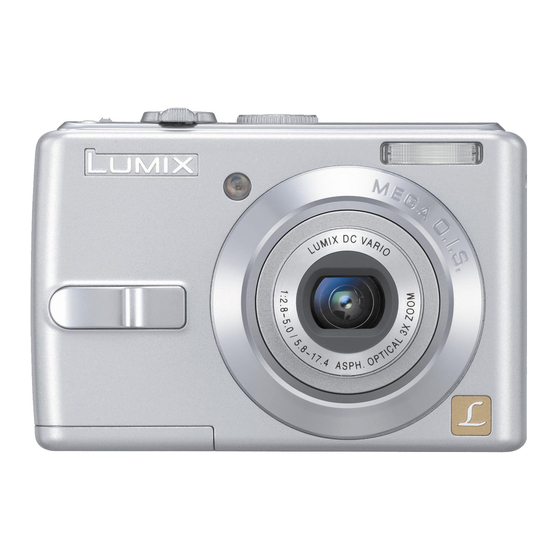
The illustration shows
DMC-LS75.
For USA assistance, please call: 1-800-272-7033 or send e-mail to : digitalstillcam@us.panasonic.com
For Canadian assistance, please call: 1-800-99-LUMIX (1-800-995-8649) or
send e-mail to: lumixconcierge@ca.panasonic.com
P
PC
Operating Instructions
Model No.
Before connecting, operating or
adjusting this product, please read the
Digital Camera
DMC-LS75
DMC-LS70
DMC-LS60
instructions completely.
VQT1C63-1
Advertisement
Table of Contents

Related Manuals for Panasonic Lumix DMC-LS60


Summary of Contents for Panasonic Lumix DMC-LS60
-
Page 1: Operating Instructions
The illustration shows DMC-LS75. For USA assistance, please call: 1-800-272-7033 or send e-mail to : digitalstillcam@us.panasonic.com For Canadian assistance, please call: 1-800-99-LUMIX (1-800-995-8649) or send e-mail to: lumixconcierge@ca.panasonic.com Operating Instructions DMC-LS75 Model No. DMC-LS70 DMC-LS60 Before connecting, operating or adjusting this product, please read the instructions completely. -
Page 2: Before Use
Dear Customer, Thank you for choosing Panasonic! You have purchased one of the most sophisticated and reliable products on the market today. Used properly, we’re sure it will bring you and your family years of enjoyment. Please take time to fi ll in the information in the box below. - Page 3 Before Use Declaration of Conformity Trade Name: Model No.: Responsible party: Panasonic Support Contact: This device complies with Part 15 of the FCC Rules. Operation is subject to the following two conditions: (1) This device may not cause harmful interference,...
- Page 4 -If you see this symbol- Information on Disposal in other Countries outside the European Union This symbol is only valid in the European Union. If you wish to discard this product, please contact your local authorities or dealer and ask for the correct method of disposal.
- Page 5 ■ About the Lens • Do not press the lens or the lens barrel with excessive force. • Do not leave the camera with the lens facing the sun as it may cause the camera to malfunction. Also, be careful when you leave the camera outside or near a window.
-
Page 6: Table Of Contents
Contents Before Use Information for Your Safety ... 2 Preparation Standard Accessories ... 8 Names of the Components ... 9 Quick Guide ... 10 About the Batteries ... 11 Inserting/Removing the Batteries/Card (Optional) ... 15 About the Built-in Memory/the Card ... 16 Setting Date/Time (Clock Set) ... - Page 7 Troubleshooting ... 98 Number of recordable pictures and available recording time ... 104 Specifi cations ... 107 Digital Camera Accessory System ... 110 Digital Camera Accessory Order Form (For USA Customers) ... 111 Request for Service Notice (For USA Only) ... 112 Limited Warranty (For USA Only) ...
-
Page 8: Preparation
“Digital Camera Accessory System”. (P110) • If any of the accessories are lost, please contact Panasonic’s parts department at 1 800 833-9626 (For USA) or in Canada call 1 800 995-8649 for more details on how to obtain replacement parts. -
Page 9: Names Of The Components
DIGITAL 7 Lens part (P5) DC IN 8 Lens barrel 9 [DC IN] Socket (P84, 87) • Always use a genuine Panasonic AC adaptor (DMW-AC6: optional). 10 [V.OUT/DIGITAL] Socket (P84, 87, 91) 11 LCD Monitor (P37, 92) 12 [MENU/SET] Button (P17) -
Page 10: Quick Guide
Quick Guide This is the overview of the procedure to record pictures with this camera. For each operation, be sure to refer to the corresponding pages. 1 Insert the batteries. (P15) • When you do not use the card (optional), you can record or play back pictures on the built-in memory (P16). -
Page 11: About The Batteries
Panasonic. It has more power than a regular alkaline battery and is suitable for high-drain equipment such as digital cameras. • We recommend using Panasonic batteries. • Battery performance may vary greatly depending on the brand used and Preparation the storage life and conditions of the batteries. - Page 12 • If rechargeable batteries are to be used, rechargeable batteries manufactured by Panasonic are recommended. • If there is dirt on the battery poles, you may not be able to charge normally. Clean the battery poles and the battery recharger terminals with a soft, dry cloth.
- Page 13 Recording conditions by CIPA standard • Temperature: 23 °C (73.4 °F)/ Humidity: 50% when the LCD monitor is on. • Using a Panasonic SD Memory Card (16 MB)* * The card is not supplied. • Starting recording 30 seconds after the camera is turned on.
- Page 14 0 °C (32 °F) and other recording conditions comply with CIPA standard.) Number of recordable pictures (Approx) Batteries Used DMC-LS75/ DMC-LS70 Panasonic Oxyride 50 pictures batteries (25 min) (supplied or optional) Panasonic Alkaline 40 pictures batteries (optional)
-
Page 15: Inserting/Removing The Batteries/Card (Optional)
• Do not remove or insert the batteries or the card while the unit is on particularly while accessing the built- in memory or the card (P24). This can damage data. • We recommend using Panasonic’s SD Memory Card/SDHC Memory Card. (Optional) VQT1C63... -
Page 16: About The Built-In Memory/The Card
fi rst fi nd out if they are able to use SDHC Memory Cards.) Please confi rm the latest information on the following website. http://panasonic.co.jp/pavc/global/cs (This site is in English only.) • Refer to page 104 for the number of recordable pictures and available recording time on a card. -
Page 17: Setting Date/Time (Clock Set)
Setting Date/Time (Clock Set) Set the mode dial to [ ■ Initial setting The clock is not set when the camera is shipped. When you turn the camera on, the following screen appears. PLEASE SET THE CLOCK CLOCK SET A: [MENU/SET] button B: Cursor buttons C: Mode dial 1 Press [MENU/SET]. -
Page 18: About The Mode Dial
About the Mode Dial When the power is on and you turn the mode dial, you can switch between shooting and playback modes, and also select modes suited to the subject such as the macro mode and scene modes. Changing the mode NORMAL PICTURE This screen appears when you turn the mode dial to show which mode is selected (P23). -
Page 19: Using The Menus
Using the Menus ■ To show the menus Press [MENU/SET]. Menu Icons • The menu icons and items that appear depend on the position of the mode dial. ■ The menu icons Recording menu (P59) Displayed when the mode dial is set to ], [ ], [ ], [... - Page 20 2 Press q. 2 / 3 AF MODE AUTO STABILIZER AUTO BURST AF ASSIST LAMP D.ZOOM SELECT MENU 3 Press e/r to select the setting. 2 / 3 AF MODE AUTO STABILIZER AUTO BURST AF ASSIST LAMP D.ZOOM SELECT MENU 4 Press [MENU/SET] to confi...
-
Page 21: About The Setup Menu
About the Setup Menu • Change the settings if necessary. • Select [RESET] to return the settings to the initial settings at the time of purchase (P23). Press [ ] to display menu, enter the setup menu [ ] and select the item. (P20) MENU The setting marked “q”... - Page 22 MENU Press [ ] to display menu, enter the setup menu [ ] and select the item. (P20) Have the LCD turn off automatically. ECONOMY Battery life is saved by reducing the brightness of the LCD monitor and turning it off automatically when the camera is not being used in recording mode.
- Page 23 MENU Press [ ] to display menu, enter the setup menu [ ] and select the item. (P20) RESET The settings on the recording or the [SETUP] menu are reset to the initial settings. • The birthday setting for [BABY1]/[BABY2] or [PET] (P50) in scene mode and the number of days that have passed since the departure date for [TRAVEL...
-
Page 24: Lcd Monitor And Changes To The Display
LCD monitor and changes to the display ■ Display in normal picture mode [ (at the time of purchase) 1 Recording mode 2 Flash mode (P40) • The fl ash icon turns red when activating the fl ash and pressing the shutter button halfway. -
Page 25: Basic
Taking Pictures Select normal picture mode [ The camera automatically sets the shutter speed and the aperture value according to the brightness of the subject. A Shutter button B Turn the camera on. C The status indicator lights for 1 second. 1 Hold the camera gently with both hands, keep your arms still at your side and stand with your... -
Page 26: Photography Basics - Exposure, Focus, And Color
Photography basics – exposure, focus, and color A little knowledge about exposure, focus and color will come in handy when you are having trouble with a shot. Are images dark? In normal picture mode [ Exposure sets the correct exposure for you, but images may be dark if problems there is backlight. - Page 27 ■ When you want to take a subject outside the AF area (AF/AE Lock) When recording a picture of people with a composition like the following picture, you will not be able to focus the camera on the subject because the people are outside the AF area.
-
Page 28: Taking Pictures In Simple Mode
Taking Pictures in Simple Mode This mode allows beginners to take pictures easily. Only the basic functions appear in the menu to make operations simple. ■ Basic menu settings 1 Press [MENU/SET]. 2 Press e/r to select the desired menu item and then press q. SIMPLE MODE PICT.MODE ENLARGE... - Page 29 ISO LIMIT in Intelligent ISO mode [ [ISO800]. • [ASPECT RATIO]/[PICT.SIZE]/ [QUALITY] (P62): – [ ENLARGE]: h/DMC-LS75/DMC-LS70: DMC-LS60: (6M)/Fine – [ 4˝ × 6˝/10 × 15 cm]: (2.5M EZ)/Standard – [ E-MAIL]: (0.3M EZ)/Standard • [AF MODE] (P63): ] (1-area-focusing) •...
-
Page 30: Taking Pictures With The Zoom
So, for example, if you choose ] (3M EZ) (3 million pixels), the 7M (7 million) (DMC-LS75/DMC-LS70) or 6M (6 million) (DMC-LS60) CCD area is cropped to the center 3M (3 million pixels) area, allowing a picture with a higher zoom effect. -
Page 31: Using The Easy Zoom Button
• “EZ” is an abbreviation of [Extended optical Zoom]. • If you set a picture size that activates the extended optical zoom, the extended optical zoom icon [ ] is displayed on the screen when you use the zoom function. •... -
Page 32: Using The Digital Zoom
Using the Digital Zoom Further extending the zoom A maximum of 12 × zoom can be achieved with the 3 × optical zoom and the 4 × digital zoom when [D.ZOOM] is set to [ON] in the [REC] menu. However, if a picture size that can use extended optical zoom is selected, a maximum of 18 ×... -
Page 33: Checking The Recorded Picture (Review)
Checking the Recorded Picture (Review) You can check the recorded pictures while still in [REC] mode. 1 Press r [REV]. REVIEW1 EXIT DELETE • The last recorded picture appears for about 10 seconds. • Review is canceled when the shutter button is pressed halfway or the r [REV] is pressed again. -
Page 34: Playing Back Pictures
Playing Back Pictures The picture data on the built-in memory appears when a card is not inserted. The picture data on the card appears when a card is inserted. (P16) Press w/q to select the picture. 100-0001 1/19 10 00 DEC 1 2007 w : Play back the previous picture. -
Page 35: Deleting Pictures
Deleting Pictures The picture data on the built-in memory is deleted when a card is not inserted. The picture data on the card is deleted when a card is inserted. (P16) • Once deleted, pictures cannot be recovered. Please double-check before deleting pictures. - Page 36 3 Press w/q to select the picture and then press r to set. (Only when selecting [MULTI DELETE]) MULTI DELETE SELECT DELETE MARK/UNMARK EXIT MENU • Repeat the above procedure. • The selected pictures appear with [A]. When r is pressed again, the setting is canceled.
-
Page 37: Advanced-Shooting
About the LCD Monitor Changing the information displayed DISPLAY A LCD monitor (LCD) Press the [DISPLAY] button to switch to the screen to be used. • When the menu screen appears, the [DISPLAY] button is not activated. During playback zoom (P69), while playing back motion pictures (P70) and during a slide show (P72), you can only select “Normal display”... - Page 38 ■ About guide line display When you align the subject on the guide lines or the cross point of these lines, you can take pictures with well-designed composition by viewing the size, the slope and the balance of the subject. ■...
-
Page 39: Recording A Picture With The Camera Held High Above Your Head (High Angle Mode)
Recording a picture with the camera held high above your head (High angle mode) The LCD monitor becomes easier to see when the camera is held in the following position. This is useful when you cannot get close to the subject because there is a person in the way. -
Page 40: Taking Pictures Using The Built-In Flash
Taking Pictures using the Built-in Flash A: Photo fl ash • Do not cover the photo fl ash with your fi ngers or any other items. ■ Switching to the appropriate fl ash setting Set the fl ash setting of the built-in fl ash according to the scene to be recorded. - Page 41 The fl ash is activated twice. The subject should not move until the second fl ash is activated. ■ Available fl ash settings by recording mode The available fl ash settings depend on the recording mode. (○ : Available, — : Not available, ◎ : Initial setting) It becomes Forced ON [ backlight compensation function is...
- Page 42 ■ The available fl ash range to take pictures in intelligent ISO mode ISO LIMIT Available fl ash range (P45) ISO400 30 cm (0.98 feet) to 3.7 m (12.14 feet) (Wide) 30 cm (0.98 feet) to 2.1 m (6.89 feet) (Tele) ISO800 30 cm (0.98 feet) to 5.3 m (17.39 feet) (Wide)
-
Page 43: Taking Pictures With The Self-Timer
Taking Pictures with the Self-timer 1 Press w [ 2 Press e/r or w [ ] to switch the self-timer mode. SELFTIMER 10SEC. 2SEC. SELECT MENU 3 Press [MENU/SET]. • You can also press the shutter button halfway to fi nish. •... -
Page 44: Compensating The Exposure
Compensating the Exposure Use this function when you cannot achieve appropriate exposure due to the difference of brightness between the subject and the background. Over exposed Compensate the exposure toward negative. Properly Exposed Compensate the exposure toward positive. Under exposed VQT1C63 Advanced-Shooting 1 Press e [C] to display [C... -
Page 45: Shooting With The Intelligent Iso Mode
Shooting with the Intelligent ISO mode The camera detects movements of the subject near the center of the frame and sets the optimum ISO sensitivity and shutter speed according to the movements and brightness. 1 Press [MENU/SET]. 2 Press e/r to select [ISO LIMIT] and then press q. -
Page 46: Taking Close-Up Pictures
Taking Close-up pictures This mode allows you to take close-up pictures of the subject, e.g. When taking pictures of fl owers. You can take pictures approaching the subject at a distance up to 5 cm (0.16 feet) from the lens by rotating the zoom lever upmost to Wide (1 ×). -
Page 47: Scene Mode
Scene mode When you select a scene mode to match the subject and recording situation, the camera sets the optimal exposure and hue to obtain the desired picture. • See pages 48 to 52 for details about the modes. Explanations about the scene modes are also included in the camera’s INFORMATION] feature. -
Page 48: Portrait Mode
MENU Press [ ] to display the [SCENE MODE] menu and select a scene mode. (P47) Portrait mode The background is blurred and the person stands out with a healthier complexion. ■ Technique to make this mode more effective: 1 Rotate the zoom lever to Tele as far as possible. -
Page 49: Night Scenery Mode
MENU Press [ ] to display the [SCENE MODE] menu and select a scene mode. (P47) Night scenery mode The nightscape can be recorded vividly. ■ Technique for Night scenery mode • Use a tripod as the shutter may be open for as long as 8 seconds. -
Page 50: Sunset Mode
MENU Press [ ] to display the [SCENE MODE] menu and select a scene mode. (P47) Sunset mode Use to take pictures of the sunset. Sunset color can be reproduced vividly. • The fl ash setting is fi xed to Forced OFF [v]. -
Page 51: High Sensitivity Mode
MENU Press [ ] to display the [SCENE MODE] menu and select a scene mode. (P47) • Focus range is 5 cm (0.16 feet) (Wide)/30 cm (0.98 feet) (Tele) to Z. • Sensitivity will be the same as when you have set ISO LIMIT in Intelligent ISO mode [ ] (P45) to [ISO400]. -
Page 52: Fireworks Mode
MENU Press [ ] to display the [SCENE MODE] menu and select a scene mode. (P47) ■ Technique for Starry sky mode • The shutter opens for 15, 30 or 60 seconds, so use a tripod and the self- timer (P43) for best results. •... -
Page 53: Motion Picture Mode
Motion picture mode 1 Press the shutter button halfway to focus and then press it fully to start recording. 30fps A: Available recording time B: Elapsed recording time • When the subject is focused, the focus indication lights. • The focus, zoom and aperture value are fi... - Page 54 • Depending on the type of SD Memory Card or SDHC Memory Card, recording may stop in the middle. • We recommend using Panasonic’s SD Memory Card/SDHC Memory Card. • Depending on the type of card you are using, the card access indication may appear for a while after shooting motion pictures.
-
Page 55: Recording Which Day Of The Vacation You Take The Picture
Recording which day of the vacation you take the picture By setting the departure and return dates, you can record which date of the vacation you take a picture. The day of the vacation is shown when you play a picture and you can add it to the picture for printing with [DATE STAMP] (P75). -
Page 56: Take A Picture
8 Take a picture. 1ST DAY 10 00 DEC 1 2007 • The day of the vacation A appears for about 5 seconds after setting the travel dates and when the camera is turned on when the travel date is set. •... -
Page 57: Displaying The Time At The Travel Destination
Displaying the time at the travel destination If you set your home area and the travel destination area when traveling abroad etc., the local time at the travel destination area can be displayed on the screen and recorded on the pictures taken. •... - Page 58 Finishing setting the home area • If you are setting the home area for the fi rst time, the screen returns to the screen shown in step 1 of “Setting the home area [HOME]” after you press [MENU/ SET] to set your home area. Press w to return to the screen shown in step 3 and then press [MENU/SET] to close the menu.
-
Page 59: Using The [Rec] Mode Menu
Using the [REC] mode menu Setting the hue, picture quality adjustment, etc. allows you to create wide variations on taking pictures. The menu items that can be set differ depending on the recording mode. ■ Using the [REC] mode menu Press [MENU/SET] to show the recording menu, then select the item you want to change (P19). -
Page 60: [W.balance]
MENU Press [ ] to display the [REC] mode menu and select the item to set. (P19) [W.BALANCE] Adjusting the hue for a more natural picture This function allows you to reproduce a white color closer to the tone in real life on the pictures recorded under sunlight, halogen lighting, etc. -
Page 61: [Sensitivity]
MENU Press [ ] to display the [REC] mode menu and select the item to set. (P19) ■ Setting the white balance manually (White set |) Use this to set the white balance manually. 1 Select [|] (White set) and then press [MENU/SET]. -
Page 62: [Aspect Ratio]
EZ) to store more pictures. Fewer pixels also means it is easier to send pictures by e-mail or use them on a homepage. ■ When the aspect ratio setting is DMC-LS75/DMC-LS70 (7M) DMC-LS60 only (6M) ] during motion DMC-LS75/DMC-LS70 (5M EZ) (3M EZ) -
Page 63: [Af Mode]
] to display the [REC] mode menu and select the item to set. (P19) ■ When the aspect ratio setting is [ DMC-LS75/DMC-LS70 3072 × 2048 pixels (6M) DMC-LS60 only 2816 × 1880 pixels (5M) (2.5M EZ) 2048 × 1360 pixels ■... -
Page 64: [Stabilizer]
MENU Press [ ] to display the [REC] mode menu and select the item to set. (P19) ■ About 1-area-focusing (High speed) • You can focus on the subject more quickly than other AF modes. • Pictures may become still in the condition they were in before the subject was focused when you press the shutter button halfway. -
Page 65: [Burst]
MENU Press [ ] to display the [REC] mode menu and select the item to set. (P19) • The stabilizer function may not work in the following cases so take special care not to move the camera when pressing the shutter button. –... -
Page 66: [Af Assist Lamp]
MENU Press [ ] to display the [REC] mode menu and select the item to set. (P19) [AF ASSIST LAMP] Focusing in low light conditions becomes easier Illuminating the subject with the AF assist lamp allows the camera to focus on the subject in low light conditions. -
Page 67: Advanced-Viewing
Displaying Multiple Screens 1 Rotate the zoom lever towards ] [W] to display multiple screens. DEC 1 2007 1/34 MENU CANCEL For example: When you have chosen to show 9 pictures • : 1 screen➝9 screens➝ 25 screens➝Calendar screen display (P68) •... -
Page 68: Displaying Pictures By Recording Date (Calendar Playback)
Displaying pictures by recording date You can display pictures by recording date using the calendar playback function. 1 Rotate the zoom lever towards ] [W] several times to display the calendar screen. MON TUE WED THU FRI SAT 2007 MENU MONTH •... -
Page 69: Using The Playback Zoom
Using the Playback Zoom 1 Rotate the zoom lever towards [3] [T] to enlarge the picture. CANCEL DELETE • 3: 1×➝2×➝4×➝8×➝16× • When you rotate the zoom lever towards ] [W] after enlarging the picture, the magnifi cation becomes lower. When you rotate the zoom lever towards [3] [T], the magnifi... -
Page 70: Playing Back Motion Pictures
Playing Back Motion pictures Press w/q to select a picture with a motion picture icon [ 30fps ] / [ ] / [ 30fps 10fps 30fps QVGA QVGA 16:9 and then press r to play back. 30fps 100-0001 PLAY MOTION 1/19 PICTURE 10 00 DEC 1 2007... -
Page 71: Using The [Play] Mode Menu
Using the [PLAY] mode menu You can use various functions in playback mode to rotate pictures, set protection for them etc. • Refer to P72 to 83 for each menu item. 1 Press [MENU/SET]. 2 Press e/r to select the menu item and then press q. -
Page 72: [Slide Show]
MENU Press [ ] to display the [PLAY] mode menu and select the item to set. (P71) [SLIDE SHOW] Playing back pictures in order for a fi xed duration This is recommended when playing back pictures on a TV screen. You can skip unwanted pictures if [FAVORITE] (P73) has been set. -
Page 73: [Favorite]
MENU Press [ ] to display the [PLAY] mode menu and select the item to set. (P71) [FAVORITE] Setting your favorite pictures You can do the following if a mark has been added to pictures and they have been set as favorites. •... -
Page 74: [Rotate Disp.]/[Rotate]
MENU Press [ ] to display the [PLAY] mode menu and select the item to set. (P71) [ROTATE DISP.]/[ROTATE] To display the picture rotated This mode allows you to automatically display pictures vertically if they were recorded holding the camera vertically or rotate pictures manually in 90°... -
Page 75: [Date Stamp]
MENU Press [ ] to display the [PLAY] mode menu and select the item to set. (P71) [DATE STAMP] Stamping the date on your pictures You can stamp your pictures with the date of shooting, ages, and travel dates. This function is suitable when you print 4˝... - Page 76 4 Press [MENU/SET]. • Images are resized as follows when you add the date to the pictures taken with a resolution of more than [ – h aspect ratio ➞ aspect ratio ➞ – – j aspect ratio ➞ 5 Press e/r to select [YES] or [NO] and press [MENU/SET].
-
Page 77: [Dpof Print]
(P82) and then set the DPOF setting. For more information please visit: http://panasonic.jp/dc/dpof_110/white_ e.htm Press e/r to select [SINGLE], [MULTI] or [CANCEL] and then press [MENU/SET]. - Page 78 ■ To cancel all settings 1 Press e to select [YES] and then press [MENU/SET]. CANCEL ALL DPOF CANCEL ALL DPOF PRINT SETTINGS? MENU SELECT 2 Press [MENU/SET] to close the menu. • DPOF print settings on the built-in memory are canceled when a card is not inserted.
-
Page 79: [Protect]
MENU Press [ ] to display the [PLAY] mode menu and select the item to set. (P71) [PROTECT] Preventing Accidental Erasure of the Picture You can set protection for the pictures you do not want to delete to prevent them from accidental erasure. -
Page 80: [Resize]
MENU Press [ ] to display the [PLAY] mode menu and select the item to set. (P71) [RESIZE] Making the picture smaller This function is useful if you want to reduce the fi le size of the picture in cases when it needs to be attached to an e-mail or uploaded to a website. -
Page 81: [Trimming]
MENU Press [ ] to display the [PLAY] mode menu and select the item to set. (P71) [TRIMMING] Enlarging a picture and trimming it Use this function when you trim unnecessary parts of the recorded picture. 1 Press w/q to select the picture and then press r. -
Page 82: [Copy]
(same fi le and folder numbers). • It may take time to copy the picture data. • Only pictures recorded with a Panasonic digital camera (LUMIX) will be copied. (Even if the pictures were recorded with a Panasonic digital camera, you may not be able to copy them if they were edited with a PC.) -
Page 83: [Format]
• If the built-in memory or the card cannot be formatted, consult your nearest Service Center. For USA assistance, please call: 1-800-272-7033 or send e-mail to : digitalstillcam@us.panasonic.com For Canadian assistance, please call: 1-800-99-LUMIX (1-800-995-8649) or send e-mail to: lumixconcierge@ca.panasonic.com... -
Page 84: Connecting To Other Equipment
Connecting to a PC • By connecting the camera to a computer, you can upload your pictures, then use the software on the included CD-ROM ([LUMIX Simple Viewer] and [PHOTOfunSTUDIO- viewer-] for Windows ) to print or send your ® images by e-mail. - Page 85 ■ Folder Composition Folders appear as follows. D C I M • Built-in memory 100_PANA • Card P1000001.JPG P1000002.JPG P1000999.JPG 101_PANA 999_PANA M I S C 1 Folder number 2 File number 3 JPG : Pictures MOV : Motion pictures MISC : Folder containing fi...
- Page 86 • Do not use any other USB connection cables except the supplied one. • While [ACCESS] is being displayed, do not disconnect the USB connection cable. • Data transmission takes time when a card contains a large number of pictures. •...
-
Page 87: Connecting To A Pictbridge-Compliant Printer
Connecting to a PictBridge-compliant Printer By connecting the camera directly to a printer supporting PictBridge via the USB connection cable (supplied), you can select the pictures to be printed or start printing on the LCD monitor. Make the necessary settings on your printer beforehand. (Read your printer’s operating instructions.) 1 Turn on the camera and the printer. - Page 88 ■ Printing the selected picture (making a single print) 1 Press w/q to select the picture and then press [MENU/SET]. PictBridge 100-0001 1/19 PLEASE SELECT THE PICTURE TO PRINT SELECT MULTI PRINT PRINT MENU • A message displays for about 2 seconds. 2 Press e to select [PRINT START] and then press [MENU/SET].
- Page 89 3 Press e to select [PRINT START] and then press [MENU/SET]. MULTI SELECT PRINT START PRINT WITH DATE NUM.OF PRINTS PAPER SIZE PAGE LAYOUT CANCEL SELECT MENU • In DPOF setting, [PRINT WITH DATE] and [NUM. OF PRINTS] are not displayed. •...
- Page 90 • [PAGE LAYOUT] (Possible layouts on the camera) Settings on the printer are prioritized. 1 page with no frame print 1 page with frame print 2 pages print 4 pages print • An item cannot be selected if the printer does not support the page layout.
-
Page 91: Playing Back Pictures With A Tv Screen
Playing Back Pictures with a TV Screen ■ Playing back pictures with the supplied cable • Set the [TV ASPECT]. (P23) • Turn the camera and the TV off. V.OUT DIGITAL DC IN 1 Connect the video cable A (supplied) to the [V. OUT] socket of the camera. -
Page 92: Screen Display
Screen Display The LCD monitor shows the status of the camera. In normal picture mode [ (Initial setting) F2.8 1/30 ■ In recording 1 Recording mode 2 Flash mode (P40) 3 AF area (P25) 4 Focus indication (P25) 5 Picture size (P62) 6 Quality (P62) Jitter alert indication (P27) : 6 7 Battery indication (P24) - Page 93 In Simple mode ■ In simple mode 1 Flash mode (P40) 2 Focus indication (P25) 3 Picture mode (P28) 6 : Jitter alert indication (P27) 4 Battery indication (P24) 5 Remaining number of recordable pictures : Built-in memory (P16) : Card (P16) 7 Recording indication 8 AF area (P25) 9 Travel date (P55)
-
Page 94: Cautions For Use
Cautions for Use ■ Optimal Use of the Camera Take care not to drop or knock the unit or put a lot of pressure on it. • Do not leave the unit in your pants pocket when you sit down or forcefully insert it into a full bag etc. - Page 95 ■ Batteries Be sure to remove the batteries when you will not be using the camera for a long period of time. • If the temperature is too high or low, the terminals may rust causing a malfunction. If you drop the batteries accidentally, check to see if the body of the batteries and the terminals are damaged.
-
Page 96: Message Display
Message Display Confi rmation messages or error messages will be displayed on the screen in some cases. The major messages are described below as examples. [CURRENT BATTERY TYPE SETTING: OXYRIDE]/[CURRENT BATTERY TYPE SETTING: ALKALINE/Ni-MH] This message is displayed the fi rst time you insert batteries and when the batteries are exhausted and you replace them. - Page 97 [MEMORY CARD ERROR FORMAT THIS CARD?] The format of the card cannot be recognized by this camera. Format the card again with this camera. Save your data to your computer, then use this unit to reformat the card. (P83) [PLEASE TURN CAMERA OFF AND THEN ON AGAIN] This message appears when the camera is not operating properly.
-
Page 98: Troubleshooting
Troubleshooting If you put the menu back to the settings at the time of purchase, the conditions may be improved. Carry out the [RESET] in the setup menu. (P23) ■ Batteries and power supply Conditions The camera turns off immediately even when battery power is full. - Page 99 Conditions The subject is not focused properly. Sometimes two or three pictures are taken with a single press of the shutter button. The recorded picture is blurred. The optical image stabilizer is not effective. Images are grainy or noisy. The brightness or color of the picture differs from the actual scene.
- Page 100 ■ LCD Conditions The LCD monitor sometimes turns off although the camera is turned on. The brightness of the LCD monitor becomes dark or bright for a moment. The LCD monitor fl ickers indoors. The LCD monitor is too bright or dark. Black, red, blue and green dots appear on the LCD monitor.
- Page 101 ■ Playback Conditions Pictures rotate unexpectedly. The picture is not played back. Folder or fi le number appears as [-] and the display goes black. The picture is displayed with a date different from the actual recording date in calendar playback. ■...
- Page 102 Conditions The display areas on the TV screen and the camera’s LCD monitor are different. Cannot play motion pictures on a television. The picture size does not fi t the TV screen. Cannot upload pictures to your computer. The computer does not recognize the card.
- Page 103 Conditions The AF assist lamp does not turn on. The camera gets hot. The lens clicks. The clock setting is reset. Images appear slightly distorted. Strange colors appear around the edge of the image. File numbers are not created in order. The fi...
-
Page 104: Available Recording Time
2 GB 4 GB 1560 VQT1C63 Others : 7M (3072 × 2304 pixels) 1090 2150 1530 3010 DMC-LS60 only : 6M (2816 × 2112 pixels) 1270 1290 2510 : 3M EZ (2048 × 1536 pixels) 1180 1220 2360 2410 4640... - Page 105 Others : 2M EZ : 1M EZ (1280 × 960 pixels) 1880 1470 3610 2920 7090 5740 DMC-LS60 only : 6M : 5M (2816 × 1880 pixels) 1220 2410 1450 DMC-LS60 only : 5.5M : 4.5M (2816 × 1584 pixels)
- Page 106 ■ Available recording time (In Motion picture mode) Picture quality 30fps setting Built-in Memory — (Approx. 27 MB) 16 MB 32 MB 64 MB 1 min 128 MB 2 min Card 256 MB 5 min 512 MB 1 GB 11 min 22 min 2 GB 44 min...
-
Page 107: Specifi Cations
35 to 105 mm] /F2.8 to F5.0 Max. 4 × DMC-LS75/DMC-LS70 : max 4.5 × (When recording resolution is or less) DMC-LS60 : max 4.1 × (When recording resolution is or less) Normal/Macro (Mode dial) 5-area-focusing/1-area-focusing (high speed)/1-area- focusing Normal : 50 cm (1.64 feet) to... - Page 108 Amorphous silicon active TFT LCD DMC-LS75: 2.5˝ (Approx. 115,200 pixels) (fi eld of view ratio about 100%) DMC-LS70/DMC-LS60: 2.0˝ (Approx. 86,400 pixels) (fi eld of view ratio about 100%) Flash range: (ISO AUTO) Approx. 30 cm (0.98 feet) to 4.7 m (15.42 feet) (Wide [ISO...
- Page 109 DMC-LS75: Approx. 4.87 oz/138 g (excluding Memory Card and battery) Approx. 6.49 oz/184 g (with Memory Card and battery) DMC-LS70/DMC-LS60: Approx. 4.76 oz/135 g (excluding Memory Card and battery) Approx. 6.38 oz/181 g (with Memory Card and battery) 0 °C to 40 °C (32 °F to 104 °F)
-
Page 110: Digital Camera Accessory System
Digital Camera Accessory System Accessory# DMW-AC6 DMW-CLS75 DMW-CHTZ3 RP-SDR04GU1K RP-SDK02GU1A RP-SDR02GU1A RP-SDK01GU1A RP-SDH01GU1A RP-SDR01GU1A RP-SDK512U1A RP-SDR512U1A RP-SDH256U1A RP-SDR256U1A RP-SD128BU1A RP-SD064BPPA • NOTE: Accessories and/or model numbers may vary by country. Please consult your local dealer. VQT1C63 Others Figure AC Adaptor... -
Page 111: Digital Camera Accessory Order Form (For Usa Customers)
CALL PANASONIC’S ACCESSORY ORDER LINE AT 1-800-332-5368 [6 AM-5 PM M-F, 6 AM-10:30 AM SAT, PACIFIC TIME] MAIL THIS ORDER TO: PANASONIC SERVICE AND TECHNOLOGY COMPANY 20421 84th Avenue South Kent, WA. 98032 In CANADA, please contact your local Dealer for more information about accessories. -
Page 112: Request For Service Notice (For Usa Only)
(Failure to do so will delay your repair.) • To further speed your repair, please provide an explanation of what wrong with the unit and any symptom it is exhibiting. Panasonic Camera and Digital Service Center 1590 Touhy Ave. Elk Grove Village, IL 60007... -
Page 113: Limited Warranty (For Usa Only)
Limited Warranty Coverage If your product does not work properly because of a defect in materials or workmanship, Panasonic Consumer Electronics Company or Panasonic Puerto Rico, Inc. (collectively referred to as “the warrantor”) will, for the length of the period indicated on the chart below, which starts with the date of original purchase (“warranty period”), at its option either (a) repair your product with new... - Page 114 Carry-In or Mail-In Service For Carry-In or Mail-In Service in the United States call 1-800-272-7033. For assistance in Puerto Rico call Panasonic Puerto Rico, Inc. (787)-750-4300 or fax (787)-768-2910. This warranty ONLY COVERS failures due to defects in materials or workmanship, and DOES NOT COVER normal wear and tear or cosmetic damage.
-
Page 115: Customer Services Directory (For Usa Only)
Web Site: http://www.panasonic.com/consumersupport You can purchase parts, accessories or locate your nearest Service Center by visiting our Web Site. Purchase Parts, Accessories and Instruction Books online for all Panasonic Products by visiting our Web Site at: http://www.pasc.panasonic.com or, send your request by E-mail to: npcparts@us.panasonic.com... -
Page 116: Précautions À Prendre (Pour Les Clients Canadiens)
• Si vous songez à utiliser des piles rechargeables, les piles fabriquées par Panasonic sont recommandées. • Assurez-vous d’utiliser un adaptateur secteur de marque Panasonic (modèle DMW-AC6; en option). • N’utilisez pas d’autres câbles de connexion USB à l’exception de celui fourni. - Page 117 Évitez d’approcher l’appareil photo de tout équipement magnétisé (four à micro-ondes, téléviseur, équipement de jeux vidéo, etc.). • Si vous utilisez l’appareil sur ou proche d’un téléviseur, les images de l’appareil photo risquent d’être distordues par le rayonnement électromagnétique. • N’utilisez pas l’appareil à proximité des téléphones cellulaires qui pourraient créer du bruit vidéo sur les images.
-
Page 118: Index
Index AC adaptor ... 84, 87, 110 Access indication ... 24 Aerial photo mode ... 52 AF Assist Lamp ... 66 AF/AE Lock ... 27 AF Mode ... 63 Alkaline batteries ... 11 Aspect ratio ... 62 Auto Review ... 21 Auto White Balance ... - Page 119 Normal picture mode ... 25 Number of Prints ... 77, 89 Number of recordable pictures ... 13, 104 Operational sound ... 22 Optical Image Stabilizer ... 64 Optical Zoom ... 30 Oxyride batteries ... 11 Page layout ... 90 PAL ... 23, 91 Paper size ...
- Page 120 QuickTime and the QuickTime logo are trademarks or registered trademarks of Apple Computer, Inc., used under license therefrom. Panasonic Consumer Electronics Company, Division of Panasonic Corporation of North America One Panasonic Way, Secaucus, NJ 07094 Panasonic Puerto Rico, Inc. Ave. 65 de Infantería, Km. 9.5, San Gabriel Industrial Park, Carolina, Puerto Rico 00985 Panasonic Canada Inc.