Table of Contents
Advertisement
Quick Links
INSTALLATION MANUAL
FOR YOUR SAFETY - This product must be installed in accordance with AS/NZ 3000 - 2018 and any other local
applicable regulations. Before installing this product, read and follow all warning notices and instructions that
accompany this product. Failure to follow warning notices and instructions may result in property damage,
personal injury, or death. Improper installation and/or operation will void the warranty.
Improper installation and/or operation can create unwanted electrical hazard which can cause serious injury,
property damage, or death.
halo
®
Automation
Expansion Module
WARNING
hub
TM
Advertisement
Table of Contents

Subscribe to Our Youtube Channel
Related Manuals for Astralpool HALO HUB


Summary of Contents for Astralpool HALO HUB
- Page 1 INSTALLATION MANUAL halo ® Automation Expansion Module WARNING FOR YOUR SAFETY - This product must be installed in accordance with AS/NZ 3000 - 2018 and any other local applicable regulations. Before installing this product, read and follow all warning notices and instructions that accompany this product.
- Page 2 ™ Installation Manual For full warranty terms and conditions and to register your warranty, visit www.astralpool.com.au/warranty and complete your details. Or scan the QR code to go directly to the registration page Record your equipment details here for quick reference: Model No.
-
Page 3: Table Of Contents
Mounting ..................5 Power Connections ..............5 Other Connections ..............6 Section 4. Pairing and Configuring a Halo Hub ........... 6 Pairing to the Halo Chlor ............6 Configuration and Setup ............8 Unpairing from a Halo Chlor ..........9 Section 5. Control using the Halo Chlor ............ -
Page 4: Important Safety Instructions
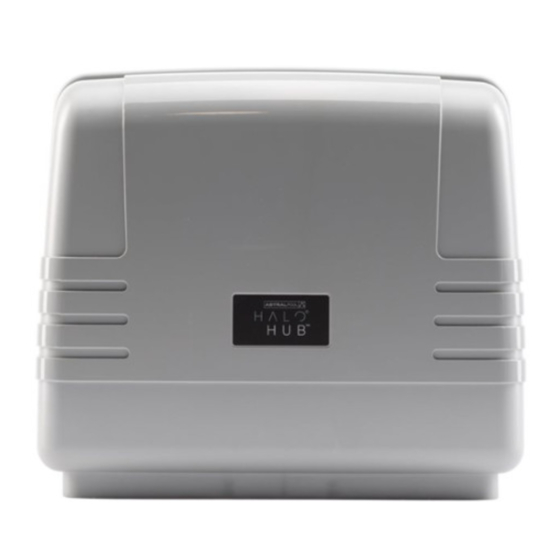
WARNING The Halo Hub has an IP23 rating, meaning it is suitable for installation outdoors. For safe operation, the Halo Hub must be installed in the correct orientation, with the cables leaving from the bottom of the device. If installing the Halo Hub near the pool or spa water, you must ensure that the rules of AS3136 are followed at all times. -
Page 5: System Overview
Mounting a Halo Chlor and can be controlled through the Halo Chlor's main touchscreen or through the Halo ChlorGo The Halo Hub must be mounted to a wall using the App. steel mounting bracket supplied. The position of the mounting bracket, relative to the top of the product, Only one Halo Hub can be paired to a Halo Chlor. -
Page 6: Other Connections
“Settings” page of the chlorinator. The following table shows typical uses for the two temperature sensors on the Halo Hub. NOTE: The Halo Hub does not support the use of the filter pump for solar control. Application Purpose... - Page 7 For information on the use of relay 1, and input 1 or 2, each one of two GPO’s. Press the button of the see Appendix 2. Halo Hub and press “Edit”. If you are adding a heater, press the “Add/Remove” button and then press “Heater”.
-
Page 8: Configuration And Setup
HALO ® ™ installation manual • “Hub Viron Heatpump” uses the Hub RJ45 The list that is generated is used to describe how you connector and an “Ethernet” cable directly to the wish to use the equipment. heat pump. For example: •... -
Page 9: Unpairing From A Halo Chlor
Chlor Manual Control All of the functions of the Halo Hub can be controlled using the icons in the top ribbon of the Halo Chlor display. (Icons will only appear in the top ribbon if appropriate devices have been configured.) Press the icons, lights, heater, solar etc., to control... -
Page 10: Control With The Chlorinator
Halo Chlorinator (although icon images may vary). can’t be controlled using the RJ12, RS485 (on the Halo The Halo Hub is controlled through the Halo Chlor Chlor) or the RJ45 connector on the Halo Hub. App. The app can be loaded onto multiple mobile... - Page 11 “Equipment Configuration“, press “Add/ The “Automation” connector is used to allow a home Remove“ and then select “Halo Hub”. Press “Edit” to automation system or manual switches to control the edit the configuration and then “Next” to get to the chlorinator system.
- Page 12 219 Woodpark Road Smithfield NSW 2164, Australia 1 300 186 875 www.astralpool.com.au ©2021 Fluidra S.A. All rights reserved. This document is subject to change without notice. ©2021 Fluidra S.A. All rights reserved. This document is subject to change without notice.
Need help?
Do you have a question about the HALO HUB and is the answer not in the manual?
Questions and answers