Table of Contents

Subscribe to Our Youtube Channel
Related Manuals for vita vPad excellence


Summary of Contents for vita vPad excellence
- Page 1 VITA vPad excellence Instructions for use VITA Farbkommunikation VITA Farbkommunikation VITA shade determination VITA shade communication VITA shade reproduction VITA shade control Date of issue: 2022-01 VITA – perfect match.
- Page 2 The VITA vPad excellence is a state-of-the-art control unit that complies with all the international safety standards. In order to ensure that you can operate the VITA vPad excellence safely and effectively, please read these instructions for use and all the relevant notices carefully.
-
Page 3: Table Of Contents
9.6 Spare parts ......... . 70 9.2 VITA system solutions ........67 9.7 Competitor material . -
Page 5: The System
High-speed sintering furnace VITA ZYRCOMAT 6100 MS • For connecting two to four firing devices to the vPad excellence, you will need a VITA SWITCHBOX II. • VITA MultiPump: an adaptor for operating one to four VITA vacuum firing devices with a vacuum pump for:... -
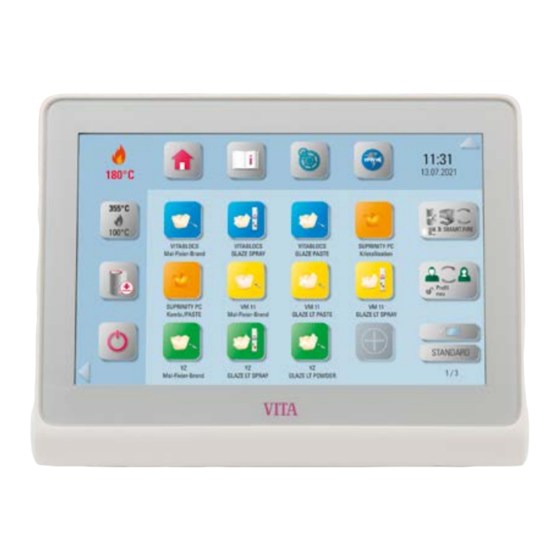
Page 6: The Control Unit
Port for connecting cable Adjustable stand Note: • The VITA vPad excellence has two USB connections for transferring photos, firing programs or device updates. • Images can be transferred directly from the camera to the VITA vPad via the SD card slot. -
Page 7: Connections Of The Vita Vacumat 6000 M
2. First use 3. Operation 2. First use 2.1 Connection to the VITA VACUMAT 6000 M (see also the VITA VACUMAT 6000 M instructions for use) Connection for VITA vPad comfort/ VITA vPad excellence or VITA SWITCHBOX II 2.2 Connections of the VITA VACUMAT 6000 MP... -
Page 8: Connections Of The Vita Zyrcomat 6100 Ms
2. First use 1. The system 3. Operation 2.3 Connection to the VITA ZYRCOMAT 6100 MS (see also the VITA ZYRCOMAT 6100 MS instructions for use) Connection for the VITA vPad comfort/ VITA vPad excellence or VITA SWITCHBOX II 2.4 Connection to the VITA SMART.FIRE (see also the VITA SMART.FIRE instructions for use) -
Page 9: Starting Up The Firing System Of A Unit
• When starting up two or more VITA devices with one VITA vPad excellence and the VITA SWITCHBOX II, pay attention to the numerically identified connections of the VITA SWITCHBOX II. • Pos. 1 of the VITA SWITCHBOX II ensures the power supply of the vPad excellence and must always be connected to a firing device that is switched on. -
Page 10: Operation
3. Operation 2. First use 4. Settings 3. Operation 3.1 Gesture controls of the control unit Swiping To go to the next desktop, swipe right or left on the desktop. Zooming You can enlarge or reduce photos or PDFs by using two fingers to expand or contract the items. Scrolling Swipe downwards or upwards to move between pages in a PDF. -
Page 11: Power
20 minutes. The firing unit will then be ready for firing processes. VITA AntiCon. If the firing unit is switched off for an extended period of time, the firing chamber is heated for five minutes while slightly open the next time the firing unit is switched on and the standby temperature is activated. -
Page 12: Instructions For Use And Information
3.7 Instructions for use and information Tap the icon. Select the desired file. Note: • Here you can find the instructions for use for VITA devices, the instructions for use for VITA materials and additional information. 3.8 Settings Tap the icon. - Page 13 2. First use 3. Operation 4. Settings Text field Cancel Bookmarks Update Homepage Back Address line Next Example: Call up webpage and set bookmark Call up web browser. Click on address line. Delete address line. Enter target address and press Enter. Set bookmarks.
-
Page 14: Multifurnace Overview
Note: • Here you can see all firing devices that you can control using the VITA vPad excellence. • Change firing device: To change the firing device, tap on the desired furnace. This will then be active and can be used. -
Page 15: Adding A Desktop
2. First use 3. Operation 4. Settings 3.12 Adding a desktop Tap the icon. New desktop. Note: • Pressing the New Desktop button gives you a new desktop view. • You can find detailed information on setting up your desktop in Chapter 5 Desktop management. 3.13 Changing the desktop Tap the icon. -
Page 16: Adding A Firing Program
3. Operation 2. First use 4. Settings 3.14 Adding a firing program Press the "+" button. Overview of available materials. Select the required material. Select the desired firing program. Confirm your selection. Create individual firing program. Select a firing curve. Note: •... -
Page 17: Control Unit Settings
• Screen saver: Here you can configure and activate the screen saver. • Contact information: Here you will find the data protection declaration, declaration for the transmission of VITA offers, as well as the contact information form. -
Page 18: Multifurnace Overview And Firing Unit Settings
Note: Temperature calibration for VITA ZYRCOMAT 6100 MS • To calibrate the temperature, please only use the VITA temperature calibration set provided by VITA and follow the instructions in the instructions for use. Cleaning firing in the VITA ZYRCOMAT 6100 MS •... - Page 19 Temperature calibration using the VITA VACUMAT 6000 M / MP Silver Test: • With the Silver Test program and the VITA Silver Test Set, you can test the temperature in the firing chamber and readjust within the range of plus / minus 40 °C.
- Page 20 4. Settings 3. Operation 5. Desktop management Standby temperature Select "Firing unit setting." Set the standby temperature. Note: • Here, you can change the standby temperature (Standby Temperature). Leak test Select "Firing unit setting." Press Leak Test Note: • This function tests the vacuum tightness of the furnace. Lift speed Select "Firing unit setting."...
-
Page 21: Device Information
USB input and tap "To USB drive" to transfer operating data / device information to a USB drive. • If you are connected to the WLAN network, you can tap on the "Send to VITA online" field. To do this, you must have saved your contact information in the device. -
Page 22: Firmware Update
• You can use the "Update from USB drive" function to load an update file previously downloaded from the homepage onto your vPad excellence. • You can use the "Online update" function to download an update directly from the VITA homepage. To do this, you need to connect your vPad excellence to the wireless network. -
Page 23: Abort Setting
• Rapid cooling is only active if the firing chamber temperature is 50 °C higher than the standby temperature. Then the lift remains in the lower position and the VITA vacuum pump is connected. After reaching the standby temperature minus 50 °C, the lift moves in and the firing chamber is heated to the standby temperature. -
Page 24: File Manager
• File Manager for creating a custom profile, desktop and flexible file management. • Firing programs, PDF documents and photos can be copied and deleted. • The "VITA" folder contains all pre-installed firing programs for VITA materials, which you can transfer into the desired profile and onto a desktop. - Page 25 • Example of transferring the "VITABLOCS GLAZE LT SPRAY" firing program in the "User" profile to the "New Screen" desktop. • To transfer a firing program in the File Manager, you must first create a new profile. The "VITA" profile and the associated desktop cannot be altered.
- Page 26 4. Settings 3. Operation 5. Desktop management Example: Import firing programs from a USB drive Select, for example "USB1." Mark the firing programs. Press "Profile." Select a profile. Select desktop. Confirm. Firing programs have been imported. Note: • Select desktop.
- Page 27 Example: Exporting firing programs to a USB drive Select the "Profile" file. Select a profile. Select desktop. Select the firing program you wish to Select "USB1." Confirm. export. Firing programs have been exported. Note: • No firing programs can be exported from the "VITA" folder.
- Page 28 4. Settings 3. Operation 5. Desktop management Example: Importing photos into the "Screensaver" folder Select, for example, "USB 1" after you Mark the photos that you would like to Select "Screensaver" file. have connected the USB drive. transfer. Confirm. Transfer completed. Note: •...
-
Page 29: Smart.view Setting
3. Operation 4. Settings 5. Desktop management 4.9 SMART.VIEW SETTINGS Select "Smart.view settings." SET SMART.VIEW. Note: • You have the option of choosing between two views during the firing process. • If you activate SMART.VIEW, you will be shown the remaining time of the active firing. •... -
Page 30: Profile Setting
• You create an individual profile with the Profile Manager. • You can rename this individual profile, configure it, protect it with a password and copy or delete it. • You can import and export individual profiles. • The "VITA" profile cannot be changed. - Page 31 3. Operation 4. Settings 5. Desktop management Example: Create a new profile Click on "Create profile." Name your profile. Configure your profile button. For example, all VM13 firings are To select individual firings, tap the Select individual firings for VITABLOCS. selected.
- Page 32 4. Settings 3. Operation 5. Desktop management Example: Renaming a profile Select a profile and then click on Name your profile. Unnamed profile. "Rename profile." Note: • Example for renaming a profile. Example: Configuring a profile Select a profile and then tap Configure your Profile button.
- Page 33 3. Operation 4. Settings 5. Desktop management Example: Export profile Select the profile that is to be exported. Click on "Export profile." Select the USB access. Select "Transfer." The desired profile has been exported. Note: • Connect a USB drive to the vPad to export a profile. Example: Import profile Select "Import profile."...
- Page 34 4. Settings 5. Desktop management 6. Button management...
-
Page 35: Desktop Editing Menu
4. Settings 5. Desktop management 6. Button management 5. Desktop management Desktop Note: • The area outlined in magenta is the desktop. This is the workspace where firing programs, photos, PDFs and bookmarks from the web browser can be stored. 5.1 Desktop editing menu Desktop editing menu Note:... -
Page 36: Naming The Desktop
5. Desktop management 4. Settings 6. Button management 5.2 Name desktop Screen Press on the desktop and hold until Select "Naming the desktop." Enter the desktop name. the desktop editing menu is activated. Tap the desktop Renamed desktop. to close the editing menu. Note: •... -
Page 37: Storing Desktop Information
4. Settings 5. Desktop management 6. Button management 5.4 Save desktop information Press on the desktop and hold until Select "Save desktop information." Tap the input field. the desktop editing menu is activated. Now you can save information to The "Info Symbol" next to the desktop the desktop. -
Page 38: Copying A Desktop
5. Desktop management 4. Settings 6. Button management 5.6 Copy desktop Press on the desktop and hold until Select "Copy desktop." Press on the desktop and hold until the the desktop editing menu is activated. desktop editing menu is activated. Select "Paste desktop."... -
Page 39: Pasting A Desktop
4. Settings 5. Desktop management 6. Button management 5.8 Pasting a desktop Please note: • This function is only active in combination with the desktop copy function and the desktop paste function. 5.9 Delete desktop Press on the desktop and hold until Select "Delete desktop"... - Page 40 5. Desktop management 6. Button management 7. Firing window...
-
Page 41: Button Editing Menu
5. Desktop management 6. Button management 7. Firing window 6. Button management 6.1 Button editing menu Hold down the button until the button Tap the desktop area to close the editing menu is activated. editing menu. Name a button Configure a button Save button information Create new firing program Copy button... -
Page 42: Moving A Button
6. Button management 5. Desktop management 7. Firing window 6.3 Moving a button Hold down the button until it becomes Repositioned button. transparent and then move it. Note: • This function allows you to reposition the button on the desktop. •... -
Page 43: Configuring A Button
5. Desktop management 6. Button management 7. Firing window 6.5 Configuring a button Hold down the button until the button Select "Configure button." Select the icon and background color. editing menu is activated. Tap the desktop Configured button. to close the editing menu. Note: •... -
Page 44: Storing Button Information
6. Button management 5. Desktop management 7. Firing window 6.6 Save button information Hold down the button until the button Select "Save button information." Tap the green field to activate the editing menu is activated. input field. Add your own information about Tap the desktop to close the editing the button. -
Page 45: Creating A New Firing Program
5. Desktop management 6. Button management 7. Firing window 6.7 Creating a new firing program Hold down the button until the Select "Create new firing program." Choose between firing curve types. button editing menu is activated. Tap the desktop to close the editing Final added firing program. -
Page 46: Copying A Button
6. Button management 5. Desktop management 7. Firing window 6.8 Copying a button Hold down the button until the button Select "Copy button." Select desktop and activate button editing menu is activated. editing menu. Select "Paste button." Copied button. Note: •... -
Page 47: Pasting A Button
5. Desktop management 6. Button management 7. Firing window 6.10 Pasting a button Note: • This function is only active in combination with the cut function and the paste function. 6.11 Deleting a button Hold down the button until the button Select "Delete button."... - Page 48 6. Button management 7. Firing window 8. Technical data / information...
-
Page 49: Firing Program: One- And Two-Step Curve
6. Button management 7. Firing window 8. Technical data / information 7. Firing window 7.1 Firing program: one- and two-step curve Select firing program. Multifurnace: Press and hold the firing Briefly press firing program to go program button to move it if you want to the firing window. - Page 50 7. Firing window 6. Button management 8. Technical data / information Note: • Modified parameters will affect the active firing process. If you want to make permanent changes to the firing programs, you will need to save them. • Process data: Used for quality assurance and traceability. •...
- Page 51 6. Button management 7. Firing window 8. Technical data / information Process data Tap on the process data. Note: • A function that allows quality assurance and traceability. • Job number, name, notes, profile, material name, firing program name, firing program data, target and actual values, device type, device serial number, date and time of the firing process are automatically saved.
- Page 52 7. Firing window 6. Button management 8. Technical data / information Pre-drying lift position Modifiable parameters: Lift position: • Value c: highest lift position entry: min. value b - max. 100% • Value b: middle lift position entry: min. value a - max. value c •...
- Page 53 6. Button management 7. Firing window 8. Technical data / information Rise time/gradient Modifiable parameters: • Rise time: 00:05 – 120:00 min • Rise gradient: 2 °C/min – 120 °C/min Note: • The rise time is automatically calculated and adjusted after the pre-drying temperature or firing temperature is entered.
- Page 54 7. Firing window 6. Button management 8. Technical data / information Firing temperature and holding time Modifiable parameters: • Firing chamber temperature: pre-drying temperature plus 10°C – 1200°C • Holding time: 00:00 min – 60:00 min Note: • The possible values to enter are displayed above the number field. •...
- Page 55 • The gloss of the restoration can be adjusted using the gloss level function. • Sliding the gloss level regulator to the right increases the gloss. • Sliding the gloss level regulator to the left reduces the gloss. • This function is only available for the gloss firing programs of the VITA materials.
-
Page 56: Firing Program: Press Curve
7. Firing window 6. Button management 8. Technical data / information 7.2 Firing program: pressing curve Select pressing program. Multifurnace: Press and hold the firing Briefly press firing program to go program button to move it if you want to the firing window. to use another firing device. - Page 57 6. Button management 7. Firing window 8. Technical data / information Start temperature Note: • Start temperature: 60°C – 800°C • The possible values to enter are displayed above the number field. Pressing time and pressing pressure 1 Note: • Pressing time: 00:00 min – 120:00 min •...
- Page 58 7. Firing window 6. Button management 8. Technical data / information Starting the pressing program Start pressing program Confirm the message. This causes Once you have inserted the pressing without pressing object. the lift plate to move to the bottom material, confirm the message.
-
Page 59: Firing Program: Sintering Curve
6. Button management 7. Firing window 8. Technical data / information 7.3 Firing program: sintering curve Select sintering program. Multifurnace: Press the firing program Briefly press firing program to go to the and hold and move if you want to use firing window. - Page 60 7. Firing window 6. Button management 8. Technical data / information Activating/deactivating Pre-drying (VITA Pre-dry) Select firing chamber temperature / Activate pre-dry. Once you have done this, confirm. holding time. Activating/deactivating the first phase Select first phase: Gradient/rise time. Activate first phase.
- Page 61 6. Button management 7. Firing window 8. Technical data / information Activating/deactivating controlled cooling Select the first cooling phase. Select first cooling phase: Confirm. "Controlled cooling." Select the second cooling phase. Select second cooling phase: Confirm. "Controlled cooling." Select the third cooling phase. Select third cooling phase: Confirm.
- Page 62 7. Firing window 6. Button management 8. Technical data / information Cooling mode 1 Note: • You can adjust the cooling phases to suit your individual needs. Cooling mode 2 Note: • There are three fixed cooling positions. • Lift position at the following temperatures: Temperature: >...
-
Page 63: Changes After Program Start
6. Button management 7. Firing window 8. Technical data / information 7.4 Changes after program start Note: • Changes of program values are possible after starting a firing program. To avoid misfires, changes which automatically impact other program areas are not allowed, such as changes in the rise time, which causes an automatic adjustment of the vacuum time. - Page 64 7. Firing window 8. Technical data / information 9. Additional information...
-
Page 65: Specification And Symbols
Application area Approved for indoor operation only Symbols CE marking The VITA vPad excellence complies with the applicable regulations of the European Union (EU). The declaration of conformity can be requested from VITA (Regulatory Affairs Department) at: www.vita-zahnfabrik.com. 8.2 Information Basic information on the device design •... -
Page 66: Safety Functions
7. Firing window 9. Additional information 8.3 Safety functions If the firing device is operated with a VITA vPad excellence, it is equipped with the following safety and monitoring functions: 1. Temperature sensor monitoring 2. Power supply failure protection 3. Obstruction sensor 4. -
Page 67: Delivery Scope Of Vita Vpad Excellence
• Use VITA AKZENT Plus masking and glazing stains for feldspar Shade and glass ceramics. modification* • Use VITA Platinum Pins and VITA Firing Paste to ensure that the restoration is securely placed on the firing tray. Firing preparation • The VITA VACUMAT 6000 M/MP is the ideal solution for crystallization, glaze, stain and corrective firing. -
Page 68: Additional Information
30% is not reached within 30 seconds. • Clean the edge seal on the firing chamber floor. For cleaning work, see the instructions for use for the VITA VACUMAT 6000 M or VITA VACUMAT 6000 MP. • Inspect the vacuum pump separately from the device. - Page 69 9. Additional information 8. Technical data / information Additional error message from the VITA ZYRCOMAT 6100 MS Display Recognition Cause/correction Ventilator power board defective. Running program is stopped, heating off. • Inspect connections to the circuit board. • Inspect/replace ventilator.
-
Page 70: Vita Warranty And Consumer Protection
Ivoclar Vivadent firing tray. The firings for IPS Empress CAD, IPS e.max ZirCAD, Celtra Duo, Celtra Ceram and n!ce can be carried out on the firing tray W with VITA platinum pins. The current firing parameters for Celtra Duo, Celtra Ceram, Celtra Press, IPS e.max CAD, IPS Empress CAD, e.max ZirCAD and n!ce are intended as guidelines only. -
Page 71: Hotline And Support
Mrs. Carmen Holsten and her team If you have technical questions concerning (Internal Sales Department) will be glad to assist VITA product solutions, you can contact you with orders or questions about the delivery, Dr. Michael Tholey, our technical advisor, product data and marketing materials. - Page 72 The VITA Modulbox is not necessarily a component of the product. Date of issue of this information: 2022-01 After the publication of this information for use any previous versions become obsolete.
Need help?
Do you have a question about the vPad excellence and is the answer not in the manual?
Questions and answers