
Related Manuals for SRAM Rock Shox Lyrik RC


Summary of Contents for SRAM Rock Shox Lyrik RC
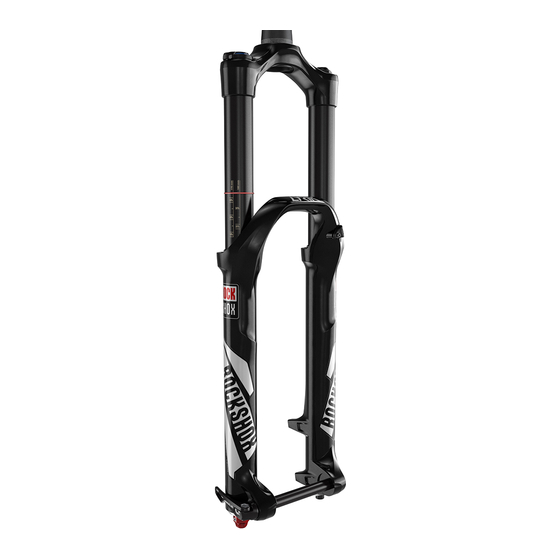
- Page 1 2016-2017 Lyrik s e r v i c e m a n u a l GEN.0000000005042 Rev E © 2022 SRAM, LLC...
- Page 2 BRAND NAMES. EXTENT OF LIMITED WARRANTY Except as otherwise set forth herein, SRAM warrants its bicycle components to be free from defects in materials or workmanship for a period of two (2) years after original purchase of the product. SRAM warrants all Zipp MOTO Wheels and Rims to be free from defects in materials or workmanship for the lifetime of the product.
-
Page 3: Table Of Contents
TABLE OF CONTENTS EXPLODED VIEW - (A1) LYRIK RCT3/DUAL POSITION AIR (DPA) .......................5 EXPLODED VIEW - (B1) LYRIK RC/SOLO AIR (SA) ............................6 ROCKSHOX SUSPENSION SERVICE ................................7 PARTS, TOOLS AND SUPPLIES ........................................... 7 MODEL CODE IDENTIFICATION ..........................................7 RECOMMENDED SERVICE INTERVALS ........................................8 RECORD YOUR SETTINGS ............................................8 TORQUE VALUES ................................................8 FLUID VOLUME .................................................8... - Page 4 SAFETY FIRST! We care about YOU. Please, always wear your safety glasses and protective gloves when servicing RockShox products. Protect yourself! Wear your safety gear!
-
Page 5: Exploded View - (A1) Lyrik Rct3/Dual Position Air (Dpa)
E x p l o d e d V i e w - ( A 1 ) L y r i k R C T 3 / D u a l P o s i t i o n A i r ( D P A ) Air Shaft Assembly Air Valve Cap Knob Retaining Nut... -
Page 6: Exploded View - (B1) Lyrik Rc/Solo Air (Sa)
E x p l o d e d V i e w - ( B 1 ) L y r i k R C / S o l o A i r ( S A ) Air Shaft Assembly Compression Damper Air Valve Cap Assembly SA Top Cap... -
Page 7: Rockshox Suspension Service
RockShox Spare Parts catalog and technical information. For order information, please contact your local SRAM distributor or dealer. For recycling and environmental compliance information, please visit www.sram.com/en/company/about/environmental-policy-and-recycling. Information contained in this publication is subject to change at any time without prior notice. Your product's appearance may differ from the pictures contained in this publication. -
Page 8: Recommended Service Intervals
**Suspension oil/fluid - Maxima PLUSH Dynamic Suspension Lube and RockShox 0w-30 suspension oils/fluids are forward and backward compatible with RockShox Dynamic Seal Grease and SRAM Butter Grease. Use ONLY RockShox, SRAM, and Maxima suspension oils/fluids and grease, unless otherwise specified. Use of any other lubricants can damage seals and decrease performance. -
Page 9: Lower Leg Removal
L o w e r L e g R e m o v a l 5 0 / 2 0 0 H o u r S e r v i c e L o w e r L e g R e m o v a l Remove the air valve cap from the top cap located on the spring side fork leg. -
Page 10: 50/200 Hour Service
Place an oil pan beneath the fork to catch any draining oil. 5 mm Use a rubber or plastic mallet to firmly strike each bottom bolt to dislodge the air and damper shafts from the lower leg. Use a 5 mm hex wrench to remove the bottom bolts from the lower leg. Firmly pull the lower leg downward until oil begins to drain. -
Page 11: 50 Hour Service
5 0 H o u r S e r v i c e L o w e r L e g S e r v i c e Remove the foam rings and clean them with isopropyl alcohol and a clean rag. -
Page 12: 200 Hour Service
2 0 0 H o u r S e r v i c e L o w e r L e g S e a l S e r v i c e Place the tip of a downhill tire lever underneath the lower lip of the dust wiper seal. - Page 13 Spray isopropyl alcohol on the inside and outside of the lower leg. Clean the outside of the lower leg with a rag. Wrap a rag around a long dowel and insert it into each lower leg to clean the inside of the lower leg. Install the new foam rings in the lower leg.
- Page 14 Hold the lower leg steady and use the RockShox 35 mm dust seal installation tool to press the dust wiper seal evenly into the lower leg until the seal surface is flush with the top of the lower leg surface. Reinstall the wire spring onto the dust wiper seal.
-
Page 15: Air Spring Service
When replacing seals and o-rings, use your fingers or a pick to remove the seal or o-ring. Spray isopropyl alcohol on each part and clean with a rag. Apply SRAM Butter grease to the new seals and o-rings. Dual Position Air: Use a 10 mm socket wrench to remove the DPA travel adjuster knob retaining nut. - Page 16 Use a 24 mm socket wrench to remove the top cap from the upper tube. 24 mm Spray isopropyl alcohol on the upper tube threads and clean the threads with a rag. Use your fingers or a pick to remove the top cap o-ring. Pick Use your fingers to install a new o-ring.
- Page 17 Dual Position Air: Push the air shaft into the upper tube to prevent it from getting scratched while removing the retaining ring. Use a flat blade screwdriver to push the seal head tab under the retaining ring. NOTI CE Scratches on the air shaft will allow air to bypass the seal head into the lower leg, resulting in reduced spring performance.
- Page 18 Use your fingers to install the bottom bolt into the air shaft. Firmly pull on the air shaft and bottom bolt to remove the air shaft assembly from the upper tube. Unthread and remove the bottom bolt from the air shaft. Clean and inspect the assembly for damage.
- Page 19 Dual Position Air: Use your fingers or a pick to remove the outer air piston o-ring. Use a pick to pierce and remove the inner o-ring. Install new o-rings. Solo Air: Use your fingers or a pick to remove the air piston quad ring. Install a new quad ring.
-
Page 20: Air Spring Travel Change And Bottomless Tokens (Optional)
For part ordering information, please contact your local SRAM distributor or dealer. S o l o A i r T r a v e l O p t i o n s a n d B o t t o m l e s s T o k e n T u n i n g 27.5"+ / 29"... -
Page 21: Bottomless Token Installation (Optional)
B o t t o m l e s s T o k e n I n s t a l l a t i o n ( o p t i o n a l ) Bottomless Tokens reduce the air volume in your fork to create greater ramp at the end of the fork travel. Add tokens to maintain your fork's bottomless feel. -
Page 22: Air Spring Installation
For part ordering information, please contact your local SRAM distributor or dealer. Apply a liberal amount of SRAM Butter grease to the air piston and seal head seals. Install the backup ring, a new wave spring, and a new seal head assembly, in that order, onto the air shaft. - Page 23 Firmly push the air shaft assembly into the bottom of the upper tube while gently rocking the air shaft side to side. Make sure the shaft remains fully extended. Use your fingers to firmly press the seal head into the upper tube until it snaps into place.
- Page 24 Install the air spring top cap into the top of the upper tube. Use a torque wrench with a 24 mm socket to tighten the top cap to 28 N·m (250 in-lb). 24 mm 28 N•m (250 in-lb) Dual Position Air: Place the DPA adjuster knob and the knob retaining nut onto the top cap with the long tab near the front of the crown.
-
Page 25: Damper Service
When replacing seals and o-rings, use your fingers or a pick to remove the seal or o-ring. Spray isopropyl alcohol on each part and clean with a rag. Apply SRAM Butter grease to the new seal or o-ring. RCT3: Turn the low speed compression and compression mode... - Page 26 RCT3: Use a 2 mm hex wrench to remove the low speed adjuster knob 6 mm RCT3 screw. Remove the low speed compression adjuster knob. Use a 6 mm socket wrench to remove the knob retaining nut. Remove the compression mode adjuster knob. 2 mm RCT3 RCT3...
- Page 27 Use your fingers or a pick to remove the compression top cap o-ring. Use your fingers to install a new o-ring. Lightly clamp the cartridge tube into a bicycle stand with the rebound damper shaft oriented upward. NOTI CE Clamp the cartridge tube into the bicycle just tighten enough so that it does not slip or spin.
- Page 28 Apply SRAM Butter grease to the new rebound damper seal head seals. Install the new seal head assembly onto the rebound damper shaft with the threads oriented toward the piston. Slide the seal head towards the piston until it stops.
-
Page 29: Charger Rebound Damper Re-Tune (Optional)
C h a r g e r R e b o u n d D a m p e r R e - t u n e ( o p t i o n a l ) All Lyrik Charger rebound dampers are configured in a medium damper tune. The rebound piston shims can however be re-arranged for a soft or firm tune. - Page 30 Use the chart below to layout the shim stack for your desired tune on Shim thickness your rebound damper piston. Use a metric caliper to verify the shim outer diameter and shim thickness or print the page at 100% scale to arrange the shim stack using the outlines on the page.
- Page 31 Install the shims on a small wrench or pick in the order of your desired Off center hoop shim tune. Slide the shim stack onto the piston face. Use your fingers to squeeze the stack and center the shims. NOTI CE Ensure the hoop shim is centered on the shim stack.
-
Page 32: Charger Damper Assembly
2 0 0 H o u r S e r v i c e C h a r g e r D a m p e r A s s e m b l y Spray isopropyl alcohol inside the cartridge tube and compression damper. - Page 33 Wrap a rag around the cartridge tube. Pour 3wt suspension oil into the cartridge tube until it is full. Maxima PLUSH 3wt or RockShox 3 wt Insert a 2.5 mm hex wrench into the rebound damper shaft until it contacts the rebound adjuster screw. Turn the hex wrench counter-clockwise until it stops.
- Page 34 Lightly clamp the cartridge tube assembly into the bicycle stand with the compression damper oriented upward. Charger Damper Assembly...
-
Page 35: Charger Damper Bleed
2 0 0 H o u r S e r v i c e C h a r g e r D a m p e r B l e e d RCT3: Use small retaining ring pliers to remove the retaining ring from the low speed compression adjuster. - Page 36 Use your fingers to install the bottom bolt into the rebound damper shaft, then pull down on the bottom bolt. Cover the top cap with a rag and cycle the rebound damper shaft a few times to pre-bleed air from the damper. Pull the rebound damper shaft down until it stops.
- Page 37 Create a vacuum in the damper assembly by pulling up on the syringe handle and simultaneously pushing up on the rebound damper shaft. This will force bubbles out of the damper assembly. Pressurize the damper assembly by pushing down on the syringe handle and simultaneously pulling down on the rebound damper shaft.
- Page 38 RCT3: Insert the low speed compression adjuster into the compression cam assembly. Push down and turn the low speed compression adjuster clockwise until it clicks into place. RCT3 RC: Use needle-nose pliers to insert the bleed plug into the compression adjuster until it clicks into place. Use retaining ring pliers to install the inner retaining ring into the retaining ring groove.
- Page 39 Push the rebound damper shaft into the cartridge tube. The shaft should not move more than 2 mm if the bleed was successful. If the shaft moves while in the locked position, repeat the bleed procedure. ≤ 2 mm Charger Damper Bleed...
-
Page 40: Charger Damper Installation
2 0 0 H o u r S e r v i c e C h a r g e r D a m p e r I n s t a l l a t i o n Remove the bolt from the rebound damper shaft. Spray isopropyl alcohol on the damper assembly and clean it with a rag. - Page 41 RCT3: Place the compression mode adjuster knob onto the RCT3 compression top cap with the long tab near the front of the crown. Turn the knob clockwise until it engages the first detent space. RCT3 RC: Place the low speed compression adjuster knob onto the compression top cap with the long tab near the back of the crown.
- Page 42 RCT3: Install the low speed adjuster knob and knob retaining screw. Use a torque wrench with a 2 mm hex bit socket to tighten the nut to 1.0-1.5 N•m (8-13 in-lb). 2 mm 1.0-1.5 N•m (8-13 in-lb) Charger Damper Installation...
-
Page 43: Lower Leg Assembly
L o w e r L e g I n s t a l l a t i o n Spray isopropyl alcohol on the upper tubes and clean them with a rag. Apply a liberal amount of SRAM Butter grease to the inner surfaces of the dust wiper seals. - Page 44 Slide the lower leg assembly along the upper tubes until it stops and the spring and damper shafts are visible through the lower leg bolt holes. Use a rag to clean all excess oil from the outer surface of the lower leg. Using a pick and needle nose pliers, remove the old crush washers from each bottom bolt.
- Page 45 Install the rebound adjuster knob onto the rebound damper 2.5 mm 1.1 N·m (10 in-lb) bottom bolt. Use a torque wrench with a 2.5 mm hex bit socket to tighten the set screw to 1.1 N·m (10 in-lb). NOTI CE Hold the rebound adjuster knob in place during installation to prevent damage to the bottom bolt.
- Page 46 Hussefelt®, Iclic®, i-Motion®, Judy®, Know Your Powers®, NSW®, Omnium®, Osmos®, Pike®, PowerCal®, PowerLock®, PowerTap®, Qollector®, Quarq®, RacerMate®, Reba®, Rock Shox®, Ruktion®, Service Course®, ShockWiz®, SID®, Single Digit®, Speed Dial®, Speed Weaponry®, Spinscan®, SRAM®, SRAM APEX®, SRAM EAGLE®, SRAM FORCE®, SRAM RED®, SRAM RIVAL®, Stylo®, TIME®, Truvativ®, TyreWiz®, UDH®, Varicrank®, Velotron®, X0®, X01®, X-SYNC®, XX1®, Zipp®...
- Page 47 ASIAN HEADQUARTERS WORLD HEADQUARTERS EUROPEAN HEADQUARTERS SRAM Taiwan SRAM LLC SRAM Europe No. 1598-8 Chung Shan Road 1000 W. Fulton Market, 4th Floor Paasbosweg 14-16 Shen Kang Hsiang, Taichung City Chicago, Illinois 60607 3862ZS Nijkerk Taiwan R.O.C. The Netherlands...
Need help?
Do you have a question about the Rock Shox Lyrik RC and is the answer not in the manual?
Questions and answers