
Subscribe to Our Youtube Channel
Related Manuals for Mobatime ECO-M-DSC Series


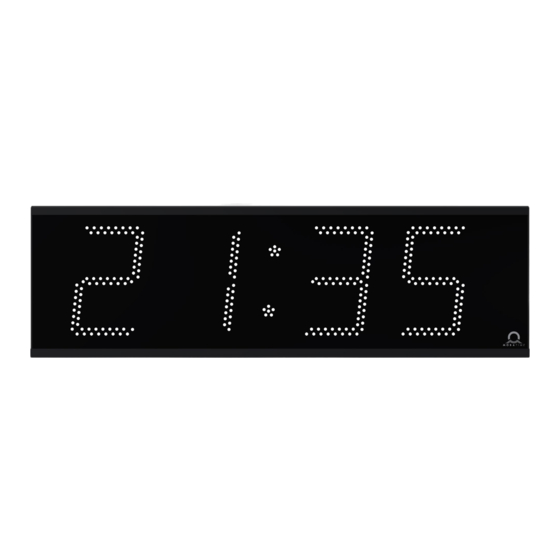
Summary of Contents for Mobatime ECO-M-DSC Series
- Page 1 INSTRUCTION MANUAL In- and Outdoor Digital Clock ECO-M-DSC Series © MOBATIME BE-801314.00...
- Page 2 It is prohibited to reproduce, to store in a computer system or to transfer this publication in a way or another, even part of it. The copyright remains with all the rights with BÜRK MOBATIME GmbH, D-78026 VS-Schwenningen and MOSER-BAER AG – CH 3454 Sumiswald / SWITZERLAND.
-
Page 3: Table Of Contents
The stopwatch menu ..........................27 Setting of the initial time for counting down ................... 27 Control of the stopwatch using IR remote control ................... 28 The stopwatch menu ..........................28 Setting of initial time for counting down....................29 © MOBATIME 3 / 52 801314.00... - Page 4 10.4.2 Synchronization only – P5 mode 2 and 4 ..................35 10.5 Slave clock controlled by MOBATIME serial code, MOBALine, Active DCF code or IRIG-B ....36 10.6 Cascaded connection of the DCF/GPS synchronised clock ..............36 11 NTP clock operation ............................ 37 11.1...
-
Page 5: Description
• alternating indication of time, date and temperature, with adjustable period of each of the displayed data; • possibility of setting up the time zone. • Temperature compensated RTC backup by means of lithium battery © MOBATIME 5 / 52 801314.00... - Page 6 • control using the keyboard or IR remote control; • concurrently, possibility of changeover into the time/date display mode, or the temperature indication Accessories • DCF 77/GPS receiver • magnetic GPS antenna • remote IR controller On request • housing colour © MOBATIME 6 / 52 801314.00...
-
Page 7: Installation
• Connect the power cable to appropriate power supply terminals (except PoE/PoE+ variant). • Configure the Line type jumper according to used synchronisation signal (applies only for DCF, MOBALine, Serial MOBATIME code, polarized impulse line or IRIG-B). • Connect the synchronisation / temperature / GPS cable to corresponding terminals on the clock electronics PCB and/or crimp the RJ45 jack to the Ethernet cable respectively. -
Page 8: Assembly Diagram
• Connect the power cable to appropriate power supply terminals (except PoE/PoE+ variant). • Configure the Line type jumper according to used synchronisation signal (applies only for DCF, MOBALine, Serial MOBATIME code, polarized impulse line or IRIG-B). • Connect the synchronisation / temperature / GPS cable to corresponding terminals on the clock electronics PCB and/or crimp the RJ45 jack to the Ethernet cable respectively. -
Page 9: Assembly Diagram
DC power cable and flat data cable back to most left digit; mount back the chassis with electronics, tight the fixing screws. • Mount back the front glass and bottom cover. Assembly diagram © MOBATIME 9 / 52 801314.00... -
Page 10: Mechanical Drawing
Mechanical drawing 2.5.1 Single-sided clock with wall mounting 2.5.2 Single-sided clock with ceiling suspension mounting 2.5.3 Double-sided clock with ceiling suspension mounting © MOBATIME 10 / 52 801314.00... -
Page 11: Connectors And Control Elements
LED indication of powering RELAY – JP27 (optional) jumper DC Out / DCF Out – JP17 Note: The placement of particular connectors and control elements is different for the ECO-M- DSC.100 clocks. © MOBATIME 11 / 52 801314.00... -
Page 12: Function Of The Plug Connectors
Function of the plug connectors LINES, DC/DCF OUT – JP1 time signal inputs: The DCF/GPS receiver, polarized impulse line, MOBALine, MOBATIME serial code, IRIG-B, power supply output: DC OUT 12–40 VDC or passive DCF current loop output TEMP – JP2 connection of the temperature sensor(s) ... -
Page 13: Connection Of The Cable Ends
Connection of the cable ends TEMP wire connection – 1 or 2 thermometers CTRL wire connection © MOBATIME 13 / 52 801314.00... -
Page 14: Control Of The Clock Using Keyboard Or Pushbuttons
1 PB2L continuous increase of the current item Menu for the setting of the clock parameters The entry into the parameter setup menu is done by pushing the PB2L button. © MOBATIME 14 / 52 801314.00... -
Page 15: Submenu For User-Specific Setting Of Time Constants For Data Switchover
The setting unit is 1/100 second. Setting range -9.99 to +9.99. Push PB1L to save the setting and return to menu item P4. Push together PB1L and PB2L to return to P4 without storage of the data © MOBATIME 15 / 52 801314.00... -
Page 16: Submenu For Network Services Configuration
Switch to the next octet by pushing the PB1S button. Octets are marked by letters A, b, C and d. By pushing the PB1L button, the entered values are stored and the clock returns to the menu item P21. © MOBATIME 16 / 52 801314.00... -
Page 17: Manual Setting Of Default Gateway Ip Address
After the last octet setting, set the constant x which determines the interval of synchronization in seconds. By pushing the PB1L button, the entered values are stored and the clock returns to the menu item P24. © MOBATIME 17 / 52 801314.00... -
Page 18: Submenu For Displaying Ipv6 Addresses
(011b) – f6.8e fifth part of the IPv6 address (100b) – s 38.ff. ixth part of the IPv6 address (101b) – fe.e.8 seventh IPv6 address (110b) – 4a.1.3. eighth part of iPv6 address (111b) © MOBATIME 18 / 52 801314.00... -
Page 19: Control Of The Clock Using Ir Remote Control
The + pushbutton increase of the value adjusted, in steps of 1 The – pushbutton decrease of the value adjusted, in steps of 1 Holding down the + button continuous increase of the value set up © MOBATIME 19 / 52 801314.00... -
Page 20: Menu For The Setting Of The Clock Parameters
Pushbuttons 0–9 entry of the corresponding numerical value Note: During entering the numbers in the octets of the IP addresses the editing to the next digit moves automatically. © MOBATIME 20 / 52 801314.00... -
Page 21: Submenu For User-Specific Setting Of Time Constants For Data Switchover
1. Set value 1 for enabling the telnet support or value 0 for disabling it. By pushing OK, the entered values are stored and the clock returns to the menu item P19. By pushing ESC, the clock returns to P19 without saving. © MOBATIME 21 / 52 801314.00... -
Page 22: Manual Setting Of The Ip Address Of The Clock
Enter the four octets of the IP address step by step. Switch to the next digit or octet respectively by pushing the >> button. Octets are marked by the letters A, b, C and d. © MOBATIME 22 / 52 801314.00... -
Page 23: Submenu For The Setting Of The Ntp Unicast Synchronization
(011b) – f6.8e fifth part of the IPv6 address (100b) – s 38.ff. ixth part of the IPv6 address (101b) – fe.e.8 seventh IPv6 address (110b) – 4a.1.3 eighth part of iPv6 address (111b) © MOBATIME 23 / 52 801314.00... -
Page 24: The Clock Menu Table
0 - 64, A (automatically) synchronization source Type of 1 - 10, A (automatically) synchronization auto detection, applicable for: DCF, the Mobatime serial source code, MOBALine, IRIG-B, NTP or GPS autonomous operation without synchronization synchronization by DCF signal the MOBATIME serial code... - Page 25 NTP, PoE: IPv4 WiFi: IPv4 NTP, PoE: IPv6 WiFi: not supported Network operation multicast (without IP address), WiFi not supported mode unicast – network param. defined manually unicast – network param. defined by DHCPv4 © MOBATIME 25 / 52 801314.00...
-
Page 26: Ipv6 Adress Submenu
First address received from DHCPv6 e.g. 2001:0db8:0000:0012:0000:0000:0000:1000 MANU Manually set address e.g. fec0:1234:0000:0000:f68e:38ff:fee8:4a13 PrEF Prefix of manually set address Range 0 – 128, default 64 GATE Default gateway obtained from SLAAC not yet e.g. 2001:0db8:0000:0012:0000:0000:0000:0001 supported © MOBATIME 26 / 52 801314.00... -
Page 27: Control Of The Stopwatch Via Keyboard
Data order 1/100 second <Minute>:<Second>.<Hundredths of second> 1 second <Hours>:<Minutes>:<seconds>. 1 minute <Hours>:<Minutes> 1 day <Days> By pushing the PB1L button, the entered values are stored and the clock returns to the “Stopwatch” display mode. © MOBATIME 27 / 52 801314.00... -
Page 28: Control Of The Stopwatch Using Ir Remote Control
© MOBATIME 28 / 52 801314.00... -
Page 29: Setting Of Initial Time For Counting Down
It is possible to control an external device such as sound devices. There is normally open contact (NO), normally closed contact (NC) and common contact (COM) on the relay port (JP27) available. © MOBATIME 29 / 52 801314.00... -
Page 30: Stopwatch Menu Table
Counter reset (to zero), or return to a preset (PB1L) time followed with counter stop Triggering the counter (PB3S) HOLD Stopping the counter (PB1S) Resetting the counter or return to a preset (PB1L) time, with counter stop © MOBATIME 30 / 52 801314.00... - Page 31 Counting unit Max. Min. Min. Max. Format 1/100 second 59:59.99 00:00.00 -9:59.99 59:59.99 MM:SS.HS 1 second 99:59:59 00:00:00 -9:59:59 99:59:59 HH:MM:SS 1 minute HH:MM 99:59 00:00 -9:59 99:59 1 day 9999 0000 0000 9999 DDDD © MOBATIME 31 / 52 801314.00...
-
Page 32: Local Time Calculation
Display time and date according to chosen Timezone-server time zone, incl. daylight saving time This setting is suitable for NTP digital clocks controlled by MOBATIME NTP servers which support the Timezone-server functionality. Calculation using timezone entries preconfigured by MOBA-NMS software ©... -
Page 33: Calculation According To Internal Time Zone Table
See the chapter 15 with actual Time zone definition table. If you want to use the zone outside the internal time zone table, follow the "Custom Time Zone settings" appendix. © MOBATIME 33 / 52 801314.00... -
Page 34: Non-Network Clock Operation
Configure the jumper JP11 according to table (chapter 2.7.) if the source of synchronization is DCF signal, Mobatime serial code, polarized impulse line, MOBALine or IRIG-B. Choose the item P4 in main MENU (chapter 5) and set the type of synchronization. The auto detection mode (P4:A), when the type of synchronization signal is set automatically, is applicable for DCF signal, Mobatime serial code, MOBALine, IRIG-B. -
Page 35: Slave Clock Controlled By Synchronizing Impulses
In case of the line fault the clock displays the right time information based on • its own quartz time base. When the normal operation of the line resumes, the clock synchronizes with the incoming pulses. © MOBATIME 35 / 52 801314.00... -
Page 36: Slave Clock Controlled By Mobatime Serial Code, Mobaline, Active Dcf Code Or Irig-B
In case of Active DCF code set the menu item P4 to value 12, otherwise use • the value A. • The time setting with using the MOBATIME serial code or Active DCF code takes place within at least 3 to 4 minutes, for MOBALine and IRIG-B within 6 to 15 seconds. 10.6... -
Page 37: Ntp Clock Operation
IPv4-Adresse 0.0.0.0 IPv4 Subnetzmaske 0.0.0.0 IPv4 Default-Gateway 0.0.0.0 NTP-Serveradresse 1 0.0.0.0 / 0:0:0:0:0:0:0:0 NTP-Serveradresse 2 0.0.0.0 / 0:0:0:0:0:0:0:0 NTP-Serveradresse 3 0.0.0.0 / 0:0:0:0:0:0:0:0 NTP-Serveradresse 4 0.0.0.0 / 0:0:0:0:0:0:0:0 NTP-Anfragenzeit [s] DNS-Server 0.0.0.0 / 0:0:0:0:0:0:0:0 © MOBATIME 37 / 52 801314.00... -
Page 38: Network Parameters Assignation By Dhcp
192.168.0.190 • request for entering the password appears after connection (default password is 718084) the information about software and hardware version followed by the MAC • address is displayed after entering the correct password © MOBATIME 38 / 52 801314.00... -
Page 39: Setting Network Parameters Over Dhcpv6
The following SLAAC options can be processed: [3] Prefix info [5] MTU [24] Route info [25] RDNSS The network administrator must set the SLAAC options on the server accordingly. Assigned parameters can be checked in the P25 submenu © MOBATIME 39 / 52 801314.00... -
Page 40: Snmp
65532 time zone client port number 65534 The menu item P19 must be set to value 1. See chapter 4.2.7 for setting the IPv4 multicast group address in the item P23 submenu. © MOBATIME 40 / 52 801314.00... -
Page 41: Testing Mode, Parameter Reset
• Using the PB2 or + button on IR set the value behind the colon to 04 • Keep pushing simultaneously both clock PCB buttons or the DISP button on IR, until the display shows FAC1 and clock makes reset © MOBATIME 41 / 52 801314.00... -
Page 42: Update Firmware
• In the terminal, open a valid COM port corresponding to the connected USB to TTL UART adapter. • Connect the jumper to the ISPE header (JP9). The terminal will then display the initial information about the firmware update. © MOBATIME 42 / 52 801314.00... - Page 43 The firmware check is then started automatically, then the firmware is written to the clock processor and started. • Remove the jumper from the ISPE header. • You can check the firmware version in the terminal list after starting the clock. © MOBATIME 43 / 52 801314.00...
-
Page 44: Update Firmware Over Ethernet At Ntp Version
• After entering the password, check if the firmware version is correct, if it isn’t, it is necessary to repeat the whole procedure. • Close the telnet window and end the program tftpd32 with the command exit. © MOBATIME 44 / 52 801314.00... -
Page 45: Time Zone Table
South Australia: Adelaide +9.5 Sun. Oct (02:00) Sun. Apr. (03:00) Northern Territory: Darwin +9.5 Brisbane, Guam, Port Moresby, Vladivostok Sydney, Canberra, Sun. Oct. (02.00) Sun. Apr. (03:00) Melbourne, Tasmania: Hobart UTC (GMT) UTC (GMT) © MOBATIME 45 / 52 801314.00... - Page 46 Time change from Standard time (Winter time) to Summer time DST → Standard: Time change from Summer time to Standard time (Winter time) Example: last Sun. Mar. (02:00) Switch over on the penultimate Sunday in March at 02.00 hours local time. © MOBATIME 46 / 52 801314.00...
-
Page 47: Engineering Data
Dimensions and weights of clock versions N.S and D.S are without ceiling suspension part. • Standard ceiling suspension lengths (70, 100, 150, 300 or 500 mm) or custom length on request. • Accessories for all models can be chosen from the table “Order reference”. © MOBATIME 47 / 52 801314.00... -
Page 48: Voltage Range And Electric Current Consumption Of The Lines
+- 12 – 30 V 3 - 7 mA MIN, CODE (on request) +- 30 – 60 V 3 - 7 mA IRIG B 20 mVpp – 2 Vpp 20 uA – 2 mA © MOBATIME 48 / 52 801314.00... -
Page 49: Accessories
1 pc • • Wood screws inclusive dowels 4 (8) pcs 16.3 Optional accessories AD 450 radiosignal receiver • • GPS 4500 receiver • magnetic GPS antenna for internal GPS receiver with cable 5m © MOBATIME 49 / 52 801314.00... -
Page 50: Cleaning
• The following circumstances are excluded from the guarantee: - inappropriate handling or interventions - chemical influences - mechanical defects - external environmental influences (natural catastrophes) • Repairs during and after the guarantee period are assured by the manufacturer. © MOBATIME 50 / 52 801314.00... - Page 51 © MOBATIME 51 / 52 801314.00...
- Page 52 19 ch. du Champ-des-Filles, CH-1228 Plan-les-Ouates Tel. +41 34 432 46 46 / Fax +41 34 432 46 99 Tel. +41 22 884 96 11 / Fax + 41 22 884 96 90 moserbaer@mobatime.com / www.mobatime.com export@mobatime.com / www.mobatime.com SALES SWITZERLAND...
Need help?
Do you have a question about the ECO-M-DSC Series and is the answer not in the manual?
Questions and answers