
Related Manuals for AIDA PTZ-X12-IP


Summary of Contents for AIDA PTZ-X12-IP
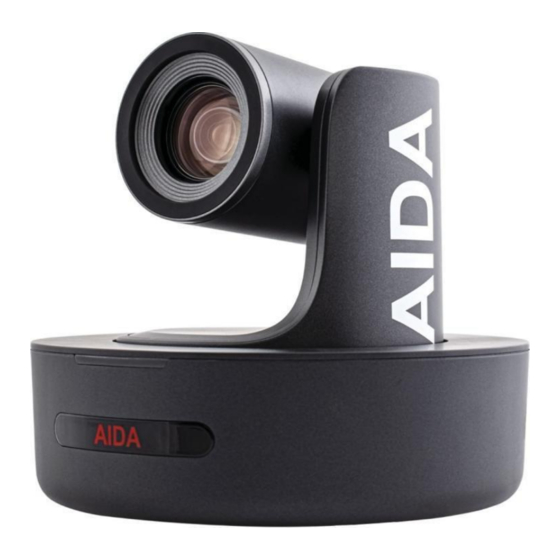
- Page 1 Full-HD Optical Zoom PTZ PTZ-X12-IP | PTZ-NDI-X12 | PTZ-NDI-X18W/B|PTZ-X20-IP | PTZ-NDI-X20 User Manual V3.0 AIDA...
-
Page 3: Table Of Contents
Table of Contents Safety Guides Packing List & Quick Start Product Highlights & Camera Specs Camera Interface & Dimension IR Remote Controller OSD Menu Web Settings VISCA Over IP VISCA (RS-232) Port VISCA Protocol UVC Control Warranty & Support The information within this manual is subject to change at any time without prior notice* NDI®... - Page 5 Packing List (CONTD) Before operation, please read all the instructions in the manual carefully. For your convenience, please keep this manual. The camera power input range is 100-240 VACv(50-60hz.) Ensure the power supply input is within this rate before powering it on. Camera power voltage = 12VDC, rated currency=2A.
- Page 6 Packing List Check for the items below when opening the package! AIDA PTZ Camera - Remote Control - Power Adapter - User Manual - Power Cable - Double Sided Adhesive - RS232 Control - QC Certification Cable - Wall Mount - USB 3.0 Cable...
- Page 7 Packing List (CONTD) Dial Switch (ARM) SW-1 SW-2 Mode Updating Mode Debugging Mode Undefined Working Mode Dial Switch Dial Switch (USB) SW-3 SW-4 Instruction SW-5 SW-6 Instruction Reserve Undefined Reserve Working Mode Reserve Updating Mode Reserve Undefined...
- Page 9 Product Highlights • Contains a Sony Progressive CMOS Sensor providing 1920x1080 crisp HD resolution. • Wide angle optical lens options: 12x / 18x / 20x optical zoom. • Full-HD video over IP, via H.264 or H.265 encoding. • Contains traditional outputs such as HDMI, SDI, USB3.0, and RJ-45 for RTSP/RTMP/SRT/NDI®...
- Page 10 Camera Specs (CONTD) Video Interface HDMI (V1.4) 3G-SDI, RJ-45, USB 3.0 Sensor SONY Progressive CMOS Sensor Zoom 12x, 18x or 20x 0ptical Zoom Lens Field of view per lens: (X12) 79°(wide)~6.8°(Tele)(Subject at 20ft from camera) (X18) 57°(wide)~4.2°(Tele)(Subject at 20ft from camera) (X20) 57°(wide)~3.3°(Tele)(Subject at 20ft from camera) Focal Length and Fstop no.: (X12) f=3.92(near)~47.32mm(far), F1.8(Wide)~2.8(Tele)...
- Page 11 3. IR receiver panel 12. 3G-SDI Output 8. RS-232 Control Input 4. Power/Tally 13. USB Port 9. RS-232 Control Output Indicator 14. RJ-45 Port 10. HDMI Output 5. Dial Switches (AIDA 15. DC12V Plug-in port support only) Camera Dimensions PTZ-X12, X20 (in mm)
- Page 12 Camera Interface PTZ-X18 1. Camera Lens 6. 1/4"Tripod Screw Hole 11. Line in Port 2. Camera Base 7. Installation Hole 12. NDI®|HX Port 3. IR Receiver Panel 8. RS-232Control Port(Input) 13. DC12V Plug 4. Power/Tally Light 9. RS-232 Control Port(0utput) 5.
-
Page 13: Ir Remote Controller
IR Remote Controller Power When powered on, pressing the power key will enter the camera into Standby mode. Pressing it again will start up the camera. *Note: This is not any means of shutting off the camera, it only shuts down the motor mechanics. Video will still display. - Page 15 IR Remote Controller (CONTD) Focus Adjustments (+/-) Tapping the + or – will set the camera to manual focus for a set precise focus adjustment. Zoom Control (+/-) Tapping the + or – will zoom in or out the camera head. Camera head Control (Up/Down/Left/Right) Tapping the directional buttons will adjust the PTZ head accordingly.
-
Page 16: Osd Menu
FOCUS MODE AUTO/MANUAL: Ability to change from auto or manual focus DEFAULT: AUTO DIGITAL ZOOM ON/OFF: Ability to digitally zoom 2X. (PTZ-X12-IP | PTZ-NDI-X12 only) DEFAULT: OFF RATIO DISPLAY ON/OFF: Grants display of the zoom X module. Off by default. - Page 17 OSD MENU (CONTD) 2DNR When enabled, image noise and sharpness is reduced DEFAULT: OFF 3DNR OFF/AUTO/0-4 optional: higher level = less image reduction happens DEFAULT: AUTO SHARPNESS ON/OFF optional, 0-15 level: higher level = sharper edges of image DEFAULT: 6 CONTRAST Set contrast level: 0-15: Sets the contrast level DEFAULT: 8...
-
Page 19: Web Settings
Default IP: 192.168.1.188. If changed, enter that specific IP address. Default Username: admin Default Password: admin *If you are having trouble logging in, please contact AIDA Imaging support. 2. Real-time Previewing: When logging in, you will get a real time image preview of the camera via our HTTP protocol. - Page 20 Web Settings (CONTD) Settings: Clicking the “Settings” button at the top right will enter the cameras web UI settings. Video Encode: Under Video Encode, you will have access to adjust the main and sub video parameters of the camera. This will also adjust the quality of your RTSP, RTMP, SRT and NDI® (if applicable.) Option Descriptions: Encode Mode: Allows for H.264 or H.265 for better compression streaming (Will not work for...
- Page 21 Web Settings (CONTD) Video Transmission Settings: Under video transmission, you will find the options to adjust your RTMP, SRT, or NDI® streams. RTMP Setting: RTMP can be used to stream directly to social media sites such as Youtube, Vimeo, and Facebook Live. To utilize this, please follow the following steps: 1.
- Page 22 Web Settings (CONTD) SRT Settings: In this menu, you can setup a SRT stream to any given software / SRT player. Option Descriptions: Mode: Change the SRT mode into Listener or Caller. Port: Enter the SRT port number here. Encryption: Allows for an encrypted SRT stream. Key Length: If Encryption is selected, choose the keylength of the password.
- Page 23 Web Settings (CONTD) Image Parameters Settings: In this menu, you can adjust the same parameters found from the OSD menu. All settings will save over the OSD settings. Ethernet Settings: In this menu, you can adjust ethernet settings of the camera. Below are the standard settings found on the camera by default.
- Page 24 Account Settings: In the account settings, you can change the account name and password from the default. If you lose your new account / password, you will have to contact AIDA support for help, so don’t forget to write it down! System Time: In the system time tab, you can adjust the timezone of each clock to sync them.
-
Page 25: Visca Over Ip
VISCA over IP VISCA over IP: Our PTZ’s use VISCA over IP to reliably send and receive information from any standard VISCA over IP controller! Information of Communications port: Control Port: RJ-45 LAN connection IP Protocol: IPv4 Transmission Protocol: UDP IP Address: *depends on your camera’s IP Port Address: 52381 What is VISCA over IP? - Page 26 VISCA RS232 IR OUT VISCA IN & Mini DIN Connection VISCA IN & DB9 Connection Camera VISCA IN Mini DIN Camera VISCA IN Windows DB9 A(+) A(+) IR OUT IR OUT B(-) B(-) Serial Port Configuration Parameter Value Parameter Value Baud Rate 2400/4800/9600/115200 Stop Bit...
-
Page 27: Visca Protocol
VISCA Protocol For whole updated list, please reach out to our support team! Part 1: Camera Return Command ACK/Completion Message Command Packet Note z0 41 FF Returned when the command is accepted Completion z0 51 FF Returned when the command has been executed z= camera address +8 Error Messages Command Packet... - Page 28 VISCA Protocol (CONTD) Stop 81 01 04 06 00 FF Enable in separate mode Tele(Variable) 81 01 04 06 2p FF Enable in separate mode CAM_DZoom Enable in separate mode Wide(Variable) 81 01 04 06 3p FF Enable in separate mode Direct 81 01 04 46 0p 0q 0r 0s FF Stop...
- Page 29 VISCA Protocol (CONTD) Full Auto 81 01 04 39 00 FF Automatic Exposure mode Manual 81 01 04 39 03 FF Manual Control mode Shutter Priority CAM_AE Shutter Priority 81 01 04 39 0A FF Automatic Exposure mode Iris Priority Automatic Iris Priority 81 01 04 39 0B FF Exposure mode...
- Page 30 VISCA Protocol (CONTD) Reset 8x 01 04 3F 00 0p FF CAM_Memory p: Preset Number (=0 to 128) 8x 01 04 3F 01 0p FF (preset) Corresponds to 0-9 on the remote controller Recall 8x 01 04 3F 02 0p FF 8x 01 04 61 02 FF CAM_LR_Reverse Image Flip Horizontal On/Off...
- Page 31 0x02 1080I50 0x03 1080P30 0x 04 1080P25 0x05 720P60 0x 06 VideoSystem Set 720P50 0x07 8x 01 06 35 00 pp FF 720P30 0x08 (AIDA) 720P25 0x09 1080P5994 0x0E 1080I5994 0x0F 1080P2997 0x10 720P5994 0x13 720P2997 0x14 1080P24 0x11 1080P2398...
- Page 32 VISCA Protocol (CONTD) Flare red 8x 01 04 B8 dat FF Flare mode red value (Default=32) Color adjust Flare green 8x 01 04 B9 dat FF Flare mode green value (Default=32) Flare blue Flare mode blue value (Default=32) 8x 01 04 BA dat FF Turn on menu Menu On 8x 01 06 06 02 FF...
- Page 33 VISCA Protocol (CONTD) Part 3: Inquiry Command Command Type Command Return Note y0 50 02 FF 8x 09 04 00 FF CAM_PowerInq y0 50 03 FF Off (Standby) CAM_ZoomPosInq 8x 09 04 47 FF y0 50 0p 0q 0r 0s FF pqrs: Zoom Position y0 50 02 FF Auto Focus...
- Page 34 50 ab cd mn pq rs tu vw FF VideoSystemInq 8x 09 06 23 FF y0 50 pp FF pp: Video position (AIDA) VideoSystemInq 8x 09 04 24 72 FF y0 50 0p 0p FF pp: Video position (Sony)
- Page 35 VISCA Protocol (CONTD) Command Type Command Return Note y0 07 7D 01 04 00 FF Zoom tele/wide AF On/Off y0 07 7D 01 04 07 FF IR_ReceiveReturn y0 07 7D 01 04 33 FF CAM_Backlight y0 07 7D 01 04 3F FF CAM_Memory y0 07 7D 01 06 01 FF Pan_tiltDrive...
-
Page 36: Uvc Control
UVC Control AIDA PTZ's also support UVC interface. PU_BRIGHTNESS_CONTROL 81 01 04 4d 00 00 0p 0q FF PU_CONTRAST_CONTROL 81 01 04 A2 00 00 0p 0q FF PU_SATURATION_CONTROL 81 01 04 A1 00 00 0p 0q FF PU_SHARPNESS_CONTROL 8x 01 04 42 00 00 0p 0q FF... - Page 37 IF proof of purchase cannot be provided during a warranty claim, AIDA Imaging reserves the right to not honor the warranty set above. Therefore, labor and parts may be charged to the consumer. For more info on our warranty, please refer to our website at: aidaimaging.com/warranty...
- Page 38 AIDA IMAGING 1278 Center Court Dr, Covina, CA 91790 Tel: (909)-333-7421 support@aidaimaging.com www.aidaimaging.com...
Need help?
Do you have a question about the PTZ-X12-IP and is the answer not in the manual?
Questions and answers