
Related Manuals for NEW BRUNSWICK SCIENTIFIC BioFlo 110


Summary of Contents for NEW BRUNSWICK SCIENTIFIC BioFlo 110
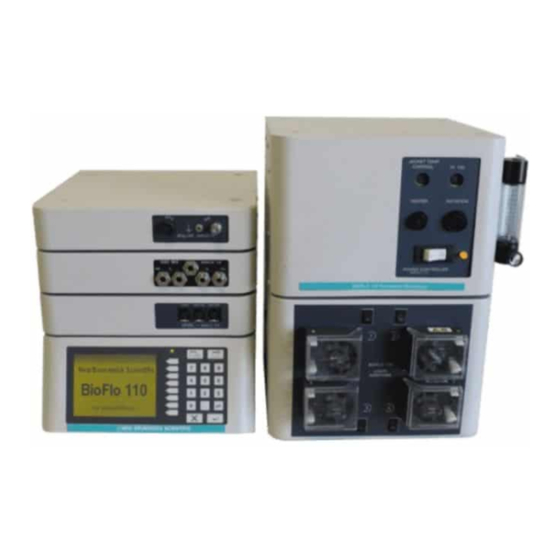
- Page 1 sales@artisantg.com artisantg.com (217) 352-9330 | Visit our website - Click HERE...
- Page 2 Modular Benchtop Fermentor MANUAL NO: M1273-0054 Revision H August 8, 2007 NEW BRUNSWICK SCIENTIFIC CO., INC. BOX 4005 • 44 TALMADGE ROAD • EDISON, NJ 08818-4005 Telephone: 1-732-287-1200 • 1-800-631-5417 Fax: 732-287-4222 • Telex: 4753012 NBSCO Internet: http://www.nbsc.com • E-mail: bioinfo@nbsc.com...
- Page 3 BioFlo 110 Modular Fermentor M1273-0054 User’s Guide...
- Page 4 Fax: 49 (0)7022 32486 E-mail: sales@nbsnv-sa.be E-mail: sales@nbsgmbh.de CHINA THE NETHERLANDS New Brunswick Scientific Co., Inc. New Brunswick Scientific BV A903, 904 Yin Hai Building Kerkenbos 1101, 6546 BC Nijmegen No. 250, Cao Xi Road P.O Box 6826, 6503 GH Nijmegen Shanghai 200235, P.R.
- Page 5 Do not use this equipment in a hazardous atmosphere or with hazardous materials for which the equipment was not designed. New Brunswick Scientific Co., Inc. (NBS) is not responsible for any damage to this equipment that may result from the use of an accessory not manufactured by NBS.
-
Page 6: Manual Conventions
Reproduction, adaptation, or translation without prior written permission from New Brunswick Scientific is prohibited. Disclaimer Notice New Brunswick Scientific Co., Inc. reserves the right to change information in this document without notice. Updates to information in this document reflect our commitment to continuing product development and improvement. - Page 7 W A R R A N T Y Every Instrument manufactured by the New Brunswick Scientific Co., Inc. is warranted to be free from defects in material and work- manship. This apparatus with the exception of glassware, lamps and electrodes (where supplied), is warranted for 1 year against faulty com-...
- Page 8 New Brunswick Scientific User’s Guide...
- Page 9 BioFlo 110 Modular Fermentor M1273-0054 User’s Guide...
-
Page 10: Table Of Contents
Install Foam Trap ..........................32 4.5.20 Plug Unused Ports ........................... 33 4.5.21 Install 1.3L, 3.0L or 7.5L Fermentation Vessel Baffle..............34 4.5.22 Install Headplate..........................34 ....................35 ESSEL SSEMBLY ATER ACKETED 4.6.1 Headplate ............................. 37 New Brunswick Scientific User’s Guide... - Page 11 ........................80 ONFIRMING P ALIBRATION & C O2 P ..................80 OLARIZING ALIBRATING THE D ROBE ....................82 OWERING THE ACKET ATER EATER OPERATION ..............................84 & C ..................84 RIMARY ONTROL ISPLAY ONTROLS BioFlo 110 Modular Fermentor M1273-0054 User’s Guide...
-
Page 12: Miscellaneous
..........................118 ROUBLESHOOTING REPLACEMENT PARTS & ACCESSORIES .................... 119 10.1 ..........................119 EPLACEMENT ARTS 10.2 .......................... 122 EPLACEMENT ESSELS 10.3 & O ................122 ISCELLANEOUS ARTS PTIONAL CCESSORIES 10.4 ............................123 ODULE APPENDIX A: SPECIFICATIONS......................124 New Brunswick Scientific User’s Guide... - Page 13 14.5 ............................153 PECIFICATIONS 14.6 ..........................153 ROUBLESHOOTING APPENDIX E: DRAWINGS......................... 154 15.1 ..........................154 ODULE CHEMATICS 15.2 ..........................162 IST OF RAWINGS APPENDIX F: PORTS & ADAPTERS ....................... 164 INDEX ................................165 BioFlo 110 Modular Fermentor M1273-0054 User’s Guide...
-
Page 14: Overview
Process Control The heart of the BioFlo 110 is the Primary Control Unit (PCU). The PCU serves as the operator interface for one to four vessels. Its bright graphic display and clearly marked keypad serve as the control center for all attached vessels and their associated loop controllers. -
Page 15: Computer-Ready
Computer-Ready The BioFlo 110 is compatible with both ModBus and New Brunswick Scientific’s BioCommand communications protocols. Optional BioCommand software adds automatic data logging, centralized monitoring and control, and process programming capabilities to one or more fermentors. Enhancing Your Fermentor Other accessories are available and new ones will be added to extend the capabilities of the BioFlo 110. -
Page 16: Inspection & Unpacking
& Inspection of Boxes After you have received your order from New Brunswick Scientific, inspect the boxes carefully for any damage that may have occurred during shipping. Report any damage to the carrier and to your local NBS Sales Order Department immediately. -
Page 17: Preparing The Location
Physical Location The surface where you place the BioFlo 110 should be smooth, level and sturdy. Ensure that there is enough space around the back and the front of the combined system for proper operation and access. Environment The BioFlo 110 operates best under the following conditions: •... -
Page 18: Installation, Assembly & Set-Up
On/Off rocker switch. • AC CONNECTION Inlet for power cord (supplied), either for connection to Power Controller outlet or for electrical service outlet. • ® FUSE HOLDER Easy access to replace 250V 2-amp Slo-Blo fuse. New Brunswick Scientific User’s Guide... -
Page 19: Power Controller
(Connect to PCU DRAWER SELECTOR with supplied LOCATION power cord) POWER INLET (Connect to Mains with supplied power cord) RS-485 CONNECTORS (daisy-chain to other modules; RS-485 CABLE cap unused connector (provided) with Terminator plug) BioFlo 110 Modular Fermentor M1273-0054 User’s Guide... -
Page 20: Do2/Ph Controller
4.1.3 dO2/pH Controller Figure 3: dO2/pH Controller – Rear Panel Reference Table for Unit Address Selector Unit Address Module Serial RS-485 Connectors Selector Number (daisy-chain to other Location Indicator modules) Lights New Brunswick Scientific User’s Guide... -
Page 21: Level Controller
Address Selector 4.1.5 Gas Mix Controller Figure 5: Gas Mix Controller Rear Panel RS-485 Connectors (daisy-chain to Indicator other modules Lights Module Serial Number Unit Address Selector Location Reference Table for Unit Address Selector BioFlo 110 Modular Fermentor M1273-0054 User’s Guide... -
Page 22: Pump Module
4.1.6 Pump Module A four-pump module is available to stack with the other BioFlo 110 modules, or to stand freely, adjacent to the module stack and vessel. NOTE: Unlike the other modules, the pump module is wired for either 110V or 220V electric service only. -
Page 23: Other Optional Modules
Stacking Modules The Power Controller, the largest and heaviest of the BioFlo 110 modules, is intended to be the base unit of any stack. You may stack any of the other modules on top of it, in any order. Every module has indentations on top to accommodate the feet of any module stacked on it. - Page 24 Figure 7: Sample BioFlo 110 Installation (For clarity, cables and tubing are not shown in this drawing.) MOTOR UNIT 1 VESSEL in Vessel Stand UNIT 1 UNIT 2 ADDITION PUMPS CONTROL BOTTLE UNIT 1 MODULES (mounted on CONTROL Vessel Base)
-
Page 25: Interconnecting The Modules
Interconnecting the Modules All BioFlo 110 control modules are interconnected, to share power and communications. WARNING! Make sure the Power Controller and Primary Control Unit (PCU) are switched off and unplugged from the power source before connecting or disconnecting any equipment. - Page 26 Repeat steps 1-3 above for stacks three and four, if appropriate. CAUTION! A terminator plug must be fastened on both unused Controller Bus connectors in the system for the communication links to work properly. New Brunswick Scientific User’s Guide...
-
Page 27: Important Warnings
Only finger-tighten the knurled headplate bolts and port adapters. Over- tightening puts undesirable pressure on the glass. Keep the glass free from contact with any diamond material (diamong jewelry, industrial diamonds or diamond dust from grinding wheels. BioFlo 110 Modular Fermentor M1273-0054 User’s Guide... - Page 28 Figure 9b below), protects the impeller shaft from bearing weight. Naturally, you will have to take care not to hit the shaft as you work around it Figure 9b: CORRECT Handling of Drive Assembly HEADPLATE DRIVE ASSEMBLY IMPELLER SHAFT New Brunswick Scientific User’s Guide...
-
Page 29: Vessel Assembly: Non-Jacketed
Vessel Assembly: Non-Jacketed One of the most versatile features of the BioFlo 110 is the wide variety of glass vessels available. There are two types of vessels, non-jacketed—which are provided with the basic models—and water-jacketed. Each type of vessel is available in four sizes: 1.3 liters, 3.0 liters, 7.5 liters and 14.0 liters (total volume;... - Page 30 For easy reference, see Appendix E for a mix and match summary of port sizes and the types of adapters and inserts available. New Brunswick Scientific User’s Guide...
-
Page 31: Headplate
4.5.1 Headplate Figure 11: 1.3L Headplate SPARGER/ EXHAUST COOLING COIL dO2 PROBE HARVEST/SAMPLER/SPARE ASSEMBLY THERMOWELL Each bolt is a possible mounting position for a bottle holder. BioFlo 110 Modular Fermentor M1273-0054 User’s Guide... - Page 32 Figure 12: 3.0L Headplate COOLING COIL EXHAUST COOLING COIL Mounting position for dO2 PROBE Sampler Assembly. RTD/THERMOWELL Each bolt is a possible mounting position for a bottle holder. New Brunswick Scientific User’s Guide...
-
Page 33: Install Heat Blanket
2. Secure the blanket by overlapping the Velcro strips, and pressing them together. WARNING! NEVER cut any portion of the heat blanket. NEVER fold the heat blanket or place any weight upon it. For storage, always lay the heat blanket flat. BioFlo 110 Modular Fermentor M1273-0054 User’s Guide... -
Page 34: Install Vessel In Vessel Stand
1. Gently compress the baffle ring at its ends (to avoid scratching the vessel walls). You may find it convenient to squeeze the tab with your thumb. 2. Slide the assembly inside, with the tab facing up, until it comes to rest at the bottom of the vessel. New Brunswick Scientific User’s Guide... -
Page 35: Install Impeller(S)
It is good practice to lightly lubricate all O-rings, port threads and adapter threads with silicone grease before you install equipment in the headplate. Also inspect the headplate O-ring to be sure it is securely seated in its groove. BioFlo 110 Modular Fermentor M1273-0054 User’s Guide... -
Page 36: Install Cooling Coil
Do not overtighten. CAUTION! Finger tighten only any adapter that has a white Teflon ferrule (tapered, cone-shaped insert under the Teflon washer). The ferrule can deform under too much pressure. New Brunswick Scientific User’s Guide... -
Page 37: Install Harvest Tube
If you are using a foam sensor with a foam trap kit: 1. Working from above the headplate, insert the foam sensor into the appropriate port (see Figures 11, 12 & 13 for reference). 2. Finger tighten the knurled adapter. BioFlo 110 Modular Fermentor M1273-0054 User’s Guide... -
Page 38: Install Foam Exhaust Tube
Prior to installation, any pH probe you are using should be inspected for damage, and replaced if necessary. NOTE: To avoid damage to the probes during operation, be sure that there is no interference between the probes and the baffle assembly, impeller blades, or cooling coil. New Brunswick Scientific User’s Guide... - Page 39 8. Gently insert the probe into the appropriate port (see Figures 11, 12 & 13 for reference), allowing the O-rings to seat fully into the port. NOTE: The fit may be snug. Gently rotate the probe as you press it into the port to avoid breakage. BioFlo 110 Modular Fermentor M1273-0054 User’s Guide...
-
Page 40: Install Do2 Probe
Figure 16: dO2 Probe with Port Adapter (exploded) dO2 PROBE ADAPTER (top portion) TOP FERRULE BOTTOM FERRULE dO2 PROBE ADAPTER (bottom portion) TEFLON O-RING (white) PORT O-RING (black) New Brunswick Scientific User’s Guide... -
Page 41: Install Exhaust Condenser
7. Connect the other end of the tubing to the water inlet (see NOTE below and Figure 17 on the following page), split from the water solenoid valve on the side of the Power Controller. Secure with a plastic tie. BioFlo 110 Modular Fermentor M1273-0054 User’s Guide... - Page 42 VALVE BODY Figure 18a: Exhaust Condenser (1.3L, 3.0L & 7.5L Vessels) STERILE FILTER WATER OUTLET WATER INLET SET SCREW in port adapter EXHAUST PORT HEADPLATE New Brunswick Scientific User’s Guide...
-
Page 43: Install Sampler
4.5.18 Install Sampler The optional BioFlo 110 sampler system is designed to aseptically remove batch samples from the vessel. The entire installation is easily autoclaved in place on the vessel. If you are using the sampler, install the kit as follows, using Figures 19a &... -
Page 44: Sampler Tube
HARVEST TUBE Figure 19b: Sampler System (3.0L, 7.5L & 14.0L Vessels) 3/16” SILICONE TUBING THUMB CLAMP SAMPLER PORT SYRINGE HEADPLATE SYRINGE FILTER SAMPLER BOTTLE HOLDER SAMPLER BOTTLE HEADPLATE CLAMPING NUT SAMPLER TUBE HEADPLATE CLAMPING SCREW New Brunswick Scientific User’s Guide... -
Page 45: Install Foam Trap
3. Secure the holder in place with the clamping nut. Leave the nut loose enough to swivel the holder. 4. Firmly place the foam trap bottle (250 ml or 500 ml) in the holder. BioFlo 110 Modular Fermentor M1273-0054 User’s Guide... -
Page 46: Plug Unused Ports
1. Install a blind plug (without a hole) in any headplate port that will not be used. 2. Install silicone tubing, secured with a plastic tie and clamped shut, on any access tube (i.e., harvest tube) that will not immediately be used. New Brunswick Scientific User’s Guide... -
Page 47: Install 1.3L, 3.0L Or 7.5L Fermentation Vessel Baffle
Finger tighten each clamping nut a little at a time to secure the headplate on the vessel stand, working diagonally from one to another (rather than working around the circle) to apply equal pressure. See important NOTE on following page. BioFlo 110 Modular Fermentor M1273-0054 User’s Guide... -
Page 48: Vessel Assembly: Water-Jacketed
Vessel Assembly: Water-Jacketed One of the most versatile features of the BioFlo 110 is the wide variety of glass vessels available. There are two types of vessels, non-jacketed—which are provided with the basic models—and water-jacketed. Each type of vessel is available in four sizes: 1.3 liters, 3.0 liters, 7.5 liters and 14.0 liters (maximum working volume;... - Page 49 LIFTING HANDLE HEADPLATE TOP CLAMPING RING BAFFLE COOLING WATER OUTLET TUBE WATER JACKET SPARGER BOTTOM CLAMPING THERMOWELL RING BASE PLATE COOLING WATER OUTLET COOLING WATER INLET (connect (connect to drain) to water solenoid valve) BioFlo 110 Modular Fermentor M1273-0054 User’s Guide...
-
Page 50: Headplate
For easy reference, see Appendix E for a mix and match summary of port sizes and the types of adapters and inserts available. 4.6.1 Headplate Figure 22: 1.3L Headplate EXHAUST PROBE HARVEST/SAMPLER/SPARE ASSEMBLY THERMOWELL Each bolt is a possible mounting position for a bottle holder. New Brunswick Scientific User’s Guide... - Page 51 Figure 23: 3.0L Headplate EXHAUST Mounting position for dO2 PROBE Sampler Assembly RTD/THERMOWELL Each bolt is a possible mounting position for a bottle holder. BioFlo 110 Modular Fermentor M1273-0054 User’s Guide...
- Page 52 Figure 24: 7.5L & 14.0L Headplate EXHAUST dO2 PROBE LIFTING HANDLE LIFTING HANDLE THERMOWELL SEPTUM PLUG 19mm/SPARE Each bolt is a possible mounting position for a bottle holder. New Brunswick Scientific User’s Guide...
-
Page 53: Install Headplate Clamping Ring
(see Figure 26 on the following page). 4. With the clamping screws in place on the ring, fit the bottom clamping ring onto the base plate. BioFlo 110 Modular Fermentor M1273-0054 User’s Guide... -
Page 54: Install Baffle (14.0L Fermentation Vessels Only)
2. Slide the assembly inside, with the tab facing up, until it comes to rest at the bottom of the vessel. 3. Orient the baffle so the opening is opposite the gradations on the vessel. 4.6.5 Install Impeller(s) Install the impeller(s) as follows: New Brunswick Scientific User’s Guide... -
Page 55: Install Sparger
Do not overtighten. CAUTION! Finger tighten only any adapter that has a white Teflon ferrule (tapered, cone-shaped insert under the Teflon washer). The ferrule can deform under too much pressure. BioFlo 110 Modular Fermentor M1273-0054 User’s Guide... -
Page 56: Install Harvest Tube
If you are using a foam sensor with a foam trap kit: 1. Working from above the headplate, insert the foam sensor into the appropriate port (see Figures 22, 23 & 24 for reference). 2. Finger tighten the knurled adapter. New Brunswick Scientific User’s Guide... -
Page 57: Install Foam Exhaust Tube
To avoid damage to the probes during operation, be sure that there is no interference between the probes and the baffle assembly or impeller blades. 1. Wear protective gloves to protect yourself in case of accidental breakage. 2. Lightly coat the pH probe with glycerol. BioFlo 110 Modular Fermentor M1273-0054 User’s Guide... - Page 58 O-rings to seat fully into the port. NOTE: The fit may be snug. Gently rotate the probe as you press it into the port to avoid breakage. 9. Finger tighten the bottom portion of the port adapter into the port. New Brunswick Scientific User’s Guide...
-
Page 59: Install Dissolved Oxygen Probe
Figure 28: dO2 Probe with Port Adapter (exploded) dO2 PROBE ADAPTER (top portion) TOP FERRULE BOTTOM FERRULE dO2 PROBE ADAPTER (bottom portion) TEFLON O-RING (white) PORT O-RING (black) BioFlo 110 Modular Fermentor M1273-0054 User’s Guide... -
Page 60: Install Exhaust Condenser
2. Place the 12mm exhaust condenser adapter into the port. 3. Place the exhaust condenser inlet (see Figures 30a & 30b below) into the port, and finger tighten the knurled adapter. 4. Tighten it with the Allen key provided, until it is secure. New Brunswick Scientific User’s Guide... - Page 61 Power Controller (see Figure 2) HOSE BARB 1: HOSE BARB 2: connect to water connect to cooling source, downstream coil or water jacket of pressure regulator inlet VALVE BODY BioFlo 110 Modular Fermentor M1273-0054 User’s Guide...
- Page 62 If the weight of the exhaust filter kinks the tubing, fasten a short length of stiffening material to the tubing, using rubber bands or tie wraps, to support the filter. Figure 30b: Exhaust Condenser (14.0L Vessel Only) STERILE FILTER SET SCREW in port adapter EXHAUST PORT New Brunswick Scientific User’s Guide...
-
Page 63: Install Sampler
4.6.17 Install Sampler The optional BioFlo 110 sampler system is designed to aseptically remove batch samples from the vessel. The entire installation is easily autoclaved in place on the vessel. If you are using the sampler, install the kit as follows, using Figures 31a and 31b for reference: 1. - Page 64 Close the plunger. 9. Remove the cap from one of the sample bottles and screw the bottle into the metal holder. 10. Position the entire assembly to your satisfaction, then finger tighten the clamping nut. New Brunswick Scientific User’s Guide...
-
Page 65: Install Foam Trap
HEADPLATE CLAMPING NUT VESSEL 6. Connect a length of silicone tubing to the longer tube in the other bottle cap penetration. Secure the tubing with a plastic tie, and clamp it off on the top. BioFlo 110 Modular Fermentor M1273-0054 User’s Guide... -
Page 66: Install Antifoam System
1. Gently place the baffle, tab facing up, around all of the other instruments protruding from the headplate. 2. Position the tab and baffle opening toward the back of the headplate. CAUTION! Hold the baffle in place with two fingers when you lift the headplate assembly. New Brunswick Scientific User’s Guide... -
Page 67: Install Headplate
You may have to walk it down by rotating it slightly left and right. BioFlo 110 Modular Fermentor M1273-0054 User’s Guide... -
Page 68: Install The Rotameter
Using a Phillips head (+) screwdriver, mount the meter bracket using the screws provided. 2. Use silicone tubing to connect the air source to the bottom air inlet hose barb on the rotameter (see Figure 34). New Brunswick Scientific User’s Guide... -
Page 69: Install Liquid Addition Systems
0.05 VVM or less for cell culture; unnecessarily high airflow can induce foaming. Install Liquid Addition Systems Addition ports are used to feed base, acid, nutrients and media into the vessel. To install an addition system: BioFlo 110 Modular Fermentor M1273-0054 User’s Guide... -
Page 70: Making Connections
Power Controllers. 4.10.2 Water The BioFlo 110 water solenoid valve is located on the side of the Power Controller. Water pressure should be 10 PSIG maximum, with 50 μm filtration. New Brunswick Scientific... -
Page 71: Probes And Sensors
Familiarize yourself with the connections and controls on the front panel of the Power Controller, as illustrated in Figure 35 below: • POWER SWITCH On/Off rocker switch. • OPERATING LIGHT Lights when the Power Controller is on. • AGITATION Connection for agitation motor. CONNECTOR BioFlo 110 Modular Fermentor M1273-0054 User’s Guide... - Page 72 Via the water solenoid valve, located on the side panel, OUTLET which provides the connection between the water supply and the vessel water inlet (either cooling coil or water jacket). Inlet is marked 1 and outlet 2. New Brunswick Scientific User’s Guide...
- Page 73 Controller If you are using the BioFlo 110 dO2/pH Controller, familiarize yourself with the connections and controls on the front panel, as illustrated in Figure 36 below: Figure 36: dO2/pH Controller – Front Panel...
-
Page 74: Pumps
(left connector marked “pH”). Attach the ground clip to the top of a headplate screw. Level Controller If you are using the BioFlo 110 Level Controller, familiarize yourself with the connections and controls on the front panel, as illustrated in Figure 37 below: Figure 37: Level Controller – Front Panel... -
Page 75: Air And Optional Gases
All gases should be medical grade. Gas pressure should not exceed 10 PSIG. Be sure to secure all tubing connections with plastic ties. If you are using the optional Air Filter/Regulator kit (see Section 10.3), install it according to the kit instructions. BioFlo 110 Modular Fermentor M1273-0054 User’s Guide... -
Page 76: Install Cable Guides
3. Connect the outlet of the rotameter to a sterile filter, taking care to observe the flow direction requirements if stamped on the filter. 4. Connect the filter outlet to the sparger inlet. 4.11 Install Cable Guides New Brunswick Scientific User’s Guide... -
Page 77: Voltage Selection And Fusing
Bolt on here BOTTOM JAW 4.12 Voltage Selection and Fusing NOTE: If you move your BioFlo 110 to a new location that requires a change in voltage and/or fusing, consult your NBS representative. BioFlo 110 Modular Fermentor M1273-0054 User’s Guide... -
Page 78: Calibrating The Ph Probe
It is possible to change the voltage on your BioFlo 110. It is also possible to change the fusing arrangement from a single fuse to a double fuse. These procedures, however, should only be performed by a qualified technician, referring to Appendix B in this manual. - Page 79 Press the selector button in the pH row. The pH Loop Details screen opens: 6.68 Control: Auto Control Output: 100.0 Setpoint Disp Hi Disp Lo Calibrate Setup 6.68 7.00 6. In the pH Loop Details screen, press the Calibrate selector button. The Calibrate pH screen opens: BioFlo 110 Modular Fermentor M1273-0054 User’s Guide...
- Page 80 12. Rinse the electrode with distilled water, then immerse it in a second pH buffer solution which is several pH units below pH 7.00 (e.g., 4.00) and allow a few minutes for the system to equilibrate, as indicated by a nearly stable Raw Input. New Brunswick Scientific User’s Guide...
- Page 81 16. After the values have been set, press the button to return to the Main Screen. CAUTION! Do not use hydrochloric acid (HCl) with the BioFlo 110 for pH control or any other purpose, because HCl corrodes stainless steel. Over time, HCl will damage the stainless steel components.
-
Page 82: Before First Use
This section provides critical pre-operation instructions. The BioFlo PCU display screens are available in English, French, German and Spanish. Before you operate your BioFlo 110 for the first time, be sure to select the preferred language for your PCU display screens. -
Page 83: For Pc Supervision
Transmit Data RS-232 Receive Data RS-232/ RS-422 Ground RS-422 Enable (Jumper to Pin #7 to enable RS-422) RS-422 Transmit Data + RS-422 Transmit Data - RS-422 Receive Data + RS-422 Receive Data - BioFlo 110 Modular Fermentor M1273-0054 User’s Guide... -
Page 84: Select Communications Protocol
3. Press the selector button for your choice: AFS or ModBus. There is no need to press the Enter key. Use the key to return to the Systems Detail screen, or the key to return to the Main Screen. New Brunswick Scientific User’s Guide... -
Page 85: Set Base Addresses
PCU’s 9-pin male “D” recorder connector. Four outputs (per PCU) are available to send data to the supervisory system for logging. Following are the pin designations for those four outputs: BioFlo 110 Modular Fermentor M1273-0054 User’s Guide... - Page 86 3. Press the selector button for Output 1. A screen with eight available loops opens: None Recorder Recorder Status: Off Temp-U1 Agit-U1 Output 1: None PumpA-U1 Output 2: None PumpB-U1 Output 3: None PumpC-U1 Output 4: None pH-U1 More… Initially, all of the Output are assigned to “None”. New Brunswick Scientific User’s Guide...
- Page 87 7. Press the key to return to the Main Screen. In future, should you wish to change an output assignment or to return it to None, follow steps 3-5 above to make new selections. BioFlo 110 Modular Fermentor M1273-0054 User’s Guide...
-
Page 88: Sterilization & Reinstallation
C. To protect hydrophobic filters from blockage, which would occur if condensation were allowed to wet and block the filter surface; D. To protect susceptible vessel assembly components from steam damage. New Brunswick Scientific User’s Guide... -
Page 89: Initial Preparation For Autoclaving
7. Remove the RTD from the thermowell. 8. Disconnect all probes and sensors, and remove their cables. 9. If you are using pH and dO2 probes, install each probe’s shorting cap (provided in the probe kit). BioFlo 110 Modular Fermentor M1273-0054 User’s Guide... -
Page 90: Autoclaving The Vessel
Do not sterilize the jacket water heater. 3. When you remove the vessel from the autoclave, immediately crimp the foil funnel on the addition port and close off the vent tubing to maintain sterility. New Brunswick Scientific User’s Guide... -
Page 91: Sterilization Time And Temperature
NBS’ long experience has shown no adverse effects at all on filters exposed to longer autoclaving times. Adjust the time and temperature as needed. If you have a water-jacketed vessel and the jacket is not half-filled, the vessel may not reach sterile temperature. BioFlo 110 Modular Fermentor M1273-0054 User’s Guide... -
Page 92: Reinstalling The System
Connect the cable to the Power Controller. WARNING! If the temperature probe is plugged into its controller but not inserted into the thermowell, the vessel will overheat, resulting in risk to the operator and to the culture. New Brunswick Scientific User’s Guide... -
Page 93: Confirming Ph Calibration
2. Take a sample of media, and measure the pH on the external meter. 3. If the two values disagree, return to the BioFlo 110 Calibrate pH screen and set Zero to the value reported by the external meter. Do not change the Span or you will invalidate the entire calibration. - Page 94 5. Establish a reference “zero” signal from the dissolved oxygen probe, using one of the following choices: (a) More accurate: Sparge with nitrogen until the dO2 Raw Input stops decreasing. (b) Widely used alternate: Momentarily disconnect the dO2 cable from the probe. New Brunswick Scientific User’s Guide...
-
Page 95: Powering The Jacket Water Heater
PCU is turned on, the jacket water stirrer should spin freely. WARNING! When the jacket water heater is plugged in, do not touch the top surface. It is very hot. BioFlo 110 Modular Fermentor M1273-0054 User’s Guide... - Page 96 (see Figure 42 below). 3. Reinstall the vessel (jacket filled with water and vessel with media; temperature probe in the thermowell and plugged into the Power Controller). Figure 42: Jacket Water Heater—Bottom View RESET BUTTON ELECTRICAL SPECIFICATION LABEL New Brunswick Scientific User’s Guide...
-
Page 97: Operation
0 through 9, a decimal point, and a +/- sign. There are also 8 selector keys, which allow the user to choose specific loop detail screens from the main screen, and to select specific interactive screens for operational input. BioFlo 110 Modular Fermentor M1273-0054 User’s Guide... - Page 98 This key allows you to go back to the previous screen. It also allows you to cancel any numerical input (e.g., setpoint, etc) that has not yet been entered. This key allows you to enter any touchpad input that you wish to save. New Brunswick Scientific User’s Guide...
-
Page 99: Selecting The Application
Cell Culture) on this screen does not relate to the units that appear on the left. You have already selected Unit 2, therefore your choice in this new screen will only affect Unit 2. BioFlo 110 Modular Fermentor M1273-0054 User’s Guide... -
Page 100: Main Screen
Unit 4: Fermentation …Back Follow the same steps any time you wish to verify or change application for a vessel (“Unit”). Main Screen 1. Press the button to open the Main Screen (see sample screen below). New Brunswick Scientific User’s Guide... - Page 101 Pump B 0.0 % Manual Pump C 0.0 % Manual 6.59 7.00 pH Auto 81.2 0.0 % Auto 4. Press once more to return to the Unit 1 (labeled “BioFlo 110”) Main Screen. BioFlo 110 Modular Fermentor M1273-0054 User’s Guide...
-
Page 102: Set The Temperature Loop
0.0 % Manual 6.68 7.00 pH Auto 77.1 0.0 % Auto The Temperature Loop Details screen appears (see sample below): Temp 23.4 °C Control: Off Control Output: 100.0 Setpoint Disp Hi Disp Lo 23.4 30.0 New Brunswick Scientific User’s Guide... - Page 103 Temp 23.4 °C Control: Off Output: 100.0 Auto 23.4 30.0 • Press the selector button next to Auto. The control mode is automatically updated as the Temperature Loop Details screen returns (see sample screen below): BioFlo 110 Modular Fermentor M1273-0054 User’s Guide...
-
Page 104: Setpoint
1. Press the selector button next to Setpoint. A highlighted edit box appears: Temp 28.7 °C Control: Auto Control Output: 100.0 Setpoint Disp Hi Disp Lo 23.4 30.0 2. Using the numeric touchpad, enter the new setpoint: New Brunswick Scientific User’s Guide... -
Page 105: Graphic Display
4. Press the Disp Lo selector button. A highlighted edit box appears. 5. Using the touchpad, enter the desired Low value. 6. Press the Enter key to save the new value. Press the button to return to the Main Screen. BioFlo 110 Modular Fermentor M1273-0054 User’s Guide... -
Page 106: Setting The Agitation Loop
Never exceed 200 rpm unless at least one impeller is immersed in liquid. Setting the pH Loop From the Main Screen of the appropriate fermentor, press the selector button in the pH row. The pH Loop Details screen opens: New Brunswick Scientific User’s Guide... -
Page 107: Setting A Deadband For Ph Control
Select “Defaults” at any time during a Setup process to return to the factory-set default settings. Advanced Control P Gain P-Gain: 140.00 I-Gain: 14.00 I Gain 2. Press the Deadband selector button. A highlighted text box opens: BioFlo 110 Modular Fermentor M1273-0054 User’s Guide... -
Page 108: Setting The Output Multiplier For Ph Control
100%, then the 25% multiplier will reduce pump output to 25%. If the controller’s output to the pump is 50%, the 25% multiplier factor will reduce pump output to 12.5%. New Brunswick Scientific User’s Guide... - Page 109 Multiplier Output Multiplier: 100.00 Advanced Control P Gain P-Gain: 140.00 I-Gain: 14.00 I Gain 3. Using the touchpad, enter the desired Multiplier value (note that you can set this percentage to the hundredths): BioFlo 110 Modular Fermentor M1273-0054 User’s Guide...
-
Page 110: Setting P & I Gains For Ph Control
4. Press the I Gain selector button. A highlighted edit box will open. 5. Using the touchpad, enter the new I Gain value. 6. Press the Enter key to save the new value (or press to cancel). The new value appears onscreen. New Brunswick Scientific User’s Guide... -
Page 111: Setting The Do2 Loop
The default setting is Cascade To: None, which means that dissolved oxygen will be controlled only by the addition of oxygen when the actual dO2 level drops below setpoint. BioFlo 110 Modular Fermentor M1273-0054 User’s Guide... - Page 112 73.1 % Agit Cascade To: None None Agit Hi Limit: 1200 Agit Lo Limit: 250 Advanced Control P-Gain: 0.20 I-Gain: 1.00 3. Press the Agit selector button. The Setup screen returns, showing the new cascade parameter: New Brunswick Scientific User’s Guide...
-
Page 113: Cascades For Fermentation With Gas Mix Controller
Gas Mix Controller.) • The default setting is Cascade To: None, which means that dissolved oxygen will be controlled only by the addition of oxygen when the actual dO2 level drops below setpoint. BioFlo 110 Modular Fermentor M1273-0054 User’s Guide... - Page 114 Agit Cascade To: None Agit Hi Limit: 1200 Agit Lo Limit: 250 Agit/O2 None Advanced Control P-Gain: 0.20 I-Gain: 1.00 3. Press the Agit selector button. The Setup screen returns, showing the new cascade parameter: New Brunswick Scientific User’s Guide...
-
Page 115: Cascades For Cell Culture Without Gas Mix Controller
Section 7.9 below) controlled agitation speed and oxygen output. This is how it functions: when the actual dO2 value rises above the dO2 setpoint, the agitation speed will automatically decrease until the dO2 setpoint is reached. BioFlo 110 Modular Fermentor M1273-0054 User’s Guide... - Page 116 Cascade Cascade To: None Agit Hi Agit Hi Limit: 300 Agit Lo Limit: Agit Lo Advanced Control P Gain P-Gain: 0.20 I-Gain: 1.00 I Gain 7. Press the Cascade selector button. The Cascade screen opens: New Brunswick Scientific User’s Guide...
- Page 117 Main Screen. To cascade to 4 Gas: follow steps 1-4 above, but select 4 Gas instead of Agitation. To cascade to Demand: follow steps 1-4 above, but select Demand instead of Agitation. BioFlo 110 Modular Fermentor M1273-0054 User’s Guide...
-
Page 118: Settingp & I Gains For D O2 Control
Anytime you wish to return to the default P & I Gain settings, open the dO2 Loop setup screen, and press the Defaults selector button. See Section 12.5.2 for the dO2 P & I control equation. New Brunswick Scientific User’s Guide... -
Page 119: For Fermentation
Gas row to open the Gas Mix Screen. “Gas Mix” for this controller is not actually a mixing process; it is an automatically sequenced feeding of various gases. Four control modes are possible: 4-Gas, Demand, 100% Feed and Off. Selecting Off will turn the Gas Mix Controller off. BioFlo 110 Modular Fermentor M1273-0054 User’s Guide... -
Page 120: 4-Gas Mode
To override the Gas Mix Controller’s control of gas sequencing in order to feed 100% of one gas: in the Gas Mix screen, press the selector button next to the gas of choice. The screen reflects your choice (in this case, CO2): New Brunswick Scientific User’s Guide... -
Page 121: Setting The Pumps
7.12.1 Pump Operation The BioFlo 110 supports five peristaltic pumps. On the rear panel of the Power Controller, the pump outlets labeled Acid and Base are integrated with the pH control loop. This is why they do not appear as individual pumps on the Main Screen. -
Page 122: Control Mode
Pump A, B and C. To set up the first peristaltic pump (Pump A) under the PCU’s supervision: 1. In the Main Screen, press the selector button in the Pump A row to open this screen: New Brunswick Scientific User’s Guide... -
Page 123: Setting The Pump Control Mode: Antifoam, Wet On & Wet Off
1. To set up the defoamer pump, from the pump’s Details screen, press the Control selector button for its designated pump. The Control screen opens: BioFlo 110 Modular Fermentor M1273-0054 User’s Guide... - Page 124 4. Press the button to return to the Main Screen. 5. Follow the same procedure to set the Wet On pump and the probe sensitivity value, and the Wet Off pump and probe sensitivity. New Brunswick Scientific User’s Guide...
-
Page 125: Inoculation
Level Controller to signal the Power Controller. The Power Controller activates the Antifoam pump to add chemical defoamer from the addition bottle through an addition port. When the probe no longer detects foam, the pump will be turned off. BioFlo 110 Modular Fermentor M1273-0054 User’s Guide... -
Page 126: Harvesting
Allow the pump to operate until the vessel is exhausted. b. Allow gravity to do the work. Note that a small amount of residue will probably remain in the vessel no matter how you harvest. New Brunswick Scientific User’s Guide... -
Page 127: Maintenance
Always disconnect the power cord from the Power Controller and the PCU before performing maintenance. Never immerse any BioFlo 110 module in liquid of any kind. Cleaning the Modules Use a sponge dampened with mild detergent and water to wipe the exterior of each BioFlo 110 module. -
Page 128: Cleaning The Vessels
2. With the other hand, reach into the vessel, squeeze the baffle (between thumb and forefinger) tightly enough to clear the vessel neck. 3. Lift the assembly straight up until the entire assembly is clear. 8.4.2 Vessel Cleaning Methods There are three ways to clean your vessel: New Brunswick Scientific User’s Guide... -
Page 129: Port & Adapter O-Ring Replacement
Port & Adapter O-Ring Replacement Each time you clean the vessel assembly, check all port and adapter O-rings for wear, distortion, rips or any other damage to their integrity. Replace them as needed. BioFlo 110 Modular Fermentor M1273-0054 User’s Guide... -
Page 130: Headplate O-Ring Replacement
1. Remove the cover/fuse block located on the rear of the unit with a small screwdriver. 2. Remove the old fuse. 3. Insert a new fuse of the same type. 4. Replace the cover/fuse block into the Fuse Holder/Power Inlet (see Figure 45 below). Figure 45: Fuse Holder/Power Inlet New Brunswick Scientific User’s Guide... -
Page 131: Service
If any problems occur with your BioFlo 110 system or its individual components, do not attempt to perform any service on it. Unauthorized servicing may void the warranty. Please contact your local NBS Service Department or your local NBS distributor. -
Page 132: Replacement Parts & Accessories
& When you order replacement parts, accessory parts, or when you request service information, please provide the Model Number (BioFlo 110), Manufacturing Part Number(s) and Serial Number(s) of your unit. This information is located on the bottom of each module. - Page 133 Direct Drive Agitation Motor, Cell Culture, all vessels M1273-3135 Direct Drive Agitation Motor, Fermentation, 1.3L & 3.0L M1273-3120 Direct Drive Agitation Motor, Fermentation, 7.5L & 14.0L M1273-3125 Magnetic Drive Agitation Motor, all vessels M1273-3130 BioFlo 110 Modular Fermentor M1273-0054 User’s Guide...
-
Page 134: Probes & Sensors
Probe, Broadley James gel-filled, 3.0L P0720-5747 pH Probe, Ingold gel-filled, 7.5L P0720-5580 pH Probe, Broadley James gel-filled, 7.5L P0720-5742 pH Probe, Ingold gel-filled, 14.0L P0720-5583 pH Probe, Broadley James gel-filled, 14.0L P0720-5743 RTD Assembly, all vessels M1273-8019 New Brunswick Scientific User’s Guide... -
Page 135: Replacement Vessels
Spare Parts Kit, 1.3L – 3.0L water-jacketed vessel M1273-9998 Spare Parts Kit, 7.5L – 14.0L water-jacketed vessel M1273-9999 Water Regulator/Filter Kit (single manifold for one vessel) M1117-2040 Water Regulator/Filter Kit (four manifolds for up to four vessels) M1273-5001 BioFlo 110 Modular Fermentor M1273-0054 User’s Guide... -
Page 136: Module Kits
Thermal Mass Flow Controller NBS Part Number Kit contains the thermal mass flow controller, module entry cable, 24VDC power line with transformer, polyurethane tubing, 2 cable guides. Fermentation application, 20 SLPM M1273-3109 Cell Culture application, 5 SLPM M1273-3112 New Brunswick Scientific User’s Guide... -
Page 137: Appendix A: Specifications
85-265 VAC 50/60 Hz, 100 VA Power Switch Located on back. Memory Back-Up Two AA alkaline batteries ® Fusing 2 Amp, 250V Slo-Blo Power Indicator Light Located on front. Other • Dual Rotameter hangers • Cabling/tubing organizers BioFlo 110 Modular Fermentor M1273-0054 User’s Guide... - Page 138 BioFlo 110 Power Controller Weight 16 lb. (7.2 kg) Dimensions Height 8 9/16 in. (21.8 cm) Depth* 12 in. (30.5 cm) Width 12 in. (30.5 cm) *allow 3 inches (7.6 cm) more, front and rear, for cable access • Agitation Drive Lift-off electric motor.
-
Page 139: Pump Flow Rates
*allow 3 inches (7.6 cm) more, front and rear, for cable access Pumps Four peristaltic type pumps, independently powered Power Line voltage (as labeled), supplied through Power Controller BioFlo 110 Gas Mix Controller Weight 5 lb. (2.3 kg) Dimensions Height 4 in. -
Page 140: Tubing
11.3 Tubing The following tubing sizes are provided with your BioFlo 110 system: Description Length NBS Part Number Blue polyurethane 1/8 inch ¼ inch 50 feet P0740-3111 3.2 mm 6.35 mm White silicone 3/16 inch 5/16 inch 25 feet P0740-2505 4.8 mm... -
Page 141: Non-Jacketed Vessel Dimensions For Autoclaving (Inclined)
Height with Exhaust Condenser 18 in. (46 cm) 20 in. (51 cm) Length with Exhaust Condenser 28 in. (71 cm) 31.5 in. (80 cm) Width with Exhaust Condenser 11.5 in. (29 cm) 11.5 in. (29 cm) BioFlo 110 Modular Fermentor M1273-0054 User’s Guide... -
Page 142: Water-Jacketed Vessel Dimensions For Autoclaving (Vertical)
• Addition bottles add no height to vessels with condenser. • Sampler adds approximately +4 cm to diameter. 11.4.4 Non-Jacketed Vessel Dimensions for Autoclaving (Inclined) NOTE: For use with an Angled Autoclave Rack, the attachment of addition bottles is not recommended. New Brunswick Scientific User’s Guide... - Page 143 20.5 in. (52 cm) Length with Exhaust Condenser 26 in. (66 cm) 28.5 in. (72 cm) Width 11.5 in. (29 cm) 11.5 in. (29 cm) CAUTION! Never autoclave the jacket water heater. Unplug and remove it. BioFlo 110 Modular Fermentor M1273-0054 User’s Guide...
-
Page 144: Appendix B: Technical Interventions
Be careful not to pull on the ground wire that is attached to the front of the left side (from the rear). 8. Rest the cover on its front panel, adjacent to the base. New Brunswick Scientific User’s Guide... -
Page 145: Replacing Pcu Batteries
9. Reinstall the side mounting screws. Tighten securely. WARNING! Always disconnect the power cord from the Power Controller and PCU before undertaking any of the following procedures. BioFlo 110 Modular Fermentor M1273-0054 User’s Guide... -
Page 146: Voltage Selection
Voltage Selection NOTE: If you move your BioFlo 110 to a new location that requires a change in voltage and/or fusing, be sure to consult your NBS representative. Locate the fuse drawer on the back panel of the Power Controller, next to the power plug. -
Page 147: Changing Pcu Fusing
12.4.1 Converting from Single Fuse to Double Fuse Your BioFlo 110 PCU was initially set up with a single fuse arrangement. To change to a double fuse: 1. Open the cover of the power module using a small blade screwdriver and remove the cover/fuse block assembly (see Figure 47 below). - Page 148 Figure 47: Fuse Holder/Power Inlet Figure 48: Fuse Block/Cover Assembly 5. Verify the correct fusing arrangement (see Figures 49a and 49b below). 6. Insert fuses. 7. Replace the cover unit into the fuse holder. New Brunswick Scientific User’s Guide...
-
Page 149: P&I Control Equations
As mentioned in Section 7.6.3, following is the P & I control equation for pH: − ∫ Out% = P * + I * (SP-CV) dt Where P is dimensionless and I is in min BioFlo 110 Modular Fermentor M1273-0054 User’s Guide... -
Page 150: Do2
As mentioned in Section 7.9, following is the P & I control equation for dO2: ∫ Out% = P * (SP-CV) + I * (SP-CV) dt Where P is dimensionless and I is in min New Brunswick Scientific User’s Guide... -
Page 151: Appendix C: Communications Protocols
Data Bits Stop Bits Even None Parity Comm2 is set up to communicate with the other BioFlo 110 control modules, which are daisy-chained together. Terminators must be installed on any and all unused connectors. Comm2 Settings 38400 Baud Rate Data Bits... -
Page 152: Afs/Modbus Pin Connections
• If the Slave detects an error in the transmission from the Master, it shall make no response. • If the Slave successfully receives a transmission from the Master, it must begin the appropriate response in less than 200 mSec. New Brunswick Scientific User’s Guide... -
Page 153: Protocol
* All controllers must respond to these four requests or they will not be recognized by BioCommand. † All Headers must contain a total of 9 characters (MD#) = Multidrop ID Number (CR) = Carriage Return (Sp) = Space BioFlo 110 Modular Fermentor M1273-0054 User’s Guide... -
Page 154: Change Commands
• All BioFlo110 parameters are represented by Register assignments (see Register Map in Section 13.3.1 below). • The BioFlo 110 implements Modbus functions 03, 06 and 16 decimal. • All registers are transmitted high byte first then low byte (standard Modbus format). -
Page 155: Register Map
NOTE: Parameters 1 through 8 use two registers each, Parameter 9 uses four registers, Parameters 10 & 11 use one register each, Parameter 12 uses sixteen registers and Parameter 13 uses eight registers. BioFlo 110 Modular Fermentor M1273-0054 User’s Guide... -
Page 156: Appendix D: Thermal Mass Flow Controller
WARNING! Be sure you are familiar with all warnings and precautions in the body of this manual, which are provided for your safety and for the protection of your BioFlo 110 system. 14.1 Installation The Thermal Mass Flow Controller (TMFC) has the same footprint as the Level Controller. - Page 157 Be sure to check the setting of the Unit Address Selector on the rear panel, to be sure it is the same as the other control modules for this system. For details, see Section 5.2. BioFlo 110 Modular Fermentor M1273-0054 User’s Guide...
-
Page 158: Loading Software Update
14.2 Loading Software Update If you purchased the optional TMFC module with the rest of your BioFlo 110 system, the supervisory software is fully configured for its presence; skip to Section 14.3, Operation. If you are adding the TMFC module to a pre-established BioFlo 110 system: 1. -
Page 159: Operation
Lo limits in addition to the above information. Press the appropriate selector keys to change these limits. Pressing the Cascade key in the dO2 Setup screen reveals dO2 cascade selections of Agitation (“Agit”), Gas Flow (“Gas”), Agitation/Gas Flow (“Agit/Gas”), or None..continued... BioFlo 110 Modular Fermentor M1273-0054 User’s Guide... -
Page 160: Fermentation Mode Setup
4-Gas (“4 Gas”), On Demand (“Demand”), Agitation (“Agit”) or None (see Section 7.8.4). 14.3.1 Fermentation Mode Setup 1. In the main screen (see sample screen on the following page), select the Gas loop, which represents oxygen and air: New Brunswick Scientific User’s Guide... - Page 161 4. Select Set O2% to set the percentage of oxygen. NOTE: After you set the O2%, the PCU will provide the complementary percentage of air. For example, if you set O2% at 25, the PCU will provide 75% air. BioFlo 110 Modular Fermentor M1273-0054 User’s Guide...
-
Page 162: Fermentation Mode Cascades
If you have the TMFC without the Gas Mix Module , the dO2 Cascade screen will look like this: dO2 73.1 % Agit Cascade To: None Agit Hi Limit: 1000 Agit Lo Limit: 250 Agit/Gas Gas Hi Limit : 20.0 None Gas Lo Limit: P-Gain: 0.05 I-Gain: 0.25 New Brunswick Scientific User’s Guide... -
Page 163: Cell Culture Mode Setup
2. While the Control mode and Gas Mix are Off, select %Air (or any other gas) to change the gas mix. 3. Select Gas Flow, then use the following screen to select a new gas flow Setpoint, if so desired: BioFlo 110 Modular Fermentor M1273-0054 User’s Guide... -
Page 164: Cell Culture Mode Cascades
If you have the TMFC without the Gas Mix Module , the dO2 Cascade screen will look like this (see sample screen on following page): New Brunswick Scientific User’s Guide... -
Page 165: Cleaning
Agit Hi Limit: 150 Agit Lo Limit: Agit None Advanced Control P-Gain: 0.05 I-Gain: 0.25 Make your choices as explained in Section 7.8.4. 14.4 Cleaning See Section 8.1 for instructions on cleaning the module. BioFlo 110 Modular Fermentor M1273-0054 User’s Guide... -
Page 166: Specifications
14.5 Specifications BioFlo 110 Thermal Mass Flow Controller Weight 4 lb. (1.8 kg) Dimensions Height 4 in. (10.2 cm) Depth* 12 in. (30.5 cm) Width 12 in. (30.5 cm.) *allow 3 inches (7.6 cm) more, front and rear, for cable access... -
Page 167: Appendix E: Drawings
15.1 Module Schematics Figure 52: PCU Schematics BioFlo 110 Modular Fermentor M1273-0054 User’s Guide... - Page 168 Figure 53: Power Controller Schematics New Brunswick Scientific User’s Guide...
- Page 169 Figure 54: dO2/pH Controller Schematics BioFlo 110 Modular Fermentor M1273-0054 User’s Guide...
- Page 170 Figure 55: Level Controller Schematics New Brunswick Scientific User’s Guide...
- Page 171 Figure 56: Gas Mix Controller Schematics BioFlo 110 Modular Fermentor M1273-0054 User’s Guide...
- Page 172 Figure 57: 4-Pump Module Schematics (110V) New Brunswick Scientific User’s Guide...
- Page 173 Figure 58: 4-Pump Module Schematics (220V) BioFlo 110 Modular Fermentor M1273-0054 User’s Guide...
- Page 174 Figure 59: Thermal Mass Flow Controller Schematics New Brunswick Scientific User’s Guide...
-
Page 175: List Of Drawings
Sampler/Harvest System (1.3L Vessel) Sampler System (3.0L, 7.5L & 14.0L Vessels) Foam Trap Motor Installation Rotameter—Side View Power Controller Front Panel dO2/pH Controller Front Panel Level Controller Front Panel 4-Pump Module Front View BioFlo 110 Modular Fermentor M1273-0054 User’s Guide... -
Page 176: Thermal Mass Flow Controller
Thermal Mass Flow Controller Rear Panel Thermal Mass Flow Controller Front View PCU Schematics Power Controller Schematics dO2/pH Controller Schematics Level Controller Schematics Gas Mix Controller Schematics 4-Pump Module Schematics (110V) 4-Pump Module Schematics (220V) Thermal Mass Flow Controller Schematics New Brunswick Scientific User’s Guide... -
Page 177: Appendix F: Ports & Adapters
& & One of the flexibility features of the BioFlo 110 is the variety of adapters that allow you to set up the headplate to suit your needs. The summary below will help you determine any adjustments you may wish to make to the recommended headplate arrangement. -
Page 178: Index
Dissolved Oxygen. See dO2 Bearing Housing Cap dO2 Control Replacement Part Numbers, 122 Setting Cascades for, 98, 100, 102 Bearing Housing Cap Replacement, 117 Setting P & I Gains, 105 BioCommand Communications Protocol, 139 dO2 Probe New Brunswick Scientific User’s Guide... -
Page 179: Calibrating The
Power Controller Front Panel, 59 How to set the pumps, 109 Power Controller Rear Panel, 6 Pump Module, Rear, 9 Sample BioFlo 110 Installation, 11 Sampler System, 31, 50, 51 Impellers Stacked Modules & Vessel, 11 Installation of, 21, 41... - Page 180 Part Numbers, 122 Pump Module, 9 Specifications Pump Multiplier, 108 4-Pump Module, 126 Pump Operation, 108 Antifoam/Level Controller, 126 Pump Setpoint, 108 Dimensions for Autoclaving, 127, 128, 129 dO2/pH Controller, 125 Gas Mix Controller, 126 New Brunswick Scientific User’s Guide...
-
Page 181: Symbol For, V
Specifications, 153 Part Numbers, 122 Troubleshooting, 153 Water Jacket Troubleshooting, 118 Filling the, 76 TMFC, 153 Wet Off, 61, 110, 111 Tubing Wet On, 61, 110, 111, 112 Part Numbers, 121 Tubing Specifications, 127 BioFlo 110 Modular Fermentor M1273-0054 User’s Guide...
Need help?
Do you have a question about the BioFlo 110 and is the answer not in the manual?
Questions and answers