Table of Contents
Advertisement
Quick Links
Advertisement
Table of Contents

Related Manuals for Smiths Hotline


Summary of Contents for Smiths Hotline
- Page 1 Maintenance, Testing and Calibration ® Blood and Fluid Warmer...
-
Page 2: Maintenance
Lubricating the O-Ring Seals Using a cotton swab, apply a small amount of silicone grease (Smiths Medical Part Number EZL 80-04-002) to the O-Rings in the Disposable Set connector block. If this does not solve the problem, reject the unit. -
Page 3: Routine Maintenance Tasks
M a i n t e n a n c e Routine Maintenance Tasks Smiths Medical recommends that preventative maintenance be carried out at specified intervals. Some maintenance tasks need to be repeated at 30-day intervals and others at annual intervals, depending on your choice of recirculating solution. - Page 4 S E C T I O N E v e r y d a y s Every 30 days ■ Perform a Visual Inspection looking for damage to the case, poleclamp, mains cable, etc. ■ Lubricate O-Ring Seals with a cotton swab, applying a small amount of silicone grease to the O-Rings.
-
Page 5: Every 12 Months
Every 12 Months Alarm Testing ® Place the HOTLINE on a suitable firm surface. Visually check that the recirculating solution level in the reservoir is above the MIN mark. Attach a Disposable Set, ensuring that it is free from kinks and twists. - Page 6 S E C T I O N E v e r y M o n t h s Over Temperature Alarm Test Allow the unit to run for sufficient time to stabilise the temperature. Press and hold the Over Temperature Alarm Test button.
- Page 7 S E C T I O N E v e r y M o n t h s Observe that: ■ the GREEN LED extinguishes. ■ the RED recirculating Solution Level LED lights up. the AUDIBLE ALARM commences beeping. ■ ■...
- Page 8 S E C T I O N E v e r y M o n t h s Replace O-Ring Seals GM-0163_8501-GB-A Figure 5 - 2: Getting access to the O-Ring Seals ■ Remove the socket head screws with an -inch Allen key.
- Page 9 S E C T I O N E v e r y M o n t h s Apply a smear of silicone grease (Smiths Medical Part ■ Number EZL 80-04-002) to two new O-Rings, and locate them in the sockets.
- Page 10 If using plain distilled water as the recirculating fluid, then this must be changed at the 30-day service interval, using the procedure given here. Smiths Medical currently recommends using the Hydrogen Peroxide based recirculating solution which allows a 12-monthly recirculating solution change protocol, resulting in a significant reduction of service time.
- Page 11 Drain Tube (in deployed posn) GM-HL90-8508-en Drain Tube End Cap Figure 5 - 4: Rear view of new-style HOTLINE case, showing drain tube Rinse reservoir with distilled water twice. ■ ■ Refill the reservoir with 1.4 litres of disinfectant flushing solution made to one of the formulae shown in the blue panel above.
- Page 12 ■ batches. ■ Install an L-70 or L-70 NI Disposable Administration Set in the HOTLINE®’s Disposable Set connector. Turn on the HOTLINE® and allow the fresh fluid to circulate ■ for 30 minutes. ® HOT LINE Blood and Fluid Warmer...
- Page 13 Install an L-70 or L-70 NI Disposable Administration Set in ■ the HOTLINE®’s Disposable Set connector. ■ Turn on the HOTLINE® and allow the fresh fluid to circulate for 30 minutes. ■ Switch off the HOTLINE® and dispose of the Disposable Set in accordance with the usual procedures for your ®...
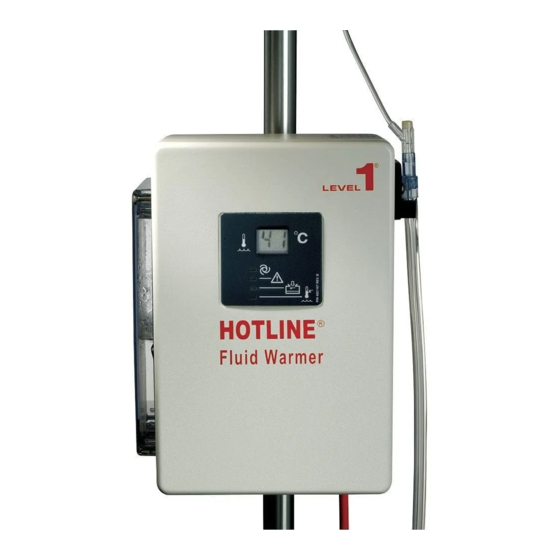
- Page 14 Temperature Checking TEMP CHECK GM-HL90-8502 Figure 5 - 5: A HOTLINE® HLTA-40 TEMP CHECK wet thermometer To accurately verify the displayed recirculating solution temperature, you will need a HOTLINE® HLTA-40 TEMP CHECK thermometer. This bespoke unit is inserted into the recirculating...
- Page 15 Disposable Set to the TEMP CHECK. Carefully unpeel the black sticker from the back of the HOTLINE®, and loosely attach it in a safe place ready for re-use. Plug the TEMP CHECK ’s Mains cable into the Auxiliary Outlet socket of the HOTLINE®.
- Page 16 C h e c k l i s t s Routine Maintenance Checklists You may freely photocopy the checklists on the next three pages to act as a continuing record of your routine HOTLINE® HL-90 maintenance. The correct checklist to use is dependent on the choice of protocol used for maintenance on the HOTLINE®s in your care.
- Page 17 S E C T I O N R o u t i n e M a i n t e n a n c e C h e c k l i s t s ® HOT LINE Blood and Fluid Warmer Technical Service Pack...
- Page 18 S E C T I O N R o u t i n e M a i n t e n a n c e C h e c k l i s t s ® HOT LINE Blood and Fluid Warmer Technical Service Pack...
- Page 19 S E C T I O N ® HOT LINE Blood and Fluid Warmer Technical Service Pack...
-
Page 20: Things You Will Need
Mains voltages are present inside. Avoid contact with any internal components not specified in this procedure. CAUTION: The Auxiliary Outlet is for use only with approved accessories supplied by your Smiths Medical distributor for that purpose. ® CAUTION: Do not fill the HOTLINE reservoir with a Disposable Set in place. - Page 21 H L - 9 0 S e r v i c e T e s t S p e c i f i c a t i o n HL-90 Service Test Specification Setup Fill unit up with de-ionised water, attach an L-70 Disposable Set, turn on and let the HOTLINE® run for 40 minutes minimum. [ii] Check that the Ambient Room Temperature is 22.0°C ±...
- Page 22 S E C T I O N 5 H L - 9 0 S e r v i c e T e s t S p e c i f i c a t i o n Alarm Test Switch Depress the General Alarm Test switch.
- Page 23 S E C T I O N 5 H L - 9 0 S e r v i c e T e s t S p e c i f i c a t i o n If necessary, turn the “H2O” or “40” temperature set point adjustment pot clockwise to increase recirculating solution temperature, or counter-clockwise to decrease recirculating solution temperature.
-
Page 24: Safety Test
You must start a fresh calibration sequence. Safety Test ® Safety test the HOTLINE in accordance with the Electrical Safety Testing System normally used by your establishment. Test Completion Drain the distilled water and refill unit with 1.4 litres of either fresh sterile distilled water or whatever formula is the usual establishment practice. - Page 25 S E C T I O N 5 H L - 9 0 S e r v i c e T e s t S p e c i f i c a t i o n Other Territories Nominal Temperature Water Temperature Over Temperature (paragraph 6)
Need help?
Do you have a question about the Hotline and is the answer not in the manual?
Questions and answers