Advertisement
Quick Links
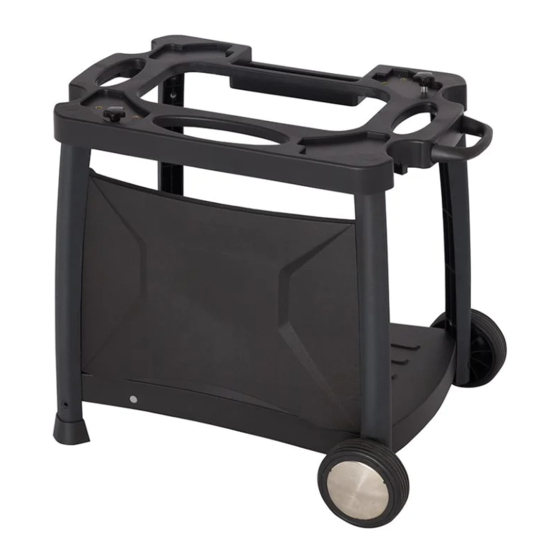
Model No. BA1037
Trolley for Gasmate Odyssey 1 and 2 Portable BBQs
– Model No. BQ1060 and BQ1061
(both sold separately, not included)
Sturdy and lightweight frame made from powder
coated steel
Screen discreetly hides gas cylinder and large
storage area
Gas cylinder locating cut-out
Do not return to place of purchase.
Integrated BBQ tool hooks
Keep your purchase receipt, this will be required to
Convenient wheels
make any claims under the 12 month warranty.
Important: Retain these instructions for future use.
Gasmate® is a registered trademark of: Sitro Group Australia Pty Ltd www.gasmate.com.au
Aber Holdings Ltd - Hamilton, N.Z. www.gasmate.co.nz
03397 05/16
Advertisement

Subscribe to Our Youtube Channel
Related Manuals for Gasmate Odyssey 1


Summary of Contents for Gasmate Odyssey 1
- Page 1 Keep your purchase receipt, this will be required to Convenient wheels make any claims under the 12 month warranty. Important: Retain these instructions for future use. Gasmate® is a registered trademark of: Sitro Group Australia Pty Ltd www.gasmate.com.au Aber Holdings Ltd - Hamilton, N.Z. www.gasmate.co.nz 03397 05/16...
- Page 2 EXPLODED DIAGRAM PARTS LIST HARDWARE Part Description AA : 12PCS BB : 12PCS CC : 16PCS M6 x 15 Top Panel Handle DD : 2PCS EE : 2PCS FF : 2PCS Front Panel Bottom Panel Leg Plugs GG : 1PC HH : 1PC Axle Screwdriver...
- Page 3 installed screw (4) CC x 4 BB x 4 AA x 4 STEP 1 Loosen the pre installed screws. Position the legs as shown and secure with the fasteners. Place the feet on the legs as shown and secure with the self tapping screw. Plug the holes as shown.
- Page 4 STEP 3 Attach the handle as shown. CC x 4 BB x 4 AA x 4 STEP 4 Position the legs into the top panel and secure with the fasteners as shown. DD x 2 STEP 5 Locate the axle through the legs as shown, attach the wheels using the nuts then push on the hub caps.
Need help?
Do you have a question about the Odyssey 1 and is the answer not in the manual?
Questions and answers