Advertisement
Quick Links
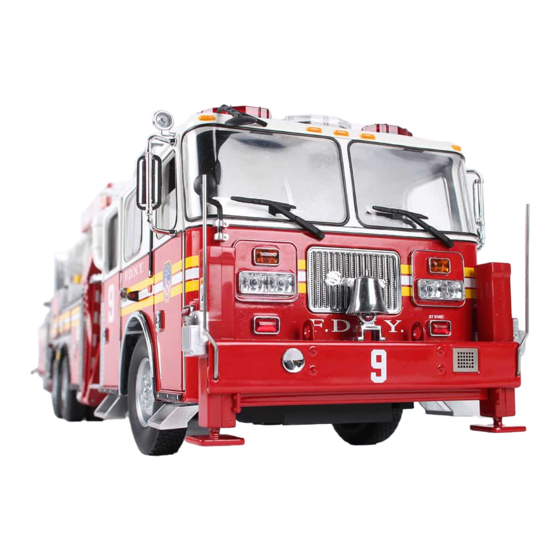
FIRE TRUCK
TOWER LADDER 9
Pack 03
B U I L D
I N S T R U C T I O N S
STAGE 17: JUMP SEAT & FRONT RIGHT LIGHT
STAGE 21: MAIN CAB BODY & DETAILS ,
CLUSTER
INSTALLING THE REAR CAB DOORS AND
INTERIOR CAB ROOF
STAGE 18: FRONT LEFT CAB DOOR
& CREW SEAT
STAGE 22: ASSEMBLE & FIT THE FRONT
LEFT WHEEL
STAGE 19: COMPONENTS FOR THE
DASHBOARD & ROOF
STAGE 23: FIT TING A CREW SEAT, INSTALLING
THE MAIN CIRCUIT BOARD, CONNECTING THE
STAGE 20: JUMP SEAT, CAB EQUIPMENT
DASHBOARD & LIGHTS , AND FITTING
& FRONT LEFT LIGHT CLUSTER
THE FRONT CAB DOORS
Advertisement

Subscribe to Our Youtube Channel
Related Manuals for Agora Models FDNY Fire Truck


Summary of Contents for Agora Models FDNY Fire Truck
- Page 1 FIRE TRUCK TOWER LADDER 9 Pack 03 B U I L D I N S T R U C T I O N S STAGE 17: JUMP SEAT & FRONT RIGHT LIGHT STAGE 21: MAIN CAB BODY & DETAILS , CLUSTER INSTALLING THE REAR CAB DOORS AND INTERIOR CAB ROOF...
- Page 2 WARNING: Some parts are assembled using magnets. These magnets can cause serious injury if they are swallowed. Keep away from children. If you suspect a magnet has been swallowed, seek medical help straight away. AGORAMODELS FDNY FIRE TRUCK...
- Page 3 LED diffuser x3 Poratble radio charger Turn signal lens (R) The Windshield wiper & Type M screws x2 Type H screws x2 Floodlight will be used in a later stage. Keep them in a safe place for now. AGORAMODELS FDNY FIRE TRUCK...
- Page 4 Align the peg and screw holes on the seat support with the Press the jump seat seat firmly into position. corresponding holes in the cab floor, just behind the engineer’s seat. AGORAMODELS FDNY FIRE TRUCK...
- Page 5 A T T A C H I N G T H E P O R T A B L E R A D I O Align the D-shaped pin on the back of the portable radio with the D-shaped hole in the side of the center console, in front of the captain’s seat. AGORAMODELS FDNY FIRE TRUCK...
- Page 6 A S S E M B L I N G T H E F R O N T L I G H T C L U S T E R Take one of the LED diffusers, holding it with the domed side facing outwards, and align with the upper single hole between two pins on the reverse side of the front light cluster. AGORAMODELS FDNY FIRE TRUCK...
- Page 7 Take the turn signal lens (R) and note the directional arrow. to the other side. Place the turn signal lens over the front light fixed in picture 13, Push firmly to fix in position. checking that the arrow is facing the direction shown. AGORAMODELS FDNY FIRE TRUCK...
- Page 8 Two more LED diffusers have been installed on the front light cluster. Turn the front light cluster over so the front side faces up and align a headlight lens over the projecting LED diffuser. AGORAMODELS FDNY FIRE TRUCK...
- Page 9 With the reverse side of the front light cluster facing up, line up the PCB (Printed Circuit Board) so that the U-shaped cut out is in line with the single pin (see picture 25). Check that the circuit board is the correct way up as shown in the picture. AGORAMODELS FDNY FIRE TRUCK...
- Page 10 Stage 17: Jump Seat & Front Right Light Cluster Type M screw Press the circuit board firmly into place and fix in position with a type M screw. S T A G E C O M P L E T E AGORAMODELS FDNY FIRE TRUCK...
- Page 11 Outer door handle Window winder Gear Crew seat Seat support Type H screws x2 Outer door panel Inner door panel Inner cab panel Seat support Crew seat Outer door handle Gear Window winder Type H screws x2 AGORAMODELS FDNY FIRE TRUCK...
- Page 12 Line up the post of the seat support with the Push the seat firmly into place. Secure the seat from the underside of the cab post-shaped hole on the rear right-hand side floor using a type H screw. of the cab floor. AGORAMODELS FDNY FIRE TRUCK...
- Page 13 Check that you have the gear the correct way up – the slightly raised The gear has been correctly fitted. surface faces down (inset). Push it onto the square peg on the inside of the inner door panel. AGORAMODELS FDNY FIRE TRUCK...
- Page 14 Apply a drop of superglue to each of the four peg holes, as indicated (circled). of the inner side of the outer door panel before pressing the parts firmly together. The inner door panel has been fixed to the outer door panel. AGORAMODELS FDNY FIRE TRUCK...
- Page 15 Apply a drop of superglue to the recess for the door handle. cab panel. Check that the raised screw hole (arrow) is positioned centrally in the corresponding hole in the hinge before firmly pressing the hinge and cab panel together. AGORAMODELS FDNY FIRE TRUCK...
- Page 16 Stage 18: Front Left Cab Door & Crew Seat Press the handle into position. This is a D-shaped fitting to ensure the This shows the handle correctly fitted. correct fit. S T A G E C O M P L E T E AGORAMODELS FDNY FIRE TRUCK...
- Page 17 GPS display Radio antenna Dashboard storage box Roof component c Push button x4 Roof component d The roof components c & d will be used in a later stage. Keep them in a safe place for now. AGORAMODELS FDNY FIRE TRUCK...
- Page 18 With the dashboard underside still facing you, position it so that the projecting through to the underside. kick panel is uppermost (arrow). Grip one of the push buttons with tweezers and align it with the pair of holes on the kick panel in the orientation shown. AGORAMODELS FDNY FIRE TRUCK...
- Page 19 4–6. The flat side of the board rests on the two ledges (dotted line, also see picture 9). When you are happy with the fit, apply a little superglue to the two ledges. AGORAMODELS FDNY FIRE TRUCK...
- Page 20 The larger circuit board with red and green cables should remain on the reverse side. Note: the cables for the two two boards can be seperated by gently pulling them apart to allow for easier fitting. AGORAMODELS FDNY FIRE TRUCK...
- Page 21 Firmly push the circuit board into the slot, checking that the contact checking that the contact point faces outwards, towards the turn point sits behind the projecting button. This button will operate the signal button. turn signals. AGORAMODELS FDNY FIRE TRUCK...
- Page 22 Apply a little glue to the tabs on the cover if necessary. Feed the cable back through to the reverse side of the dashboard as you fit the steering column into the dashboard. AGORAMODELS FDNY FIRE TRUCK...
- Page 23 Using tweezers, align another push button with steering column. the hole below the circuit board installed in picture 9. Press the stem of the button into the hole. Apply a little glue along the channels either side of the push button. AGORAMODELS FDNY FIRE TRUCK...
- Page 24 Align the lugs on the GPS display with the pair of holes on the left side of the two black controls that came pre-fitted. Note: The two lugs are different sizes to ensure the correct fit. AGORAMODELS FDNY FIRE TRUCK...
- Page 25 This shows how the dashboard should now look. Fit the lugs on the dashboard storage box into the holes on the far Push firmly to fit. right-hand side of the dashboard. Note: the two lugs are different sizes. AGORAMODELS FDNY FIRE TRUCK...
- Page 26 Align the lugs on the radio antenna with the holes in the cab roof. roof details will be fitted in a later stage. Push firmly to fit. S T A G E C O M P L E T E AGORAMODELS FDNY FIRE TRUCK...
- Page 27 Windshield wiper LED diffuser x3 lens (L) The Windshield wiper, Mirror & Floodlight will be used in a later stage. Keep them in a safe Type M screws x2 Type H screws x2 place for now. AGORAMODELS FDNY FIRE TRUCK...
- Page 28 Check you have the seat support in the correct orientation with the lug aligned with the back of the seat. Align the peg and screw holes on the seat support with the Press firmly. corresponding holes in the cab floor, just behind the captain’s seat. AGORAMODELS FDNY FIRE TRUCK...
- Page 29 Push the two halves firmly together to fit. Align the lug at the narrower end of the water cooler with the hole at the back of the center console on the right-hand side. AGORAMODELS FDNY FIRE TRUCK...
- Page 30 This is a D-shaped hole to ensure the correct fit – the taller end of the battery charger should face forward. Press firmly to fit. Align the cab cylider with the hexagon-shaped hole in front of the portable radio charger. AGORAMODELS FDNY FIRE TRUCK...
- Page 31 Push the diffuser into position so that the domed side projects Take the turn signal light lens (L) and note the directional arrow. through to the other side. AGORAMODELS FDNY FIRE TRUCK...
- Page 32 Repeat to fix the third diffuser to the front light cluster. Turn the front light cluster over so the front side faces up and align a headlight lens over the projecting LED diffuser. AGORAMODELS FDNY FIRE TRUCK...
- Page 33 PCB so that the U-shaped cut out is in line with the single M screw. pin (see picture 24). Check that the circuit board is the correct way up, as shown in the picture. AGORAMODELS FDNY FIRE TRUCK...
- Page 34 Stage 20: Jump Seat, Cab Equipment & Front Left Light Cluster S T A G E C O M P L E T E AGORAMODELS FDNY FIRE TRUCK...
- Page 35 Rear cab vent Type D screws x4 Folding steps x2 Front windshield Cab side window x2 Spotlight Spotlight Side maker x2 lens frame External Side reflector x2 power Plug x2 Emergency light Emergency light lens x6 frame x6 AGORAMODELS FDNY FIRE TRUCK...
- Page 36 The different sized holes side. should match up. Push into place to fit. Now take a rear cab panel and again, note that there are different sized lugs that match different sized holes on the cab. AGORAMODELS FDNY FIRE TRUCK...
- Page 37 Push firmly to fit. exterior wall of the cab. Repeat on the opposite side to fit the remaining rear cab panel. The rear cab side panels fit in a similar way. First, note the different sized lugs. AGORAMODELS FDNY FIRE TRUCK...
- Page 38 Repeat on the opposite side to fit the remaining rear cab side panel. Take a folding step (note: these are both the same). Align the lug with the D-shaped hole next to the rear cab panel. AGORAMODELS FDNY FIRE TRUCK...
- Page 39 Rear Cab Doors and Interior Cab Roof Push firmly to fit. Repeat on the opposite side to fit the remaining folding step. The emergency lights are assembled by pushing an emergency light Make six of these. lens into an emergency light frame. AGORAMODELS FDNY FIRE TRUCK...
- Page 40 Note that each emergency light frame has two lugs of different sizes The first emergency light fits onto the left-hand side of the cab as which match the holes on the cab. indicated above. Fit another emergency light on the right-hand side of the cab. AGORAMODELS FDNY FIRE TRUCK...
- Page 41 Fit a side marker into the hole next to the side reflector. This is a D-shaped fitting to ensure the corect orientation. Note: the slot on the side marker faces upwards. Add a drop of glue for a stronger hold. AGORAMODELS FDNY FIRE TRUCK...
- Page 42 Holding one of the plugs with tweezers, align the D-shaped lug with the lower hole in the orientation shown. Note: both plugs are the same and can be fitted to either hole. AGORAMODELS FDNY FIRE TRUCK...
- Page 43 Push into place. Add a drop the emergency light seen here will be fitted at a later stage. of glue to each of the six handles if necessary. AGORAMODELS FDNY FIRE TRUCK...
- Page 44 Carefully place the cab main body upside down on your work surface. Position one of the cab side windows so that the notch along one side lines up with the tab above the window opening. Check that the raised area of the window projects outwards. AGORAMODELS FDNY FIRE TRUCK...
- Page 45 From the inside of the cab, fit the right-hand window into the window recess on the right-hand side of the cab. Check that the notch and the hole are correctly positioned and aligned (circled). Press to fit. AGORAMODELS FDNY FIRE TRUCK...
- Page 46 Push the windshield into position in the frame. Fit the tabs at the top Check that the windshield tabs are correctly positioned on the inside of the windshield, then fit the tabs at the bottom, and push gently, but of the cab. firmly to fit. AGORAMODELS FDNY FIRE TRUCK...
- Page 47 Line up the pin on the spotlight lens with the hole in the spotlight frame. Push the parts firmly together. Keep in a safe place until ready to be attached to the cab in a later stage. AGORAMODELS FDNY FIRE TRUCK...
- Page 48 . Type C screw From the outside, drive a type C screw into the screw hole to secure the door in place. AGORAMODELS FDNY FIRE TRUCK...
- Page 49 Secure the inner cab panel at the fixing points indicated above, From the outside, drive a type C screw into the screw hole to secure checking that the door is a good fit when closed. the door in place. AGORAMODELS FDNY FIRE TRUCK...
- Page 50 2 x type D screws Push the tabs firmly into the recesses. Press firmly along all four edges of the roof to fit it into the main body. Secure in place with 4 x type D screws. AGORAMODELS FDNY FIRE TRUCK...
- Page 51 Fit roof component (c) from Stage 19 into the roof, covering Push the two lugs firmly to fit. the screw hole. Repeat to fit roof component (c) from Stage 05 on the opposite side of Push firmly to fit. the roof. AGORAMODELS FDNY FIRE TRUCK...
- Page 52 Push firmly to fit. towards the rear of the cab roof. Repeat on the opposite side to fit roof component (d) from Stage 19. The cab roof has now been fitted to the cab, along with details. AGORAMODELS FDNY FIRE TRUCK...
- Page 53 Check that the three cables extend to their maximum reach and lay The three cables feed through two cut-out sections of the inside roof flat underneath the roof as you press the inside roof firmly against the (arrows). inside of the cab roof. AGORAMODELS FDNY FIRE TRUCK...
- Page 54 Rear Cab Doors and Interior Cab Roof 2 x type I screws Secure the cab roof in place with 2 x type I screws that came with Stage 16. S T A G E C O M P L E T E AGORAMODELS FDNY FIRE TRUCK...
- Page 55 S T A G E 2 2 P A R T S L I S T Name Front tire Wheel Hub cap Front tire Wheel Hub cap AGORAMODELS FDNY FIRE TRUCK...
- Page 56 Working quickly while the tire is warm, push the wheel into the tire The wheel should now look like this. and stretch it around the outer flange of the wheel. AGORAMODELS FDNY FIRE TRUCK...
- Page 57 ‘wheel nuts’ facing outwards. Type L screw Secure in place with a type L screw from Stage 15. Align the tabs on the hub cap with the notches on the wheel. AGORAMODELS FDNY FIRE TRUCK...
- Page 58 Stage 22: Assemble & Fit the Front Left Wheel Push firmly to fit. S T A G E C O M P L E T E AGORAMODELS FDNY FIRE TRUCK...
- Page 59 S T A G E 2 3 P A R T S L I S T Name Main circuit board Main circuit board AGORAMODELS FDNY FIRE TRUCK...
- Page 60 D-shaped hole in the rear of the cab floor. Type H screw Secure the seat from the underside with a type H screw. All six seats have now been fitted to the cab. AGORAMODELS FDNY FIRE TRUCK...
- Page 61 The tall raised screw socket projects through the circuit board - see picture 8. Warning: take care when handling the circuit board. Hold the circuit board by the edges and avoid touching any of the other components on the board. AGORAMODELS FDNY FIRE TRUCK...
- Page 62 C O N N E C T I N G U P T H E D A S H B O A R D one way round. Take the dashboard from Stage 19, aligning the projecting tabs in the center (circled) with the channel immediately in front of the mobile data terminal (arrow). AGORAMODELS FDNY FIRE TRUCK...
- Page 63 & yellow) and plug it into the nearest 4-pin black socket as shown. Plug the connector firmly into the socket. Grip the remaining dashboard connector at the end of the three cables (black, yellow and red). AGORAMODELS FDNY FIRE TRUCK...
- Page 64 Take the front-right cab door assembled in Stage 02, holding it upside pull the cables through until the lights sit flush on the front of the down, feed the inner cab panel into the cab as shown. main cab body (inset). AGORAMODELS FDNY FIRE TRUCK...
- Page 65 Push the lugs on the inner cab panel into the front wall of the main opening in the inner door panel. cab body. Type C screw Drive a type C screw from the outside, through the central screw hole to secure the door in place. AGORAMODELS FDNY FIRE TRUCK...
- Page 66 Pass the connector and cable through the opening in the inner cab panel Press the lugs on the inner cab panel into the corresponding holes in the front wall of the main cab. AGORAMODELS FDNY FIRE TRUCK...
- Page 67 (arrows – shown here held upside down). cab body. They must be not get trapped when the center console is installed in the next steps. Note the two slots in the cab roof (circled). AGORAMODELS FDNY FIRE TRUCK...
- Page 68 (see picture 34, inset), and the top of the dashboard is flush with the front windshield (inset). AGORAMODELS FDNY FIRE TRUCK...
- Page 69 This is how the console should look when correctly in position. The inset picture shows the tabs on the cab divider glass ready to be pushed into the slots in the roof. AGORAMODELS FDNY FIRE TRUCK...
- Page 70 4-pin socket as shown. 3-pin socket on the circuit board. Note: You may wish to check the available lengths of the three yellow 3-pin cables, and plug them in from longest to shortest for steps 38-40. AGORAMODELS FDNY FIRE TRUCK...
- Page 71 Note: Any of the three yellow plugs may be fitted into this blue socket. Tidy the cables so that they are all routed in the center console. The cable tidy supplied is useful for this. AGORAMODELS FDNY FIRE TRUCK...
- Page 72 Stage 23: Fitting a Crew Seat, Installing the Main Circuit Board, Connecting the Dashboard & Lights, and Fitting the Front Cab Doors S T A G E C O M P L E T E AGORAMODELS FDNY FIRE TRUCK...
Need help?
Do you have a question about the FDNY Fire Truck and is the answer not in the manual?
Questions and answers