Table of Contents
Advertisement
Advertisement
Table of Contents

Related Manuals for Sangean DPR-25+


Summary of Contents for Sangean DPR-25+
- Page 1 DPR-25+ Revision 1...
-
Page 2: Table Of Contents
Recalling a preset station ... 10 Finding new stations – DAB ... 11 Manual tuning - DAB ... 11 Operating your radio – Search tuning FM ... 12 Manual tuning – FM ... 13 Display modes – DAB ... 14 Display modes –... -
Page 3: Controls
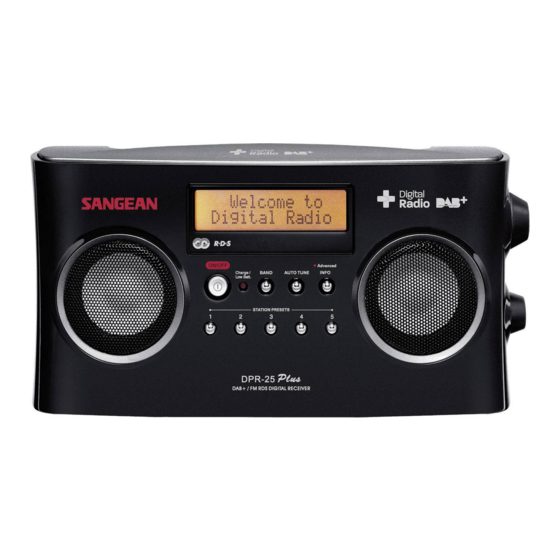
Controls(Front) 1. Power On/Off 2. Charge/Low battery indicator 3. Band button 4. Auto Tune button 5. Advanced information button 6. LCD display 7. Tuning Control 8. Volume Control 9. Station presets... - Page 4 Controls(Back) 10. Battery compartment 11. Telescopic aerial 12. Music/News tone control 13. Aux In socket 14. Line Out socket 15. Headphone socket 16. DC input socket...
- Page 5 Controls(Back) 17. Rechargeable/Alkaline battery switch...
-
Page 6: Battery Operation Using Alkaline Batteries
Reduced power, distortion and a “stuttering“ sound are all the signs that the batteries may need replacing. If the radio is not to be used for any extended period of time, it is recommended that the batteries are removed from the radio. -
Page 7: Using The Ac Adaptor
Reduced power, distortion or your radio switching off by itself are all signs that the batteries may need charging. If the radio is not to be used for any extended period of time, it is recommended that the batteries are removed from the radio. -
Page 8: Operation Modes
Operation modes Your radio has 3 operation modes DAB, FM and Auxiliary input. 1. Press the Band button to change the operation mode between DAB, Note: Display will show AUX IN only when the AUX IN socket is plugged in by a 3.5 mm cable from MP3 players, mini disc players and similar devices. -
Page 9: Operating Your Radio - Dab
2. Press the On/Off button to switch on your radio. The display will show “Welcome to Digital radio“. 3. If this is the first time the radio is used, a quick scan of Band III DAB channels will be carried out, known as Auto-Tune. The display will show “Welcome to DAB“. -
Page 10: Selecting A Station - Dab
Stop rotating the tuning control when you find the station you wish to hear. 3. Press and release the Tuning control to select the station. The display may show “Now tuning ….“ while your radio finds the new station. 4. Adjust the Volume control to the required setting. -
Page 11: Presetting Stations
Presetting stations There are 5 memory presets on each radio band DAB and FM. 1. Press the On/Off button to switch on the radio. 2. Tune to the required station as previously described. 3. Press and hold down the required Preset button until the display show e.g. -
Page 12: Finding New Stations - Dab
1. Press and release the Auto Tune button, the display will show “Scanning“. Your radio will perform a scan of the DAB frequencies. As new stations are found, the station counter on the right-hand side of the display will increase and stations will be added to the list. -
Page 13: Operating Your Radio - Search Tuning Fm
Operating your radio – Search tuning FM 1. Fully extend the telescopic aerial for FM reception. 2. Press and On/Off button to switch on your radio. The display will show “Welcome to Digital Radio“. 3. Press the Band button to select the FM band. -
Page 14: Manual Tuning - Fm
3. Rotate the Tuning control to tune to a station. The frequency will change in steps of 50 kHz on FM. 4. When the waveband end is reached, the radio will recommence tuning from the opposite waveband end. 5. Set the Volume control to the desired settings. -
Page 15: Display Modes - Dab
Display modes – DAB Your radio has seven display modes: 1. Press the Advanced info button to cycle through the various modes Scrolling text Displays scrolling text messages such as artist/track name, phone in number etc. Program type Displays type of station being listened to e.g. -
Page 16: Display Modes - Fm
Displays frequency of the station being listened to. Auto/Mono Displays Stereo or Mono broadcasting of listening station. Note: When tuned to the FM band, information display is only available when the radio is able to receive RDS information from the broadcaster. -
Page 17: Dynamic Range Control ( Drc ) Settings - Dab
Dynamic Range Control ( DRC ) settings – DAB DRC can make quieter sounds easier to hear when your radio is used in a noisy environment. 1. Press the On/Off button to switch on your radio. 2. Press and hold in the Advanced in button until display shows “Manual tune“. -
Page 18: Stereo/Mono Setting - Fm
However, as a stereo signal becomes weaker, the audio signal will become poorer. It may be preferable to force the radio to play the station in mono in order to reduce the level of audio noise. -
Page 19: Scan Sensitivity Setting - Fm
The Local or Distant setting is stored in the radio and remains in force until changed or until a System Reset. Note: The initial setting (out of box or after s System Reset) causes the radio is ignore weak (distant) signals. -
Page 20: System Reset
System reset If your radio fails to operate correctly, or some digits on the display are missing or incomplete, carry out the following procedures. 1. Switch on your radio. 2. Press and hold in the Advanced info button until “Manual tune“... -
Page 21: Auxiliary In Socket
3. Adjust the Volume control for comfortable listening. Line out socket A 3.5 mm Line out socket located on the left hand end of your radio is provided for connecting the audio signal to an external amplifier. Inserting a line out audio cable will not mute the internal loudspeaker. -
Page 22: News/Music Sound Switch
Display backlight 1. When your radio is powered by the AC adaptor, the display backlight will always be switched on. 2. When using on batteries, the display backlight will be switched on... -
Page 23: A Few Words About Batteries
4) NEVER mix Alkaline and Rechargeable batteries. The recharging of Alkaline batteries can be very dangerous. Rechargeable batteries Your radio use a range of methods to ensure correct and safe charging of Rechargeable Nickel-Metal-Hydride batteries. These work to protect your batteries from excessive charge and discharge. - Page 24 However, if the radio is not to be used for a few weeks, we recommend that the batteries are fully charged before the radio is put to one side (charge light show steady green).
-
Page 25: Specifications
Specifications Power Requirements AC 100-240 Volts, 50-60 Hz Mains Batteries 6 x LR14 (C size, UM2) Battery life Approx. 20 hours listening for 4 hours a day at normal volume using alkaline cells. Frequency Coverage 174.928 – 239.200 MHz 87.50 – 108 MHz The company reserves the right to amend the specification with notice If at any time in the future you should need to dispose of this product please note that: Waste electrical products should not be disposed of with household waste.