Table of Contents
Advertisement
Attention Symbols, Warning Symbols, and Gray Boxes
You must be aware of safety when you install and use this system. This User Guide provides various
procedures. If you do some of these procedures carelessly, you could injure or kill yourself or damage
equipment or property. Some other procedures require special attention.
The
WARNING!
You could injure or kill yourself, or
You could damage equipment or property.
The
ATTENTION!
Important instructions for using the system, or
Important instructions for maintaining the system.
The Class II Symbol alerts qualified service personnel to use only identical replacement
parts in this apparatus.
For Your Safety
Do not try to open the case of the receiver. There is risk of electrical shock, which may cause
damage to the receiver and/or personal injury or death to you. There are no user-serviceable parts
inside the receiver. Opening the receiver case or making unauthorized changes will void
the warranty.
To reduce the risk of fire or electric shock, do not expose this appliance to rain or moisture.
Important Software Notice
As with all software controlled products, unexpected behavior could arise if the user tries to perform operations in a non-
routine manner. This product, like almost any other high tech product, is subject to bugs and hence EchoStar CANNOT AND
DOES NOT GUARANTEE OR WARRANT THAT ALL FEATURES, SUCH AS PARENTAL CONTROL, WILL WORK
AS INTENDED UNDER ALL CIRCUMSTANCES. EchoStar endeavors to improve such conditions and will periodically
download improvements.
Equipment and Software Covered by this User's Guide
This User Guide covers DISH Player-DVR 522 and DISH Player-DVR 625 receivers and software models DP522 and DP625. This Guide
may cover other devices not listed here.
Copyright Notice
Copyright © 2005 EchoStar Technologies Corporation, Englewood, Colorado 80112. All rights reserved.
The information in this User Guide may change without notice. We may issue revisions to tell you about such changes.
Please send comments or questions about this User Guide to: Technical Publications, EchoStar Technologies Corporation, 94 Inverness Terrace East,
Englewood, Colorado 80112.
Part Number: 136838
Printed in the United States of America.
DISH Network is a registered trademark of EchoStar Satellite L.L.C. For information about DISH Network, please visit our website at www.dishnetwork.com.
We acknowledge all product names, trade names, or corporate names we mention in this User Guide to be the proprietary property of the registered owners.
symbol means that if you are not careful,
symbol means you should pay special attention to:
Advertisement
Table of Contents
Troubleshooting

Related Manuals for Dish Network 118523


Summary of Contents for Dish Network 118523
-
Page 1: For Your Safety
Printed in the United States of America. DISH Network is a registered trademark of EchoStar Satellite L.L.C. For information about DISH Network, please visit our website at www.dishnetwork.com. We acknowledge all product names, trade names, or corporate names we mention in this User Guide to be the proprietary property of the registered owners. -
Page 2: Table Of Contents
Contents Safety Instructions... iii Chapter 1 - Introduction ... 1 Welcome! ... 1 About this Receiver ... 2 Overview ... 4 Getting Started ... 6 Quick Tour of Basic Features ... 7 Quick Tour of the Menus ... 9 Quick Tour of Digital Video Recorder Features ... 14 Quick Tour of Watching One Program While Recording Others ... - Page 3 Contents Watching One Program While Recording Another ...79 Using the DVR Features ...85 Using Themes and Search ...90 Using Locks ...93 Personal Identification Number ...101 Using Caller ID ...101 Resetting Receiver to Factory Default Settings ...102 Changing Program Languages ...103 Using Dolby®...
-
Page 4: Safety Instructions
Safety Instructions 1. Read these instructions. 2. Keep these instructions. 3. Heed all warnings. 4. Follow all instructions. 5. Do not use this apparatus near water. 6. Clean only with a dry cloth. 7. Do not block any ventilation openings. Install in accordance with the manufacturer’s instructions. - Page 5 Safety Note to Satellite TV System Installer satellite TV system installer’s attention to Article 820-40 of the National Electrical Code (NEC) that provides guidelines for proper grounding and, in particular, specifies that the cable ground shall be connected to the grounding system of the building as close to the point of cable entry as practical.
-
Page 6: Chapter 1 - Introduction
Congratulations on choosing DISH Network. You are about to experience the excitement and convenience of Direct Broadcast Satellite (DBS) service, which delivers the very best picture and sound quality. DISH Network consistently provides state-of-the-art products and satellite-delivered services — with high performance, ease of operation, and a wide variety of entertainment options. -
Page 7: About This Receiver
Chapter 1 Introduction About this Receiver Your DISH Network satellite receiver has features that make watching TV more exciting. Along with the DVR functions, you are about to discover new ways to make programming choices. Dual and Single Modes The satellite receiver can be installed and operated in one of two ways:... -
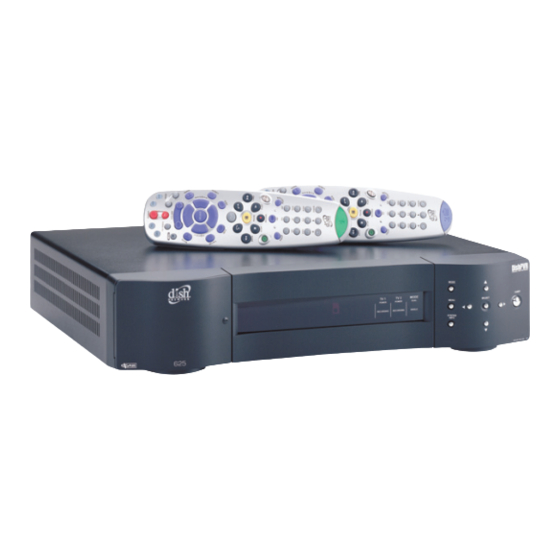
Page 8: Remote Controls
Single Mode Single Mode provides dual tuner features to a single TV like Picture-in- Picture (PIP) and the ability to watch one live program while recording another. Program viewing at each TV location is the same (Shared View enabled). Remote Controls Two remote controls come with your receiver: •... -
Page 9: Overview
Chapter 1 Introduction Overview Before you use your satellite receiver have it installed by a professional technician. For a professional installation, please call the Customer Service Center at 1-800-333-DISH (3474). If you install the system yourself, use the instructions in Chapter 2. For information on the receiver and its installation, read Chapter 2, Receiver Description and Installation beginning on page 23. -
Page 10: Fixed Images
TV, what operating/ viewing restrictions apply to avoid this problem, and associated TV warranty coverage. Moving DISH Network Logo Whenever the receiver’s outputs are turned off using the remote control or front panel POWER buttons, you will see the DISH Network logo moving around on your TV screen. -
Page 11: Getting Started
Note numbers on the 4. Call the Customer Service Center at 1-800-333-DISH (3474). A customer service representative will help you start DISH Network programming on your system and will discuss the various programming packages available. 5. Choose a package and the representative will authorize your programming. -
Page 12: Quick Tour Of Basic Features
Step 2: Finding Programs to Watch 1. Press the GUIDE button. 2. When the Program Guide DOWN ARROW to view information on other channels. Press the PAGE UP and PAGE DOWN buttons to move you quickly through the . The channels for the programming you ordered Guide should be shown in white and are available for viewing. - Page 13 Chapter 1 Introduction 5. Select 6. Press the VIEW TV button to go back to watch a program. 7. Press the INFO button to see information about the program. Note information screen is transparent. Press the INFO button again to make the information screen solid. When you press the INFO button a third time, the information screen closes.
-
Page 14: Quick Tour Of The Menus
10. Press the UP or DOWN ARROW button to change the channel information you see at the bottom of the TV screen. 11. Press the RIGHT ARROW button to highlight the program coming on next at the bottom. Press the LEFT ARROW button to go back to the program on now. - Page 15 Chapter 1 Introduction 2. Press the 1 button to select the Main Menu You can use the For now, though, go on with this tour. 3. Press the MENU button to go back to the 4. Press the 2 button to select the programming by themes (movies, sports, etc.) or by key words used in the program information.
- Page 16 6. Press the 3 button to select the provides convenient access to your DISH Network account to review your statement, pay your bill, upgrade programming, and more. 7. Press the 0 button to go back to the 8. Press the 4 button to select the order channels, check the news and weather, and even play games.
- Page 17 Chapter 1 Introduction 10. Press the 5 button to select the Menu locks on programming based on rating, or even on a channel- by-channel basis. 11. Press MENU to go back to the 12. Press the 6 button to select the Main Menu want.
- Page 18 14. Press the 7 button to select the . The Main Menu Daily Schedule planned for today, the future (up to nine days), and those that occurred in the recent past. 15. Press MENU to go back to the 16. Press the 8 button to open the allows you to set up your receiver to make it easier to use.
-
Page 19: Quick Tour Of Digital Video Recorder Features
The following tour gives you an overview of the DVR features of your DISH Network satellite TV receiver. For instructions on specific functions, see Chapter 3, Using the System. - Page 20 : The status bar at the bottom of your screen shows how long the Note program has been paused. You can pause a live program for up to two hours. 3. Press the PLAY button to watch the program from the point where you paused it.
- Page 21 Chapter 1 Introduction 7. Press PLAY. 8. Press the SKIP FWD button to skip ahead about 30 seconds in the play back. Note 9. Press the PAUSE button and then press the FWD button to forward the program in slow motion. When you press the FWD button once the program advances at 1/15 the speed of normal play.
- Page 22 10. Press the VIEW TV button to go back right away to the program in progress. 11. Press the RECORD button to start recording the program right now. 12. When the Record Remainder of this Event to start recording now. See page 71 for an explanation of the recording options.
- Page 23 Chapter 1 Introduction 16. Press the BACK button to reverse the program. Note 17. Press the DVR button. This opens the the TV screen. 18. Use the remote control arrow buttons to highlight an event on the menu (it’s OK to highlight an event you’re recording).
-
Page 24: Quick Tour Of Watching One Program While Recording Others
Quick Tour of Watching One Program While Recording Others The steps below show one of many ways to watch one program while recording another. To tour this feature, your satellite receiver must be in (see page 49) or in Single Mode (see page 81). -
Page 25: Quick Tour Of Picture-In-Picture (Pip)
10. You should now be watching a pre-recorded program while the receiver is recording the other two events (programs). Quick Tour of Picture-in-Picture (PIP) Your DISH Network receiver allows you to watch two different programs at the same time using Picture-in-Picture (PIP). This feature is available in only (see page 52). -
Page 26: Satellite Television
3. Press GUIDE on the remote. Use the that you want to watch now. Select that program. 4. This new program will be full screen. 5. Press SWAP to go back to watching your original program and put this new program in the PIP window. 6. -
Page 27: Satellite Signal Quality
Solar Interference Twice a year, the sun moves to a position behind the DISH Network satellite as it orbits the Earth. The exact time of the year that this occurs varies, depending on the location, but it is near the beginning of spring and again near the beginning of autumn. -
Page 28: Chapter 2 - Receiver Description And Installation
Chapter 2 Receiver Description and Installation Receiver Front Panel Smart Card Door Behind this door is a slot for a future smart card. No smart card is included with this receiver. Indicators • - The green light indicates that the receiver is providing TV1 Power programming to the nearby TV through the •... -
Page 29: Receiver Back Panel
Chapter 2 Receiver Description and Installation Receiver Back Panel Tip: The six coaxial connections on the back of your receiver are color coded to make the The receiver connections on the back panel are placed in three groups: connectors easy to •... -
Page 30: Digital Audio Out
Digital Audio Out is for use with high-quality digital IGITAL UDIO UTPUT sound decoding systems. Connect the with a Digital Audio Optical cable (available at consumer electronics stores). TV Antenna/Cable In is used if you want the satellite TV A NTENNA ABLE receiver to connect the tuner of the nearby TV to an off-air... -
Page 31: Remote Controls
Otherwise, you may not be able to order pay per view programs, use all of the DISH Interactive features, or other services from DISH Network. Remote Controls The two remote controls give you easy access to all the features of your satellite receiver. - Page 32 Types of Remote Controls uses infrared (IR) Remote Control 1 light signals to: • Control menus for the TV 1 nearby TV in Dual Mode • Control the satellite receiver in Single Mode IR signals travel only short distances (40 feet or less), and cannot go through walls or other solid objects.
-
Page 33: Low Battery Warning
Chapter 2 Receiver Description and Installation Batteries The remote controls come with AAA batteries, which need to be installed when you first receive your system. When you replace old batteries, you should replace all of the batteries. Use batteries of the same kind, for example alkaline or carbon zinc, and don’t mix batteries of different kinds. -
Page 34: Connecting The Receiver To A Nearby Tv
Connecting the Receiver to a Nearby TV This section describes how to connect receiver The easiest way to connect the receiver to the TV is using coaxial cable connections, but you may also use Coaxial Cable Connections 1. Connect a coaxial cable from the nearby TV’s tuner port. -
Page 35: Confirm Remote Control 1 Operation
Chapter 2 Receiver Description and Installation RCA and S-Video Connections (TV1) 1. Connect one of the following video cables: • • 2. Connect the outputs to the nearby TV’s audio inputs. If the TV has only one input for this type of audio, connect it to the right (R) phono (RCA) audio output on the receiver. -
Page 36: Connecting The Receiver To The Tv(S) In Another Room(S)
TV. Due to the difficulty of this installation, you should consider having this professionally installed. Call DISH Network at 1-800-333-DISH (3474). : When connecting to the home distribution ( Note you must meet the FCC requirements in the Appendix. - Page 37 Chapter 2 Receiver Description and Installation Tip: Using cable labels makes it easy to tell which cables connect to 1. Connect the tuner input of the remote TV(s) in other rooms to an existing the receiver ports. wall cable outlet using a coaxial cable. Inside the front cover of this guide 2.
- Page 38 8. Connect on the receiver to your existing wall cable outlet CH 21-69 O using a coaxial cable. : If you do not have an existing in-home cable system, you will need to Note run coaxial cable to each TV in other rooms. If this is too difficult, you may want to contact a professional to do this installation.
- Page 39 Chapter 2 Receiver Description and Installation 16. You may need to change the cable connection on the splitter that sends the TV signal throughout your house. The change that needs to be made is move the cable coming from the receiver the splitter to the input of the splitter using the instructions that follow.
- Page 40 23. If desired to remind you of which TV channel your satellite programming is on, write the channel number you wrote in step 4 on a blank channel sticker and place it on or near your remote TV(s). The stickers are inside the front cover of this guide.
-
Page 41: Programming The Recover Button
Chapter 2 Receiver Description and Installation Programming the Recover Button Your remote controls come equipped with a RECOVER button that helps you if you accidentally change the channel or video input on your remote TV and cannot get the picture back from your satellite receiver. When you press the RECOVER button as described on page 56, the remote control sends commands to your remote TV to change channels or video inputs to try to get you back to watching satellite programming. -
Page 42: Changing The Tv1 And Tv2 Output Channels
Changing the TV1 and TV2 Output Channels The receiver comes preset to use channel 3 for . If you are experiencing interference on the channels you are using, follow these instructions to change the channel that Make sure you are familiar with how to change channels on your TV and if necessary how to switch your TV between off-air and cable channels. -
Page 43: Connecting The Receiver To The Phone Line
: If you have a Digital Subscriber Line (DSL), you may have to install a Note DSL filter between the receiver’s back panel PHONE JACK and the telephone wall jack to successfully connect with DISH Network. You can obtain a filter from your DSL provider. Phone Line Connection Run a telephone cable with a standard RJ-11 connector from the receiver’s back... -
Page 44: Connecting The Receiver To A Dish Antenna System
Connecting the Receiver to a Dish Antenna System : Before you can begin connecting your receiver to your dish antenna, you Note must first complete the preceding sections on connecting your TVs to the receiver. Then if you are installing a dish antenna system for the first time, see Chapter 4 - Dish Antenna Installation. - Page 45 Chapter 2 Receiver Description and Installation 3. On Remote Control 1, press MENU-6-1-1 to display the screen on the nearby TV. 4. Select 5. The receiver begins performing the finished, the 6. Make sure that the information on the identifies your system correctly and shows all transponders for all satellites in your system.
-
Page 46: Optional - Connecting Vcrs To The System
Optional - Connecting VCRs to the System The diagram below provide example of how to connect VCRs to your satellite TV system. Your installation may be different. Connecting a VCR to the Nearby TV 1. Connect a coaxial cable from the nearby VCR’s tuner port. -
Page 47: Optional - Connecting To An Off-Air Antenna Or Cable
FCC requires that your install appropriate equipment between the off-air antenna/cable and the satellite TV receiver to prevent you from accidentally retransmitting DISH Network programming (see FCC Compliance in the Appendix). TV distribution equipment devices include coax panels, amplifiers or super home nodes, and are available through many companies. -
Page 48: Optimize Your Remote Controls
Optimize Your Remote Controls Change the Address When you receive your system, both remote controls and the receiver have been set to communicate on address 1. However, because UHF signals travel long distances and go through walls, a neighbor’s UHF Pro remote could control your receiver by mistake if they are on the same address. -
Page 49: Attach A Uhf Attenuator
Chapter 2 Receiver Description and Installation 6. Press the RECORD button. 7. Make sure the System Info it isn’t, the remote cannot control the receiver. 8. Press the SELECT button to close the Information Checking the Remote Control Address 1. Press and hold the SAT mode button for three seconds, until all of the mode buttons light up, and then let go of the SAT button. - Page 50 1. Take the UHF antenna off of the receiver’s back panel UHF Remote Antenna input 2. Put the attenuator onto the UHF Remote Antenna input. 3. Put the UHF antenna onto the attenuator. Page 45...
-
Page 51: Setting Up Tv1 To Operate In Uhf Pro
Chapter 2 Receiver Description and Installation Setting Up TV1 to Operate in UHF Pro You can set your receiver to operate your TV1 using another UHF Pro remote control (sold separately) by completing the following instructions: 1. Perform the following using an existing remote control: a. -
Page 52: Setting Up Tv1 To Operate In Ir
Setting Up TV1 to Operate in IR The following instructions describe how to set up TV1 to operate in IR only. 1. Perform the following with an existing remote control: a. Open the TV1 UHF Pro Setup remote control. b. Select from the Disable c. - Page 53 Chapter 2 Receiver Description and Installation Notes Page 48...
-
Page 54: Chapter 3 - Using The System
Chapter 3 Using the System Using Dual and Single Modes Your DISH Network satellite receiver includes features that gives you greater flexibility in how you watch TV. These features include two modes of operation: Dual Mode Dual Mode uses TV1 outputs to deliver programming to the nearby TV and Dual Mode TV2 outputs to deliver programming to the remote TV(s). - Page 55 Chapter 3 Using the System Using Picture-In-Picture Single Mode instructions describe how to use PIP: 1. Press the PIP button. The the screen. 2. Press the POSITION button to move the the TV screen. Each time you press the POSITION button, the moves to another location.
- Page 56 Using Shared View is a feature of Shared View Single Mode and video outputs to display the same programming as the TV1 outputs. While using this feature, both the green 1 and blue 2 remotes for your satellite receiver can control what is displayed on all TVs connected to the system. The following instructions describe how to enable 1.
-
Page 57: Using The Remote Controls
Chapter 3 Using the System Switching Between Dual and Single Mode Put the satellite receiver in Mode receiver between Indications Recording Favorites Lists Locks Using the Remote Controls Tip: Remote Control 1 is used to The following section describes how to use the remote controls with your control TV1 menus satellite receiver. - Page 58 Menu Button Press the MENU button to open the Page Up and Page Down (Arrow) Buttons Press the PAGE UP button or the PAGE DOWN button to move, page by page, through the Program Guide list, a results list, or a list of channels. Timers Search Mute Button...
-
Page 59: Arrow Buttons
Chapter 3 Using the System • Change channels while watching TV - Press the UP and DOWN ARROW buttons. • Open the • Show • Move around within the Press the UP, DOWN, LEFT, and RIGHT ARROW buttons. • Delete - Press the LEFT ARROW button to delete characters while using Search Select Button Press the SELECT button to select the option you highlight in a menu. -
Page 60: View Tv Button
View TV Button Press the VIEW TV button to close all menus and go to watching programming. Press the VIEW TV button to briefly display the watching a program. Cancel Button Press the CANCEL button to cancel and go back to the previous menu or to watch a program. -
Page 61: Recover Button
Chapter 3 Using the System Star Button Press the STAR button to: • Open the • Backspace without deleting while using the Zero Button Press the ZERO button to forward space while using the search function of your receiver. Pound Button Press the POUND button to display the Recover Button Press the RECOVER button if you accidentally change the channel or video... -
Page 62: Dvr Buttons
3. If you see the screen, press the SELECT button to close the System Info screen. You have recovered your satellite video. 4. If you do not see the System Info have recovered your satellite video. : Press any remote control button other than the RECOVER button to Note end this procedure. -
Page 63: Using The Menus
Chapter 3 Using the System Using the Menus The menus make using the receiver and selecting programs quick and easy. Use the menus to control the receiver and to use its features, such as setting locks, choosing a program, or creating a favorites list. Open and Close Menus You can open the menus in either of two ways: Tip: In Dual Mode,... -
Page 64: Highlighting Menu Options
– When watching a program, open the – Display the Browse Banner To close a menu and return to watching a program, press either the VIEW TV or CANCEL button. : If you do not do anything in a menu for several minutes, the menu Note automatically closes. -
Page 65: Selecting Menu Options
Chapter 3 Using the System Selecting Menu Options When you select a menu option, that option takes effect right away. You can select a menu option in either of two ways: • • List of Choices in the Menus When you make a choice in a list, the receiver does not apply the change until you select the Cancel There are two types of lists:... -
Page 66: Using Text Fields
Canceling a Procedure You can cancel a procedure in any of three ways: • If you want to return to watching a program, press the remote control VIEW TV button. • If you want to return to the previous menu, press the CANCEL button. -
Page 67: Changing Channels
Chapter 3 Using the System Changing Channels There are three ways to change channels: Using the Program Guide The on-screen channels and programs. You can use the see what programs are scheduled, to set up timers, and to buy Pay-Per-View programs. - Page 68 Changing the Channel in the Program Guide 1. Press GUIDE to open the 2. Choose a channel using either of the following: • Use the NUMBER PAD buttons to enter the channel number. Program Guide you just entered. • Use the ARROW buttons to move the highlight to the channel. 3.
-
Page 69: Displaying Program Information
Chapter 3 Using the System Displaying Program Information The Program Banner Program Banner are watching. The receiver displays the seconds at the top of the TV screen every time you change the channel or press the remote control VIEW TV button. The Browse Banner You can use the programs are available without changing the program that you are watching. -
Page 70: Using The Browse Banner
Using the Browse Banner 1. Press the BROWSE (RIGHT ARROW) button to open the Browse Banner 2. Change the channel displayed on the following: • Enter the channel number for the program that you want, using the NUMBER PAD buttons. •... -
Page 71: Ordering Pay-Per-View Programs
With Movies On Demand, you have immediate access to the newest movies on that you’ll always DISH Network. You can even use your DVR buttons (PAUSE, FWD, and have the latest BACK) to enhance your viewing experience. DISH On Demand programs. -
Page 72: Reviewing Purchase History
To order a DISH On Demand program: 1. Press the DVR button to open 2. Select Movies & More 3. Use the LEFT and RIGHT ARROW buttons to scroll through your program choices. 4. Select the program you want to watch and follow the on-screen instructions. : When you confirm an order for a DISH On Demand program, you Note cannot cancel the order and you will be billed for it. - Page 73 Chapter 3 Using the System • When you put the receiver in not available. • If you choose a program using numbers, the receiver tunes to the channel for that program whether or not that channel is on the active Creating or Changing a Favorites List You can create, add channels to, and remove channels from a 1.
-
Page 74: Using Timers And Recordings
Naming a Favorites List 1. Press MENU-8-3 to open 2. Select the Favorites List 3. Select the option. Edit Name : You cannot change the name of the Note 4. Enter the list’s name by either using the virtual keyboard or the remote control NUMBER PAD to enter the letters in the Using Text Fields on page 61 for instructions. -
Page 75: Timer Frequency
Chapter 3 Using the System Overview Refer to this section as you get familiar with how to set up Timer Types There are three types of timers: • • • Timer Frequency Deciding how often you want to watch a program will help you make the best choice: •... -
Page 76: Timer Options
For example, having six programs scheduled to record at the same time cannot be done on a dual-tuner receiver; therefore, the receiver will record only the two programs with the highest priorities. • All timers have a priority that you can change at any time. •... - Page 77 Chapter 3 Using the System • • • Daily Schedule Daily Schedule nine days), and those that occurred in the recent past. Use the • • • Reasons Why Timers are Skipped If a timer is skipped, the reason is stated on the •...
-
Page 78: Special Considerations When Using Timers
When a Timer Starts a Recording For two minutes before an timer starts a recording, the receiver may display a digital countdown on the TV screen. This symbol disappears when the program begins. While the symbol is displayed, you may do one of the following: Press CANCEL to clear the symbol from the TV screen. -
Page 79: Using The Daily Schedule
Chapter 3 Using the System Using the Daily Schedule Use the 1. Press MENU-7. 2. Use the ARROWS to select a future program if you want to skip or restore a timer. You can also choose to protect it, or view the start early/end late settings. -
Page 80: Setting Up An Automatic Timer
Setting Up an Automatic Timer The following instructions explain the easiest way to set up an automatic timer. 1. Find the program that starts in the future you want to record using the Program Guide Browse Banner 2. Select the future event. The 3. - Page 81 Chapter 3 Using the System Setting Up a Manual Timer Manual Timer 1. Press MENU-7. Tip: You can edit and delete timers 2. Select from either TV output. 3. Select PAGE Tip: Use the PAGE DOWN buttons to scroll quickly through the channel list.
-
Page 82: Setting Up A Dish Pass Timer
Setting Up a DISH Pass™ Timer DISH Pass lets you create timers to record programs automatically based on your search criteria. When the receiver finds programs that meet your search criteria, it will automatically set a timer to record that program. As the program guide is updated, DISH Pass will continue to find and record your shows based upon your search criteria. -
Page 83: Deleting A Timer
Chapter 3 Using the System Note sure to review the timers that Tip: It's very you are expecting. You can: important to leave the receiver • enabled to receive Updates. By doing this, the Program • Guide will have the most up-to-date information, and can adjust or... -
Page 84: Watching One Program While Recording Another
4. Select the timer or timers you want to delete. if you want to delete all of your timers. Note Select All 5. Select . The timer(s) are deleted. Delete Watching One Program While Recording Another Single Mode While in , you can set up the satellite receiver to record programs Single Mode while you’re also watching one you’ve already recorded. - Page 85 Chapter 3 Using the System 5. Press GUIDE on the remote. Use the you want to watch now. Select that program. You are now watching one program while recording another. 6. Press RECORD and select recording two programs at the same time. 7.
- Page 86 Dual Mode with Record Plus Another feature that adds flexibility to the way you watch TV is When is enabled, you can decide which receiver output ( Record Plus ) will record your events. This feature is available in Enabling Record Plus The following instructions describe how to enable 1.
- Page 87 Chapter 3 Using the System 3. When the the following: • • Note other TV to cancel your recording. 4. Select one of the following: • • 5. Press GUIDE on the remote. Use the you want to watch now. Select that program. You are now watching one program while recording another.
- Page 88 6. Press RECORD. Select one of the following: • Select to start the recording now. • Select to customize the recording as described on page 82. Options 7. Press DVR on the remote control. The should see the two programs that are recording indicated by the red dot next to the listings.
- Page 89 Chapter 3 Using the System 3. Press the RECORD button. A message will display asking whether you want to record the remainder of the program. Select 4. Press DVR on the remote control. The should see the program that is recording indicated by the red dot next to the listings.
-
Page 90: Using The Dvr Features
Using the DVR Features Most satellite TV programs and films are copyrighted. In some cases, copyright law may apply to private, in-home recording. The DVR features let you decide how to watch TV. You can pause, reverse, or skip back through a program. Then you can go back to watch, fast forward, or skip ahead through the program. - Page 91 Chapter 3 Using the System Press the FWD (“FORWARD”) button once to forward the program four times as fast as normal play. Press the FWD button twice to forward at 15 times normal speed, three times to forward at 60 times normal speed, and four times to forward at 300 times normal speed.
- Page 92 Start Recording a Program • At a program’s start, press the remote control’s RECORD button. • If you’ve watched a program from its start, up to about two hours after it’s started, you can reverse to its start: 1. Press the BACK button. 2.
- Page 93 Chapter 3 Using the System • Tip: Press the remote to see a • list of the events you’ve recorded. To view one of these events, just select it. You can then start • the recording, start over, stop or resume play.
- Page 94 • Press the FWD (“FORWARD”) button once to forward the program four times as fast as normal play. Press the FWD button twice to forward at 15 times normal speed, three times to forward at 60 times normal speed, and four times to forward at 300 times normal speed.
-
Page 95: Using Themes And Search
Chapter 3 Using the System Tip: If you want to archive an event to save it for a long time, you can move Copy Recordings to Videotape it from the receiver to a VCR. You may want to keep a videotape copy of a recording you made on the DVR. You will not be able to play back events with full digital audio and video quality from a videotape. - Page 96 • Press the MENU button, and then select the option. Search 2. Select a category. 3. Select a program in the list. : If the program you highlighted is on some time in the future, the Note receiver will open the Create An Event Timer Recordings on page 69 for more information.
-
Page 97: Search History
Chapter 3 Using the System 3. You can search for events two ways: • • 4. You can use the keyboard shown on the screen or you can use the letters above the NUMBER PAD buttons on the remote control while the highlight is in the instructions 5. -
Page 98: Using Locks
2. Select to display the History 3. At the screen, you have the following options: Search History • - Select one of the items and then select Search • - Select one of the items and then select Edit • - Select one of the items and then select Delete •... -
Page 99: Locking And Unlocking The Receiver
Chapter 3 Using the System When You Have Locked the Receiver • If you try to access a locked item or open the displays a message prompting you to enter the password. • The receiver allows you three tries to enter the correct password. If you fail to enter the correct password, the receiver does not allow more tries for several minutes. - Page 100 3. Select the Lock System message prompting you to enter a password to lock the system. 4. Enter and verify a password, using the NUMBER PAD buttons. The receiver displays stars (*) as you enter the digits of the password. When you enter the fourth digit of the password, the receiver highlights the 5.
-
Page 101: Creating Or Changing Channel Locks
Chapter 3 Using the System Note selected. For example, if you lock PG-13 rated programs, then all programs with the R, NC-17, and NR/AO ratings are also locked. 6. Select the expanded rating code(s), if you want to also lock these ratings. 7. - Page 102 Locking and Unlocking the Receiver Front Panel (TV1 Only) This keeps anyone from using the front panel buttons, but it does not lock the remote control buttons. This option is only available on TV1 menus. 1. Press the MENU button. 2.
-
Page 103: Hiding And Showing Adult Channels
Chapter 3 Using the System 4. Select the 5. If the receiver is not locked, you must lock it to put the lock you just created into effect. Hiding and Showing Adult Channels When you hide adult channels, you keep the Browse Banner choosing such channels by using the UP or DOWN ARROW buttons or the remote control NUMBER PAD buttons. - Page 104 highlights the option. 3. Press the SELECT button. 4. Select the Change Password 5. Enter the current password using the number pad buttons. As soon as you enter the fourth digit of the password, the receiver highlights the 6. Press the SELECT button. option.
- Page 105 Chapter 3 Using the System 7. Enter the new password using the number pad buttons. As soon as you enter the fourth digit of the password, the receiver highlights the 8. Select the 9. Enter the new password again for confirmation, using the NUMBER PAD buttons.
-
Page 106: Personal Identification Number
Personal Identification Number If you want to make sure that you are the only one who can make changes to your DISH Network account, you can assign a Personal Identification Number (PIN) for call-in requests. Call the Customer Service Center (1-800-333-DISH (3474)) at any time to set up the PIN. -
Page 107: Resetting Receiver To Factory Default Settings
Chapter 3 Using the System Turning Caller ID On and Off 1. Press MENU on the Remote Control. 2. Select 3. Select 4. Select 5. Select 6. Select Resetting Receiver to Factory Default Settings : Resetting the receiver to factory default settings discards all Note except the Lists... -
Page 108: Changing Program Languages
If you want to reset the receiver to be the same as when it was shipped from the factory, do the following: 1. Press MENU-6-6. 2. When the receiver displays a reset the receiver’s preferences by selecting Changing Program Languages You may be able to change the language of some programs. -
Page 109: Using Dolby® Digital Sound
Chapter 3 Using the System Using Dolby® Digital Sound Dolby Digital gives you the capability to enjoy programs in surround sound. An external decoder is required to enjoy this feature. Refer to your decoder user’s guide. : Not all programs contain a Dolby Digital sound track. Note The receiver uses an optical port for outputting digital audio. -
Page 110: Updates
Updates Your satellite receiver is set to turn itself off at 3:00 a.m. so that it can receive updates to the Program Guide change the update time, complete the following: 1. Press the MENU-8-5 to open the 2. Highlight the Activation 3. -
Page 111: Inactivity Standby
Chapter 3 Using the System Inactivity Standby If your receiver is on for a preset period of time without any activity (for example, no channel changes), the receiver so that you’ll always have the latest Demand the reliability of your receiver. To change the settings for this feature, complete the following: 1. -
Page 112: Additional Information
Use the remote control’s mode buttons, SAT (satellite receiver), TV (for a TV), VCR (for a VCR or a DVD player), and AUX (“auxiliary,” for a second TV, a second VCR, a DVD, a tuner, or an audio amplifier) to set the remote to the right mode for the device. - Page 113 Chapter 3 Using the System 4. For AUX mode only: 5. Enter one of the three-digit Tip: Limited mode is 6. If you want to program not used with audio amplifiers. 7. Press the POUND (#) button. 8. Press the blank POWER 9.
-
Page 114: Scan For Device Codes
Scan for Device Codes If the code for your device is not listed in the tables starting on page 147, use this procedure to scan the remote control’s memory for the device code. Instructions 1. Turn the device on. 2. Press and hold the mode button until all the other mode buttons light up, and then let go of the button. -
Page 115: Check The Device Codes
Chapter 3 Using the System 8. Turn the device back on and 9. Repeat this procedure until Check the Device Codes You can find out what device code you’ve set for each remote control mode. Tip: In Dual Mode, Remote Control 1 is used to control TV1 menus on the 1. -
Page 116: Remote Control Buttons
Remote Control Buttons Control the Receiver When you get the remote, it’s already set up to control the receiver. However, you must set up the remote to control the TV before you can use the MUTE and VOLUME buttons. For information on the remote buttons that control the receiver, see Using the Remote Controls on page 49. - Page 117 Chapter 3 Using the System Press this button to raise (+) or lower (-) the TV sound volume. Use the UP and DOWN ARROW buttons to change channels on the TV. : These buttons do not change the channels on the TV if the remote control Note is in limited mode.
- Page 118 VCR Mode Button You must first set up the remote to control the VCR. See Set Up the Remote to Control Devices, beginning on page 107. Then, you must press the VCR mode button to set the remote to VCR mode. The VCR mode button lights for two seconds to show you’ve set the remote to VCR mode.
-
Page 119: Control A Tuner Or Amplifier
Chapter 3 Using the System VCR Buttons • Press the BACK button to rewind a videotape. Press the PAUSE button to pause a videotape. Press this • button or the PLAY button to go back to playing the tape. • Press the FWD button to forward a videotape. - Page 120 Power Button Press the blank POWER button to turn the tuner or amplifier on or off. Mute Button Press the MUTE button to turn the sound off or on. Volume Button Press the VOLUME button to raise (+) or lower (-) the volume. Up and Down Arrow Buttons Use UP and DOWN ARROW buttons to change channels on the tuner or amplifier.
-
Page 121: Other Remote Control Features
Chapter 3 Using the System Other Remote Control Features Switch Between TV and AUX Device Volume Control When you set up the remote to control a TV, the mute and volume buttons control the TV volume. However, if you want to use the AUX mode to control a tuner or amplifier and the device has a volume setting, you can set up the remote to control the device’s volume instead of the TV volume. -
Page 122: Using Troubleshooting Tools
Even though these tools are quite helpful, it is recommended that you only use them when on the phone with a DISH Network representative. Resetting Your Receiver... -
Page 123: Point Dish And Check Switch
Chapter 3 Using the System Point Dish and Check Switch Point Dish Representatives. You may be asked to display these screens when you call DISH Network. 1. Press MENU-6-1-1 to open the information to help maximize your satellite signal. The bar at the bottom of the screen tells you the signal strength. -
Page 124: Chapter 4 - Dish Antenna Installation
Chapter 4 Dish Antenna Installation These instructions guide you through the installation of a satellite system which includes your receiver (included with this manual), and a DISH Pro DISH 500 antenna system that can be identified by the DISH Pro logo shown below. Installing a DISH 500 Antenna The first step in installing your dish antenna is to assemble the satellite dish, mount it, and point it in the general direction of a satellite. -
Page 125: Mounting The Dish
Chapter 4 Dish Antenna Installation Mounting the Dish 1. Using the azimuth and elevation angles, find a location for the satellite dish which can be pointed towards the satellites located at these angles. With a compass, find the required azimuth angle. Then, use the elevation angle to find out how high the satellites are in the sky from your location. - Page 126 4. Assemble the satellite dish as shown below, except do not attach the Y- bracket or LNBF at this time. 5. Loosen both skew bolts and set the skew by rotating the dish mounting bracket to align the red mark with the required angle on the skew scale which you wrote down on page 119.
- Page 127 950 to 2150 MHz. Some cables may say "Swept tested for 2150 MHz." If you have any doubt about this, ask your DISH Network retailer, examine the cable’s outer jacket, or look on the container the cable came in. Do not use cable company TV cables or cables from other satellite TV systems not rated for 950- 2150 MHz.
- Page 128 15. When the check switch procedure finishes, you will see an screen similar to the one below. The information for Summary Input 1 Satellite Input 2 • Satellite - twice. • twice. This is OK and does not indicate a problem Transponder with the receiver.
- Page 129 Chapter 4 Dish Antenna Installation : If you cannot find the signal, turn the dish back to the first azimuth angle. Note Then, loosen both elevation bolts just enough so you can tilt the dish. Tilt the dish elevation up by two degrees, and then tighten both bolts. Now, turn the dish back and forth again.
-
Page 130: Installing A Multiple Dish Dish Pro System
If you do not have good signal strength with 110, go back to step 18, and fine-tune the dish but with 110 selected instead of 119. While the signals will not be equal, you should be able to fine-tune the dish until you have the strongest possible signal from both satellites. - Page 131 Chapter 4 Dish Antenna Installation 2. Select the satellite your dish will be pointed toward. 3. Select 4. Use the number buttons on the remote to enter your ZIP code to get the Azimuth: necessary azimuth and elevation. Write these numbers down in the spaces Elevation: provided in the margin.
- Page 132 12. Connect two RG-6 cables between both ports on your DISH Pro Twin LNBF and your switch(es) using the switch instructions and the DISH Pro Wiring Diagrams that start on page 128. 13. Select Check Switch from the Point Dish menu. When the Check Switch menu opens, select Retest.
-
Page 133: Dish Pro Wiring Diagrams
Chapter 4 Dish Antenna Installation DISH Pro Wiring Diagrams DISH 500, One DISH Pro Twin LNBF When you set up your system following this diagram and run Check Switch the Installation Summary screen should look similar to the one shown below. Page 128 This diagram leaves out grounding to be clear. - Page 134 DISH 500, One DISH Pro Quad LNBF This diagram leaves out grounding to be clear. Make sure you ground the system per the National Electrical Code (NEC) and all local electrical codes. Note: Each cable carries both the 119 and 110 signals after you use each receiver to check the setup.
- Page 135 Chapter 4 Dish Antenna Installation DISH 500 with a DISH Pro Twin LNBF, One Dish with a DISH Pro LNBF, DP34 Switch When you set up your system following this diagram and run Check Switch the Installation Summary screen should look similar to the one shown below. Page 130 This diagram leaves out grounding to be clear.
- Page 136 One DISH 500 with a DISH Pro Twin LNBF, One Dish Antenna with a DISH Pro Dual LNBF, and Two DISH Pro 21 Switches This diagram leaves out grounding to be clear. Make sure you ground the system per the National Electrical Code (NEC) and all local electrical codes.
- Page 137 Chapter 4 Dish Antenna Installation Two Dish Antennas, Two DISH Pro Dual LNBFs, and Two DISH Pro 21 Switches When you set up your system following this diagram and run Check Switch the Installation Summary screen should look similar to the one shown below. Page 132 This diagram leaves out grounding to be clear.
-
Page 138: Running Coaxial Cable
Running Coaxial Cable 1. Using the shortest path possible, run the coaxial cable(s) from the ground block or switch to the satellite receiver(s). Do not kink or pinch any cable. Cables should be bent only in gentle curves. Do not use a longer cable between the satellite dish and the receiver than is specified in the DISH Pro or Legacy system installation instructions. - Page 139 Chapter 4 Dish Antenna Installation Notes Page 134...
-
Page 140: Chapter 5 - Reference
Reference Troubleshooting Tables Use these tables if you have problems using the system before calling the Customer Service Center. Many problems arise from misunderstandings of how the system works, especially when you are just becoming familiar with it. These tables cover many problems, usually with a simple solution for each one. To solve a particular problem, do the following: 1. - Page 141 • Install a DSL filter between the receiver and the telephone wall jack. You can obtain the filter from your DSL provider. • Remember that the program providers specify which programs are “blacked out” for which viewers, not DISH Network™.
- Page 142 Message Number Possible Reason • You may have tried to tune to a program on a channel which you 013, 014 have not bought. • You may have just plugged in the receiver, and it is acquiring the satellite signal. Or, the receiver may have temporarily lost the signal.
-
Page 143: Dish Pro Twin Lnbf
Chapter 5 Reference Message Number Possible Reason • The receiver gives you three chances to enter the correct password. If you fail to do so, the receiver “times out” and will not allow you to try again for several minutes. •... -
Page 144: Using The Remote Control
What’s Happening When you run Check Switch, you see "Twin" identified as the Device/LNBF but you only have signal confirmed from one satellite. When you run Check Switch, you see "Twin" identified as a Device or LNBF, but only odd transponders are detected. Getting receiver messages that signal is lost or being acquired * Compatible accessory devices must pass 2150 MHz signals, 22 KHz signals both directions (per DiSEqC 2.0... -
Page 145: Hearing A Program
Chapter 5 Reference What Is Happening When you press the remote control Power button to turn the receiver ON, the receiver front panel Power light does not light up. You use a pyramid type IR extender (not a “mouse tail”), and it does not seem to work. Hearing A Program What Is Possible Reason... -
Page 146: Watching A Program
Using the Menus What Is Possible Reason Happening You were using a menu, The receiver has a time-out feature and it suddenly closed. that closes any menu after several minutes of no activity. This will discard any changes you have made, but otherwise does no harm to the receiver. - Page 147 Chapter 5 Reference What Is Possible Reason Happening The receiver front panel • The TV set may not be working Power light is on, and properly. there is a picture on the If the receiver is connected to the TV screen, but the picture: TV using only the RF or VHF connections, there may be a has sparkles or is grainy,...
- Page 148 Using Locks What Is Possible Reason Happening You set a lock (for • You may not have locked the example, a lock on receiver. programs by ratings), but the lock does not take effect. You forgot the password, • You may not have written down so that you are unable to the password, to keep it in a safe unlock the receiver.
-
Page 149: Buying A Pay-Per-View Program
Chapter 5 Reference You try to apply an empty • The receiver will not allow you Favorite List. The receiver to apply an empty list. displays an ERROR message. A Favorite List does not • If you have set up the locks to show channels that you hide adult channels and the know you have added to it. - Page 150 The receiver cannot connect • Maybe the receiver is connected to to DISH Network. a DSL (Digital Subscriber Line) phone line. You pick up the telephone to • The receiver was calling the...
- Page 151 Chapter 5 Reference What Is Happening Possible Reason You set up an event timer, • The program time may have but the timer does not changed so that the event timer operate at all. overlapped another event timer. The program time may have changed by more than twenty-four hours.
-
Page 152: Device Codes
663, 664, 665, 670, 672, 674, 684, 698, 719, 727 Daytron 526, 627, 652, 654, 658, 665, 670, 672 Dimensia 645, 650 DISH Network 722, 742 Dixi 566, 620 Dumont 501, 627, 652 Electrohome 526, 573, 651, 652, 654, 656, 659, 660,... -
Page 153: Vcr Codes
Chapter 5 Reference Codes Memorex 590, 627, 653, 654, 659, 675, 678, 720 504, 505, 506, 542, 571, 573, 627, 652, 653, 654, 656, 660, 728 Mitsubishi 504, 505, 542, 570, 571, 572, 573, 597, 623, 627, 652, 653, 654, 656, 659, 660, 664, 665, 670, 671, 705, 728 Montgomery Ward... - Page 154 CODES Colortyme 592, Craig 591, 658, 675, 676, 681, 685, 687, 688 Curtis Mathes 554, 592, 594, 605, 607, 675, 677, 678, 679, 683, 684 Daewoo 506, 534, 546, 547, 559, 588, 684 Daytron Denon Dimensia Dumont Electrohome 512, 676, 687 Emerson 505, 506, 508, 509, 511, 512, 534, 559,...
- Page 155 Chapter 5 Reference TV/VCR Combo Programming for : Program combination devices the remote control in TV mode and then in VCR mode. TV/VCR Codes Broksonic Goldstar Panasonic Quasar Zenith DVD Player Codes Programming in AUX mode Press 1 before entering the DVD code.
-
Page 156: Tv/Dvd Combo Codes
Tuner/Amplifier Codes Technics 643, 644, 652, 742, Toshiba Yamaha 663, 730, 731, 732, 733, 745, 747 DVD/VCR Combo DVD/VCR Codes Go Video 692,693 Samsung 667,691 TV/DVD Combo Codes Programming for combination devices Program the remote control in TV mode and then in VCR (or AUX - press 1 before entering the DVD code) mode. - Page 157 Chapter 5 Reference Notes Page 152...
-
Page 158: Appendix
Appendix Limited Warranty This Limited Warranty is a legal document. Keep it in a safe place. Remember to retain your Bill of Sale for warranty service! Any items returned without a copy of the Proof of Purchase will be considered out of warranty. - Page 159 Accessory Warranty An accessory is any DISH Network branded equipment, displaying the DISH Network logo, excluding the receiver, cables and hookups, and non-mechanical components. A one-year warranty becomes effective upon the activation of the DISH system or date of purchase, if bought separately. A proof of purchase is required to verify the purchase date. If an accessory has an expired warranty, no exchange will be issued.
-
Page 160: Residential Customer Agreement
Thank you for choosing DISH Network for your television service provider. DISH Network is happy to answer any questions you may have and to provide you with technical and other customer support through the following toll-free number and email address... - Page 161 Services and, in addition to all other applicable fees, you agree to pay us the difference between the amounts actually received by us and the full retail price for the Services authorized for each DISH Network DBS receiver on the account, whether owned by you or not.
- Page 162 C. DISH Network has the right to terminate your Services at any time without providing notice to you if: (i) you fail to pay your bill when it is due; (ii) we receive confirmation that you have received the Services, or any part of the Services without paying for them;...
- Page 163 6. TRANSFER OF ACCOUNT, SERVICES OR EQUIPMENT DISH Network may sell, assign or transfer your account to a third party without notice to you. You may not assign or transfer your Services without our written consent which will not be unreasonably withheld. We may, however, refuse to allow you to assign or transfer your Services if you lease your Equipment or if your account has an outstanding balance.
-
Page 164: Staying Legal
9. MISCELLANEOUS A. Physical Address/Change of Address. When setting up your DISH Network account, you agree to provide us with the physical street address where the Equipment will be located. A post office box does not constitute a physical address and is not sufficient to meet this requirement. -
Page 165: Signal Strength Present At The Television
If trouble is experienced with this equipment, for repair or warranty information, please contact DISH Network at 1-800-333- DISH (3474). If the equipment is causing harm to the telephone network, the telephone company may request that you disconnect the equipment until the problem is resolved. -
Page 166: Index
Index Index Address Changing 43 Checking 44 Alternate Audio 103 Antenna Adjusting 44 Attenuator 44 Off-Air 42 Remote Control 28 Arrow Buttons 54 Arrows/Select 23 Auto Recording 85 Automatic Timer 75 Back Panel 24 CH 3–4 Out 24 CH 21–69 Out 25 RCA Out 24 Remote Antenna 26 Satellite In 26... - Page 167 Mode Buttons 111 Mode Indicator 23 Modes Dual 23 Single 2 Switching 52 Modulator Setup 37 Moving DISH Network Logo 5 Mute Button 53 Nearby TV 2 Changing Output Channels 37 Coaxial Connections 29 Connecting 29 Mode Indicator 23 Power 23...
- Page 168 Preferences 13 Program Banner 64 Program Guide 10 Purchase History 67 Quick Tours Basic Features 7 DVR Features 14 Menus 9 Using Picture in Picture (PIP) 20 Watch and Record 19 RCA Out 24 Reasons Why Timers are Skipped 72 Recall Button 54 Record Plus 19 Recordings 69...
- Page 169 Index Hearing a Program 140 Locks 143 Menus 141 On-Screen Messages 136 Program Guide or the Browse Banner 142 Remote Control 139 Telephone for Voice/Data/FAX 145 Watching a Program 141 Troubleshooting Tools Diagnostics 117 Point Dish and Check Switch 118 Tuner/Amplifier Codes 150 TV 2 Connections 25 TV Antenna/Cable In 25...
-
Page 170: Remote Control Settings
Receiver Information Write the following information in the spaces provided below. You may need to provide this information if you call the Service Center. To get the Conditional Access Numbers, display the Important System Information menu (see Ordering Your Program Packages). Purchase Location Name: Purchase Location Telephone Number: Receiver Serial Number:... - Page 171 AFFIX THESE TO CABLES THAT CONNECT AFFIX THESE TO THE TV SET TO THE BACK OF THE RECEIVER CH 3 CH 4 Use these labels to help remind you of the channel you should use See Chapter 2, Receiver Description & Installation to watch Satellite TV Instructions for details on using these labels...
-
Page 173: T Imers And R Ecordings
Name-Based Recording Introduction to Name-Based Recording NTRODUCTION TO The new name-based recording feature has two key benefits: • Program recording based on the name, instead of the date and time the program is listed in the Electronic Program Guide (EPG). If the program moves (for example, to another day) or the program length is extended (for example, a final one-hour episode of a half-hour show), you will have the correct recording. - Page 174 • Monday-Friday - Records a program once a day, Monday through Friday, at a selected time, on a selected channel. • DISH Pass - Records programs on all channels (default) or a specific channel, based on your specific criteria. See page 6 for details. Timer Priorities Priorities are used by the receiver to know which program you would prefer to record, if there is a timer conflict.
-
Page 175: Maximum Number Of Event Timers
Name-Based Recording Timers and Recordings Timer Skip Types The following are reasons why timers are skipped. They are listed within Daily Schedule, when you choose select a previous day's timer from the list. • Priority - this timer had a lower priority than other events being recorded at the time. •... - Page 176 Special Considerations When Using Event Timers • For Locked Programs - You must enter the receiver password before you can create an automatic event timer. You can create a manual event timer for a locked program without entering the password. However, if you do this, when the event timer operates the receiver may display only an error or password entry menu.
- Page 177 Name-Based Recording Setting Up a DISH Pass DISH P ETTING DISH Pass lets you create an automated DVR timer for a program title, actor’s name, or keyword. After you set up a DISH Pass, the receiver will continually search based on your request.
-
Page 178: Dish Pass
General • It's very important to enable the receiver to receive Nightly Updates. By doing this, the Electronic Program Guide will have the most up-to-date information, and can adjust or create timers accordingly. Enable Nightly Updates in Menu, Preferences, Updates, and select an update time when you are not normally watching TV. - Page 179 Purchase Location Name: Purchase Location Telephone Number: Receiver Serial Number: Receiver Conditional Access Number Smart Card Conditional Access Number: Remote Address (SAT Mode) Television Code (TV Mode) VCR Code (VCR Mode) Auxiliary Code (AUX Mode) 118523 Remote Control 1 Remote Control 2...