Table of Contents
Advertisement
Available languages
Available languages
Quick Links
Parts Manual
P1683E
2003-07
Max. Kapazität / Rated Capacity
250 – 250 Nm
Ausführung / Style
P – Pistolengriff
Impulsmechanismus / Hydraulic pulse mechanism
H – Hydraulik
For additional product information visit our website at http://www.apextoolgroup.com
250
P
H
F
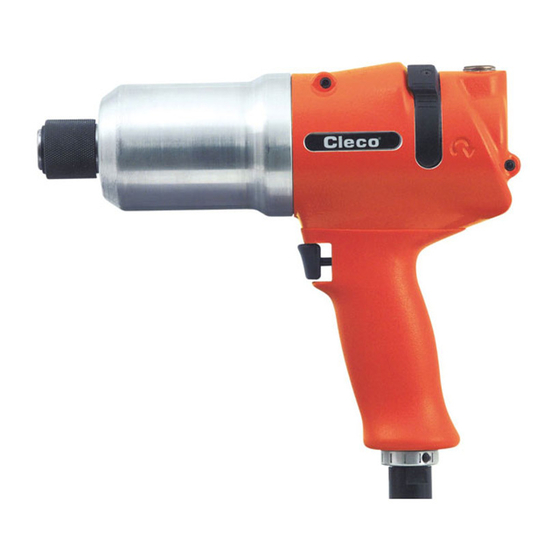
250PHF406
Pulse Nutsetter
40
6
Abtrieb / Final drive
6 – Außenvierkant 3/4"
Drehzahl / Speed
Sonderfunktion / Speciual Feature
F – Frequenzverstellung / Frequency
40 – 4000 1/min
Advertisement
Table of Contents

Related Manuals for Cleco Tools 250PHF406

Summary of Contents for Cleco Tools 250PHF406
- Page 1 Parts Manual P1683E 2003-07 250PHF406 Pulse Nutsetter Max. Kapazität / Rated Capacity Abtrieb / Final drive 250 – 250 Nm 6 – Außenvierkant 3/4" Ausführung / Style Drehzahl / Speed P – Pistolengriff 40 – 4000 1/min Impulsmechanismus / Hydraulic pulse mechanism Sonderfunktion / Speciual Feature H –...
-
Page 2: Table Of Contents
250PHF406 Diese Betriebsanleitung vor dem Auspacken Read and carefully observe these operating Lisez et observez ce manuel d'instructions und vor Inbetriebnahme des Werkzeugs le- instructions before unpacking and operating avant déballage et mise en marche de l'outil. sen und genau beachten! Der Schrauber darf the tool! The tool must be operated, main- Cet outil ne doit être utilisé, entretenu et réparé... - Page 3 250PHF406 Leggere e osservare scrupolosamente le Antes de desembalar y de poner en marcha la istruzioni di utilizzo prima di togliere l’utensile herramienta, ¡léanse cuidadosamente estas dall’imballo. L’utensile deve essere usato, intrucciones!. La herramienta solamente debe revisionato e riparato esclusivamente da per- ser manipulada, mantenida y reparada por sonale che abbia già...
-
Page 4: Technische Daten
250PHF406 1. T · T · D · D · D ECHNISCHE ATEN ECHNICAL DATA ONNÉES TECHNIQUES ATI TECNICI ATOS TÉCNICOS BMESSUNGEN IN MM IMENSIONS IN MM IMENSIONS EN MM ISURE IN MM IMENSIONES EN MM Anwendung mit Luftanschluß <39>... -
Page 5: Produktbeschreibung
250PHF406 2. Produktbeschreibung 4. Inspektion und Wartung Der Impulsschrauber Um Ausfälle zu verhindern: • ist ein Abwürgschrauber Siehe "Ergänzung zur Betriebsanleitung P1770E" • hat einen alternativen Luftanschluß von oben. Um diesen zu nutzen, muß die Verschlußschraube <9> in den unteren Luft- 5. -
Page 6: Reparaturanleitung
250PHF406 6. R EPARATURANLEITUNG 6.1 D 6.4 D EMONTAGE DER MPULS INHEIT EMONTAGE DES OTORS Werkzeug am Pistolengriff <1> in einen Schraubstock mit Nur zulässig, wenn Befüllen mit Öl-Befülleinrichtung <A> Kunststoffbacken einspannen. gewährleistet ist, Impuls-Einheit muß auf Raumtemperatur abgekühlt sein. -
Page 7: Ölbefüllung
250PHF406 6.6 Ö LBEFÜLLUNG Lagerring <46> auf das geforderte Drehmoment anziehen 1. Impulseinheit mit Hilfe der Injektionsspritze <B> mit ESSO (8. Montagehinweise, Bild 15). UNIVIS J26 vorfüllen. Kugellager <72> in Gehäuse <74> einbauen. O-Ring <73> einle- 2. Impulseinheit mittels Adapter <A2> an die Schnellkupplung an- gen. - Page 8 250PHF406 2. Product Description 4. Inspection and Maintenance The pulse nutsetter Check "Supplement to Operating Manual P1770E" • is a stall torque nutsetter • has an optional top air inlet. To use it the plug screw <9> must 5. What to Do, If...
-
Page 9: 6. Repair Instructions
250PHF406 6. R 6.4 D EPAIR NSTRUCTIONS ISASSEMBLING THE ULSE This is allowed only if you can guarantee filling with the oil 6.1 D ISASSEMBLING THE OTOR filler unit <A>. The pulse unit must have cooled down to room temperature. -
Page 10: 6.6 Filling With Oil
250PHF406 6.6 F ILLING WITH Tighten bearing ring <46> to the required torque (8. Assembly 1. Prefill the pulse unit with ESSO UNIVIS J26 using the injection Notes, fig. 15). syringe <B>. Install ball bearing <72> in housing <74>. Insert O-ring <73>. -
Page 11: Description Du Produit
250PHF406 2. Description du produit 4. Contrôle et maintenance Le tournevis à impulsion Voir "Complément à la notice d'utilisation P1770E" • est un tournevis de test de rupture à la torsion • dispose d'une entrée alternative d'air comprimé sur le haut. -
Page 12: Instructions De Réparation
250PHF406 6. I de sécurité soit bien alignée <7> sur le tamis. NSTRUCTIONS DE RÉPARATION 6.4 D ÉMONTAGE DE L UNITÉ D IMPULSION 6.1 D ÉMONTAGE DU MOTEUR N'est autorisé que lorsque le remplissage est assuré par Fixer l'outil à la poignée pistolet <1> dans un étau doté de le dispositif de remplissage d'huile <A>... -
Page 13: Remplissage De L'huile
250PHF406 6.6 R Visser la bague filetée <56> au couple de serrage requis EMPLISSAGE DE L HUILE (8. Instructions de montage, figure 15). 1. Procéder à la première injection de l'unité d'impulsion d'huile Monter le roulement à billes <72> dans le carter <74>. Installer le ESSO UNIVIS J26 à... -
Page 14: Descrizione Del Prodotto
250PHF406 2. Descrizione del prodotto 4. Controllo e manutenzione L'avvitatore a impulsi Guarda "Supplemento alle istruzioni per l'uso P1770E" • é un avvitatore stallo • ha una presa d'aria alternativa dall'alto. Per utilizzarla, la vite di 5. Cosa si fà, se.. -
Page 15: Istruzioni Per La Riparazione
250PHF406 6. I 6.4 S STRUZIONI PER LA RIPARAZIONE MONTAGGIO DELL UNITÀ IMPULSI Consentito esclusivamente se il riempimento è effettuato 6.1 S MONTAGGIO DEL MECCANISMO MOTORE con il dispositivo di riempimento olio <A>. L'unità impulsi deve essere raffreddata fino a temperatura ambiente. -
Page 16: Riempimento Olio
250PHF406 6.6 R Serrare la ghiera <46> alla coppia richiesta uguale (Istruzioni di IEMPIMENTO OLIO montaggio no. 8, fig. 15). 1. Riempire l'unità impulsi a mezzo della siringa <B> con olio di tipo Montare il cuscinetto a sfere <72> nel corpo <74>. Inserire l'anello ESSO UNIVIS J26. -
Page 17: 14 2. Descripción Del Producto
250PHF406 2. Descripción del producto 4. Inspección y mantenimiento El destornillador de impulsos Ver "Complemento al Manual de Instrucciones P1770E" • es un destornillador de desconexión, • tiene una conexión de aire alternativa por arriba. Para poderla 5. Qué hacer cuando... -
Page 18: 14 6. Instrucciones De Reparación
250PHF406 6. I 6.4 D NSTRUCCIONES DE REPARACIÓN EMONTAJE DE LA UNIDAD DE IMPULSO Permitido solo si se dispone del dispositivo <A> para 6.1 D EMONTAJE DEL MOTOR carga de aceite. La temperatura de la unidad debe haberse enfriado a la temperatura del local. -
Page 19: Carga De Aceite
250PHF406 6.6 C Apretar el anillo roscado <46> al momento de apriete requerido ARGA DE ACEITE (8. Instrucciones de montaje, Fig. 15). 1. Cargar previamente la unidad de impulso con ayuda de la jeringuilla Montar el cojinete de bolas <72> en la carcasa <74>. Colocar el de inyección <B>... -
Page 20: 16 7. Despiece De Recambios
250PHF406 Despiece de Recambios Ersatzteil-Zeichnung · Spare parts exploded view · Vue éclatée · Esploso · Versand erfolgt mit Werkzeug in Plastiktasche (nicht montiert) Shiped with tool in plastic bag (not assembled) Expédition avec outil en sac de plastique (ne pas assemblé) Spedizione con l’utensile in sacchetto di plastica (smontato) -
Page 21: Liste De Pièces De Rechange
250PHF406 7. E · S · L · E · L RSATZTEIL ESTELLISTE PARE ARTS ISTE DE PIÈCES DE RECHANGE LENCO RICAMBI ISTA DE PIEZAS DE RECAMBIO é é f õ i l o t ä . l p t e l . -
Page 22: 21 7. Despiece De Recambios
250PHF406 7. E · · RSATZTEIL E I C H N U N G PARE PARTS EXPLODED V I E W UE ÉCLATÉE · SPLOSO ESPIECE DE ECAMBIOS Teil des Hydraulik Service Kits # 542867 Included in hydraulic service kit # 542867... -
Page 23: Liste De Pièces De Rechange
250PHF406 7. E · S · L · E · L RSATZTEIL ESTELLISTE PARE ARTS ISTE DE PIÈCES DE RECHANGE LENCO RICAMBI ISTA DE PIEZAS DE RECAMBIO é é f õ i t i n é t i ' d à... -
Page 24: Instructions De Montage
250PHF406 8. M · · ONTAGEHINWEISE SSEMBLY INSTRUCTIONS NSTRUCTIONS DE MONTAGE · S T R U Z I O N I PER I L MONTAGGIO NSTRUCCIONES DE ONTAJE Montage des Motors Motor assembly Montage du moteur Montaggio del motore Montaje del motor 1. - Page 25 250PHF406 3. Rotor auspressen Rotor disassembly Démonter le rotor Smontaggio rotore Desmontaje de rotor <E4> Demontage der Impuls-Einheit Dismounting of the pulse unit Démontage de l’unité d’impulsion Smontaggio dell'untià idraulica Desmontaje de la unidad de impulso Lösen des Lagerrings <46>...
- Page 26 250PHF406 Montage der Impuls-Einheit Assembly of the pulse unit Montage de l’unité d’impulsion Montaggio dell' unità idraulica Montaje de la unidad de impulso <B> Montage der Hydro-Lamelle Assembly of the hydraulic blade <58> (2) Montage de la palette hydropneumatique Montaggio della paletta idraulica Montaje de la paleta hidráulica...
- Page 27 250PHF406 Montage der Steuer-Lamelle Assembly of the control blade Montage de la lame à côntrole Montaggio della paletta di controllo Montaje de la paleta de control <59> <60> <52> Anziehen des Lagerrings <56> Tightening of the bearing ring <56> Serrage de la bague du palier <56>...
-
Page 28: Liste De Commande Des Dispositifs
250PHF406 9. V · · ORRICHTUNGS ESTELLISTE IXTURES ORDER L I S T ISTE DE COMMANDE DES DISPOSITIFS · L E N C O DISPOSITIVI PER LA MANUTENZIONE ISTA DE TILLAJES é é f õ i f i t i... - Page 29 250PHF406 Axialspiel des Rotors siehe 8. Montagehinweise, Bild 1-2 Abdeckung <38> zurückstülpen und Befestigungsschraube mit Axial movement of the rotor see 8. Assembly Instructions, Gabelschlüssel SW13 mit Gewinde in Gehäuse ansetzen. fig. 1-2 Vor dem Festziehen Griff in gewünschte Position bringen und Jeu axial du rotor voir 8.
- Page 30 Sales & Service Centers Note: All locations may not service all products. Please contact the nearest Sales & Service Center for the appropriate facility to handle your service requirements. Dallas, TX Detroit, MI Houston, TX Lexington, SC Apex Tool Group Apex Tool Group Apex Tool Group Apex Tool Group...
Need help?
Do you have a question about the 250PHF406 and is the answer not in the manual?
Questions and answers