Advertisement
Quick Links
PowerPro
™
Portable
PA
Owner's
Manual
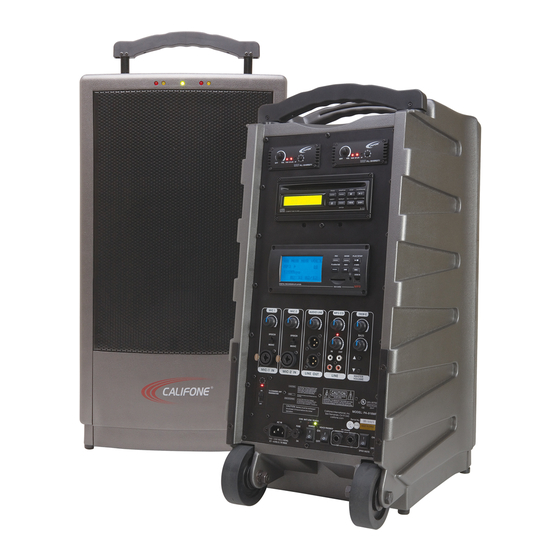
PA919SD Public Address Speaker
PA919PS Powered Companion PA
PA916-SP Non-powered Speaker
Califone® International Inc. 1145 Arroyo Ave., # A • San Fernando, CA 91340 USA
Toll Free 800.722.0500 | Toll Free Fax 877.402.2248
International Customers call 818.407.2400 or Fax 818.407.2405
califone.com
califonepro.com
March 2009
Advertisement

Subscribe to Our Youtube Channel
Summary of Contents for Califone PowerPro PA919PS
- Page 1 PA919SD Public Address Speaker PA919PS Powered Companion PA PA916-SP Non-powered Speaker Califone® International Inc. 1145 Arroyo Ave., # A • San Fernando, CA 91340 USA Toll Free 800.722.0500 | Toll Free Fax 877.402.2248 International Customers call 818.407.2400 or Fax 818.407.2405 califone.com...
-
Page 2: Specifications
We encourage you to visit our website to register your PA for its warranty coverage at califone.com/registration, and while there please signup to receive our enewsletter, and learn more about the complete line of Califone audio visual products including: Portable and installed wireless PA systems, multi-media players &... -
Page 3: Operation
Operation Battery Charge the battery for at least 10 hours before the first use of the PA919SD, PA919, or the PA919PS. Simply plug the power cord into an AC outlet and charging begins automatically. The charging indicator will flash until fully charged, then it will stay green. - Page 4 Wireless Operation Wireless UHF Receivers Wireless receiver “A” is preset at the factory for channel 4 and receiver “B” is set on channel 6. There are three (3) LEDs on the receiver; power (green), RF reception (red) and Audio reception (amber). There are also LEDs on the front of the speaker above the grille making it easy to see if the microphone and receiver are working properly.
- Page 5 NOTE: Firmware updates and the most up to date user manual for the DigitalAudio Player/Recorder module can be downloaded from the Califone website. Main Menu Operation After turning on the power, the main menu will show the icons for “Setting Mode, ” “Music Mode, ” “Record Mode, ” and “Voice Mode”.
- Page 6 Music Mode SOFT 00:00 00:00 X X X X X X X Digital Audio Player/Recorder Music Mode Continued 2. Short press “REV” and “FWD” to select items from menu. Equalizer Short press “PLAY / PAUSE” once to confirm. 3. The REV and FWD buttons will now function differently depending on your selection.
- Page 7 Digital Audio Player/Recorder Voice Mode Continued Voice Mode (While music/voice is playing): The following instructions apply to while music is playing. 1. Short press “MENU” once to enter the local menu. 2. Short press “FWD” or “REV” to select the desired item and then short press “PLAY / PAUSE” once to confirm. Available options include: Next/ Prev 1.
-
Page 8: Troubleshooting
Digital Audio Player/Recorder Setting Mode Continued Contrast adjustment 1. Press “REV” and “FWD” to adjust contrast. 2. Press “PLAY / PAUSE” to confirm the setting or short press “MENU” to cancel. Memory Info 1. This screen displays the used and unused memory. It can display this information for either the ‘ internal (Flash) or SD card. - Page 9 CD Player CD Player After the power is turned on the LCD display will read “NO disc” Gently push the CD into the slot and CD SLOT the CD will be recognized and begin playing track #1. LCD DISPLAY When “Play” is pressed, the first track will begin to Play. When Play is pressed again, the mode goes to PAUSE/PLAY Pause.
- Page 10 Powered Companion Speaker PA919PS The PA919PS works with the PA919 series and M319 and Q319 microphones. It is not compatible with the PA916 series, M-316 and Q-316 microphone. The Powered Companion PA has the same amplifier, power supply and speaker compliment as the full featured PA919 or PA919SD. It does not have the mixer panel because it can be controlled by the PowerPro PA919SD and PA919.
- Page 11 PA919PS Specifications Acoustic Speaker Compliment Woofer 10” Diameter, 40 Oz. Magnet, 2” Dia. Voice Coil, 6 Ohm Tweeter Compression Horn Driver, 12 Oz. Magnet, 1” Voice Coil, 8 Ohm Frequency Response 45Hz to 18KHz Amplifier 90 Watts RMS @ 5% THD (AC) Sound Pressure Level 94 dB, 1 Watt @ 1 Meter Power Sources...
-
Page 12: Important Safety Instructions
CAUTION RISK OF ELECTRIC SHOCK - DO NOT OPEN CAUTION: TO REDUCE THE RISK OF ELECTRIC SHOCK, DO NOT REMOVE COVER OR BACK. NO USER SERVICEABLE PARTS INSIDE. REFER SERVICING TO QAULIFIED PERSONNEL. The lightening flash with arrowhead within a triangle is intended to tell the user that parts inside the product are a risk of electric shock to persons.


Need help?
Do you have a question about the PowerPro PA919PS and is the answer not in the manual?
Questions and answers