Table of Contents
Advertisement
Quick Links
©2008 ClearSpan™
All Rights Reserved. Reproduction
is prohibited without permission.
Revision date: 10.27.08
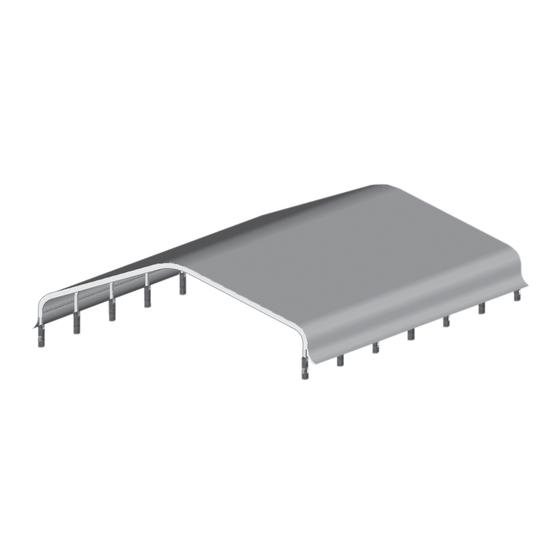
ClearSpan
Low-Profile Roof Frame
Photo may show a different but similar model.
CLEARSPAN
™
STK#
105624
105625
105626
105627
CARPORTS
™
DIMENSIONS
18' W x 20' L
18' W x 24' L
18' W x 36' L
18' W x 48' L
1
Advertisement
Table of Contents

Subscribe to Our Youtube Channel
Related Manuals for ClearSpan 105624


Summary of Contents for ClearSpan 105624
- Page 1 CARPORTS ™ ClearSpan ™ Low-Profile Roof Frame Photo may show a different but similar model. STK# DIMENSIONS 105624 18' W x 20' L 105625 18' W x 24' L 105626 18' W x 36' L ©2008 ClearSpan™ 105627 18' W x 48' L All Rights Reserved.
-
Page 2: Safety Precautions
• Never erect the structure under power lines. • Identify whether underground cables and pipes are Thank you for purchasing this ClearSpan™ shelter. When present before preparing the site or anchoring the properly assembled and maintained, this product will structure. -
Page 3: Assembly Procedure
These words and phrases are common to most straight ends of other pipes. ClearSpan™ shelters and identify the different parts of the shelter. (Some are used in this document. Others may •... -
Page 4: Required Tools
CLEARSPAN CARPORTS ™ REQUIRED TOOLS The following list identifies the main tools needed to Space below is reserved for customer notes. assemble the shelter. Additional tools and supports may be needed depending on the structure, location, and application. • Tape measure or measuring device •... - Page 5 CLEARSPAN CARPORTS ™ The following graphics and photos will help you identify the different parts and show you how they are used. (Not all parts are shown.) FA4482B QH1061 100441 Tek Screw Ratchet Nut Setter 104626 104627 105560 103620d Black Tie Down Strap...
- Page 6 CLEARSPAN CARPORTS ™ Low Profile Roof Frame 18' Wide OVERVIEW This section is an overview of the process for assembling your Low Profile Roof Frame. For details, please see section, Assembling the Low Profile Roof Frame Components. See illustration below to identify main parts of shelter.
-
Page 7: Rafter Assembly
CLEARSPAN CARPORTS ™ LAY OUT THE BUILDING SITE End Rafter Assembly: Complete the following steps to assemble the two (2) end The Low-Profile Roof Frame is designed to be secured rafters. to a permanent structure, or to 4" x 4" posts anchored in the ground. - Page 8 CLEARSPAN CARPORTS ™ EXAMPLE #1: Post Cap Installation RAFTER ASSEMBLY (CONTINUED) Interior Rafter Assembly: If the roof frame is to be attached to a structure where the 4" x 4" posts run parallel with the purlins of the frame, use 1.
- Page 9 CLEARSPAN CARPORTS ™ EXAMPLE #1: Frame Assembly EXAMPLE #2: Post Cap Installation To assemble and secure a low-profile roof frame to 4" x 4" posts that run parallel with the purlins, complete If the support structure consists of individual 4" x 4" support these steps.
- Page 10 CLEARSPAN CARPORTS ™ EXAMPLE #2: Frame Assembly 3. Select two sections of the precut purlins and slide one onto each of the 3-Way fitting of the first end rafter. These instructions describe one way to assemble the frame when the support structure consists of individual 4" x 4"...
-
Page 11: End Panel Installation
CLEARSPAN CARPORTS ™ EXAMPLE #2: Frame Assembly (continued) FINAL FRAME CHECK Gather the Parts 6. Verify that the rafter is plumb and secure the purlin to each 4-Way fitting and the rafter to each post cap as • Duct tape previously described using Tek screws. - Page 12 CLEARSPAN CARPORTS ™ END CONDUIT ASSEMBLY 2. On a zippered end panel, insert the end conduit through the two side panels of the end panel (as shown Gather the parts (additional purchase required): below) and not through the door sections.
- Page 13 CLEARSPAN CARPORTS ™ ATTACH END PANEL 3. Evenly space the fasteners along the rafter and pull the end panel tight as the fasteners are installed. Gather the parts: 4. After securing the lower section of the end panel, move •...
- Page 14 CLEARSPAN CARPORTS ™ INSTALL END RATCHETS INSTALL THE SIDE RATCHETS The end ratchets are used to secure the bonnet portion of Consult the following information when installing the side the main cover. ratchets. Gather the Parts: Gather the Parts: •...
- Page 15 CLEARSPAN CARPORTS ™ MAIN COVER CONDUITS ASSEMBLY ATTACH MAIN COVER Gather the Parts: Gather the Parts: • Pipe 1.315'' x 75'' Swaged • Main cover (with conduits already inserted) • Pipe 1.315'' x XXX'' Plain • Ropes long enough to reach over the frame (provided by customer).
- Page 16 9. Repeat the same steps for the remaining ratchets. NOTE: With the exception of Truss Arch buildings, 10. Using additional help (if needed), tighten the main ClearSpan™ shelters and greenhouses do not have any cover beginning with the ratchets along the side of the tested loading criteria.
- Page 17 CLEARSPAN CARPORTS ™ QUICK START GUIDE 18' Wide Low Profile Roof Frame Frame shown may differ in length from actual frame. Revision date: 10.27.08...
- Page 18 CLEARSPAN CARPORTS ™ Revision date: 10.27.08...
- Page 19 CLEARSPAN CARPORTS ™ Revision date: 10.27.08...
- Page 20 CLEARSPAN CARPORTS ™ Revision date: 10.27.08...
- Page 21 CLEARSPAN CARPORTS ™ Revision date: 10.27.08...
- Page 22 CLEARSPAN CARPORTS ™ Revision date: 10.27.08...
- Page 23 CLEARSPAN CARPORTS ™ Revision date: 10.27.08...
Need help?
Do you have a question about the 105624 and is the answer not in the manual?
Questions and answers