Advertisement
Quick Links
Advertisement

Subscribe to Our Youtube Channel
Related Manuals for Brickhouse Security B-L4G


Summary of Contents for Brickhouse Security B-L4G
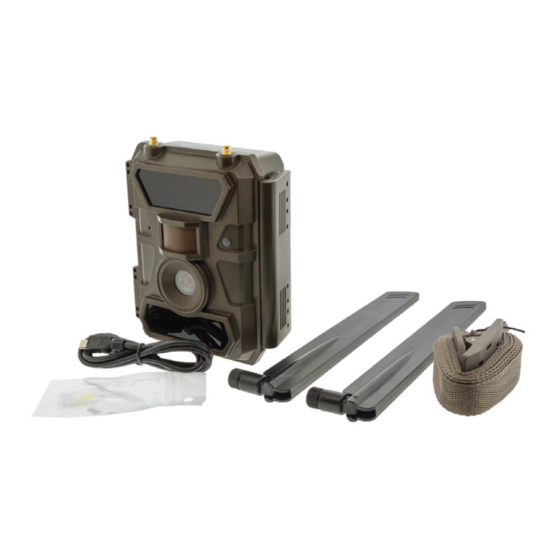
- Page 1 Remote Scout 4G Cellular Outdoor Camera User’s Manual...
- Page 2 Remote Scout 4G Cellular Outdoor Camera is one of the easiest cameras to set- up with wireless connectivity, and it is ready to use out of the box. Our 1080p FHD Outdoor camera shoots video at 30FPS and features customizable full color resolution from 5MP, 8MP or 12MP.
- Page 4 Camera Functions and Features 1 Antenna 2 27 IR LEDs 1 PIR Sensor 4 Indicator Light 5 Camera Lens 6 30 IR LEDs...
- Page 5 9 USB Port 8 SD 12 Navigation Buttons/ Card Slot OK Entry Button 10 LCD Screen 11 Menu Button 13 Battery 12 Power On/ Off/ Slot Set-Up Switch...
-
Page 6: Getting Started
Getting Started The Remote Scout Camera will already have the SIM Card inserted and programmed. We recommend you use NiMH batteries for better performance on battery life. Insert the SD memory card with gold contacts facing downward. Next screw both antennas onto the top of camera. Then you will insert 12 AA batteries. Note: Please use high-quality AA batteries in order to protect battery cells from corrosion caused by leaked acid. - Page 7 Camera Menu Set-Up mode, press “Menu” once to enter camera setting menu; to navigate setting interface by pressing “←”, “↑”, “→”, or “↓”, press “OK” for selection, “Menu” to exit to previous page, and “Menu” to switch alpha/digits/symbols. Note: For settings, you’ll need to press “Menu” to save & exit the configuration, after pressing “OK”...
- Page 8 Programmable Options Settings Select “ON”, press “OK”, to set 12 digits/ alphabets for Cam ID each camera. This function can help the user identify which photos are from which camera. Photo, Video, PIC+VIDEO Cam Mode 1) Photo: camera shoots photos only based on configured Multi-shot &...
- Page 9 a) Min. Blur: Short exposure time to minimize motion blur Night Mode for better image quality; shortened IR flash range; b) Max. Range: Longer exposure time to extend IR flash range for better night vision; lower image quality; c) Balanced: combination of above 2 options; Programmable 1~5 photos per trigger Multi-shot Video On...
- Page 10 Settings Programmable Options PIR Switch OFF/ON Note: a) PIR Switch off, camera will not be able to take photo/ video per motion; b) PIR Switch on, camera is able to take photos/ videos per motion even when Time Lapse is ON.
- Page 11 High, Middle, Low Sensitivity Higher sensitivity 1) is more sensitive to movements by smaller subjects; 2) has longer detection distance; 3) makes it easier for sensor to detect difference between body heat and outdoor temperature; 4) easier to trigger camera to record. In high temperature environment, body heat of subjects and environment temperature is hard to identify by camera, suggest setting High.Flash LED Select “ON”, press “OK”, to set a time interval between...
- Page 12 Select “ON”, press “OK”, to set the beginning time and Timer1 end time (hour/minute); camera will only work during the time period set by the user. i.e.: 15:00 – 18:00; camera only works during 15:00 – 18:00 Select “ON”, press “OK”, to set the beginning time and Timer2 end time (hour/minute);...
- Page 13 SMTP Camera comes with default SMTP setups; you only need to enter receiving email accounts in “Send to” field. Please finish setups below if you’d like to use your own SMTP server. 1)Enter your mailbox server IP; i.e.: Hotmail IP: smtp.live.com; Gmail IP: smtp.gmail.com; 2) Enter your mailbox port;...
- Page 14 3) Enter your FTP server password access. Note: FTP only uploads photos to preset FTP account; if FTP information is entered wrong, then FTP account will not be able to receive photos from camera. Send To (4G model is able to send photos and videos to your emails/ FTP account) Email Enter recipients’...
- Page 15 Multi-shot Send: 1 Pic; this function works with Multi-shot. i.e.: Multi-shot is set as 5P; and you choose 1 Pic and 3 Pic in Multishot Send. Then the 1 photo and 3 photo taken from the 5 pics multi-shot will be sent out to your email(s) or FTP account.
- Page 16 SMS Ctrl 1) Daily: (Suggest for AA battery power) Camera will only be able to change & save setups remotely when camera sends daily report. 2) Instant: (Suggest using when Power adapter is connected as this option will consume large amounts of battery power.) Camera 4G module stand-by all the time;...
- Page 17 Other English Language Auto/Manual Date/Time Auto: camera will synchronize data/time after you enter your time zone info; Manual: manually set date/time date : month : year : hour : minute : second Note: Please adjust camera date/time to ensure functions work as expected.
- Page 18 Alkaline/ NI-MH Battery Type Choose correct battery type for maximum camera performance. 50HZ, 60HZ; improper settings may cause camera screen Frequency to flicker Select “ON”, press “OK”, camera will continue to record SD Cycle photos/videos by deleting earliest photos or video clips. Select “ON”, press “OK”, to enable password protection Password for your camera;...
- Page 19 Trail Camera Mobile Application Getting Started: This Mobile application only sends commands that will trigger the camera to send images to your email address and/or change the settings to your device. Compatible with Android and iPhone Go to Play Store (on Android) or the Apple App Store, search for “Trail Camera”...
- Page 20 In the “ ” you will enter the Camera SIM Number that was sent to your email address on file. Once the information is entered correctly, the camera will appear in the camera menu. Then you may continue to your menu options.
- Page 21 Access your Menu setting by touching the arrow next to the camera icon. You can Note: then select general settings to enter up to two email addresses. (Send to Phone field is disabled). If you choose to send an image daily or instantly, make sure SMTP is enabled.
- Page 22 Other Settings. From here you can make changes and send them to the camera.Camera modes, nightvision, picture and video resolution, PIR sensitivity, video recording length, amount of images being taken in multi shot mode, daily report on activity, and SD Cycle for overwrite on the SD card storage.
- Page 23 Get a Picture, select the arrow, the following message “Send the message right now?” will appear, select confirm to send.
-
Page 24: Troubleshooting
Troubleshooting Camera did not capture any images 1. Check the “Sensor Level” (PIR sensitivity) parameter setting. For warm environmental conditions, set the Sensor Level to “High” and for cold weather, set the sensor for “Low.” 2. Try to set your camera up in an area where no heat sources are in the camera’s field of view. - Page 25 Camera stopped taking images or has not taken images 1. Your SD Card has probably reached the max storage limit and is full. Enter your settings menu to turn on Cycle Recording to prevent your SD card from reaching its storage limit. 2.
- Page 26 3. “Max Range” offers better IR flash range. Given IR flash range values are based on Max Range setting; so please adjust Night Mode to Max Range for better night vision flash range. 4. High-quality 1.5V NiMH rechargeable AA batteries can also offer much better IR flash range;...
Need help?
Do you have a question about the B-L4G and is the answer not in the manual?
Questions and answers