Advertisement
Quick Links
ASSEMBLY INSTRUCTIONS
ITEM# : GBO21-602-1
SKU# : 810493301
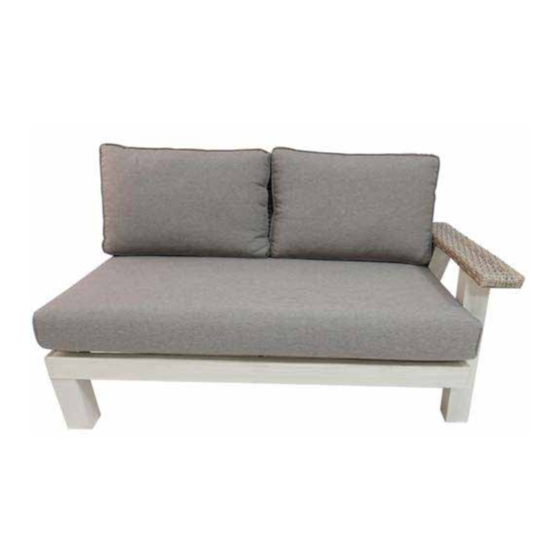
ASHFORD SECTIONAL SET
RIGHT ARM SOFA AND LEFT ARM SOFA
Need help? We are here for you! 1-888-733-8169 Toll Free
Or email us at customerservice_01@yeah.net,customerservice_02@yeah.net
customerservice_03@yeah.net
Advertisement

Subscribe to Our Youtube Channel
Related Manuals for Broyhill GBO21-602-1


Summary of Contents for Broyhill GBO21-602-1
- Page 1 ASSEMBLY INSTRUCTIONS ITEM# : GBO21-602-1 SKU# : 810493301 ASHFORD SECTIONAL SET RIGHT ARM SOFA AND LEFT ARM SOFA Need help? We are here for you! 1-888-733-8169 Toll Free Or email us at customerservice_01@yeah.net,customerservice_02@yeah.net customerservice_03@yeah.net...
-
Page 2: Maintenance
GENERAL BEST PRACTICE FOR ASSEMBLY: Read all instructions before starting Clear a flat covered space to begin assembly Always best to do it with a friend Note that hardware required is provided for every step Pay attention to orientation Letter of the part corresponds to a sticker on the product Number of the hardware corresponds to its letter in the package Helpful hints provided along the way Retain these assembly instructions for future reference. - Page 3 PARTS LIST FOR RIGHT ARM SOFA: Part No. Part Image Part No. Part Image Short Bolt Sofa Back (M6x15mm) Middle Bolt Sofa Seat Panel (M6x28mm) Long Bolt Armrest (M6x41mm) Back Armrest Foot Washer ( with one threaded hole) Front Armrest Foot Back Cushion ( with two threaded hole) Back Foot...
- Page 4 PRODUCT FRAME MAP...
- Page 5 STEP 1 STEP 1 PART REQUIRED: R3, R4 & R5 Keep the bolts loose. Note: After assembled, keep all the threaded holes inwards. STEP 2 STEP 2 PART REQUIRED: R1, R2, 6 & 7 Keep the bolts loose.
- Page 6 STEP 3 PART REQUIRED: R1 & R3 Keep the bolts loose. STEP 4 STEP 3 PART REQUIRED: R2, R4 & R5 Keep the bolts loose.
- Page 7 STEP 5 PART REQUIRED: 12 & 13 Make sure the sofa stand on the ground stable, then tighten all the bolts. Put the cushions on the seat. Warranty One-year limited warrantly. Proof of purchase (dated register receipt) is required for warranty claims. It remains the customer's responsibility for freight and packing charges to and from the service center.
- Page 8 LEFT ARM SOFA: PARTS LIST FOR Part No. Part Image Part No. Part Image Short Bolt Sofa Back (M6x15mm) Middle Bolt Sofa Seat Panel (M6x28mm) Long Bolt Armrest (M6x41mm) Back Armrest Foot Washer ( with one threaded hole) Front Armrest Foot Back Cushion ( with two threaded hole) Back Foot...
- Page 9 PRODUCT FRAME MAP...
- Page 10 STEP 1 STEP 1 PART REQUIRED: L3, L4 & L5 Keep the bolts loose. Note: After assembled, keep all the threaded holes inwards. STEP 2 STEP 3 PART REQUIRED: L1, L2, 6 & 7 Keep the bolts loose.
- Page 11 STEP 3 STEP 4 PART REQUIRED: L1, & L3 Keep the bolts loose. STEP 4 PART REQUIRED: L2, L4 & L5 Keep the bolts loose.
- Page 12 STEP 5 PART REQUIRED: 12 & 13 Make sure the sofa stand on the ground stable, then tighten all the bolts. Put the cushions on the seat.
- Page 13 REMINDER REQUIRED: Sectional Set CTN#1 - Right Arm Sofa and Left Arm Sofa and CTN# 2 - Corner Sofa Two other connection locks is included in the hardware pack for sectional sofa set CTN#2 - Corner Sofa . PLEASE FIX SOFA SEAT TOGETHER WITH PROVIDED Warranty One-year limited warrantly.
Need help?
Do you have a question about the GBO21-602-1 and is the answer not in the manual?
Questions and answers