Santec E Series Installation Instructions
Hide thumbs
Also See for E Series:
- Instruction booklet (9 pages) ,
- Installation instructions (2 pages) ,
- Installation instruction (8 pages)
Advertisement
7
1
"
16
3
2
"
4
K EE P T H I S I N S T R U C T I O N B OO KL E T F OR FU T U R E R EF E R EN CE
Important : Please register your product online at www.santecfaucet.com within
30 days of purchase. Santec reserves the right to request additional documents
b e f o re s e rv ic i n g w a rr an t y req u es t s .
0 1
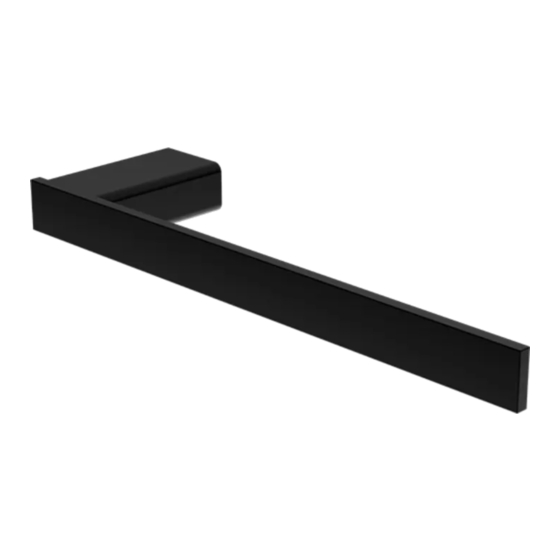
E -SER I ES S ERI E S
SQ U ARE CO LL ECT I O NS
T O WEL RI NG
M O DEL : 2 46 4S Q 10
24 64 SQ 7 5
7
"
8
7
8
"
16
13
9
"
16
In stal lati on In stru cti on s
1.
Place the trim parts against the assigned wall location. Make sure that the ring is leveled. Mark the ring
post flange position and remove the trim.
2.
Using the Allen key provided, remove the mounting post from the ring post. Press the mounting post
against ring post position on the wall and mark the screw hole positions.
NOTE: MAKE SURE THE ALLEN SCREW HOLE ON THE MOUNTING POST IS FACING DOWN
WHEN SECURING TO WALL.
INSTALLING ON WOODEN SURFACE
For wooden surface, the mounting post can be
secured by screwing the screws directly into the wall.
INSTALLING ONTO DRYWALL SURFACE
Using a drill, pre-drill holes for the anchors. Insert the
anchors into the wall. The mounting post can be
secured by screwing the screws into the anchors.
INSTALLING ONTO A SOLID SURFACE
Measure the dimensions carefully.
Using a drill,
pre-drill the holes.
Secure the mounting post by
screwing the screws into the wall.
WALL
ring post mark
mounting post
0 2
Advertisement
Table of Contents

Subscribe to Our Youtube Channel
Related Manuals for Santec E Series


Summary of Contents for Santec E Series
- Page 1 30 days of purchase. Santec reserves the right to request additional documents b e f o re s e rv ic i n g w a rr an t y req u es t s .
- Page 2 I ns ta l l ati on In s tr u cti ons Press the ring post against the mounting post. Align the ring post and secure it by tightening the set screw. Check the ring post to make sure it is firmly secured. If not, tighten the set screw with the Allen key.
Need help?
Do you have a question about the E Series and is the answer not in the manual?
Questions and answers