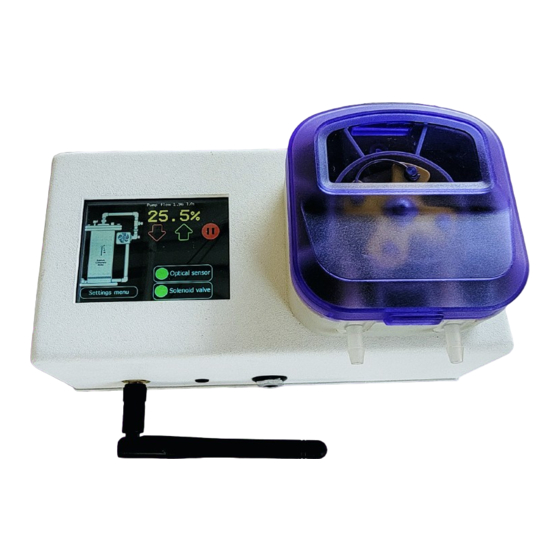
Pacific Sun CalcFeeder PRO User Manual
Controller for calcium reactor with stepper motor feeding pump
Hide thumbs
Also See for CalcFeeder PRO:
- User manual (22 pages) ,
- User quick manual (5 pages) ,
- User manual (7 pages)
Summary of Contents for Pacific Sun CalcFeeder PRO
- Page 1 CalcFeeder PRO Controller for Calcium reactor with stepper motor feeding pump User Manual ver. 3.0 cloud www.Pacific-Sun.eu...
-
Page 2: Table Of Contents
2. CalcFeeder PRO Controller ..............4 2.1. Controller Touch-Screen Operations ................5 2.2. Controller Maintenance ....................6 3. Controller Wi-Fi Pacific Sun Cloud setup ...........7 3.1. Connecting Controller to your home Wi-Fi network ..........7 3.2. Adding Controller to Pacific Sun Cloud ..............9 3.3. -
Page 3: Introduction
With this unit and CalcFeeder PRO calcium reactor, you are able to adjust the calcium level as well as the carbonate hardness in your seawater tank simply and efficiently in order to achieve optimum levels. -
Page 4: Calcfeeder Pro Controller
CalcFeeder PRO Calcium Reactor 2. CalcFeeder PRO Controller Step Motor Pump LCD Touch Screen Water Output Water Input FROM Reactor Aquarium Solenoid Valve Port Optical Sensor Port Wi-Fi Antena Power USB Port Supply Page 4... -
Page 5: Controller Touch-Screen Operations
CalcFeeder PRO Calcium Reactor The Controller unit was designed to work with CalcFeeder PRO calcium reactor but can be used also as a very precise feeding pump for any other Calcium Reactor brand (require turning the “Standalone” mode to ON). -
Page 6: Controller Maintenance
CalcFeeder PRO Calcium Reactor Manual degassing screen Pump cycles The controller pump work cycles are counted in the upper left corner. The degassing process takes 200 cycles. Reactor manual water refills screen In order to Turn OFF the refilling process, press and hold the „Turn off refill mode”... -
Page 7: Controller Wi-Fi Pacific Sun Cloud Setup
CalcFeeder PRO Calcium Reactor 3. Controller Wi-Fi Pacific Sun Cloud setup 3.1. Connecting Controller to your home Wi-Fi network 1. Connect power to CalcFeeder Controller. Find your CalcFeeder Controller on you Wi-Fi network list devices. Click Connect directly to the CalcFeeder Controller Wi-Fi Network. - Page 8 CalcFeeder PRO Calcium Reactor 5. Open the Controller WiFi network setup. Open your Internet Browser and type the Controller WiFi network IP address into the address 192.168.4.1 field. http://192.168.4.1 Switch to STA+AP mode Under WiFi Association you should see Scanning for available home Wi-Fi networks.
-
Page 9: Adding Controller To Pacific Sun Cloud
CalcFeeder PRO Calcium Reactor 3.2. Adding Controller to Pacific Sun Cloud Connect to your home Wi-Fi internet network, open Internet Browser, and go to the following address: https://cloud.pacific-sun.eu Click Create an account Create Cloud Pacific Sun account. Enter Email address... - Page 10 CalcFeeder PRO Calcium Reactor Add a Tank: Type in your preferred Name Click Add tank Under your tank Name: Click Add Device Type In your preferred Name and select the device from the list: Calcfeeder PRO WiFi Click Add Device...
- Page 11 CalcFeeder PRO Calcium Reactor Under your Client ID: Click Auto Connect Connect Controller to Pacific Sun Cloud: Step Click Next Configure device and Ready: Step Use your Controller IP address Click Configure! Note: Controller IP address on the screen after power OFF/ ON in a similar format: 192.168.#.###...
- Page 12 CalcFeeder PRO Calcium Reactor The Controller added to the PS Cloud, ready for the configuration process and operation. Page 12...
-
Page 13: Linking Calcfeeder Controller Pro With Kore 7Th Khlab
CalcFeeder PRO Calcium Reactor 3.3. Linking CalcFeeder Controller Pro with Kore 7th kHLab Pacific Sun Cloud is giving all users the opportunity to add all WiFi PS Cloud-ready devices, configure them and link them to enable additional functionality and more automatic control to the aquarium. -
Page 14: Calcfeeder Controller Firmware Upgrade
CalcFeeder PRO Calcium Reactor 4. CalcFeeder Controller Firmware Upgrade Warning! Switching OFF the power supply during the Firmware updating process may damage your doser CPU. Uploading wrong Firmware may damage your doser and void your warranty. The damage may require returning the doser to our service department to restore it’s original functionality. - Page 15 CalcFeeder PRO Calcium Reactor Option 2: Verify the USB Serial Port COM number from “Devices and Printers”. 4. Right Click on the device and select “Properties”. 5. The USB Serial Port COM number will be visible under device Properties. Page 15...
- Page 16 CalcFeeder PRO Calcium Reactor 6. Download the “Firmware Updater” application from the Pacific Sun website: http://www.pacific-sun.eu/pliki/PSunFlash32.zip Unpack the ZIP file and run the “Firmware Uploader”. Note: For the Mac OS version download from: http://www.pacific-sun.eu/pliki/PSunFlash21.app.zip 7. In the “Settings” tab, choose the port...
- Page 17 CalcFeeder PRO Calcium Reactor 9. Select the previously downloaded Firmware file and click Open 10. Click Update 11. The Firmware upgrade will be in progress with message “Please wait……..” Page 17...
- Page 18 CalcFeeder PRO Calcium Reactor 12. Now: disconnect power cable from the controller connect power back the controller. 13. The Firmware writing process will start and the number in bytes will be increasing. 14. The Firmware upgrade status will be indicated with the green progress bar.
- Page 19 CalcFeeder PRO Calcium Reactor 15. Final Firmware Upload steps: 1. At the end of the Firmware writing process program will show “Firmware updated”. 2. Disconnect the USB cable from your computer and Pacific Sun device. 3. Disconnect device from the power source for a few seconds and connect the power back.
- Page 20 If you need technical support - please contact with Copyright: Pacific Sun Sp. Z o.o. ul. Ogrodników 22 84-240 Reda Poland tel. + 48 58 778 17 17 email: office@pacific-sun.eu...


Need help?
Do you have a question about the CalcFeeder PRO and is the answer not in the manual?
Questions and answers