Advertisement
Quick Links
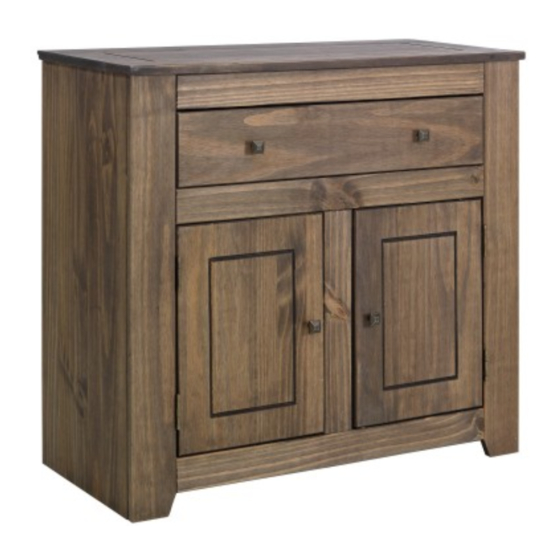
Amersham -
Solid Pine Small Sideboard
Assembly Instructions -
Please keep for future reference
724/4199
Dimensions
Width - 92cm
Depth - 42cm
Height - 84cm
Important –
Please read these instructions fully before starting assembly
If you need help or have damaged or missing parts, call the
Customer Helpline: 03456 400 800
Issue 2 - 08/08/18
Advertisement

Related Manuals for Argos Amersham 724/4199


Summary of Contents for Argos Amersham 724/4199
- Page 1 Amersham - Solid Pine Small Sideboard Assembly Instructions - Please keep for future reference 724/4199 Dimensions Width - 92cm Depth - 42cm Height - 84cm Important – Please read these instructions fully before starting assembly If you need help or have damaged or missing parts, call the Customer Helpline: 03456 400 800 Issue 2 - 08/08/18...
- Page 2 Safety and Care Advice Important – Please read these instructions fully before starting assembly Check you have all the This product has been produced We do not components and tools listed on from natural timber; you may recommend the pages 2 and 3. notice some variation in the grain use of power and colour of different component...
- Page 3 Components - Panels Please check you have all the panels listed below Right front frame (82 x 9.2cm) 15 Door x 2 (43 x 31.8cm) 1 Top panel Left front frame (92 x 42cm) (82 x 9.2cm) Vertical frame (47.7 x 6.5cm) Top front frame (75.6 x 6.5cm) 17 Drawer sides...
- Page 4 Components - Fittings If you have damaged or missing components, call the Customer Helpline: 03456 400 800 Please check you have all the fittings listed below Note: The quantities below are the correct amount to complete the assembly. In some cases more fittings may be supplied than are required.
- Page 5 Assembly Instructions Step 1 Fixing right front frame to the right side panel (Two people required for an easier assembly). Insert right side panel into right front frame through joints. Yes! Note: Before fixing blocks into place it is important to ensure that the slot and groove of parts are fully pushed together...
- Page 6 Assembly Instructions Step 3 Fitting Metal dowels. Screw metal dowels into right side panel left side panel and top panel Note: Insert metal dowels as far as shown. Do not over tighten. Step 4 Insert dowels into the indicated parts. Insert shelf supports into the right side panel and left side panel...
- Page 7 Assembly Instructions Step 5 Fixing drawer runners. Fit drawer runner to the right side panel . Fit and push dowels into the front frame first. Attach drawer runner using screw Repeat step 5 for the left side panel drawer runner. Step 6 Assembling parts.
- Page 8 Assembly Instructions Step 7 Insert the assembled frame and top front frame into the holes on left side panel Step 8 Fixing base panel. With help, fit base panel to the left side panel. Insert 2 locking nuts into base panel where shown.
- Page 9 Assembly Instructions Step 9 Fixing right side panel. With help, place right side properly panel ensuring dowels and front frames are all fit into their holes at the same time. Insert 2 locking nuts into base panel where shown. Use a screwdriver to turn locking nuts clockwise to lock.
- Page 10 Assembly Instructions Step 11 Fixing top panel. Important: With help, carefully stand the product upright. With help, f it top panel to the cabinet. Insert locking nuts into side p anel where shown. Use a screwdriver to turn locking nuts clockwise to lock.
- Page 11 Assembly Instructions Step 13 Hanging doors. With help, centralise the doors in the opening of the cabinet using the door spacer to ensure correct spacing, as shown. From inside the View from behind cabinet fix the hinges using screws shown. Note: To ensure the alignment of the doors is...
- Page 12 Assembly Instructions Step 15 Fitting door lock. Screw clip in place using screws Ensure that the 2 small wheels are flush with the edge of the base as shown in the diagram. Insert plug into clip , ensuring they are leveled as shown in the diagram.
- Page 13 Assembly Instructions Step 17 Drawer assembly. Attach drawer sides to the drawer front using screws Slide drawer bottom into slots on drawer sides and position drawer back in place. Holding the drawer back , press the drawer sides and fix them using screws Using bolts attach...
- Page 14 Assembly Instructions Step 18 Insert drawer into unit. With the back of the drawer past the front frames, use a hammer to tap dowels in flush to drawer sides. This is a safety catch to stop drawer falling out. Step 19 Position shelf into place.
- Page 15 Assembly Instructions Step 20 Fixing back panels. Important: Cabinet MUST ‘square’ when back panels are attached. Attach back panel at the top first using nails Position profile onto back panel (just attach). Carefully slot the second back panel into the profile and fix it to the cabinet using nails Step 21 Fixing to wall...
-
Page 16: A Guide To - Wall Mounting & Fixings
A Guide to - Wall Mounting & Fixings Important: When drilling into walls always Important note: check that there are no hidden wires or pipes etc. If plastic wall plugs Make sure that the screws and wall plugs being used are supplied with your are suitable for supporting your unit. - Page 17 Argos store Key exclusions applying to both the Manufacturer’s Guarantee and Furniture Care include where the fault is due to misuse, abuse, deliberate damage, wear and tear, neglect, use in contravention...
Need help?
Do you have a question about the Amersham 724/4199 and is the answer not in the manual?
Questions and answers