Advertisement
Quick Links
Advertisement

Subscribe to Our Youtube Channel
Related Manuals for Mantis 7234


Summary of Contents for Mantis 7234
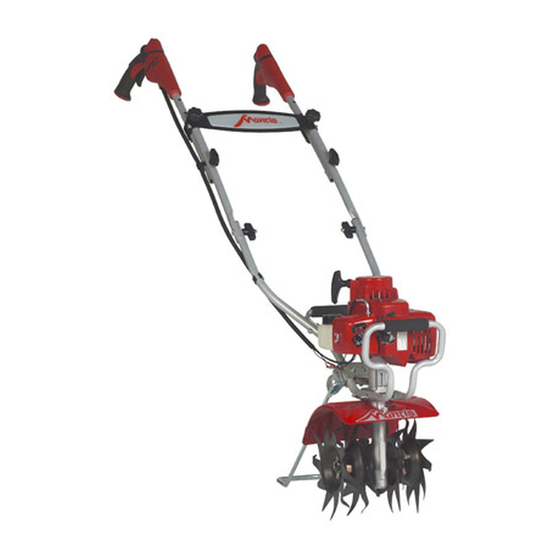
- Page 1 All manuals and user guides at all-guides.com 7234 DELUXE 2-CYCLE TILLER/CULTIV TOR OWNER’S M NU L IMPORT NT! SSEMBLY INSTRUCTIONS ST RT ON P GE 5! PLE SE REVIEW THE W RNING & S FETY INFORM TION ON P GES 3-4...
-
Page 2: Table Of Contents
Eastern Time. ttention Mantis Product Owners! Get maintenance tips for your Mantis product on our website at www.mantis.com T BLE OF CONTENTS Safety Rules & Warnings ....3-4 Tine Positioning . -
Page 3: Safety Rules & Warnings
All manuals and user guides at all-guides.com S FETY RULES & W RNINGS You will notice throughout this Owners Manual Safety Rules and Important Notes. Make sure you understand and obey these warnings for your own protection. I. Special Safety Information W RNING •... - Page 4 All manuals and user guides at all-guides.com IV. Warnings - Do’s are doing and use common sense. Do not to be sure the equipment is in safe working operate unit when fatigued. condition. Read and understand the owner’s 6. lways dress properly. Do not wear 12.
- Page 5 SSEMBLY IMPROPER ASSEMBLY OF THIS TILLER CAN RESULT IN SERIOUS INJURY. MAKE SURE TO FOLLOW ALL INSTRUCTIONS CAREFULLY. IF YOU HAVE ANY QUESTIONS, CONTACT OUR FACTORY AT 1-800-366-6268 OR AN AUTHORIZED MANTIS DEALER. Your M NTIS Tiller comes partially assembled.
- Page 6 All manuals and user guides at all-guides.com SSEMBLY (continued) Step 9 The right handle, additional parts and tiller engine will be in the box cradle. Helpful Hint Do not remove the cardboard cradle from around the tiller base. The cradle will make Pull box straight up.
- Page 7 All manuals and user guides at all-guides.com SSEMBLY (continued) Tine ssembly Kickstand ssembly Y – Kickstand Z – Kickstand Brace Kit V, W – Tines X – Tine Retaining pins Qty. Part No. Description Qty. Part No. Description 410158 Stand 438RA Tine assembly, right 430037...
- Page 8 All manuals and user guides at all-guides.com SSEMBLY (continued) IMPORT NT Carry Handle ssembly 1/4-20 H – 1/4-20 x J – Two-way 1-1/8 Hex head Parts Needed: lock nut cap screws I – Carry Handle w/grip Step 5 Helpful Hint 7/16”...
- Page 9 All manuals and user guides at all-guides.com SSEMBLY (continued) Helpful Hint Tine ssembly Parts Needed: Step 7 V, W – Tines X – Tine Retaining pins Remove cardboard cradle Place tines (V, W) on tine Secure with tine retaining Put Kickstand down and rest from tiller.
- Page 10 All manuals and user guides at all-guides.com SSEMBLY (continued) Parts Needed: S – Curved Step 10 Q – Knobs, Two- Head Bolts Prong female Slide curved head bolt (S) into bottom Take right handle (K) and slide it between middle handle tube (M) and brace (O). slit of the upper handle.
- Page 11 All manuals and user guides at all-guides.com SSEMBLY (continued) Step 12 Height djustment Feature Step 13 5’10” and under use position #1 5’11” to 6’2”use Position #2. Tighten round knob (P) Fully tighten 6’3” and into the handle brace on nuts and bolts over use the right and left handles...
-
Page 12: Ssembly And Mixing Fuel
The following steps will instruct you on Need more premeasured oil? You can how to mix the oil with the gas. order it directly from Mantis or your local authorized Mantis dealer. Just call toll free 1. Pour 1/2 of the gasoline into a safe 2.6 oz. -
Page 13: Starting
All manuals and user guides at all-guides.com ST RTING (continued) Starting a Warm Engine W RNING Throttle 1. Push ignition switch to “start/on” Lock-out Lever AVOID ACCIDENTAL BLADE ENGAGEMENT position. DO NOT SQUEEZE THE THROTTLE 2. Push choke button in to the RUN TRIGGER WHEN STARTING. -
Page 14: Tilling
All manuals and user guides at all-guides.com WH T TO DO JUST IN C SE (continued) from the fuel tank to Here’s nother Way to choke button in. Then pull the the carburetor. Pull it starter cord. The engine should Start your M NTIS Tiller off at the carburetor start and run. - Page 15 All manuals and user guides at all-guides.com TILLING (continued) You Can Even Control Depth. (See page 16 to learn how.) Then move your W RNING Tiller quickly over your For Deeper Tilling: • soil surface. Move your Tiller slowly back and forth, as D NGER For Big Weeds or you would a vacuum cleaner.
-
Page 16: Tilling/Cultivating
All manuals and user guides at all-guides.com TILLING/CULTIV TING How about a family-size someone with a large tiller to break ground for you. This is a W RNING • D NGER vegetable garden? one-time-only investment that’s well worth the small cost. Nowadays many gardeners prefer IF YOUR TINES GET JAMMED OR small gardens —... - Page 17 All manuals and user guides at all-guides.com M INTEN NCE Check the ir Filter Often the air-cleaner cover. (See Picture 1, Order a new one directly from our or look up Key #1 in Intake Parts Customer Service Dept. Call 1-800- wet or dirty air filter can affect the ssembly on page 17.) 366-6268.
- Page 18 All manuals and user guides at all-guides.com M INTEN NCE (continued) warm-up to clear any air from the Fuel system. W RNING•D NGER Then stop the engine after it reaches operating temperature. REMOVE TINES BEFORE Now, turn the RED, high-speed screw STARTING ENGINE AND MAKING counter-clockwise all the way to stop…Then ADJUSTMENTS...
- Page 19 Always make sure the handle easy steps: Loosen the handle knobs knobs are secure before the plug from a hot aluminum (#53), fold the handles forward (see starting your MANTIS Tiller. cylinder head. picture 1, inset). Tighten knob...
-
Page 20: Trouble Shooting
All manuals and user guides at all-guides.com TROUBLE SHOOTING Problem Cause Remedy 1. Tines don’t turn when throttle • Engine is not seated properly on the gear • Re-install engine following the instructions is depressed housing. on page 13 (How to reseat the flange). 2. - Page 21 400630 Triangle Warning Label (2 Cycle Engine) 4079 M6 Jam Nut Roller Bearing (closed end) 430048 Curved Head Bolt, 1/4-20 X2" 430058 Mantis Logo Label Fender Guard Acorn Nut 400904 Engine Assembly Sv-5ci/2 1/4-20 Two-way Lock Nut Drive Shaft 144-2 1/4-20 X 1.125 Hex Head Cap Screw...
- Page 22 All manuals and user guides at all-guides.com P/N 438LA P/N 438RA DIRECTION DIRECTION Raised Hub Raised Hub Teeth point in Teeth point in a Clockwise a Counter Clock- Direction wise Direction When you look at Tine with the raised hub facing you When you look at a Tine with the raised hub facing you and the teeth are pointing in a CLOCKWISE and the teeth are pointing in a COUNTER CLOCK WISE...
- Page 23 All manuals and user guides at all-guides.com LE NER ITEM P RT # QTY. DESCRIPTION / REM RKS B1 90052800005 1 WING BOLT XPLOSION B2 13032611522 1 COVER, IR CLE NER B3 89012147530 1 L BEL, CHOKE B4 13031004560 1 FILTER, IR B5 90024205057 2 SCREW 5X57...
- Page 24 All manuals and user guides at all-guides.com & S GNITION NGINE HORT LOCK XPLOSION ITEM P RT # QTY. DESCRIPTION / REM RKS 130000550 CYLINDER E3 90016205022 SCREW 5X22 G SKET, CYLINDER 1 V100000160 P021007712 PISTON KIT / INCLUDES ITEMS 6-9 101000090 RING, PISTON E7 10001311520...
- Page 25 All manuals and user guides at all-guides.com ECHO INCORPOR TED EMISSION CONTROL W RR NTY ST TEMENT FOR ECHO ND SHIND IW BR NDS The Environmental Protection gency (EP ) and the California ir Resources Board (C. .R.B.) and ECHO Incorporated (ECHO Inc.) are pleased to explain the emission control system warranty on your 2010 and later equipment/small off-road engine (SORE).
- Page 26 Southampton, P 18966 (215) 355-9700 Mantis tiller has been subjected to negligence or has been repaired or altered by anyone other than an authorized dealer or authorized service center. Specifications, descriptions, and illustrative material in this literature are as accurate as known at the time of publication, but are subject to change without notice.
Need help?
Do you have a question about the 7234 and is the answer not in the manual?
Questions and answers