Advertisement
Quick Links
Advertisement

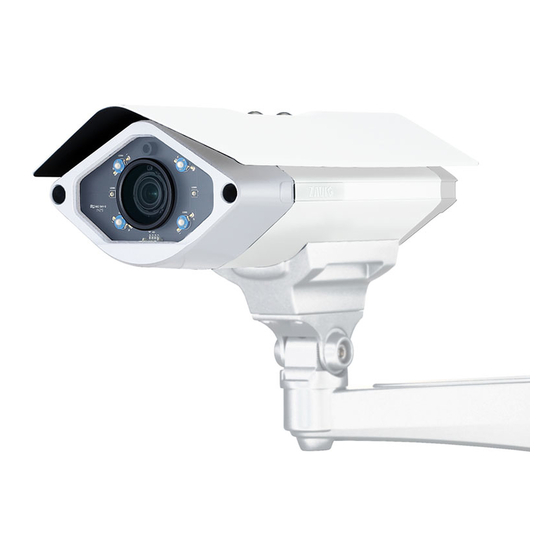
Summary of Contents for Zavio B8220
- Page 1 8608586000060 ZAVIO Motorized Outdoor IR Bullet Quick Installation Guide...
- Page 2 Power Mode. See P.5 Installation of hardware and connection of all cables. See P.5 Windows: Go to Zavio website and download Camera Installation Tool. See P.9 Access the IP Camera using Camera Installation Tool. See P.10 MAC OS: using Safari Browser. See P.12 Lighting environment.
- Page 3 Physical overview - Front - Light Sensor IR LED Lens Warning: The IR LED is classified as class 3B laser IR. Avoid looking at the IR LEDs during operation as direct and long term exposure might be harmful to the eye. -...
-
Page 4: I/O Terminal Block Circuit
I/O Terminal Block Circuit I/O Terminal Block Pin Definition Definition Description Max. V/A Ground 12V DC + 12VDC 1.2 W Audio In Unbalanced, 1.4Vp-p, 1Vrms, terminal block Audio Out Unbalanced, 1.4Vp-p, 1Vrms, terminal block Uses an NPN transistor with the emitter connected Digital 100 mA to the GND pin. -
Page 5: Led Indicator
LED Indicator Color Indication Solid blue when network is established. Network Blue Blink blue when there is network activity. Solid red for booting up process Blue Solid blue for booting up completion Power When reset button pressed for at least 5 sec. Unlit to factory default Solid yellow means SD card ready... - Page 6 b) Loosen back cover with supplied T25 wrench. c) Unplug the seal at the bottom of the camera and plug the M12 waterproof connector. Insert all cables (power cord/ DIDO/ video out) into the connector. d) Connect the cables to the specific sockets on the back manual plate and tightly secure waterproof connector.
- Page 7 f) Fix U-shape bracket to the bottom of camera with supplied screws. g) Feed all cables through the front opening of the wall mount bracket. h) Push the spring mortise of the wall mount bracket. Then hook the U-shape bracket onto the groove of the former.
- Page 8 b) Hang the wall mount bracket on the plate and fix it with the supplied screw. c) Adjust the angle of the wall mount bracket to aim the desired area. C. Connect all cables E1. Without Power over Ethernet (PoE) connection 1.
- Page 9 1. Make sure all components are assembled as shown on the below graph. 2. Check that the Ethernet Port and the Waterproof main body are tightly fasten. Windows: Go to Zavio Website and download Camera Installation Tool Please go http://www.zavio.com/softwaredownloads.php download “Camera...
- Page 10 Access the IP Camera using Camera Installation Tool 1. Please check two settings before using Camera Installation Tool. a. Browser’s Internet Properties → Security→ Default Level b. Browser’s Internet Properties → Privacy → Uncheck Pop-up Blocker...
- Page 11 3. Enter Username and Password to login to the IP Camera. (Default is admin / admin) 4. When accessing the IP Camera for the first time, a yellow information bar appears below the address bar: This website wants to install the following add-on: AxvideoView.cab from ‘Zavio Inc’.
- Page 12 5. Click the information bar, and select Install ActiveX control. 6. Click Install 7. Live video will display in the center of your web browser. MAC OS using Safari Browser 1. Select Safari Icon...
- Page 13 2. Click Bonjour function and select the camera you wish to access. 3. Enter name and password to login to the IP camera. (Default is admin / admin) 4. Live video will display in the center of your web browser.
- Page 14 Before accessing the Setting page to change the language of the web interface, you must download the language pack. 1. Go to http://www.zavio.com/downloads.php and download the language pack corresponding to your IP camera model. 2. Go to the IP camera setting page and upload the preferred language from the language pack downloaded from step 1.
- Page 15 Application of IP Camera...
- Page 16 Memo ………………………………………………………………………………………………………………………………………………….. ………………………………………………………………………………………………………………………………………………….. ………………………………………………………………………………………………………………………………………………….. ………………………………………………………………………………………………………………………………………………….. ………………………………………………………………………………………………………………………………………………….. ………………………………………………………………………………………………………………………………………………….. ………………………………………………………………………………………………………………………………………………….. ………………………………………………………………………………………………………………………………………………….. ………………………………………………………………………………………………………………………………………………….. ………………………………………………………………………………………………………………………………………………….. ………………………………………………………………………………………………………………………………………………….. ………………………………………………………………………………………………………………………………………………….. ………………………………………………………………………………………………………………………………………………….. ………………………………………………………………………………………………………………………………………………….. ………………………………………………………………………………………………………………………………………………….. ………………………………………………………………………………………………………………………………………………….. ………………………………………………………………………………………………………………………………………………….. ………………………………………………………………………………………………………………………………………………….. ………………………………………………………………………………………………………………………………………………….. ………………………………………………………………………………………………………………………………………………….. ………………………………………………………………………………………………………………………………………………….. ………………………………………………………………………………………………………………………………………………….. ………………………………………………………………………………………………………………………………………………….. ………………………………………………………………………………………………………………………………………………….. ………………………………………………………………………………………………………………………………………………….. ………………………………………………………………………………………………………………………………………………….. ………………………………………………………………………………………………………………………………………………….. ………………………………………………………………………………………………………………………………………………….. ………………………………………………………………………………………………………………………………………………….. …………………………………………………………………………………………………………………………………………………..


Need help?
Do you have a question about the B8220 and is the answer not in the manual?
Questions and answers